vPipes — Uilleann
Quick Start Guide v1.0
2/3
09/06/2010
Quick Reference Guide
Start playing the vPipes-Uilleann in 5 easy steps:
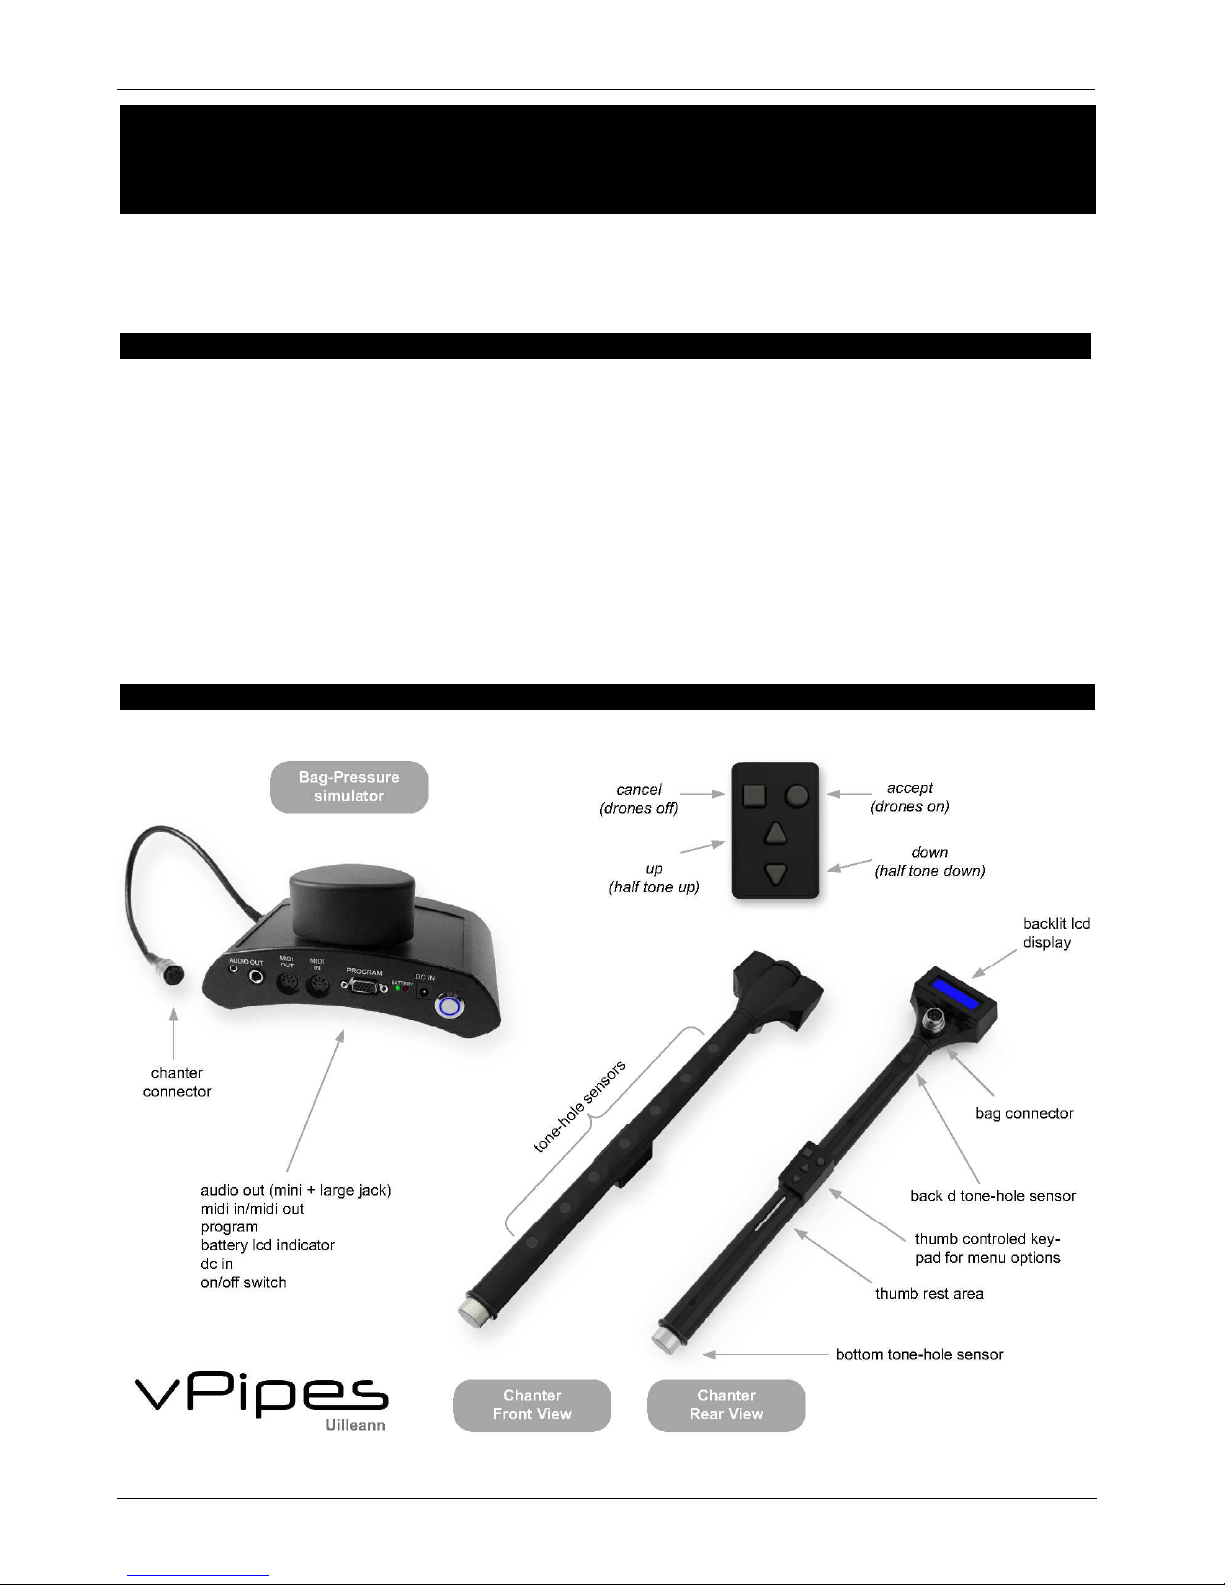
1> Switch on and place bag-simulator comfortably under the arm to activate and deactivate
the pressure sensor.
2> On the key-pad press left button (
) to enter Play Mode.
3> Press ok button (
) to activate drones - left button (
) to deactivate drones.
4> Press cancel and ok buttons (
+
) simultaneously to enter into Set-Up Mode.
5> To revert to Play Mode press left button (
) until Play Mode is reached.
Brief Description
LCD SCREEN
The option of view holes helps you to monitor your fingers in real time allowing correction of finger
posture to cover the tone-hole sensors properly. It is recommended to use this option when plugged
in as having the LC screen permanently switched on reduces battery autonomy considerably.
BATTERY
The battery duration depends on various factors. If the option View Holes is activated, this will reduce
battery duration considerably. Avoid deep discharges. Lithium Ion batteries can be charged at any
time independently of the charge left.
CALIBRATION
(Set-Up Mode Sensitivity Calibration)
This option allows the calibration of the tone-hole sensors. When calibration is activated, you have 3
seconds to hold the chanter in the air by the head and away from any object including your body.
This is important to achieve correct sensor readings.
QUICK ACCESS MENU
This menu is accessible by reducing the amount of pressure applied to the bag-simulator, the black
dots representing the finger positions will disappear and you will immediately see one of the following
options: Pset > Volume > Transpose > Metronome Speed (when activated). Make the required
adjustments and start playing again by increasing the pressure on the simulated bag.
BAG-SIMULATOR PRESSURE ADJUSTMENT
(Set-Up Mode Sensitivity Bag-pressure Adj)
(Set-Up Mode Sensitivity No Bag Mode)
The bag simulator allows you to adjust the sensitivity range of the pressure sensor to your specific
preference, just like playing with soft or hard reeds.
Place bag simulator under your arm and navigate to Set-Up Mode >Sensitivity > Bag-pressure Adj.
Press lightly so that the >>>> symbols appear. The softer you press the fewer >>, conversely the
harder you press the more >>>>>>>> symbols will appear. It doesn’t matter if you go off the scale.
To set the lower level when you don’t want the pipes to sound, release the pressure until you are
comfortable holding the bag under your arm and press the DOWN (
) button on the key-pad. To set
the higher level as if wanting to play in second octave higher notes, increase the pressure on the
bag-simulator under your arm until you are comfortable and press the UP (
)button on the key-pad.
Finally, press the OK (
) button to save or the C NCEL (
) button to discard changes.
If you wish to play with no pressure, such as not wanting to have the bag-simulator under your arm,
navigate to Set-Up Mode > Sensitivity > No Bag Mode and select EN BLED or DIS BLED according
to your preference. Please note that in this mode, the QUIC ACCESS MENU is not accessible.