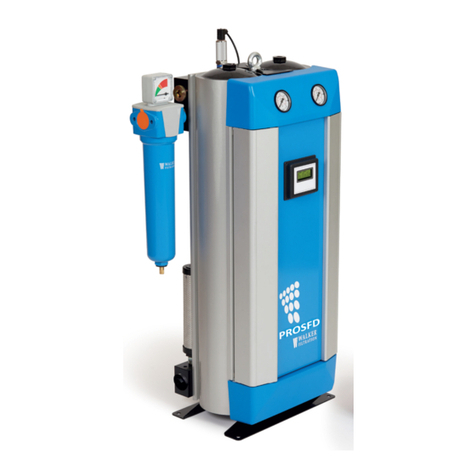
WALKER FILTRATION PD004 Installation guide

Installation, Operating and Maintenance Manual
All models (PD004 - PD365)
EN
Heatless Desiccant Dryers
In Canada Contact CAG Purication Inc.
www.cagpurication.com

The product to which this manual refers must not be supplied, installed,
used, operated or serviced until the contents of the manual has been
fully read and understood by all relevant personnel.
Please complete the following information at the time of installation
found on the rating label on the upper right hand side of dryer
Model Number
Serial Number
Regulated Inlet Pressure
Filtration present with Dryer
Outlet Flow of Dryer
Compressor Outlet Flow
Supply Voltage
When contacting Walker Filtration regarding this product, please have
the above stated information at hand to speed up your query.

1Safety 4
Safety Guidelines 4
Symbols 5
2General Description 6
Function of the Dryer 6
Package Contents 7
3Mechanical Installation 10
4Electrical Installation 16
5Operation 19
Start-Up 19
Shut Down 20
6Maintenance 23
Servicing 23
Purge Plug 28
Exhaust 30
Replacing Shuttle Valves 36
7Energy Management 38
8Troubleshooting 44
9Technical Data 48
10 Component Parts 51
11 Spares Information 56
12 Warranty 58
13 Declaration of Conformity 59
Contents

4
Pro Dry Instruction Manual |Walker Filtration | www.walkerltration.com
The following safety guidelines must be
strictly observed.
• Leave this manual at the place of installation of
the product.
• It is essential that only Walker Filtration or it’s appointed
agents carry out maintenance and servicing work.
Users, maintenance and servicing personnel must be familiar
with:
• Accident prevention regulations.
• Safetyinformation(generalandspecictotheunit).
• Safety devices of the unit.
• Measures to be taken in case of an emergency.
• Allow only suitably trained persons to be involved with
installation, start-up, operation, servicing and maintenance
of the product.
• It is the responsibility of the installer to ensure that the
pipe work to and from the dryer is suitable, in accordance
with applicable legislation and subject to inspection and
testing prior to being put into service. All piping must be
adequately supported.
• Before carrying out any maintenance or servicing work the
unit must be taken out of operation. Users and others will
be exposed to risk if work is carried out whilst the unit is
running. This means electrical disconnection plus isolation
from the compressed air supply and full depressurisation.
• Only trained and competent persons familiar with the
electrical requirements of the unit as laid out in this
manual and electrical safety rules and regulations should
be allowed to carry out work on the electrical components
and power supply to the unit.
• When carrying out any work on the unit, use only
correctly sized appropriate tools in good condition.
• Only use original spare parts and accessories from the
manufacturer. There is no guarantee that non-original
parts have been designed and manufactured to meet
the safety and operational requirements of the unit.
Walker Filtration assume no liability for any equipment
malfunction resulting from the use of non-approved parts.
Safety
• If carrying out installation work above head height, use
suitable and safe working platforms or other means of
working access.
• Do not make any constructional changes to the product.
Anychangesormodicationsmayonlybecarriedoutby
the manufacturer, Walker Filtration.
• Any faults or defects that could affect safety must be put
right fully before using the unit.
• Used items and materials must be disposed of in the
correct manner, complying with local laws and regulations,
in particular the desiccant cartridge.
Section 1: Safety

5
Pro Dry Instruction Manual |Walker Filtration | www.walkerltration.com
Risk of Danger
Risk of High Pressure
Equipment Protected by
Double Insulation
Risk of Electric Shock
Warning
Important Note
Section 1: Safety
Figure 1.1: Definition of symbols
Manual Handling
As with all areas of the workplace, Health and Safety is of
great importance and must be given due care and attention.
While working with this equipment, manual handling
regulations must be considered and adhered to.
Full advice, support and guidance should be detailed in your
Health and Safety Policy and Manual Handling guide, please
take the time to familiarise yourself with these documents.
The Manual Handling Operations Regulations apply to a wide
range of manual handling activities, including lifting, lowering,
pushing, pulling or carrying.
We ask every person handling this product to take the
responsibility for their own Health and Safety and the Health
and Safety of others around them. If you feel there is a
signicant risk, you must take steps to either remove the risk
altogether, or reduce the risk prior to carry out the activity. If
you need further support or guidance with this, please consult
your line manager or the HR Department.
There are safe systems of work and correct procedures in
relation to manual handling, please consult these documents
available within the workplace.
We ask everyone handling this product to:
• Follow appropriate systems of work laid down
for their safety.
• Make proper use of any equipment provided for
their safety.
• Inform the company if they identify hazardous
handling activities.
• Take care to ensure that their activities do not put
others at risk.
If in doubt, please seek further advice and ensure you always
follow the correct procedures and guidance.
For more information please see our Health and Safety
manual attached.
When used in the UK, a 3 amp fuse should be tted as per the
wiring diagram (gure 4.4).

6
Pro Dry Instruction Manual |Walker Filtration | www.walkerltration.com
Function of the Dryer
Pro Dry is designed to provide a smooth, controlled and
uninterrupted delivery of dry compressed air. Wet air passes
through a pre-lter and travels down to the bottom valve
assembly. The air is then fed through the bottom of the
desiccant bed and moves through the high performance
desiccant until it becomes dry. On exit from the desiccant
cartridge, the air is passed through the outlet valve assembly.
During this process, the dryer control system cycles the process
air between the two desiccant towers. While one chamber is
on stream removing water vapour, the other is being carefully
depressurised in preparation for regeneration. The desiccant
bed is regenerated by expanding a small amount of dry
process air, or purge air, through the saturated desiccant.
Purge air passes to atmosphere through the silencer, which is
tted to an exhaust valve. The chamber is then repressurised,
with the control system assuring each chamber is at full
operational pressure prior to changeover.
This ensures a reliable and efcient operation. The air stream is
switched and the cycle repeats on a continuous basis.
General Description
Section 2: General Description
This manual is valid for the following dryer models
PD004 PD006 PD008
PD010 PD015 PD025
PD035 PD045 PD055
PD065 PD085 PD105
PD135 PD175 PD215
PD275 PD365

7
Pro Dry Instruction Manual |Walker Filtration | www.walkerltration.com
Package Contents
The dryer is delivered in protective packaging. Take care when transporting, loading and unloading the unit.
The package contains the following items (refer to gure 2.1):
Figure 2.1: Package contents
1. Dryerunit(6SCFMshown)
2. Instructionmanual(includingcerticateofconformity)
3. Power connector
3
1
2
6
4
5

8
Pro Dry Instruction Manual |Walker Filtration | www.walkerltration.com
13
1
2
3
4
5
6
7
8
9
10
11
12
14
15
16
17
19
18
20
1. Top valve assembly
2. Control unit
3. Bottom valve assembly
4. Dryer base
5. Bottom valve fixing bolt
6. Front panel
7. Front panel fixing screw
8. Pressure housing
9. Pressure housing retaining bolt
10. Desiccant cartridge comes with dust filter
11. Multiport manifold
12. Top cover
13. Top cover fixing screw
14. Rear panel
15. Banjo fixing bolt
16. Pressure seal
17. Exhaust silencer
18. Purge plug
19. Purge plug fixing screw
20. Prefilter
Figure 2.2: Models PD004 – PD035
Section 2: General Description

9
Pro Dry Instruction Manual |Walker Filtration | www.walkerltration.com
9
1
2
3
4
5
6
7
8
9
10
11
12
13
16
14
15
1. Inlet valve assembly
2. Bottom valve assembly
3. Exhaust valve assembly
4. Control/valve unit
5. Quadra-port manifold
6. Pressure housing
7. Desiccant cartridge c/w dust filter
8. Pressure housing retaining bolt
9. Quadra-port manifold retaining bolt
10. Quadra-port manifold top cover
11. QPM fixing screw
12. Front panel
13. Back panel
14. Air transfer down-pipe
15. Silencer
16. Prefilter
* Models PD215 – PD365 are duplex
Figure 2.3: Models PD045 – PD365
Section 2: General Description

10
Pro Dry Instruction Manual |Walker Filtration | www.walkerltration.com
Connecting the pre-lter to the dryer
• PD004-PD035, Utilise O Ring and bolt supplied to
assemblelteraspergure3.1.
• PD045-PD365,Attachprelterutilisingnipplesupplied.
• Fit4mm(5/32”)blacktubingtolteranddrainvalveinlet.
• Pipeawaycondensatewith4mm(5/32”)tubingfrom
drain outlet. Ensure condensate is drained into an oil/
water separator.
• Fitanyfurtherltrationorancillaryequipment.
• Drain kits supplied with dryer and comprise of the
following: Swivel elbow adapter and 4mm tubing.
All tubing should be secured up to the point of drain to
prevent whipping during discharge.
It is recommended that a bypass line including lter is
installed, as per gure 3.13
1
2
1
2
Figure 3.1: Connecting pre-filter
Mechanical Installation
Section 3: Mechanical Installation
1. Inlet
2. Outlet
Figure 3.2: Connecting filter drain

11
Pro Dry Instruction Manual |Walker Filtration | www.walkerltration.com
Orientation
The Pro Dry range of dryers is designed to operate in both
vertical and horizontal orientation.
11
Pro Dry Instruction Manual | Walker Filtration |
11
Pro Dry Instruction Manual | Walker Filtration |
Figure 3.3: Horizontal orientation
Figure 3.4: Vertical orientation
Section 3: Mechanical Installation

12
Pro Dry Instruction Manual |Walker Filtration | www.walkerltration.com
Figure 3.6: Reconfiguration of inlet/outlet ports
Figure 3.5: Inlet/outlet ports
Reconguration of the inlet / outlet ports
PD004 – PD035 models only
Pro Dry has three ports on the inlet (A, B and C) and three
ports on the outlet (D, E and F). Any of the three can be
used for inlet (A, B or C) and outlet (D, E or F). Make sure the
remaining two are blanked off with provided pressure plugs.
Dryer can be recongured to interchange position of inlet and
outlet ports (Figure 3.6).
A
B
C
D
E
F
A
C
DE
F
B
Section 3: Mechanical Installation
Tools required
• 4mm hex key
• 6mm hex key
Directional arrows are etched into the inlet manifold.
Any / all of the three outlet ports can be used on occasion.
Please ensure combined flow at outlet should not exceed
specification. Please adhere to regional regulations.
It is strongly advised to connect a non-return valve to each
outlet used.
Only use one inlet port at any one time
Ensure original seals are in place.
Check dryer is leak-free prior to operation.
A
B
C
D
E
F

13
Pro Dry Instruction Manual |Walker Filtration | www.walkerltration.com
Section 3: Mechanical Installation
13
13
Figure 3.7: Level ground
13
13
Figure 3.8: Drainage (all tubing should be secured up to the point of drain to prevent whipping during discharge)

14
Pro Dry Instruction Manual |Walker Filtration | www.walkerltration.com
Max 50OC
(122OF)
>Max 50OC
(122OF)
Max 50OC
(122OF)
>Max 50OC
(122OF)
Max 50OC
(122OF)
>Max 50OC
(122OF)
Figure 3.10: Hard piped installation
Max 50OC
(122OF)
>Max 50OC
(122OF)
Figure 3.11: Exposure to heat
Max 50OC
(122OF)
>Max 50OC
(122OF)
Max 50OC
(122OF)
>Max 50OC
(122OF)
Figure 3.9: Location
Section 3: Mechanical Installation

15
Pro Dry Instruction Manual |Walker Filtration | www.walkerltration.com
Figure 3.12: Direction of flow
Section 3: Mechanical Installation
A
C
Figure 3.13: Typical installation
To prevent back flow into the dryer a non-return valve should be placed
in-line, downstream of the dryer. This is essential when more than one dryer
is used in a single application.

16
Pro Dry Instruction Manual |Walker Filtration | www.walkerltration.com
Section 4: Electrical Installation
Electrical Installation
Connection
The dryer is designed to operate on either AC or DC supply
voltage.
Electrical wiring must comply with local regulations. Voltage
requirements must be conrmed to be within the specication
on the dryers rating plate.
Ensure only one power source is connected at any one time
and is connected to the correct socket as shown in gure 4.3
and 4.4.
The dryer controller is double insulated therefore no earth
is required on the power connector. External fuse to be
connected to plug.
The cable selection must suit local installation regulations and
be appropriate to power consumption as shown in the Power
Supply table.
Power Supply
Supply Amp
12 VDC 0.80
24 VDC 0.40
100 VAC 0.16
115 VAC 0.14
230 VAC 0.07
240 VAC 0.07
How to wire a power connector
Figure 4.1 illustrates how to wire power connector. Please
refer to wiring diagram, gure 4.2, page 17, for further
information.
1 (+)
LIVE
2 (-)
NEUTRAL
EARTH
GASKET
Figure 4.1: Din connector

17
Pro Dry Instruction Manual |Walker Filtration | www.walkerltration.com
Section 4: Electrical Installation
Different voltage setting
Figure 4.3: 100 to 240 VAC
-
+
RIGHT
+ (Pin 1)
- (Pin 2)
Figure 4.2: Wiring diagram
Figure 4.4: 12 to 24 VDC

18
Pro Dry Instruction Manual |Walker Filtration | www.walkerltration.com
Section 4: Electrical Installation
Controller Description
Controller Specification
Ambient temperature 1.5°C to 50°C (35°F to 122°F)
Max. relative humidity 80% up to 31°C, decreasing linearly to 50% RH at 50°C
Input voltage range 100–240VAC, 50–60Hz, 12–24VDC
Mains supply voltage not to exceed ±10% of nominal
Protection class IP65
Transient over voltage IEC 60664 Class II
Pollution degree 2, IEC 60664
A circuit breaker or switch must be installed near the dryer.
This should be easy to reach and shall be certified according
to EN60947-1 and EN60947-3. The switch or circuit breaker
shall be marked as the disconnecting device for the dryer
and needs to be marked with on and off positions.
Output connections do not provide isolation from the mains
connectors and interconnecting wiring must meet EN61010-
1:2001 requirements for reinforced insulation.
For energy and alarm installation management please see
section 8

19
Pro Dry Instruction Manual |Walker Filtration | www.walkerltration.com
Section 5: Operation
Background / Function of the dryer
The dryer operation is designed to give smooth, uninterrupted
delivery of compressed air to the designated specication.
During the cycle of operation, the rst pressure housing is
fully pressurised and airow is directed upwards through the
desiccant cartridge, removing moisture from the air during its
passage, to the minimum specied dewpoint.
During the drying cycle, a small bleed of process air is directed
to the opposite pressure housing. This process air ows down
through the desiccant cartridge and into the atmosphere by
means of an exhaust silencer, thereby affecting regeneration
of the desiccant.
After 120 seconds of operation, the cartridge under
regeneration is sealed by closing of the exhaust valve and the
pressure housing is brought up to full system pressure by the
purge air.
After an extended time (See start-up procedure for individual
sizes) the pressure in the rst housing is released into the
atmosphere by means of the corresponding exhaust valve and
the desiccant cartridge then operates in regeneration mode.
The main air ow and drying function is then transferred
to the desiccant cartridge that was previously under
regeneration.
The cycle of operation continues in this pattern with
the cartridges switching alternately between drying and
regenerating.
Start-up procedure PD004 - PD035
• Seegure5.1and5.2.
• Close valves A, B, C and D.
• Switch on compressor.
• Open valve A slowly.
• Check there are no leaks from the dryer.
• Switch on electric power. All four display panel LED’s will
ashsimultaneouslygreenfourtimesthensimultaneously
red four times to acknowledge application of power
and readiness to function. Observe display panel for one
complete cycle. Note: cycle described is factory setting.
a. Power LED illuminates green and tower LED X illuminates
Operation
green.
b. After 120 seconds, tower LED X switches off and drain
LED Z illuminates green.
c. After a further 50 seconds drain LED Z switches off and
tower LED Y illuminates green.
d. After a further 120 seconds, tower LED Y switches off.
e. After a further 50 seconds, tower LED X illuminates green
- this is point ‘a’ in the cycle described above.
Theabovecycle(a–e)repeats.
On initial commissioning only run the dryer for a minimum
of 6 hours to ensure dewpoint is adequate. Thereafter,
continue directly to next point.
Open valve B slowly.
Start-up procedure PD045 - PD365
• Seegure5.1and5.2.
• Close valves A, B, C and D.
• Switch on compressor.
• Open valve A slowly.
• Check there are no leaks from the dryer.
• Switch on electric power. All four display panel LED’s will
ashsimultaneouslygreenfourtimesthensimultaneously
red four times to acknowledge application of power
and readiness to function. Observe display panel for one
complete cycle. Note: cycle described is factory setting.
a. Power LED illuminates green and tower LED X illuminates
green.
b. After 120 seconds, tower LED X switches off and drain
LED Z illuminates green.
c. After a further 20 seconds drain LED Z switches off and
tower LED Y illuminates green.
d. After a further 120 seconds, tower LED Y switches off.
e. After a further 20 seconds, tower LED X illuminates green
- this is point ‘a’ in the cycle described above.
Theabovecycle(a–e)repeats.
On initial commissioning only run the dryer for a minimum of
6 hours to ensure dewpoint is adequate. Thereafter, continue
directly to next point.
Open valve B slowly.

20
Pro Dry Instruction Manual |Walker Filtration | www.walkerltration.com
Section 5: Operation
Figure 5.2: Controller description
Z
YX
POWER
X Lefttowerregenerating(Righttowerdrying)
Y Righttowerregenerating(Lefttowerdrying)
Z Drain solenoid
Power Power connected to controller
Shut-down Procedure
• Close valve B.
• Close valve A.
• Leave dryer running for 15 minutes to fully de-pressurise.
• Switch off all electrical power to the dryer.
Under no circumstances must compressed air be allowed
to flow through the dryer following switch off of electrical
power. This will result in terminal failure of the desiccant
cartridges and regeneration will not be possible.
Figure 5.1: Typical installation
A B
C D
This manual suits for next models
16
Table of contents
Other WALKER FILTRATION Dryer manuals
Popular Dryer manuals by other brands

WINIA
WINIA DTE74 Series user manual

Samsung
Samsung DV431AEP/XAA Service manual

Sharp
Sharp KD-NCB8S7PS91-EN user manual

Andrew Barton
Andrew Barton SALON PRO-DRY 5568ABBU manual

Dexter Laundry
Dexter Laundry T-30 Operators manual installation & operation instructions

Maytag
Maytag Epic MED9800TK Use and care guide