Waring WPG250TSWE User manual

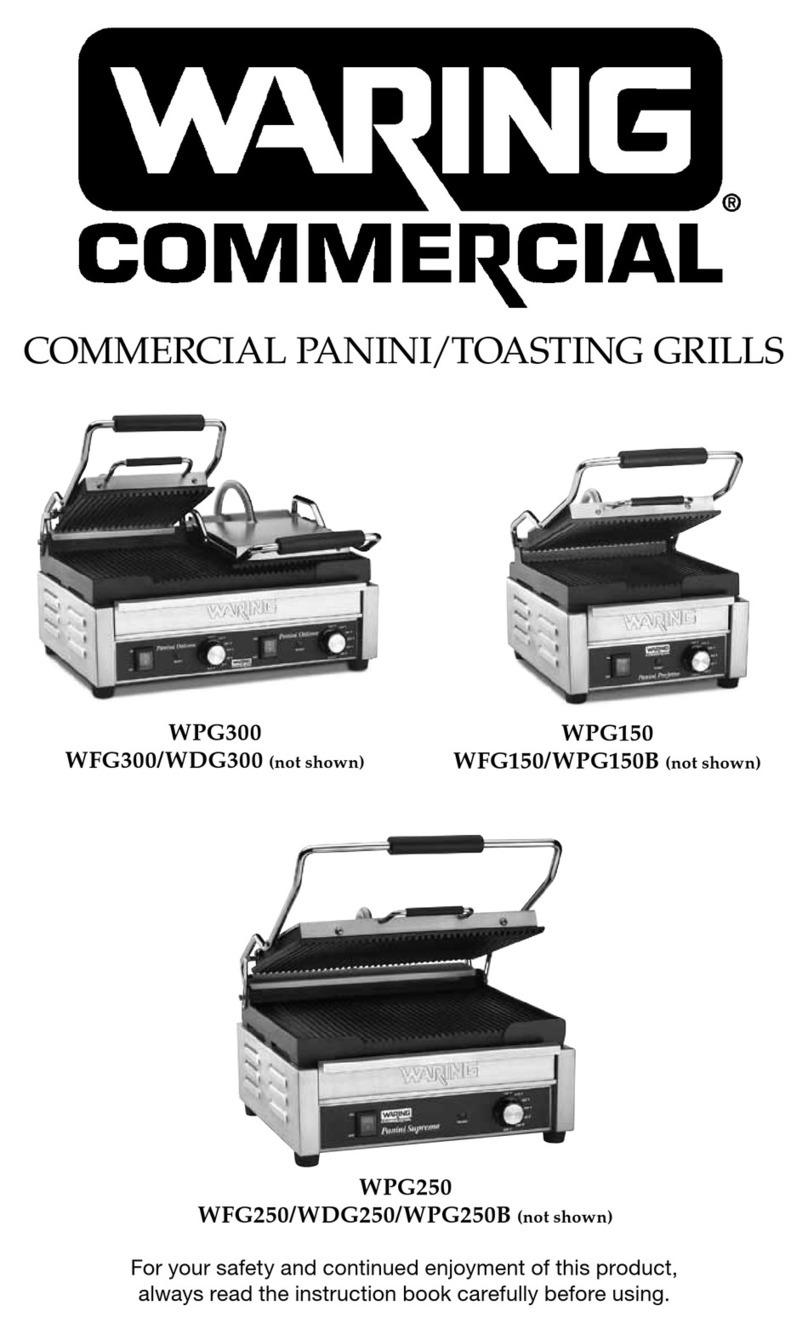
COMMERCIAL PANINI/
TOASTING GRILLS
PARRILLAS/SANDWICHERAS
COMERCIALES
GRILS/PRESSE-PANINI COMMERCIAUX
For your safety and continued enjoyment of this product,
always read the instruction book carefully before using.
Para su seguridad y para disfrutar plenamente de este producto,
siempre lea cuidadosamente las instrucciones antes de usarlo.
An que votre appareil vous procure en toute sécurité beaucoup de satisfaction,
lire attentivement le mode d’emploi avant de l’utiliser.
WPG250TSWE /WPG250TSW/WPG250TSWC

2
IMPORTANT SAFEGUARDS
When using electrical appliances, basic safety precautions should
always be taken, including the following:
1. READ ALL INSTRUCTIONS.
2. Unplug from outlet when not in use, before putting on or
taking off parts and before cleaning.
3. Always unplug from outlet prior to handling or cleaning.
4. To protect against risk of electrical shock, do not put appliance
in water or other liquids.
5. This appliance is not intended for use by persons (including
children) with reduced physical, sensory or mental capabilities,
or lack of experience and knowledge, unless they have been
given supervision or instruction concerning use of the appliance
by a person responsible for their safety.
6. Do not touch surfaces that may be hot. Use handles and knobs
provided.
7. Avoid contact with moving parts.
8. Do not operate the Waring®Commercial Panini/Toasting Grill
or any other electrical equipment with a damaged cord or plug,
or after the unit malfunctions or is dropped or damaged in any
manner. Return it to the nearest authorized service center for
examination, repair, and/or adjustment.
9. The use of attachments not recommended or sold by Waring
may cause re, electric shock, or injury.
10. Do not use outdoors.
11. Always check that the control is off before plugging cord into
wall outlet. To disconnect, turn the control knob to OFF, then
remove plug from wall.
12. Do not place near a hot gas or electric burner or heated oven.
13. Do not let cord hang over edge of table or counter, or touch hot
surfaces.
14. When ON, the Waring®Commercial Panini/Toasting Grill should
always be on a stable countertop or table.
15. Close supervision is necessary when any appliance is used by
or near children.
16. Do not use appliance for other than it’s intended use.

3
SAVE THESE INSTRUCTIONS
APPROVED FOR
COMMERCIAL USE
GROUNDING INSTRUCTIONS
This appliance must be grounded while in use to protect the
operator from electrical shock. The appliance is equipped with a
3-conductor cord and 3-prong grounding-type plug to t the proper
grounding-type receptacle. The appliance has a plug that looks like
the plug in drawing (1). An adapter, as in drawing (2), should be used
for connecting the appliance plug to two-prong receptacles. The
grounding tab that extends from the adapter must be connected to a
permanent ground such as a properly grounded outlet box as shown
in drawing (3) using a metal screw.
CAUTION: Before using an adapter, it must be determined that the
outlet cover plate screw is properly grounded. If in doubt, consult a
licensed electrician. Never use an adapter unless you are sure it is
properly grounded.
NOTE: Use of an adapter is not permitted in Canada and Europe.

4
GROUNDING METHOD
The lightning ash with arrowhead symbol within an
equilateral triangle is intended to alert the user to the
presence of uninsulated dangerous voltage within the
product’s enclosure that may be of sufcient magnitude
to constitute a risk of re or electric shock to persons.
The exclamation point within an equilateral triangle is
intended to alert the user to the presence of important
operating and maintenance (servicing) instruction in the
literature accompanying the appliance.

2
8
9
3
7
1
6
4
5
5
PARTS
1. Thermo-insulated handles
2. Temperature dial
3. ON/OFF power switch
4. Removable drip tray
5. Stainless steel housing
6. Bottom grill plate (ribbed)
7. Top grill plate (ribbed)
8. Ready indicator light
9. Timer

6
INSTRUCTIONS FOR USE
1. Remove Waring®Commercial Panini/Toasting Grill from
packaging.
2. Place on a rm and stable surface.
3. Remove all packaging and instruction book.
4. Please read all instructions prior to rst use.
5. Keep this instruction book in a safe location for future reference.
6. It is highly recommended that you clean the plates before
rst use.
7. Warm up unit in closed position for 10 minutes. This will allow all
oils and other sediment to burn off.
8. After cleaning (see page 10), the Waring®Commercial Panini/
Toasting Grill is ready for use.
9. Turn unit on. Allow grill to warm up. Depending on size and
model, this could take 10–25 minutes. The READY indicator
light will illuminate once temperature is reached.
10. Lift the handle to open panini grill.
11. Carefully place food on bottom plate.
12. For double-sided cooking, push handle down; this will press top
plate down on food and cook both sides simultaneously.
13. For single-sided cooking, simply keep handle raised in open
position.
Model Description Voltage Power
Cooking Surface
WPG250TSWE/
WPG250TSW/
WPG250TSWC
Large Panini Grill with
Ribbed Plates
120 Volt 1800 Watt 14.5" x 11"

1
2
3
4
5
6
7
8
7
NON-STICK SHEET ASSEMBLY INSTRUCTIONS
Remove drip tray.
Reinstall drip tray so that the non-stick
sheet “tongue” is held behind it.
Locate the
bottom
non-stick
sheet.
Locate the top non-stick sheet.
Place sheet onto bottom grill plate.
Open the top lid and slide the top
non-stick sheet from the front so the
back edge is protruding between top
and bottom plates on the back.
Assemble
top sheet to
clip on the
back. Line up
slots with the
clip tabs.
Fit the slot
over one side
of the clip tab.

9
10
8
PANINI GRILL HANDLE ADJUSTMENT
INSTRUCTIONS
Your Waring Commercial Panini grill comes with a handle tension
control. This device allows you to adjust the tension on the rear
hinges with the allen wrench provided, so the top plate will remain
open at the appropriate level and maneuver to your satisfaction.
This will only need to be done a few times over the life of the product.
The following is the proper way to adjust the tension control
device (when necessary):
• Ensure that the unit is unplugged and cool before proceeding
with the following steps
• Locate the allen wrench clip (A) attached to the power cord
and remove the wrench
• Raise adjusting screw cover on back
of unit (B)
Repeat steps 7– 9 on the front of top
grill plate.
Fit the slot
over the
opposite side
of the clip.
Repeat for
second clip
on the back.
Finished Assembly

A.
B.
9
• Insert allen wrench into adjusting screw
• To increase handle tension, turn allen
wrench clockwise
• To reduce handle tension, turn allen
wrench counter clockwise
• Remove allen wrench from adjusting
screw
• Lower adjusting screw cover (B)
• Return allen wrench to clip on
power cord
IMPORTANT: Locate allen wrench clip
on power cord and slide it closer to the
panini grill housing for easy
future access.
TIMER INSTRUCTIONS
The WPG250TSWE/WPG250TSW/WPG250TSWC are equipped with
a timer that can be easily installed. The timer does not control the
power of the unit.
Timer Installation
1. Installing the batteries
• Remove batteries from packaging
• Open battery box cover
• Install batteries as displayed on the inside of the battery box
• Once batteries are properly secured, slide battery cover back
into position until you hear a click and the cover is securely
closed
2. Installing timer into the unit
• Always be sure the appliance is unplugged and cool prior to
installing the timer
• Insert timer into the port until side tabs lock into place
• Your timer is now installed, operational and ready for use
3. Removing the timer
• Always be sure that the appliance is unplugged and cool prior
to removing the timer
SHOWN IN CLOSED POSITION

10
• To remove the timer, place your ngers on the two tabs on
the sides of the timer and rmly depress while gently pulling
toward you. This will release the timer unit.
• If you have trouble using your ngers, you may use a at
head screwdriver to gently press tabs and pull the timer out
of position. Always use caution when using a metal tool to
remove the timer so that you do not cause harm to the timer,
the appliance or yourself.
Timer Operation
NOTE: The timer will not automatically shut off your unit. Once time
has lapsed, the unit will beep 5 times.
This timer is equipped with two preprogrammed times; 30 and 45
seconds.
Press button for desired time.
Once button is pressed, the corresponding LED will start to blink.
This will continue until the time lapses. When time is up, the unit will
beep 5 times.
If you wish to cancel timer at any time press either button and the
unit will beep once to signify timer is cancelled.
SAFETY AND TROUBLESHOOTING
Please note that the Waring®Commercial Panini/Toasting Grill will be
too hot to handle immediately after use.
The panini grill has a thermal cutoff safety device to avoid
overheating. If the panini grill shuts off automatically, unplug it and
allow it to cool for 30 minutes in the open position. Plug back in and
continue use.
CLEANING AND MAINTENANCE
For best results, your panini grill must be cleaned thoroughly after
each use with warm, soapy water. Daily buildup of sediment left over
from cooking can affect the performance of the grill plates.
The exterior of unit may be cleaned by carefully wiping with a damp
cloth.
Clean plates while the unit is warm, using warm, soapy water and
the cleaning tool provided. DO NOT USE COLD WATER ON WARM
PLATES.

11
To clean drip tray, carefully remove tray, wash with warm, soapy
water and dry, or you may place the tray in the dishwasher. Tray
must be completely dry before putting back into the unit.
LIMITED ONE-YEAR WARRANTY
Waring warrants every new Waring®Commercial Panini/Toasting
Grill to be free from defects in material and workmanship for a period
of one year from the date of purchase when used with foodstuffs,
nonabrasive liquids (other than detergents) and nonabrasive semi-
liquids, provided it has not been subject to loads in excess of the
indicated rating. Under this warranty, Waring will repair or replace
any part which, upon our examination, is defective in materials
or workmanship, provided the product is delivered prepaid to the
Waring Service Center at 314 Ella T. Grasso Ave., Torrington, CT
06790, or any Factory Approved Service Center. This warranty
does not: a) apply to any product that has become worn, defective,
damaged or broken due to use or due to repairs or servicing by
other than the Waring Service Center or a Factory Approved Service
Center, or due to abuse, misuse, overloading or tampering; or b)
cover incidental or consequential damages of any kind. Warning:
This warranty is void if appliance is used on Direct Current (DC).

12
MEDIDAS DE SEGURIDAD
IMPORTANTES
Al usar aparatos eléctricos, siempre debe tomar precauciones
básicas de seguridad, incluso las siguientes:
1. LEA TODAS LAS INSTRUCCIONES.
2. Desconecte el aparato cuando no está en uso, antes
de instalar/sacar piezas y antes de limpiarlo.
3. Desconecte el aparato antes de cualquier manipulación o
mantenimiento.
4. Para reducir el riesgo de electrocución, no coloque el aparato
en agua ni en ningún otro líquido.
5. Los niños o las personas que carezcan de la experiencia
o de los conocimientos necesarios para manipular el aparato,
o aquellas cuyas capacidades físicas, sensoriales o mentales
estén limitadas, no deben utilizar el aparato sin la supervisión
o la dirección de una persona responsable por su seguridad.
6. No toque las supercies calientes; utilice los mangos/asas y los
botones/perillas.
7. Evite el contacto con las piezas móviles.
8. No utilice este aparato si el cordón o la clavija estuviesen
dañados, después de que hubiese funcionado mal o que se
hubiese caído o si estuviese dañado; devuélvalo a un centro
de servicio autorizado para su revisión, reparación o ajuste.
9. El uso de accesorios no recomendados o vendidos por Waring
presenta un riesgo de incendio, electrocución o herida.
10. No lo utilice en exteriores.
11. Asegúrese de que el botón de encendido/apagado esté en
la posición “OFF” antes de conectar el cable a la toma de
corriente. Ponga el control en la posición “OFF” antes de
desconectar el aparato.
12. No coloque el aparato sobre o cerca de un quemador a gas o
de una hornilla eléctrica caliente, ni en un horno caliente.
13. No permita que el cordón cuelgue del borde de la encimera o
de la mesa, ni que haga contacto con supercies calientes.
14. Coloque el aparato sobre una supercie llana y segura, como
una mesa o una encimera.

13
15. Supervise el uso de este aparato cuidadosamente cuando sea
usado por o cerca de niños.
16. No utilice el aparato para ningún otro n que no sea el indicado.
GUARDE ESTAS INSTRUCCIONES
APROBADO PARA
USO COMERCIAL
INSTRUCCIONES DE PUESTA A TIERRA
Para su protección, este aparato está equipado con un cable/
enchufe con puesta a tierra, el cual debe ser conectado a una
toma de corriente debidamente puesta a tierra (Fig. 1). Si una
toma de corriente puesta a tierra no está disponible, se podrá usar
un adaptador para conectar el aparato a una toma de corriente
polarizada (Fig. 2). El adaptador debe ser puesto a tierra mediante
un tornillo de metal que conecte la lengüeta del mismo a la caja
eléctrica (Fig. 3).
PRECAUCIÓN: antes de conectar el adaptador, asegúrese de
que la toma de corriente esté puesta a tierra. Si no está seguro,
comuníquese con un electricista. Nunca use un adaptador sin estar
seguro de que la toma de corriente esté puesta a tierra.
NOTA: está prohibido usar un adaptador en el Canadá y en Europa.

14
MÉTODO DE PUESTA A TIERRA
El símbolo representado por un relámpago con punta de
echa dentro de un triángulo equilátero tiene como n
alertar al usuario de la presencia de voltajes peligrosos
no aislados en el interior del aparato, los cuales pueden
ser de suciente magnitud para constituir un riesgo de
incendio o electrocución.
El signo de exclamación dentro de un triángulo equilátero
tiene como n alertar al usuario de la presencia de
instrucciones importantes de operación y mantenimiento
(servicio) en la documentación que acompaña al equipo.

2
8
9
3
7
1
6
4
5
15
PIEZAS
1. Asas termoaislantes
2. Control de temperatura
3. Botón de encendido/apagado
4. Bandeja de goteo amovible
5. Cuerpo de acero inoxidable
6. Placa inferior (estriada/“parrilla”)
7. Placa superior (estriada/“parrilla”)
8. Luz de listo
9. Temporizador

16
INSTRUCCIONES DE USO
1. Retire el aparato de la caja.
2. Ponga el aparato sobre una supercie llana y segura.
3. Remueva el material de embalaje y el libro de instrucciones.
4. Lea atentamente el modo de empleo antes de utilizar este
aparato por primera vez.
5. Guarde el modo de empleo para futura referencia.
6. Le recomendamos que limpie las placas antes del primer uso.
7. Encienda el aparato y permita que se caliente, con las placas
cerradas, durante 10 minutos. Esto quemará el aceite y otros
residuos acumulados durante la fabricación y el transporte.
8. Una vez terminada la limpieza, el aparato está listo.
9. Encienda el aparato. Permita que se caliente. Según el modelo
y el tamaño del aparato, esto puede demorar 10 a 25 minutos.
La luz de listo se encenderá cuando el aparato alcance la
temperatura deseada.
10. Alce el asa para abrir la placa.
11. Disponga los alimentos sobre la placa inferior.
12. Baje la placa superior para asar los alimentos por ambos lados.
13. Para asar los alimentos por solamente un lado, deje la placa
superior abierta.
Modelo Descripción Voltaje Potencia
Placa
WPG250TSWE/
WPG250TSW/
WPG250TSWC
Parrilla/Sandwichera
grande con placas
estriadas
120 V 1800 W 37 cm x 28 cm

1
2
3
4
5
6
7
8
17
INSTALACIÓN DE LA HOJA ANTIADHERENTE
Retire la
bandeja de
goteo.
Vuelva a instalar la bandeja de goteo,
de tal manera que la “lengüeta” de la
hoja antiadherente esté bloqueada
atrás de ella.
Prepare la hoja
antiadherente
inferior.
Prepare la hoja antiadherente superior.
Coloque la hoja sobre la placa inferior.
Abra las placas y deslice la hoja hacia el
fondo de tal manera que salga entre las
placas en la parte trasera del aparato.
Sujete la hoja
superior al clip
en la parte de
atrás de la
unidad. Haga
coincidir las
hendiduras en
la hoja con las
patas del clip.
Pase un lado
de la pinza
por la
hendidura
en la hoja.

9
10
18
CÓMO AJUSTAR LA TENSIÓN EN LAS BISAGRAS
El mecanismo del asa controla la tensión en las bisagras, haciendo
que la placa superior pueda quedarse abierta a la posición deseada
durante la cocción. El aparato incluye una llave Allen que permite
ajustar la tensión, lo que será necesario varias veces durante la vida
del aparato.
Para ajustar la tensión:
• Desconecte la unidad y permita que se enfríe
• Retire la llave Allen del cable (A)
• Abra la tapa del tornillo de ajuste de tensión (B) en la parte
trasera de la unidad
• Introduzca la llave Allen en el tornillo
• Gire en sentido horario para apretar/aumentar la tensión
• Gire en sentido antihorario para aojar/reducir la tensión
Repita los pasos 7 a 9 en la parte
delantera de la placa superior.
Pase el lado
de la pinza por
la hendidura
en la hoja.
Haga lo
mismo del
otro lado.
Hoja antiadherente instalada

A.
B.
(ENSEÑADO EN POSICIÓN CERRADA)
Tapa del tornillo
de ajuste de tensión
19
• Retire la llave Allen del tornillo
• Cierre la cubierta del tornillo de ajuste de
tensión
•
Vuelva a colocar la llave Allen sobre el cable
IMPORTANTE: guarde la llave Allen sobre
el cable, para siempre tenerla al alcance
de la mano.
TEMPORIZADOR
Los modelos WPG250TSWE, WPG250TSW y
WPG250TSWC cuentan con un temporizador
fácil de instalar. Nota: el temporizador no
controla el encendido/apagado del aparato.
Instalación del temporizador
1. Instalación de las pilas
• Retire las pilas del paquete
• Abra el compartimiento de las pilas
• Instale las pilas, según se indica sobre el diagrama adentro
del compartimiento
• Cierre el compartimiento de las pilas, deslizando la tapa hasta
que escuche un “clic”
2. Instalación del temporizador
• Siempre apague y desconecte el aparato antes de instalar el
temporizador
• Introduzca el temporizador en el puerto del aparato, hasta que
las patas laterales se bloqueen
• Su temporizador ya está instalado, operativo y listo para usar
3. Remoción del temporizador
• Siempre apague y desconecte el aparato antes de sacar el
temporizador.
• Presione rmemente las patas laterales mientras jala el
temporizador hacia usted para liberarlo.
• Si es necesario, utilice un destornillador plano para presionar
las patas. Tenga cuidado de no dañar el temporizador y de no
lastimarse.

20
Funcionamiento del temporizador
NOTA: el temporizador no apagará automáticamente el aparato.
Al nal del tiempo, emitirá 5 pitidos.
El temporizador ofrece dos opciones de tiempo: 30 segundos
y 45 segundos.
Presione el botón correspondiente al tiempo deseado.
El indicador luminoso correspondiente empezará a parpadear
y parpadeará hasta el nal del tiempo. Al nal del tiempo, el
temporizador emitirá 5 pitidos.
Para cancelar el temporizador en cualquier momento, presione uno
de los dos botones. El temporizador emitirá un pitido para indicar
que el tiempo ha sido cancelado.
PRECAUCIONES
El aparato estará muy caliente después del uso; no lo toque ni lo
mueva hasta que haya enfriado.
Este aparato está equipado con un sistema de seguridad que lo
apagará automáticamente en caso de recalentamiento. Si esto
ocurriera, apague el aparato, desconéctelo y permita que se enfríe,
abierto, durante 30 minutos. Tras enfriarse, vuelva a conectarlo.
LIMPIEZA Y MANTENIMIENTO
Limpie el aparato después de cada uso. La acumulación diaria de
residuos puede afectar el rendimiento de las placas.
Limpie la carcasa del aparato con un paño humedecido.
Limpie las placas aún tibias, usando agua jabonosa tibia y el
raspador provisto. NO ECHE AGUA FRÍA SOBRE LAS PLACAS
CALIENTES.
Retire la bandeja de goteo y lávela en agua jabonosa tibia, o en el
lavavajillas. Permita que se seque antes instalarla de nuevo.
GARANTÍA LIMITADA DE UN AÑO
Waring garantiza toda nueva parrilla/sandwichera Waring®
Commercial contra todo defecto de materiales o fabricación durante
un año a partir de la fecha de compra, siempre que haya sido usada
con alimentos, líquidos no abrasivos (a excepción de detergentes)
y semilíquidos no abrasivos, y que no haya sido sujeta a cargas
que excedan su máxima capacidad. Bajo esta garantía, Waring
This manual suits for next models
2
Table of contents
Languages:
Other Waring Grill manuals
Popular Grill manuals by other brands

Nexgrill
Nexgrill 720-0830MG Assembly instructions

Char-Broil
Char-Broil 463250108 Product guide

izzy
izzy MV 13251 instruction manual

Fulgor Milano
Fulgor Milano FOBQ 1000 G MBK Instructions for installation and use

Falcon
Falcon G2522 Installation and servicing instruction

Char-Broil
Char-Broil PERFORMANCE 463330521 Product guide

West Marine
West Marine 315SS owner's manual

Kenmore
Kenmore 464311009 - 596 sq. in 3 Burner Gas Grill Use and care guide

Black & Decker
Black & Decker BXGR2000E instructions

Vintage
Vintage VBQ-30G owner's manual

SILESIA VELOX
SILESIA VELOX CG1 Operating instructions and general guide

camry
camry Premium CR 3053 user manual