1
Important notes
It is important to read this user guide very carefully and follow all the instructions given
while installing the device. Then store it for future reference if necessary.
Device specication
The ME13 weather station consists of a control unit and a set of outdoor sensors. It can
be further extended with additional sensors and devices, with the possibility of controlling
the device based on integrated weather conditions. The measured values can easily be
displayed on a computer, smartphone, tablet or any other device with an Internet browser.
The weather station can also be integrated into higher-level systems. Communication is
then mediated via TCP/IP protocol and data can be read using the ModBus technology or
the XML format. More information about integration of the weather station into higher-
level systems can be found in a separate user guide available at www.meteo-pocasi.cz in the
“Download” section.
If you want to access your data in a clear and easily understandable way or if you want to
share it with other users, you can register your weather station at www.meteo-pocasi.cz and
you will get many additional features and extensions.
Safety instructions
Please read the following instructions very carefully before plugging in your device to
electricity or connecting it to your computer, in order to prevent any potential injuries and
minimize the risk of damaging the weather station and/or its accessories.
The manufacturercarriesnoresponsibility foranydamageresultingfrom incorrect installation
or non-compliance with this user guide or technical instructions. If these safety instructions
are not followed the device may not be safe to use and data might be inaccurate. Wanet Ltd.
offers warranty service conditions of which are specified in a document available at www.
meteo-pocasi.cz and warranty is performed based on this document or the legislation of
the Czech Republic. Installation and configuration of the weather station and computer
network should be performed by a person with the appropriate knowledge and skills.
Opening or removing the outer lid can result in electrical shock. Because the device is
exposed to outdoor weather conditions, all the installation steps must be followed carefully
to prevent water leaking into the control unit area. The supplied power supply can only
be used in electrical circuit with a voltage that corresponds to the label on the power
supply. Some parts of the sensors are fragile and therefore close attention must be paid
while handling them during installation or cleaning. Do not use the device in environments
with aggressive chemical compounds and gases and do not clean or soak the device
with chemical detergents. Do not place the weather station close to devices with strong
electromagnetic fields.
Do not use the device if it is malfunctioning or if it shows visible signs of damage. The
outdoor sensors for measuring wind speed and direction, solar radiation and precipitation,
should be kept clean during winter. Also keep in mind that even a thin layer of snow can
significantly influence the measured values, especially in case of the rain gauge if not heated
(heated rain gauge is optional).
2
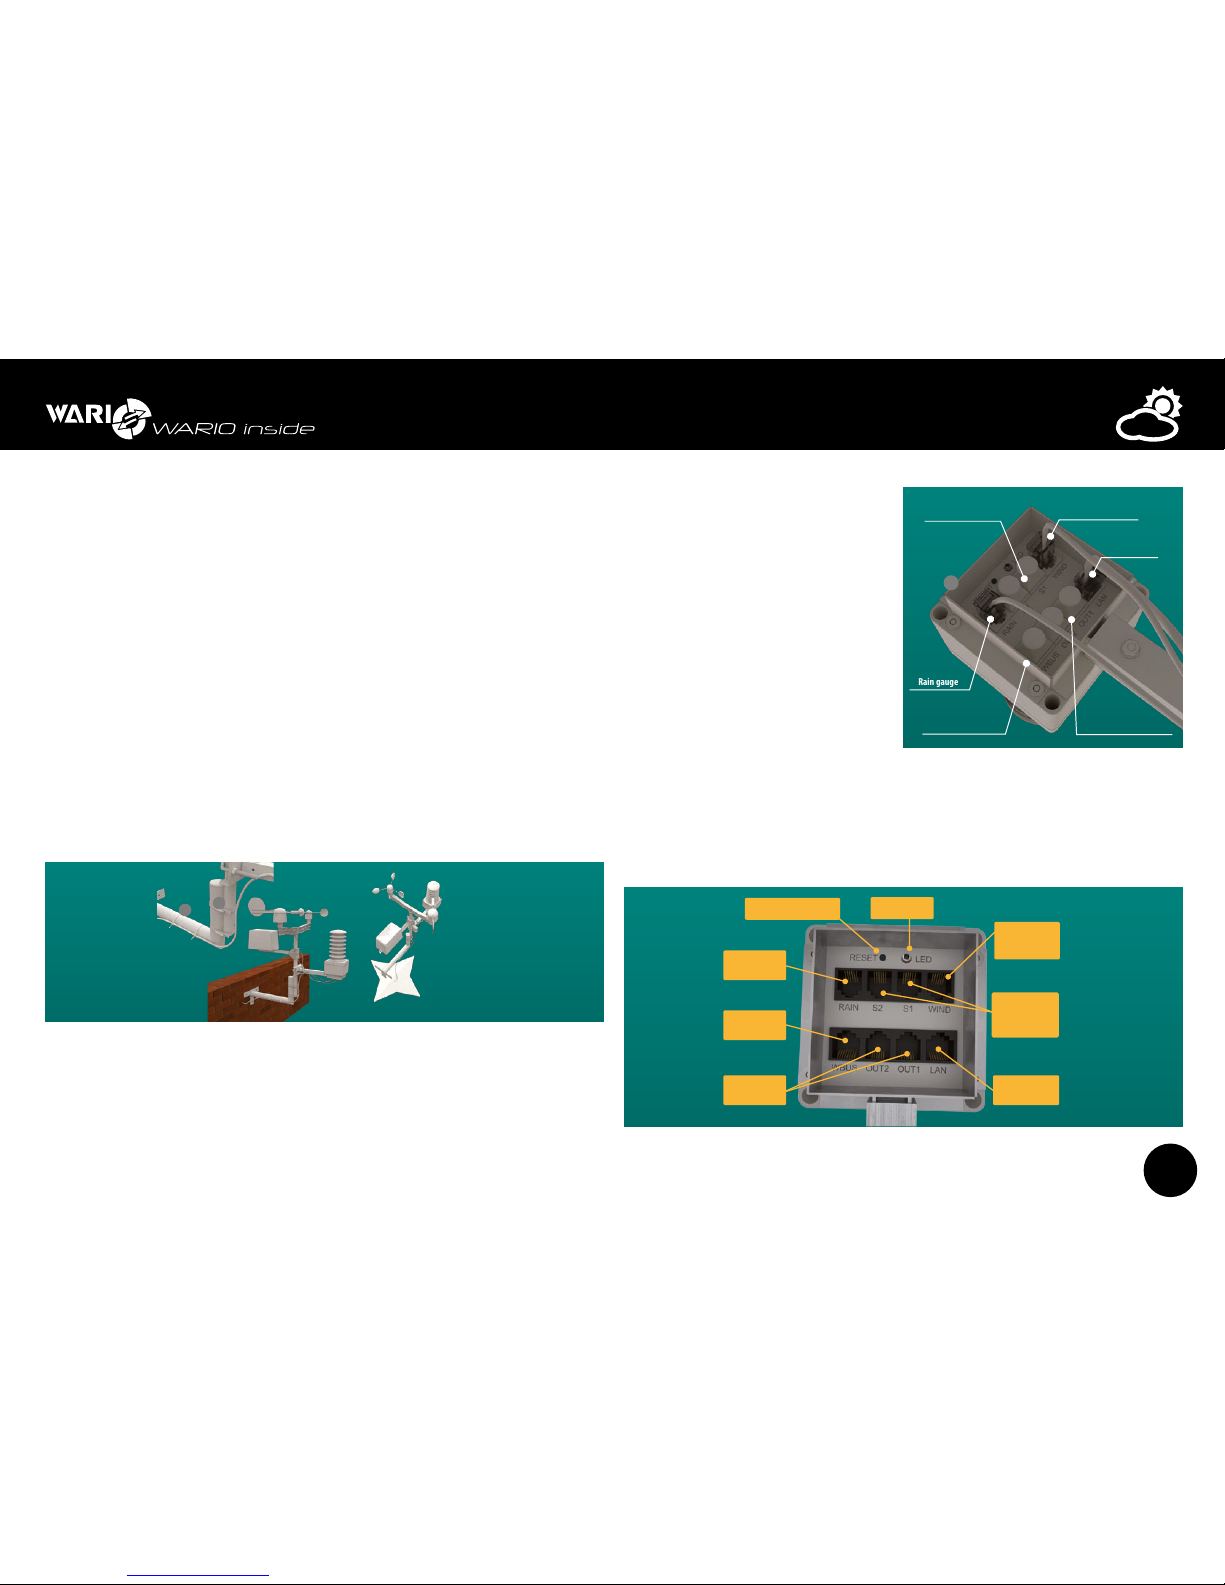
Locating the Weather Station
Installing and using the weather station
The weather station is intended for outdoor use. Minimum distance from the ground is 1m
and the maximum possible distance from the energy supply, data switch or router is 25 m.
The station must be placed in an open-space and the surrounding area must be free of any
devices that could potentially influence the measured values. In order to guarantee accurate
measurements, the station must also be unshaded and no obstacles should prevent normal
air flow. In the winter, the mechanical sensors must be kept clean.