Wave Central Axis Series User manual

Axis Series – RX User Guide
Rev. 2.5 – 2/12/2015
Wave Central LLC
99 Garden Parkway, Suite C., Carlisle, PA 17013
+1 888 736 9283 www.wave-central.com

Axis Series – RX User Guide
Software v2.0 and above
User Guide – Ver. 2.5
Revision 2.5
February 2015
Page 0-1
Contents
Contents......................................................................................... 0-1
0. Systems Description .................................................................. 0-1
0.1What is the AXRX1 Broadcast Receiver?............................................................. 0-1
0.2What are the Features and Benefits of AXRX1? .................................................. 0-2
0.3Getting an Overview of the AXRX1 .................................................................... 0-4
1. Getting Started.......................................................................... 1-6
1.1Identifying your Device..................................................................................... 1-6
1.2Unpacking your AXRX1 ..................................................................................... 1-6
1.3Planning the Hardware Installation .................................................................... 1-8
1.4Identifying the Variants of AXRX1...................................................................... 1-9
1.5Identifying the Options on AXRX1...................................................................... 1-9
1.6About the Software with your AXRX1................................................................1-10
2. Controls, Connections and Indicators.........................................2-12
2.1About Controls, Connections and Indicators ......................................................2-12
2.2Exploring the Front Panel.................................................................................2-12
2.3Exploring the Rear Panel..................................................................................2-13
3. Setting up your AXRX1 .............................................................3-15
3.1Connecting the Antennas .................................................................................3-15
3.2Connecting AC Power ......................................................................................3-16
4. Basic Operation ........................................................................4-17
4.1Starting and Stopping the AXRX1 .....................................................................4-17
4.2Exploring the Control Panel ..............................................................................4-17
4.3Navigating the Menu Pages on the Control Panel...............................................4-18
4.4Exploring the Status Menu ...............................................................................4-20
4.5Exploring the Config Menu ...............................................................................4-22
4.6Changing Numbers in the Config Menu .............................................................4-25
4.7Toggling DHCP On or Off .................................................................................4-27
4.8Setting a Fixed IP Address ...............................................................................4-27
4.9Setting the Receiver Configuration....................................................................4-28
5. Advanced Operation .................................................................5-30
5.1About Encryption.............................................................................................5-30
5.2Setting up Encryption ......................................................................................5-30
5.1About the Encryption Key Characters Required..................................................5-32
5.1About Streaming Over IP .................................................................................5-33
5.2Configuring UDP Multicast Streaming................................................................5-33
5.3Recovering a UDP Multicast Stream - VLC .........................................................5-35
5.4About RTSP Multicast and Unicast ....................................................................5-38

Axis Series – RX User Guide
Software v2.0 and above
User Guide – Ver. 2.5
Revision 2.5
February 2015
Page 0-2
6. Advanced Setup .......................................................................6-39
6.1About Advanced Setup.....................................................................................6-39
6.2Installing the Browser Application on your PC....................................................6-39
6.3Connecting your PC to the AXRX1 using IP........................................................6-40
6.4Exploring the Main Window..............................................................................6-42
6.5Configuring the Basic Settings..........................................................................6-43
6.6Working with the Status Tab ............................................................................6-44
6.7Working with the Global Settings Tab ...............................................................6-61
6.8Setting the Clock .............................................................................................6-75
6.9Working with the Configuration Tab .................................................................6-76
6.10Working with the Copy from Config Button ....................................................6-86
6.11Working with the Log Tab.............................................................................6-88
6.12Working with the Upload Tab ........................................................................6-88
6.1Working with the Frequency Tab ......................................................................6-90
6.2Working with the Information Tab ....................................................................6-94
7. Appendix A – Cautions and Warnings ........................................7-97
7.1Cautions and Warnings ....................................................................................7-97
8. Appendix B - Care and Maintenance ..........................................8-99
8.1Caring for your Equipment ...............................................................................8-99
8.2Charging.........................................................................................................8-99
8.3Working with Lithium Batteries.........................................................................8-99
8.4Cleaning .......................................................................................................8-100
8.5Storage.........................................................................................................8-100
8.6Repairs .........................................................................................................8-100
9. Appendix C-Glossary...............................................................9-101
9.1Glossary........................................................................................................9-101

Axis Series – RX User Guide
Software v2.0 and above
User Guide – Ver. 2.5
Revision 2.5
February 2015
Page 0-1
0. Systems Description
The subject equipment of this User Guide is:
Equipment Title Part Number
AXRX1- Axis Series Diversity Receiver (AXRX2 2-Way, AXRX4 4-Way, AXRX6 6-Way and
AXRX8 8-Way)
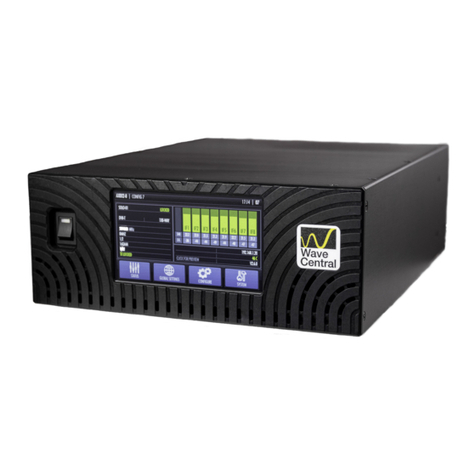
Figure 0-1 – AXRX1 Broadcast Receiver
0.1 What is the AXRX1 Broadcast Receiver?
The AXRX1 is a feature rich multi-way diversity COFDM receiver designed to work with the
next generation of H.264 wireless camera systems.
Designed specifically for the demanding broadcast market, it is supplied in a 1/2 19” 2U high
rack receiver chassis, where two units can be mounted together to occupy a 19” slot and
uses standard broadcast connectors for signal interfaces.
It is available with 2-way, 4-way, 6-way and class leading 8-way maximum ratio combining
RF inputs, ensuring video is recovered free from the distortions typically associated with
fading and multipath. All DVB-T 6/7/8MHz modes are supported. Designed to work with
external down-converters, the receiver can be located up to 100m from the antennas using
standard 75Ωco-axial cables.

Axis Series – RX User Guide
Software v2.0 and above
User Guide – Ver. 2.5
Revision 2.5
February 2015
Page 0-2
The AXRX1 incorporates an extremely flexible decoding platform, with low-delay SD and HD
H.264 decoding capability plus an SD MPEG2 decoder for compatibility with existing systems.
Multiple video output formats are offered with composite and SDI outputs in SD mode and
HD-SDI and in HD mode. SDI/HD-SDI both feature embedded audio and a HDMI output is
provided for use with domestic TVs. Please note HDMI is enabled as a cost option.
A full Genlock facility is available in both SD and HD modes. When in HD mode, an optional
down converted SD composite video monitoring output is also offered. When enabled, the
down converted SD is also available on the SDI2 output.
The AXRX1 can be controlled through its OLED front panel display, as well as on its RS232 or
IP Ethernet browser control interfaces.
For customers wanting to distribute received video to remote locations, the AXRX1 is
supplied with ASI and optional IP streaming outputs.
A comprehensive On-Screen Graphical display is available for monitoring and diagnostics,
which can be enabled or disabled separately on the composite and SDI outputs.
0.2 What are the Features and Benefits of AXRX1?
It can be very useful to understand how the features of the unit yield tangible benefits to
you. This table summarises these features and, more importantly, the benefits.
0.2.1 Features and Benefits Table
Key Features Key Benefits
Digital COFDM Modulation
Excellent performance - Resistant to multipath
interference, delivers high quality video and
audio, even when mobile or in built-up areas
like urban environments.
Receivers with 2, 4, 6 or 8-way COFDM
maximum ratio combining antenna
diversity.
Excellent performance and reliability - Enables
fade and multipath elimination delivering
reliable reception.
Compliant DVB-T Modulator and
comprehensive demodulation at 8, 7, and
6MHz,
True multi-mode operation - Simple
integration with your current equipment.
H.264 SD & HD decoding. Highly flexible – Configure the unit to suit your
current operation.
Low Delay, high quality and fully MPEG-2
compliant SD decoding
High reliability - Use a radio system just like it
was a line.
HD-SDI/SDI with embedded audio out Simple connection to your current equipment.

Axis Series – RX User Guide
Software v2.0 and above
User Guide – Ver. 2.5
Revision 2.5
February 2015
Page 0-3
Key Features Key Benefits
Composite video output (with optional
HD down-conversion)
Low cost of ownership - Easy integration with
Composite systems.
HDMI Output (Cost Option) Industry standard linking.
ASI input and output Low cost of ownership - Easy connection to
your current devices
IP control and optional IP streaming
video
Easy to use - Operations staff can make quick
changes to reconfigure the receiver.
More flexibility – IP streaming enables internet
based broadcast systems to be supplied.
Genlock input Easy synchronisation with your current
systems.
Comprehensive On-Screen display (OSD)
Software Driven - Simple and fast to deploy
and operate – saves you time and cost with
diagnostics for link analysis, including
spectrum analyser.
External Down converters provide choice
to be used with various bands.
Improved operational efficiency - Efficient use
of limited radio spectrum. Choose the
frequency that suits your operations. Select
licence free bands for some operations. Avoid
cluttered parts of the radio spectrum.
Also enables convenient antenna placement.
Integral Encryption at AES128 or AES256
(Optional).
Secure - Preserve your security of
transmission with powerful, simple to operate
encryption.
Facility for generating log files of receiver
status information. (Available in future
release of software).
Makes receiver management easy and simple.
Table 0-1 – Features and Benefits of AXRX1

Axis Series – RX User Guide
Software v2.0 and above
User Guide – Ver. 2.5
Revision 2.5
February 2015
Page 0-4
0.3 Getting an Overview of the AXRX1
Diagram: AXRX1 Main System
Figure 0-2 Main System Diagram

Axis Series – RX User Guide
Software v2.0 and above
User Guide – Ver. 2.5
Revision 2.5
February 2015
Page 0-5
No Item Function
1 Antenna. Matched to band of the down
converter.
Do not over tighten – hand tight
only.
2 Down converter. Enables the AXRX1 to be used in
various RF bands.
3 IF cable, TNC 2-way plug, (pins) to BNC 2-
way plug, (pins).
Down converter to AXRX1
connection.
IF – Intermediate Frequency.
4 XLR 4-way plug (sockets). Power connection to the AXRX1 from
the CA649 power supply unit.
5 LEMO OB 5-way plug (pins) twin key. For Audio output. CA512 AXRX1
External XLR Audio Cable Assembly
2 Meters.
6 XLR 3-way plug (pins) For left audio output.
7 XLR 3-way plug (pins) For right audio output.
8 D-Type 9-way plug, sockets. For RS232 control and data output.
9 D-Type 9-way plug, sockets. For PC control.
10 D-Type 9-way plug, sockets For Data 1 output.
11 D-Type 9-way plug, sockets For Data 2 output.
Table 0-2 – Main System Diagram Key

Axis Series – RX User Guide
Software v2.0 and above
User Guide – Ver. 2.5
Revision 2.5
February 2015
Page 1-6
1. Getting Started
1.1 Identifying your Device
There is only one type of AXRX1 Receiver described in this User Guide.
This is a AXRX1 Receiver.
Its type designation is: AXRX1-
Size: 358mm (L) x 220mm (W) x 87.5
(H).
Weight: 2.8kg.
Operating Temperature: -20 deg C to
+60 deg C.
DC Input 9 to 16VDC Reverse Polarity
Protected
Power Consumption:
27W (Two Way Diversity Inc. D/C)
35W (Four Way Diversity Inc. D/C)
43W (Six Way Diversity Inc. D/C)
51W (Eight Way Diversity Inc. D/C)
Figure 1-1 – AXRX1 Receiver
1.2 Unpacking your AXRX1
Carefully open the packaging and remove the device. Verify that all the components have
been included in the package as shown in the packing list. Inspect the unit for shipping
damage.
Retain the packing list and all the packing materials for storage.
The codes on the picture mean:
CA – Cable Assembly
SA – Sub Assembly
AP – Assembly Part.
The codes are useful to you if you need to order a new cable sometime.

Axis Series – RX User Guide
Software v2.0 and above
User Guide – Ver. 2.5
Revision 2.5
February 2015
Page 1-7
Diagram: Unpacking your AXRX1
Figure 1-2 – AXRX1 Packing Diagram

Axis Series – RX User Guide
Software v2.0 and above
User Guide – Ver. 2.5
Revision 2.5
February 2015
Page 1-8
No Item Notes
1 Main Unit. AXRX1-2 for example, 2-way diversity, DVBT
demodulation, includes MPEG2 and H.264 SD decoder,
Composite and SDI out, Genlock, Web-browser
interface, with BNC connectors, excludes antennas and
down converters.
2 AXRX1 External 12V
6.67A 80W Desktop
Power Supply Unit
Assembly 1.165 Meters.
CA0649
Power Cable Assembly (3 Meters)
PSU Block to XLR 4-way plug (sockets) 12VDC.
3 AXRX1 External XLR
Audio Cable Assembly 2
Meter LEMOs.
CA0512
LEMO 5 pin connector to
XLR 3 female connector (left audio)
XLR 3 female connector (right audio).
Table 1-1 – Parts in the AXRX1 Package
1.3 Planning the Hardware Installation
During the design and layout of the system, you should give careful consideration of the
location of this and all other associated modules. Some of the items to consider include:
Space - Leave at least 100mm clearance left and right to allow for cable bending.
Proximity to other devices (for example, source equipment).
Length of cable runs.
Environmental conditions (temperature, humidity, etc.)
Access for service repair.
Compliance with local regulations.

Axis Series – RX User Guide
Software v2.0 and above
User Guide – Ver. 2.5
Revision 2.5
February 2015
Page 1-9
1.4 Identifying the Variants of AXRX1
Step 1: Identify the Variants
Equipment Title Part Number
2-way diversity, DVBT demodulation, includes MPEG2 and
H.264 SD decoder, Composite and SDI out, Genlock, Web-
browser interface, with BNC connectors, excludes
antennas and down converters.
AXRX1-2 and AXRX1-2NA
4-way diversity, DVBT demodulation, includes MPEG2 and
H.264 SD decoder, Composite and SDI out, Genlock, Web-
browser interface, with BNC connectors, excludes
antennas and down converters.
AXRX1-4 and AXRX1-4NA
6-way diversity, DVBT demodulation, includes MPEG2 and
H.264 SD decoder, Composite and SDI out, Genlock, Web-
browser interface, with BNC connectors, excludes
antennas and down converters.
AXRX1-6 and AXRX1-6NA
8-way diversity, DVBT demodulation, includes MPEG2 and
H.264 SD decoder, Composite and SDI out, Genlock, Web-
browser interface, with BNC connectors, excludes
antennas and down converters.
AXRX1-8 and AXRX1-8NA
1.5 Identifying the Options on AXRX1
The AXRX1 has two types of options:
Accessory Options
Licensing Options
Step 1: Identify the Accessory Options
Equipment Title Part Number
Professional Receiver Broadcast 42HP Single Rack Front
Panel.
AXRX1SRFP
Upgrade with extra 2-way diversity including additional
licensing.
AXRX1-UP
Professional Receiver Coupler Kit. Dual rack mount kit. AXRX1-RXCPLKT
Enable HDMI output on AXRX1 receiver AXRX1-HDMIUP

Axis Series – RX User Guide
Software v2.0 and above
User Guide – Ver. 2.5
Revision 2.5
February 2015
Page 1-10
Step 2: Identify the Licensing Options
Equipment Title Part Number
License for Receiver Streaming Upgrade (Professional
Receiver Broadcast).
NETAXRX1IPUP
1.6 About the Software with your AXRX1
The AXRX1 has two software elements:
Firmware that runs inside the device on the boards.
Control Pages that you access using your web browser on your Windows PC.
About the Firmware
Although much of the unit is built up of hardware components, many of the sophisticated
features are implemented in firmware running on a Field Programmable Gate Array (FPGA)
inside the device.
When you need to perform an internal software upgrade we provide an installer pack which
contains all the code you’ll need to do this easily.
About the Control Pages
The software tools provide users a convenient access to the most common features and
functions of the device. All software tools are implemented as a web interface. The
advantage of a web interface is that it is independent from the user’s operating system and
doesn’t require any specific software on the host PC.
The Control Panel on the front of the unit gives access to many of the features of the radio
but for more sophisticated operations and configuration tasks you’ll connect up a PC running
a web browser to access the Control Pages on your AXRX1.
The Control Pages enables you to set up sixteen presets in the radio and have control over
many parameters of the unit.
Here’s what one of the AXRX1 Control Pages look like:

Axis Series – RX User Guide
Software v2.0 and above
User Guide – Ver. 2.5
Revision 2.5
February 2015
Page 1-11
Screenshot: AXRX1 Control Page
Figure 1-3 – AXRX1 Control Page

Axis Series – RX User Guide
Software v2.0 and above
User Guide – Ver. 2.5
Revision 2.5
February 2015
Page 2-12
2. Controls, Connections and Indicators
2.1 About Controls, Connections and Indicators
You’ll need to be able to find all the controls and connections on the unit. You’ll also need
to be able to identify and interpret any alarms or indicators. The following topics will help
you identify all these features.
Each AXRX1 has front and rear panels which contain all the interface connections for the
units and the controls and indicators. There is an operational control panel on the front of
the unit.
2.2 Exploring the Front Panel
Diagram: Front Panel
Figure 2-1 AXRX1 Front Panel
No Item Used for...
1 Rack Mounting Ears. Removable metalwork to enable the
AXRX1 to be fitted in a half of a 19”
rack.
Two AXRX1s can be joined together
to fit a full 19” rack space using the
Professional Receiver Coupler Kit,
part code AXRX1-RXCPLKT.
2 Display Screen. This two line OLED display screen
forms part of the Control Panel
where you can quickly set up many
of the features of the AXRX1.

Axis Series – RX User Guide
Software v2.0 and above
User Guide – Ver. 2.5
Revision 2.5
February 2015
Page 2-13
No Item Used for...
3 Cancel / Back Button. Press to cancel action or go back one
level.
4 Joystick / Confirm Button Move the joystick for UP, DOWN,
LEFT and RIGHT.
Press the joystick for ENTER.
5 Power Button. Toggles the power on or off.
6 USB Jack. Supplies USB Power.
7 BNC female connector. For video output.
Table 2-1 – AXRX1 Front Panel Key
2.3 Exploring the Rear Panel
Diagram: Rear Panel
Figure 2-2 AXRX1 Rear Panel

Axis Series – RX User Guide
Software v2.0 and above
User Guide – Ver. 2.5
Revision 2.5
February 2015
Page 2-14
No Item Used for...
1 XLR 4 pin female connector POWER
12V 4A.
Power input to the AXRX1.
2 BNC female connectors x 8 marked 1
to 8.
Connect your IF cables from the down
converter / antenna assembly here.
Do not over tighten. Hand-tight only.
3 HDMI Type-A 19 pin female connector HDMI (High Definition Multimedia
Interface) output.
Note: Not connected. Can be enabled
as a factory installed cost option.
4 RJ45 8 pin female connector marked
ETHERNET.
Ethernet input / output.
You’ll use this port to control your
AXRX1 using a web browser on your
PC.
It is also used for streaming video if
your unit is licensed for that.
5 D-Type 9 pin male connector marked
RS232 Data/Ctrl.
RS232 Data/Control port.
Data output and enables you to
control the AXRX1 serially if required.
6 BNC female connectors marked SDI 1
and SDI 2.
SDI video outputs, decoder 1 and 2.
7 LEMO 5 pin female connector marked
AUDIO 1 and AUDIO 2.
Audio outputs, decoder 1 and 2.
8 BNC female connectors marked
VIDEO 1 and VIDEO 2.
Composite video outputs, decoder 1
and 2.
Table 2-2 – Rear Panel Key

Axis Series – RX User Guide
Software v2.0 and above
User Guide – Ver. 2.5
Revision 2.5
February 2015
Page 3-15
3. Setting up your AXRX1
3.1 Connecting the Antennas
This topic describes connecting systems designed mainly for transporting the RF signals. Of
all the variables affecting single-channel broadcast communications, the one factor that an
operator has the most control over is the antenna. With the right antenna, an operator can
change a marginal signal into a reliable signal and product a broadcast quality picture.
There are eight antenna interfaces located on the rear panel of the AXRX1 receiver.
Note: If you have four-way diversity AXRX1 then you must connect four antennas to
achieve best performance from the four-way diversity receiver system.
If you have six-way diversity AXRX1 then you must connect six antennas to achieve best
performance from the six-way diversity receiver system.
If you have eight-way diversity AXRX1 then you must connect eight antennas to achieve
best performance from the eight-way diversity receiver system.
Before you Begin
You’ll need:
2, 4, 6 or 8 down converters that match the frequency range you want to receive.
2, 4, 6 or 8 antennas that match the frequency range of your down converters.
Step 1: Select your Down Converters
All AXRX1 receivers use down converters to lower the frequency from microwave (L, S and
C-Band) to an Intermediate Frequency (IF) between 51 and 858 MHz that the on-board
tuners in the receivers can use.
It is important to select the correct down converter for the microwave transmission
frequency you are planning to receive. Down converters have a label to help you select the
correct unit.
If you are using long cable runs from the base of the down converter to the rear panel of the
AXRX1, the normally set high gain setting on the down converter will compensate for the RF
losses in the long cable runs.
Step 2: Attach the Antennas to the Down converters
1. Connect each antenna directly to the N type female on the top panel of each down
converter.
Step 3: Set Antenna Polarization
1. COFDM links are very robust and are tolerant to changes in antenna position, however, it
is important to try and keep the antennas in the same plane if possible.
2. The antennas used with the COFDM links are normally linearly polarized.

Axis Series – RX User Guide
Software v2.0 and above
User Guide – Ver. 2.5
Revision 2.5
February 2015
Page 3-16
Step 4: Attach IF Cable to the Down converter
1. Connect the BNC connector on the IF Cable to the BNC male connector on the bottom
panel of each block down converter.
Step 5: Attach IF Cable to the AXRX1
Connect the BNC plug on the IF Cable to the BNC connector on the rear panel of the AXRX1.
Next Steps
Connect AC Power.
3.2 Connecting AC Power
Before you Begin
You’ll need:
A CA0649 AXRX1 External 12V 6.67A 80W Desktop Power Supply
AXRX1.
Step 1: Connect the AC Power
1. Connect the XLR 4 female connector from the AC adaptor to the XLR 4 male
connector on the AXRX1 Receiver which is located on the left side of the rear panel.
2. Now connect the IEC power 3 pin male to the IEC power 3 pin female connector on
the AC adaptor.
3. Connect IEC mains plug to your local AC supply and switch on.

Axis Series – RX User Guide
Software v2.0 and above
User Guide – Ver. 2.5
Revision 2.5
February 2015
Page 4-17
4. Basic Operation
4.1 Starting and Stopping the AXRX1
AXRX1 units have a power switch on the right side of the front panel.
Before you Begin
You’ll need:
An AXRX1 connected to a source of power.
Step 1: Powering Up
1. Press the Power Switch on the front panel.
2. You’ll see the Splash display appear.
3. Let the unit Initialise.
Step 2: Shutting Down
It is important to shut down the system carefully. This ensures that all processes are
terminated correctly and no data or settings are lost.
1. Press the Power Switch on the front panel.
2. The display will go blank.
3. The system is shut down safely.
Next Steps
Explore the Control Panel.
4.2 Exploring the Control Panel
When you have powered up the AXRX1 you’ll see the control panel located on the front
panel.
Before you Begin
You’ll need:
A fully powered AXRX1
Other manuals for Axis Series
1
Table of contents
Other Wave Central Receiver manuals
