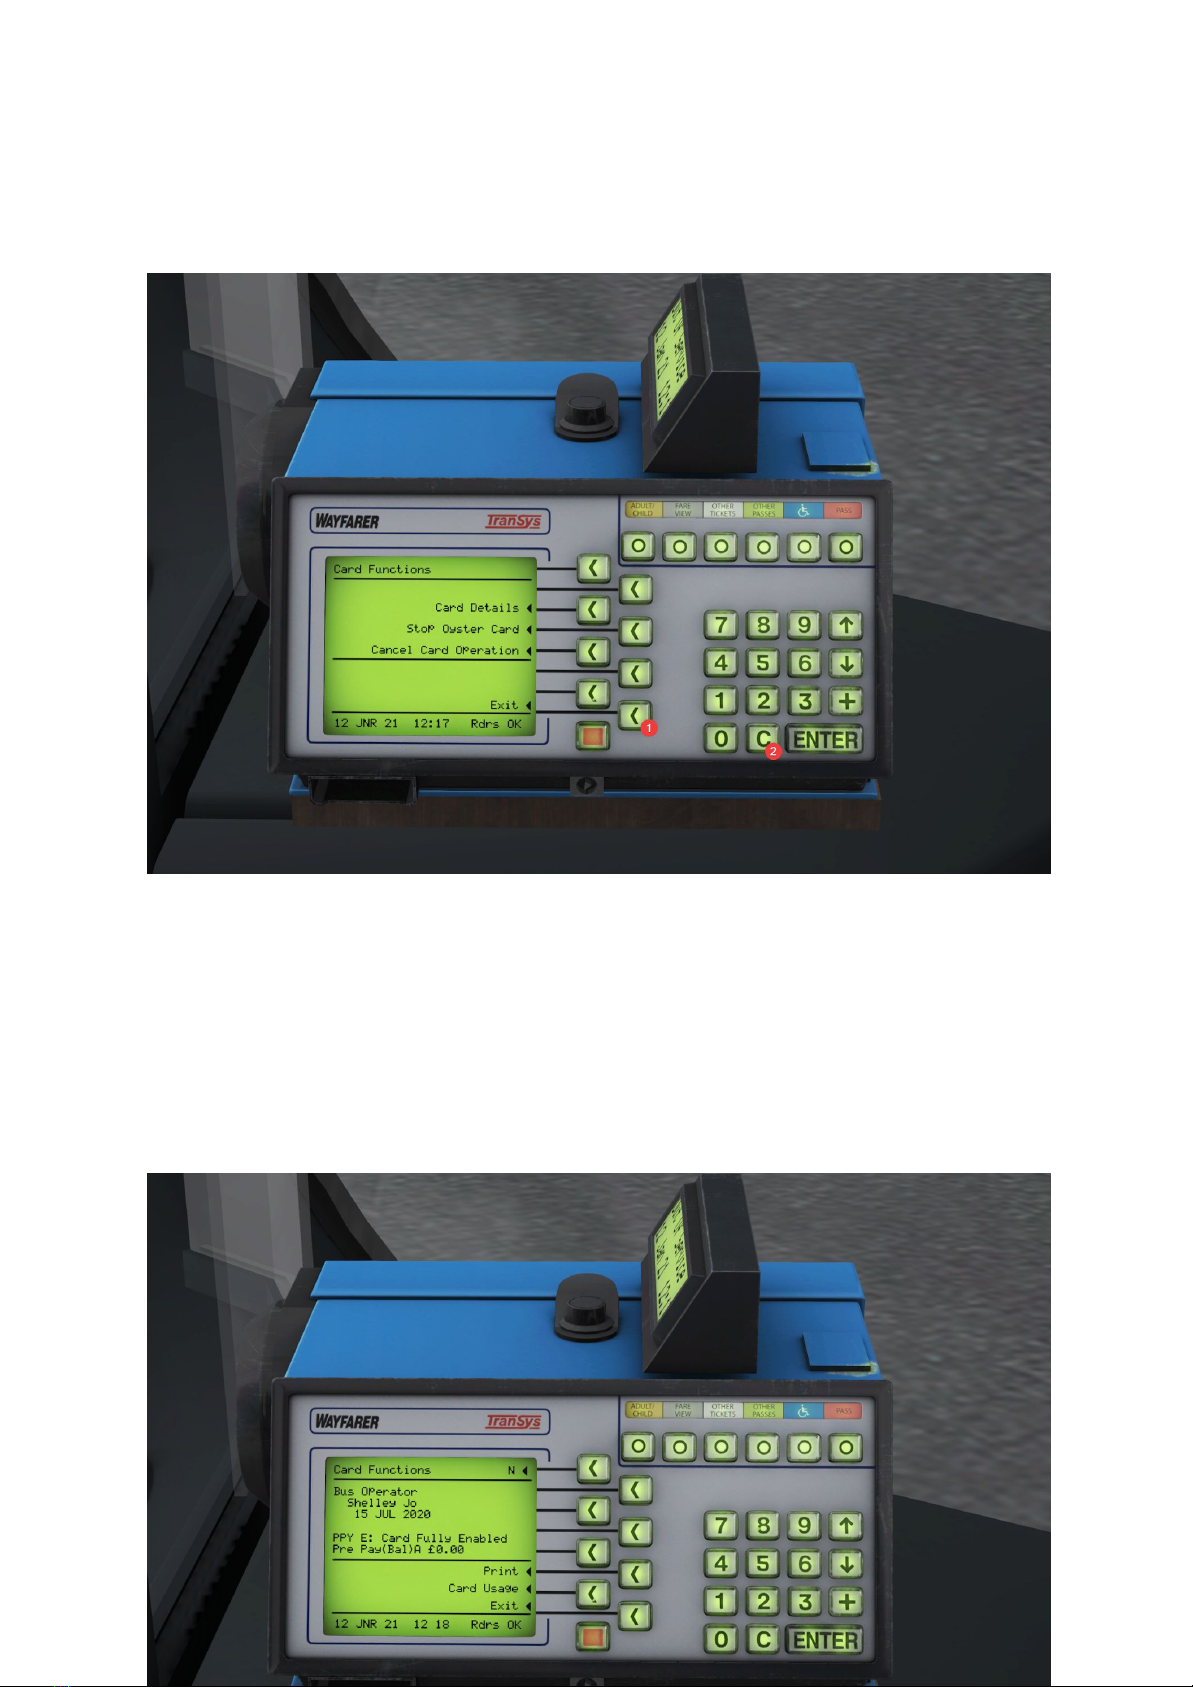
WAYFARER 150 ETM User manual

Wayfarer 150: Drivers Handbook
Welcome to our Addon London update. One key feature of this update is our fully-simulated
Wayfarer 150 ETM. In this handbook you can find instructions on how to Sign On, Sign Off,
and more.
This manual outlines every feature of our Wayfarer 150 rendition. It also goes into complete
depth on how to use the machine as intended. This manual is lengthy, so if you don’t want to
read it all, please see the Studio Polygon YouTube page for short videos showing you how
to correctly use the machine.
With that said, if you are an advanced user or you know what you are doing and want to get
started as quickly as possible, the Driver Number is 5431134 and the PIN is 2361.
Throughout the manual, you may see “enter any digits 1-3”, these are things Addon London
doesn’t simulate, however, if you have a real life running board, you can find all the info on
there and use those numbers instead.
If you just want a quick brief, see the next page.

Wayfarer 150: Quick Start
Log On Summary:
- Turn on the Battery and wait 10 seconds for the ETM to boot.
- Press Enter to begin sign on, the Driver Number is 5431134 and the PIN is 2361.
- The Garage ID is any 3 numbers, followed by ENTER.
Sign on Summary:
- Checked Bus? Use the Arrow Keys, 0 or 1 on the number pad or + to cycle through
the route numbers, then press ENTER.
-Operator, Duty and Trip, enter any digits from 1-3, then press “ENTER”
- For Route, use the Arrow Keys, 0 or 1 on the number pad or + to cycle through,
then press ENTER.
- Wait 5 seconds for the ETM to transfer data to the MDT.
Ticket Selling:
- Use the < buttons or O buttons at the top to select a ticket, then press ENTER to
issue. Tickets not available are simulated also.

Turning on the Wayfarer:
To turn on the Wayfarer 150, all you need to do is turn on the Battery Master Switch, or E on
your keyboard 1 time, and then the Wayfarer will boot, this usually takes around 10 seconds
to initialise.
For the Lite, the button will look like this: For the 400MMC, the button will look like this:
Signing On:
To begin the Sign On process on the Wayfarer 150, simply press the “ENTER”
button in the bottom right. Annotated as 1.
If you’re not ready to sign on, you can press the Inner Left bottom button to check
the card Readers, it is labelled “Rdrs”. Annotated as 2. To get out of this menu, you
can press the same button you clicked, or press C, left of “ENTER”.

Once you’ve pressed ENTER, the ETM will proceed onto the login screen. From here, you
need to input your Driver Number, PIN, and Garage ID.
First off, input your Driver Number with the number pad. This is 5431134, as annotated as 1
in the image, and then press “ENTER” as annotated as 2.
If you make an error inputting your Driver ID, PIN or any other input, just press the C button,
the machine will remove the last digit inputted per press.
From here, the ETM will enter the PIN input stage, which is 2361, and then press “ENTER”.

Once you’ve proceeded, enter your Garage ID. This can be any number you desire, from 1
digit to 3. Then press “ENTER”.
Next, the ETM will proceed onto the Sign On Summary, which is where you input your route
parameters.
First off is Checked Bus?, for this, you can enter “Yes” or “No” depending on if you have
checked your bus, this acts as a reminder to do the vehicle condition report.
To scroll through “Yes” or “No”, you can press 1 or 0 accordingly, + or C accordingly, or
Arrow Up, and Arrow Dn accordingly, and then press “ENTER” to proceed onto the next
phase. All annotated in order.

Now the ETM will move onto Operator Number and then Duty. For Operator Number, you
can enter any 1-3 digits and then press “ENTER”, and the same for Duty, any 1-3 digits you
desire, then press enter.
Then the ETM will progress to the Route input, followed by the Trip input. For your Route,
scroll using the + or Arrow Up button to scroll up the list of routes available (All routes are
available for Addon London, 3, 201, P5 etc, however please note, regional maps are not
yet supported for scrolling, but you can use the number input buttons to manually input a
route number if this is the case) and then Arrow Dn to scroll down. You can also use the
number pad to input manually. All annotated in order below. Then press “ENTER” to move
onto the Trip input.
For Trip, you can input any number you want with the keypad, you can find the trip on your
timetable in the cab, or on the OMSI trip selection screen, and then press “ENTER”.

Once you have completed this screen, the machine will now boot into the home screen,
ready to issue tickets and accept Oyster cards. On your MDT, the ETM icon will also
disappear as it has sent the required data to the MDT and both systems are ready to go*.
The screen will display this message:
for 5 seconds, and then boot into the Home Screen as shown here:

As you can see, the Home Screen is now visible.
For Addon London, and any other map that has a ticket name as “”, the machine will display
an error saying “Cash Fare not available” (annotated 1) with a different audible beep. This is
true-to-life and will disappear after 2 seconds, alternatively you can press C to remove the
message instantaneously.
The areas in Green are buttons you can click to print tickets, followed by “ENTER”, if you
mistakenly click one, press C (annotated Blue) to remove the ticket selection, alternatively
you can click the same button you just pressed to remove the ticket selection.
Once in service, each passenger will scan their Oyster card on the reader, and you’ll get a
popup that lasts for a second with an audible acceptance noise. The popup also displays the
balance on the card.
However, if the Oyster Card balance is below £1.50, an error acceptance sound will play
instead of the regular acceptance sound, and an emergency fare ticket will automatically
print out. This is something that has never been done in OMSI before.
Once you’re on the Home Screen, you can check the Readers (Rdrs) status by pressing the
same button as before, and the same button, or C, to get rid of it.

Additionally, you can now enter the Card Functions Menu (Card) by pressing the Outer
Bottom Right button, as annotated. You can also press C to exit out of this menu and
subsequent submenus.
Card Details:
To check Card Details, press the Inner Left 2nd button down, to select this option, and then
look inside the cab for your Oyster Wallet, click that and the ETM will read the data. Then,
after a second or 2, the Card Details will show, you can see your Name, Date, your status
and balance.
You can press Print to print out a readout of this, Exit to exit, or Card Usage to see when
you last used your Oyster Card.

Stop Oyster Card:
This submenu is for Inspectors, they can type in their several digit PIN and null and void the
last Oyster Card scanned into the ETM. You can try and guess the PIN, but you being a
driver, not an inspector, this part isn’t simulated.
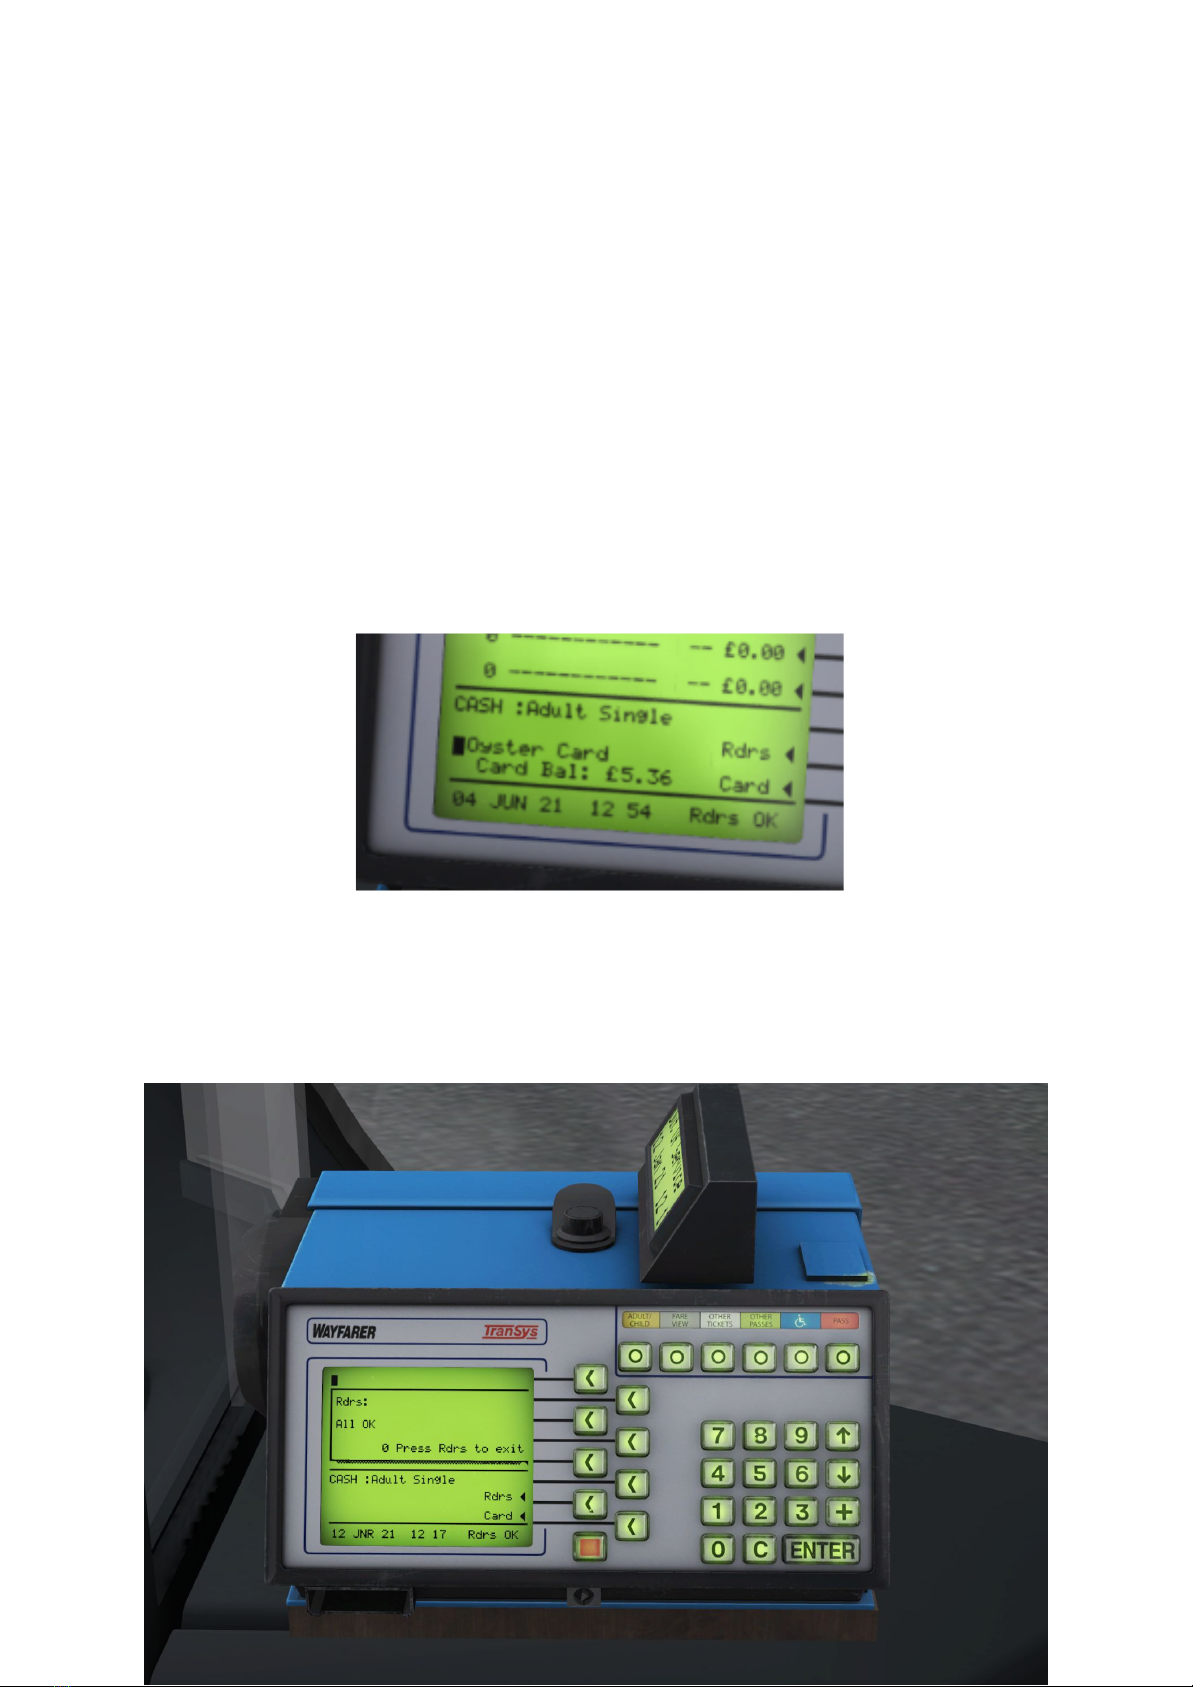
Cancel Card Operation:
The last ticket scanned can be cancelled and refunded if you click it. There’s a 30 second
timer as per real life.
You can press “Exit” or C to back out of all of these submenus and menu.
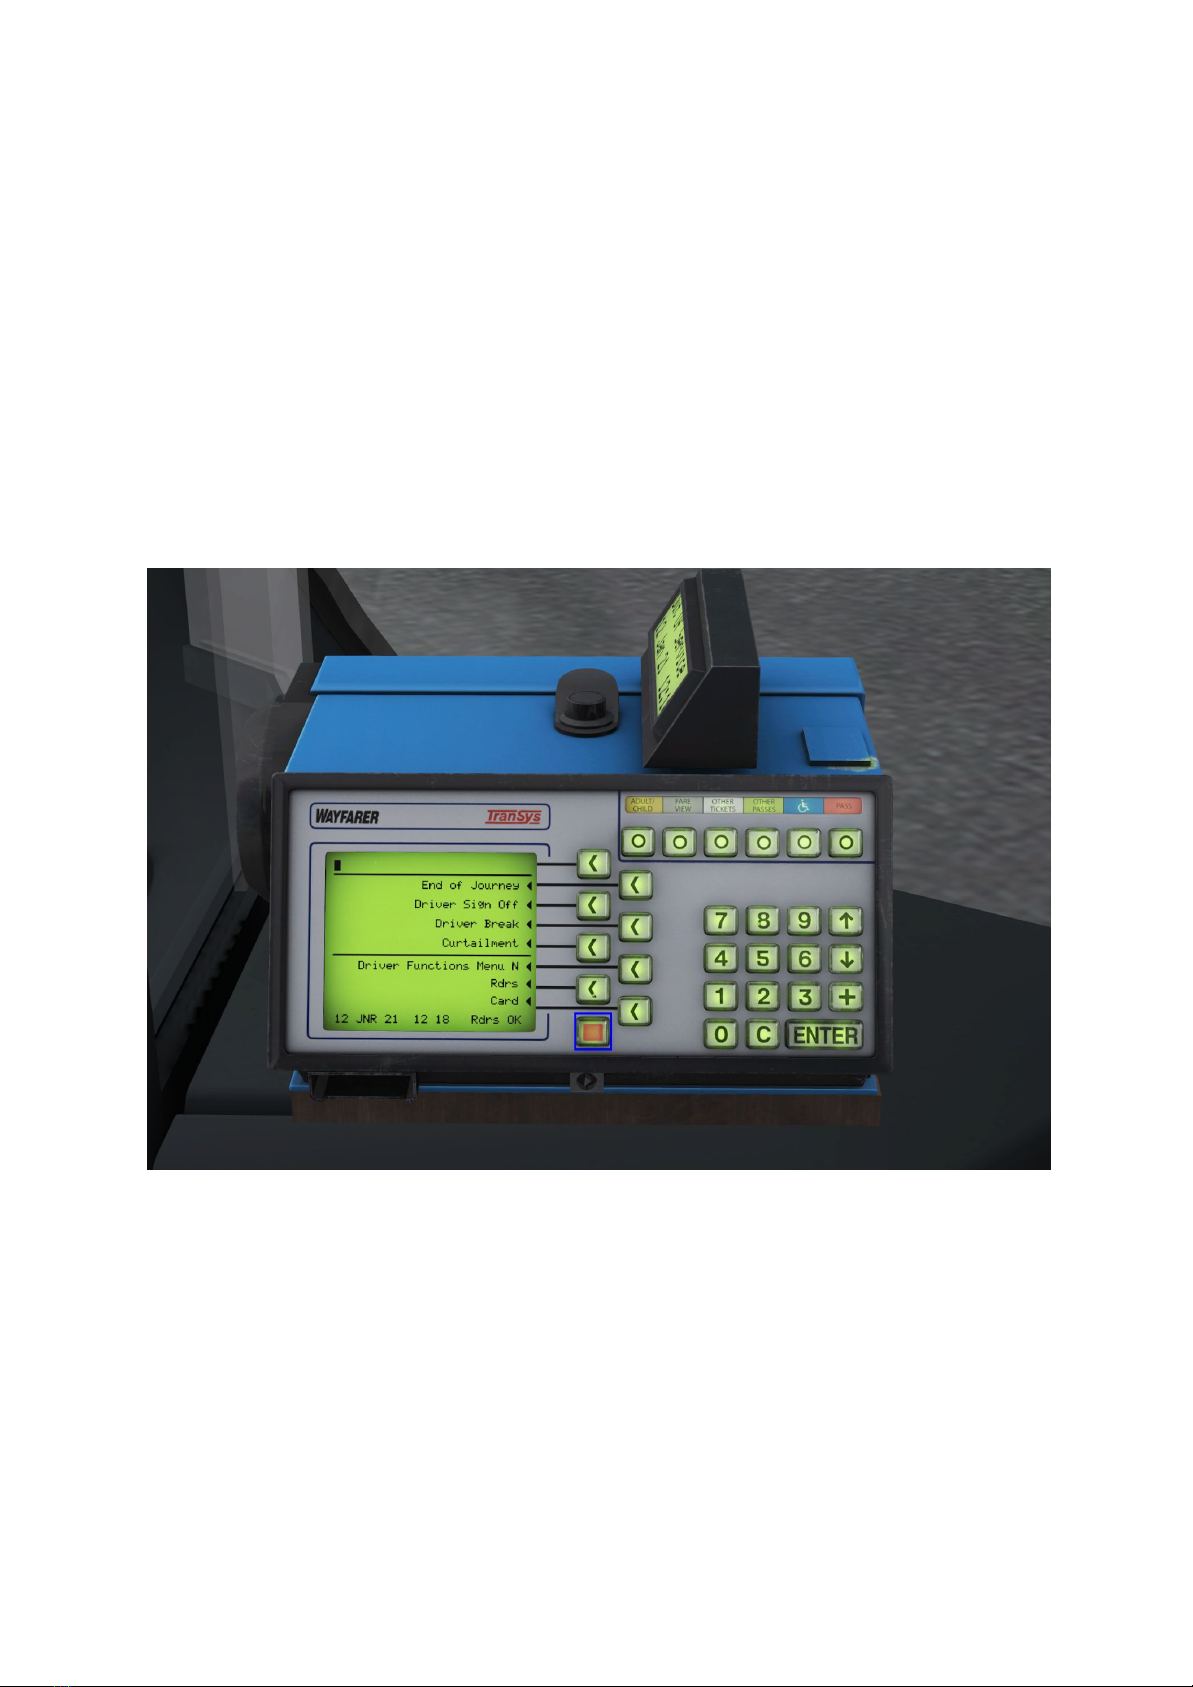
Next, is the Functions Menu, or the Red Button, as annotated in Blue.
There are 4 options on this screen, End of Journey, Driver Sign Off, Driver Break, and
Curtailment.
End of Journey:
If you press the Outer Right button, you’ll be asked if you want to End Journey, press
ENTER to End Journey, or press C to exit out.
If you pressed ENTER, and ended your journey, please see Page 5 again to sign on again
with a new trip. The only difference is this menu has a LUL Resolution option, which, if
enabled, customers touching in will not be charged if they’re entering from a station. You get
an LUL Code from the iBus Controller to plug in the ETM, but for the purposes of our
simulation, any 3 digits will do fine, followed by ENTER.

From here, the ETM will sign on again with the new details given. You’d do this at the end of
a route each time.
Driver Sign Off:
Next is Driver Sign Off. If you press this button, a popup will appear confirming if you want to
sign off or not. If you press ENTER, you’ll be signed off and returned to the post-boot up
screen. If you do not want to sign off, press C to cancel.
Driver Break:
Second to last is Driver Break, you can click this if you need to go for a break or just to lock
the ETM. If clicked, you’ll need to re input your PIN again to unlock, which is 2361, or if you
want to sign off completely, press C to be brought to the post-boot up screen.
Curtailment:
Finally, is curtailment, you can click this button and a curtailment ticket will print out for the
passenger.
Drivers Functions Menu N:
To enter the next submenu, click Drivers Functions Menu N to enter.
There are again, 4 submenus of this screen. Inspector, Paper Status, Driver Settings, and
Driver Totals.
Inspector:
To print out an Inspector ticket, you’d ask for their digits, and type them in and then press the
Inspector button. A ticket will print out, and a popup will appear saying “Retrieving data From
RTD'', this will auto disappear in 5 seconds, or you can press the Inspectors button again, or
C to remove the popup.
Paper Status:
Every time you print a ticket out, this number will decrease by 1. Once clicked, a popup will
appear, you can press the Paper Status button again to remove the popup, press C, or wait
again, 5 seconds for it to auto remove itself.

Driver Settings:
This menu is quite a unique feature. You can dim/brighten the display by changing the
backlight and contrast settings. Just click the correlating buttons.
Bright with High Contrast: Dim with Low Contrast:
For those worried about memory usage when doing this, there’s no need. Whilst they are
texture changes, they’re compressed DXT1 images and are very low in memory, and OMSI
will dump them almost instantaneously out of memory.
You can press C to exit out of this menu.
Driver Totals:
Finally is Driver Totals. For London, it will never say anything other than £0 as it doesn’t
accumulate Oyster Card deductions, it was used back when TfL accepted change. For this
reason, the popup won’t function in Regional maps as it would be a wasted function for its
intended map, London.
This popup will time out after 5 seconds, or you can press C to get rid of it.

To exit these menus and submenus, you can press C to back out in all screens.
Now you’ve learned how to operate the Wayfarer 150 ETM. Have fun!
Credits:
NanaSinfo on YouTube for reference material used:
https://www.youtube.com/watch?v=CVaHp_ZgGl8&t
Studio Polygon for the Model, Textures, Sounds and Scripts
Table of contents