1
wibenchmfg.com 507 E. Grant St. Thorp, WI 54771 • P - 800.242.2303
Step 1:
• Attach (2) 4”L-brackets to the inner side of the left leg
aligning them with the pre-drilled holes using #10x¾”
square pan screws. Tighten with a #2 square drive screw
driver or a #2 square bit with a screw gun. Repeat this
step for the right leg.
Step 2:
• Attach (1) 4”L-bracket to the inner side of the modesty
panel aligning it with the pre-drilled holes using #10x¾”
square pan screws. Tighten with a #2 square drive screw
driver or a #2 square bit with a screw gun.
Step 3:
• Align connectors on the left and right ends of the
modesty panel with the connectors on the left and right
legs. Press down until it’s fully engaged. (This is the step
where it would be helpful to have three people; one
person per leg holding them in place and one person
pressing down the modesty panel into the connectors
located on the left and right legs.)
• NOTE: If you are assembling an Adder Kit along with this
Starter Kit, you will need to replace the right leg with the
center leg. The right leg will be the very last one to be
attached.
Step 4:
• Place top face down on a protected surface so pre-drilled
holes are facing up. Attach cord channel to top aligning
it with the pre-drilled holes using #10x¾” square pan
screws. Tighten with a #2 square drive screw driver or a
#2 square bit with a screw gun.
V041819 subject to change.
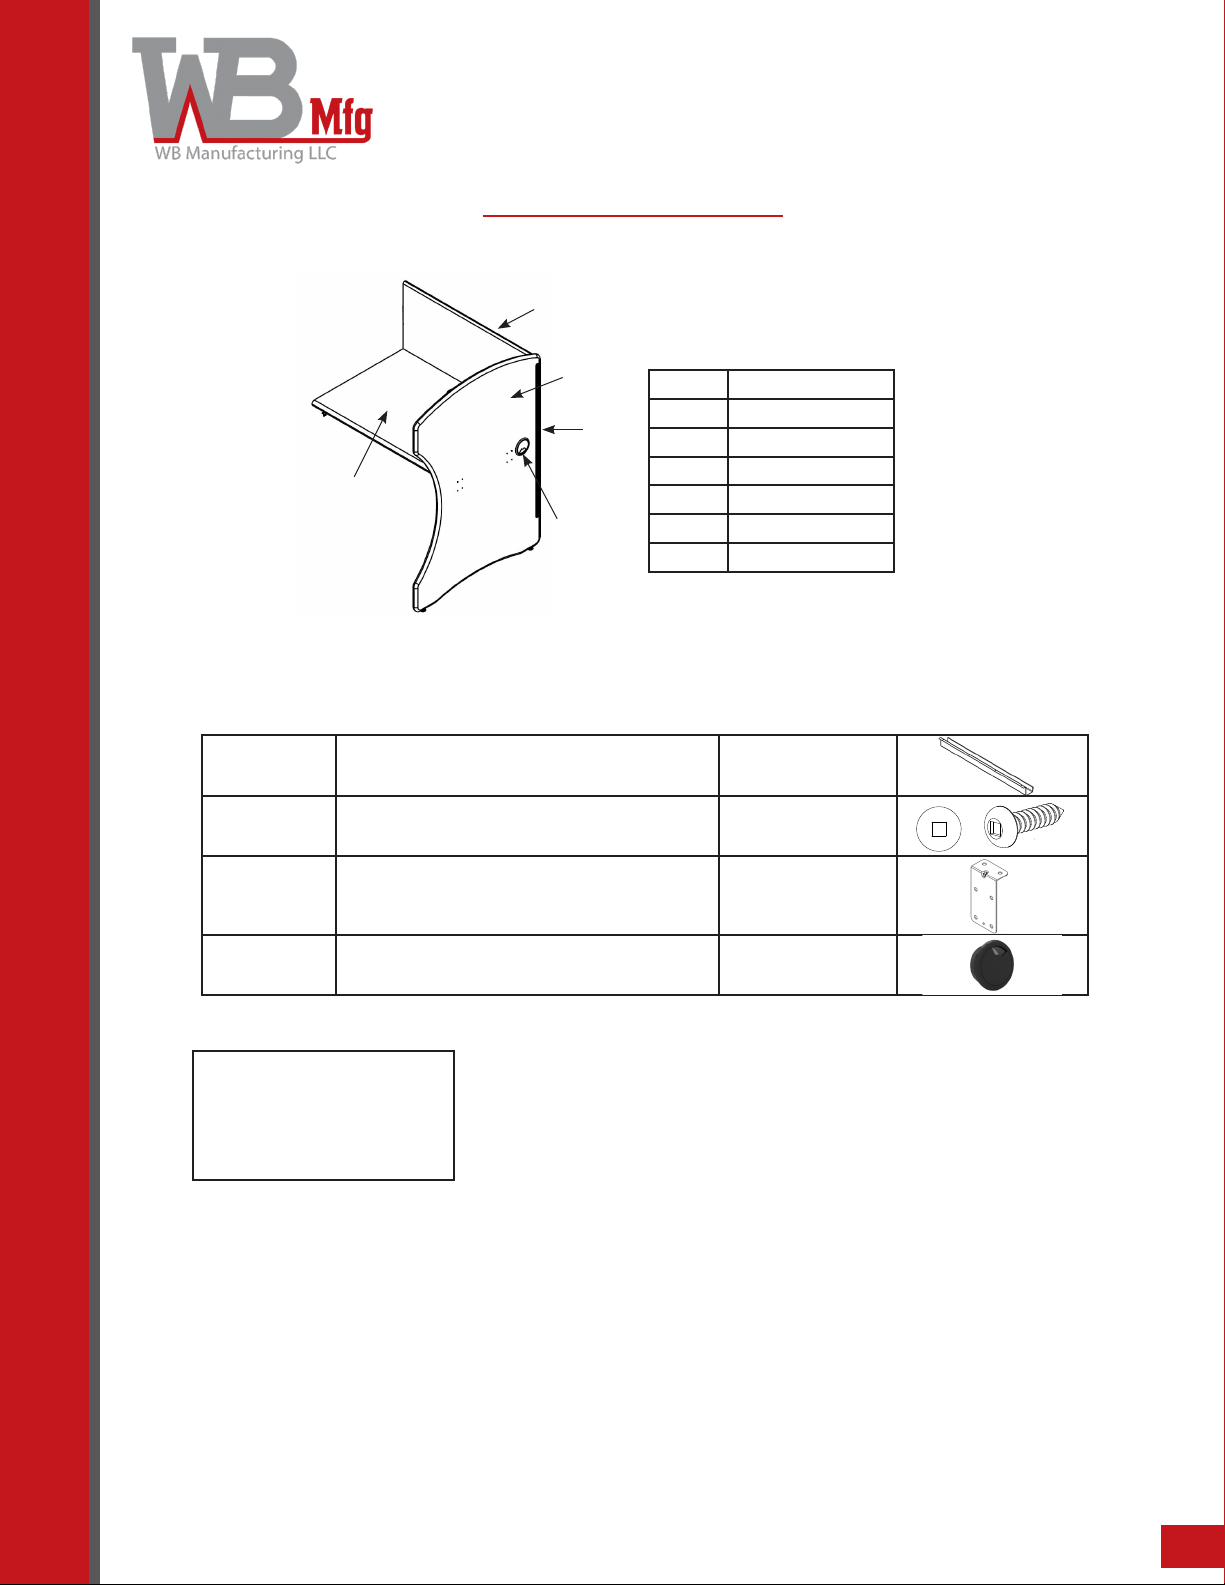
Study Carrel
Starter Kit
Step 1
Modesty
panel
Left leg
Step 2
Step 4
Step 3
Modesty
panel
Connectors
Left leg
Right leg
Assembly Instructions
Before you begin, please make sure all parts and proper quantities are included. (See Part Identier Key) Any parts damaged during shipment must be
reported within 24 hours of receipt. To report information regarding damages or if you have any questions, please call 800.242.2303.
Assembling this unit on Step 3 may take up to three
people to help hold both left/right legs and another to
assemble the modesty panels.