4
Installation Instructions
www.WoodworkerExpress.com
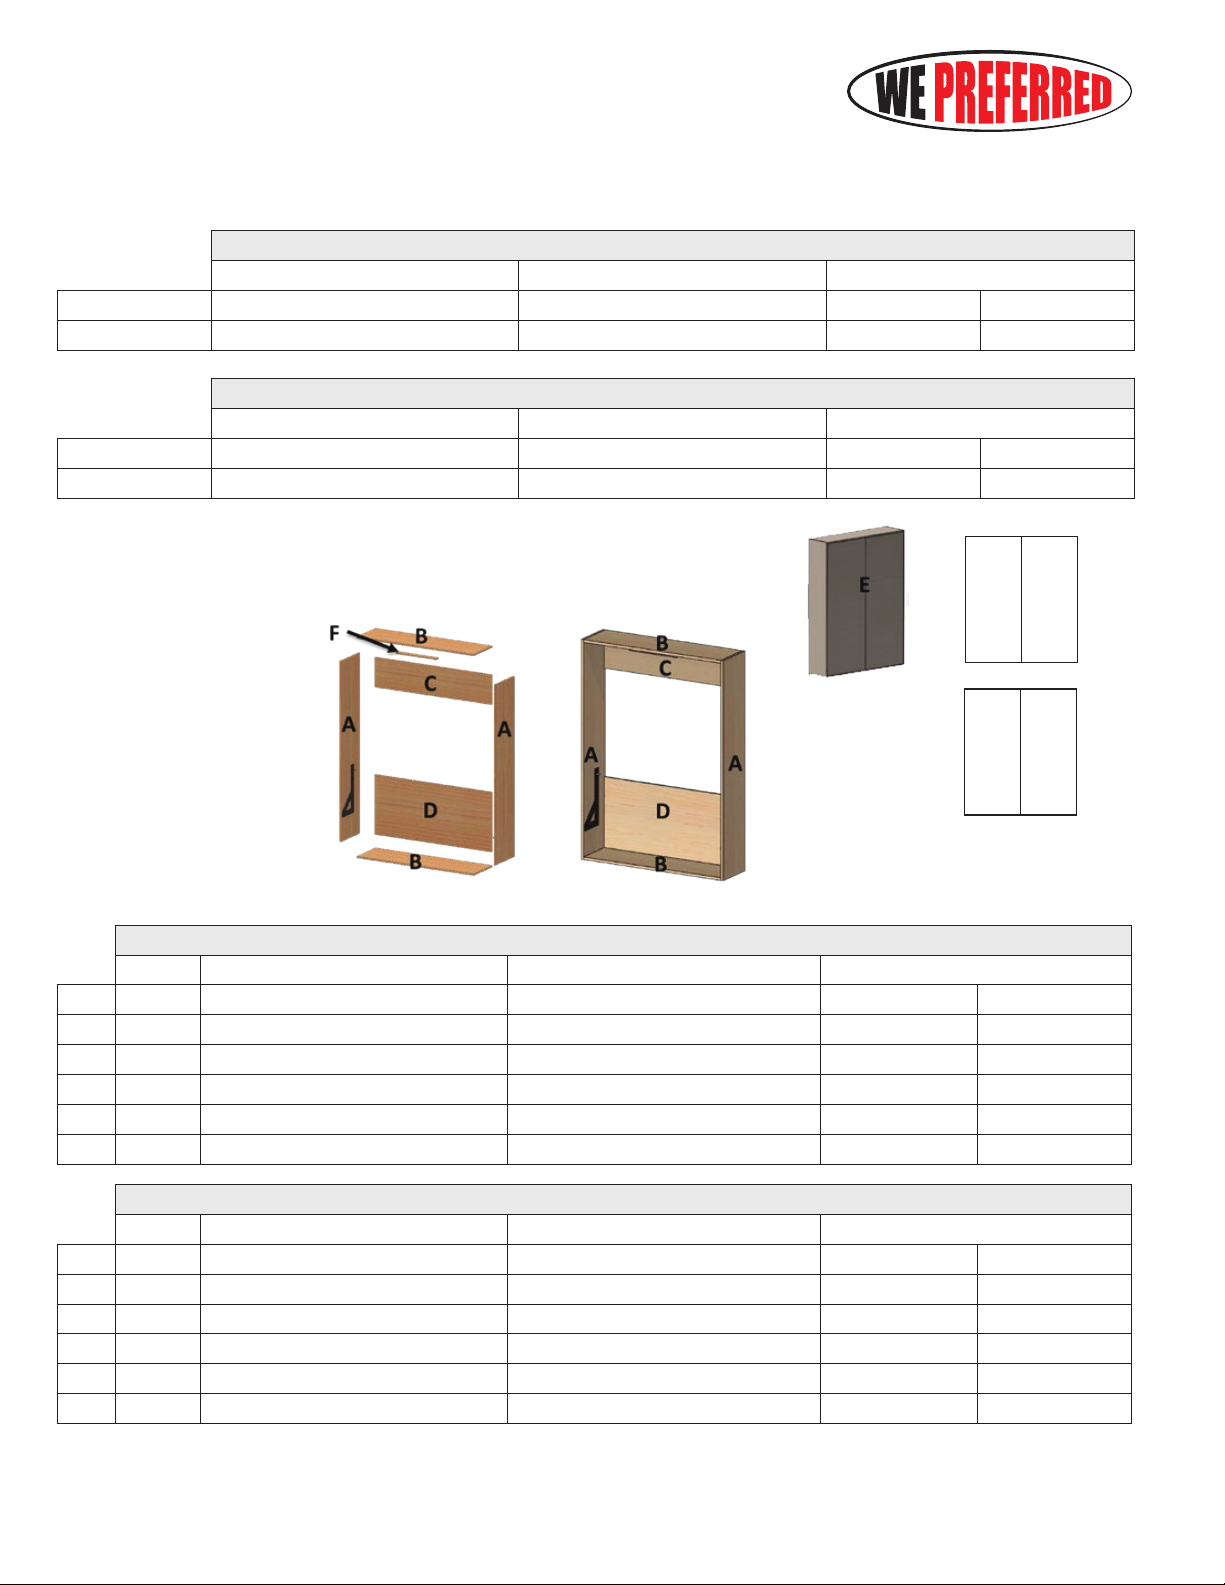
Conversion Table
Inside Measurements
Width Depth Height
Full 1454mm / 57-1/4” 368mm / 14-1/2” 2006mm 79”
Queen 1606mm / 63-1/4” 368mm / 14-1/2” 2137mm 84-1/8”
Outside Measurements
Width Depth Height
Full 1492mm / 58-3/4” 406mm / 16” 2044mm 80-1/2”
Queen 1644mm / 64-3/4” 406mm / 16” 2175mm 85-5/8”
*All measurements are for 19mm (3/4”) board.
Full Wall Bed
Qty Width Length Thickness
A2 406mm / 16” 2044mm / 80-1/2” 19mm 3/4”
B2 406mm / 16” 1454mm / 57-1/4” 19mm 3/4”
C1 330mm / 13” 1454mm / 57-1/4” 19mm 3/4”
D1 660mm / 26” 1454mm / 57-1/4” 19mm 3/4”
E2 724mm / 28-1/2” 1999mm / 78-11/16” 19mm 3/4”
F1 76mm / 3” 457mm / 18” 16mm 5/8”
Queen Wall Bed
Qty Width Length Thickness
A2 406mm / 16” 2175mm / 85-5/8” 19mm 3/4”
B2 406mm / 16” 1606mm / 63-1/4” 19mm 3/4”
C1 330mm / 13” 1606mm / 63-1/4” 19mm 3/4”
D1 660mm / 26” 1606mm / 63-1/4” 19mm 3/4”
E2 800mm / 31-1/2” 2129mm / 83-13/16” 19mm 3/4”
F1 76mm / 3” 457mm / 18” 16mm 5/8”
A = Exterior
B - C - D - E = Inset
E E
E E
Full
Queen
*Suggested dimensions.