WeatherHawk 600 Series User manual

WeatherHawk®
815 W. 1800 N. Logan Utah 84321-1784, Email: service@weatherhawk.com Copyright © 2004 - 2013
Toll free in USA: 866-670-5982, International: 435-227-9802, FAX: 435-227-9749 Printed November 2012
Quick Start Guide Series 600 - Models 610/611/620/621
Computer Requirements
Available Serial Port or USB Port (Serial-to-USB onverter required)
WeatherHawk Setup Procedure
1. Remove the top foam packing from the WeatherHawk box and verify you have all ordered equipment.
Your system may have a wireless receiver (Model 620/621), and/or a solar panel (P/N 16851). Figure 1
below shows a wireless Model 620 with solar panel. Unpack all equipment and check for physical damage.
a. Lift the WeatherHawk by the main body of the weather station. Removing the station by lifting on
the sensors may damage the sensors (see Figure 1).
b. Avoid striking or resting the WeatherHawk on the domed top of the weather station.
c. Report missing or damaged equipment to WeatherHawk Customer Service before installing your
system.
.
d. A black rubber mast shim is inside the WeatherHawk
Integral mast mount. This shim reduces the diameter
to accommodate a 1 ¼ inch OD mast. Discard the shim
if using a 1 ¾ inch mast. Fully seat the shim on the mast,
with the flange down, before sliding the WeatherHawk
over the shim/mast.
2. Install your application software on your computer.
3. Connect the serial cable male connector to the WeatherHawk RS-232 port and the serial cable female
connector to a computer serial port (Figure 2).
Figure 2: Serial cable (left) and the
WeatherHawk serial port in which the serial
cable male connector connects. A dust cover
must be removed from the WeatherHawk
RS-232 port before connecting the cable.
Figure 1 Model 620 with solar panel

WeatherHawk®
815 W. 1800 N. Logan Utah 84321-1784, Email: service@weatherhawk.com Copyright © 2004 - 2013
Toll free in USA: 866-670-5982, International: 435-227-9802, FAX: 435-227-9749 Printed November 2012
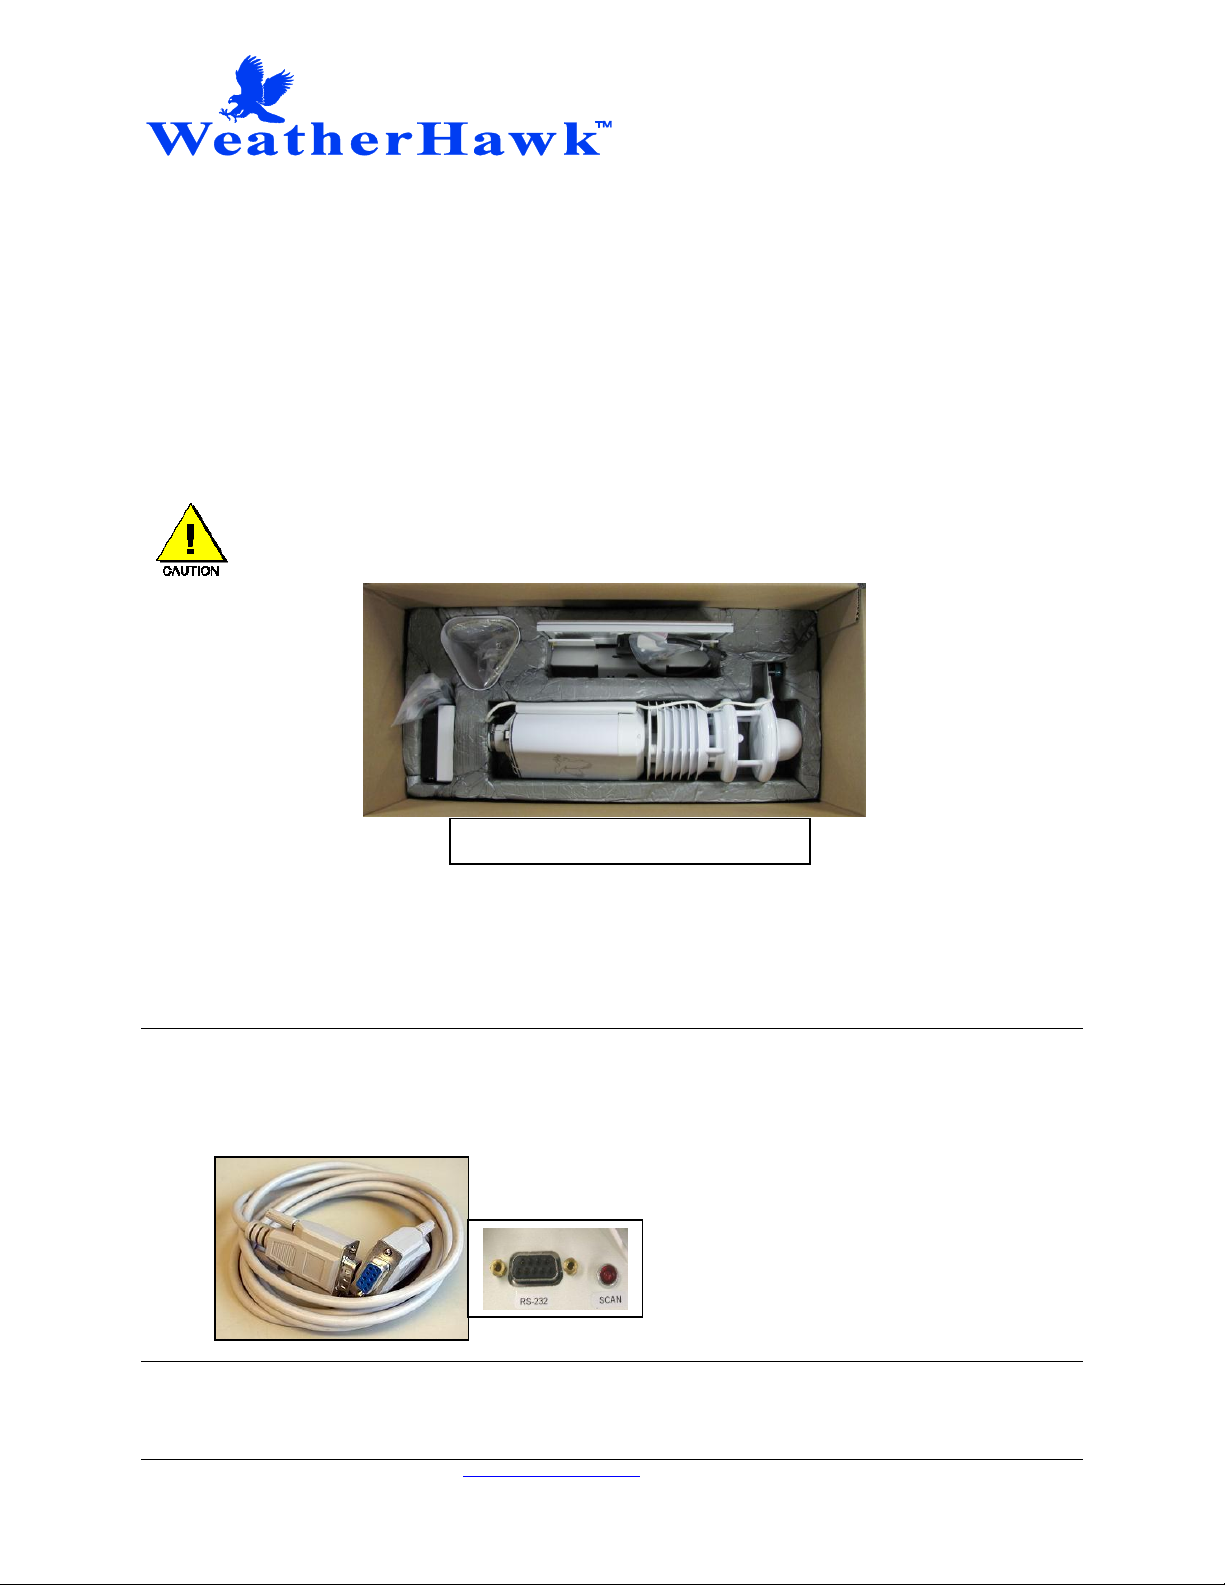
If you’re connecting the cable to a USB port, a serial-to-USB converter is required and optionally available
from WeatherHawk (P/N 16878, USB-AD).
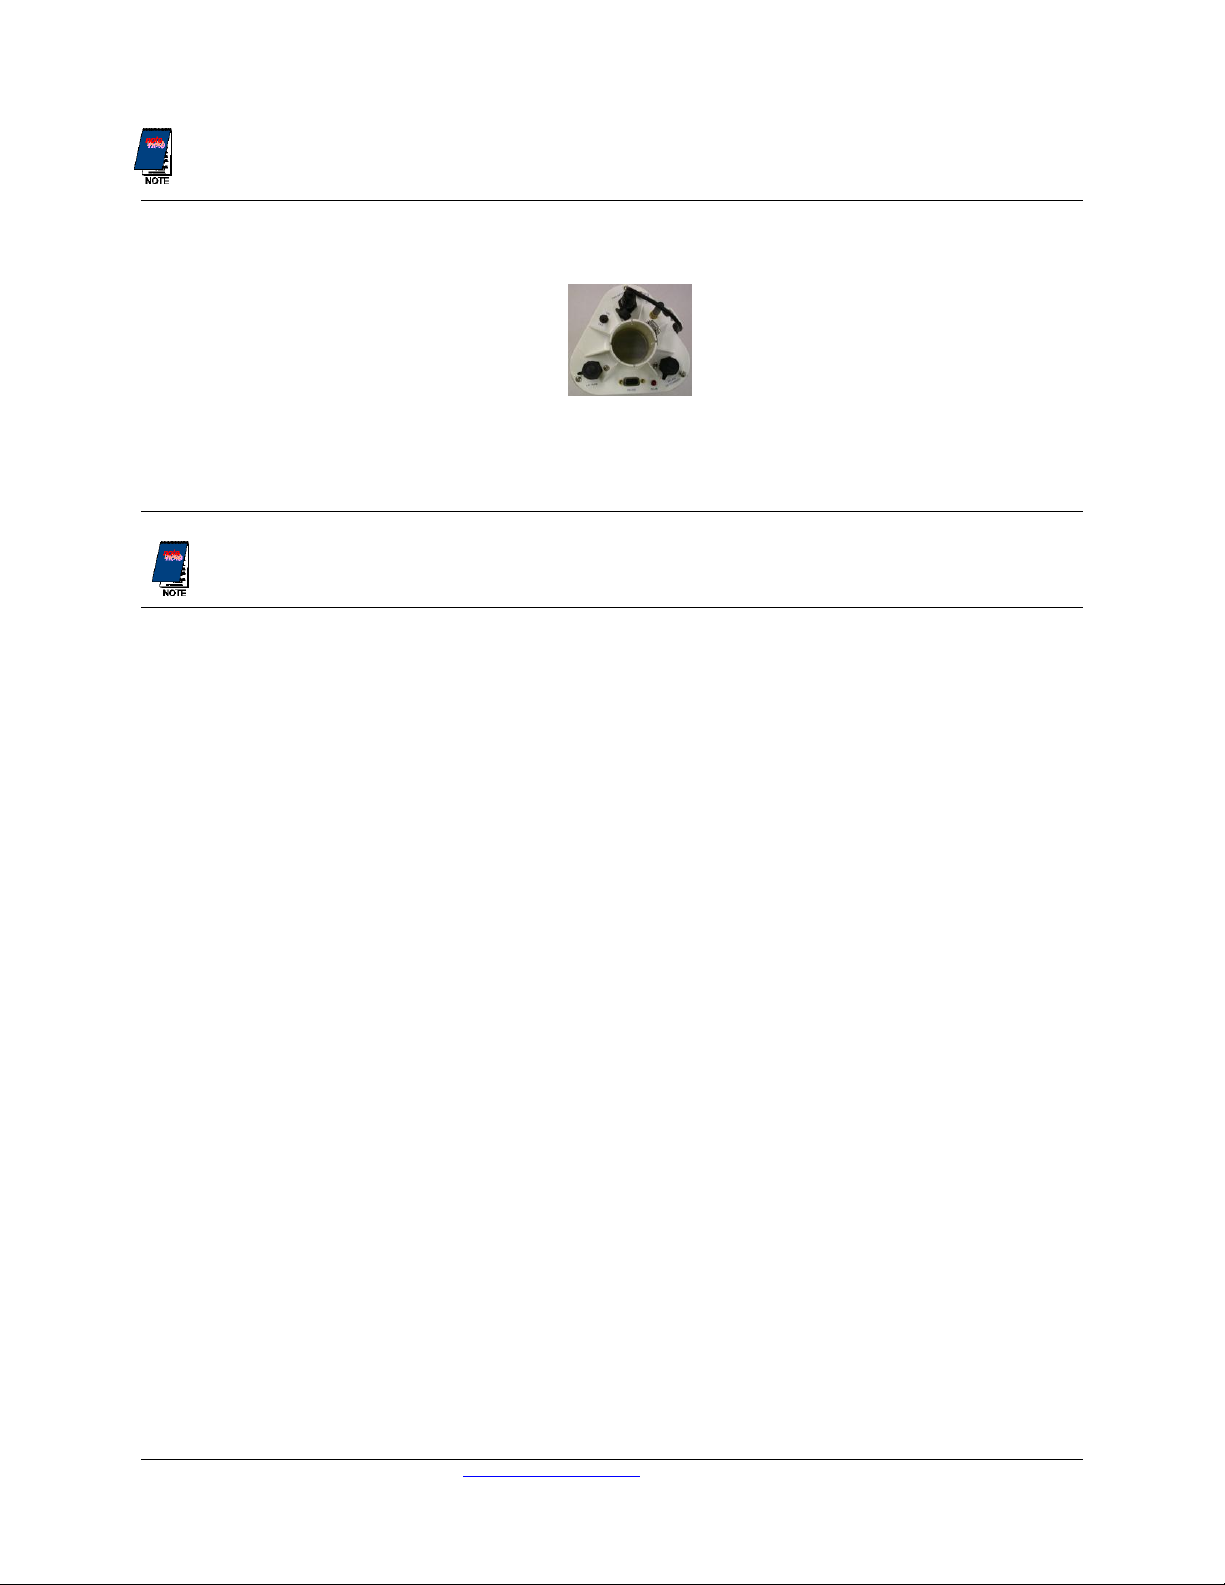
4. On the underside of the WeatherHawk, turn the on/off switch to the on position (Figure 3), and observe that
the circular red Scan light will briefly flash.
5. Start the application software and monitor the sensor displays. Within a couple of minutes, numerical
values should appear confirming that the WeatherHawk is functioning. The light labeled Scan on the
underside of the weather station should also faintly blink every ten seconds.
If the WeatherHawk does not function properly, contact WeatherHawk Customer Service to solve the
problem before continuing to the next steps.
6. Using your PC and weather station software, enter the setup parameters for the station. Refer to the set-up
or Quick Start section of your software manual for third party software applications. If you are using
WeatherHawk XP/X software, please refer to the software manual in the WeatherHawk folder that was
created on your computer when the software was installed.
7. If your WeatherHawk is wireless, change the Logger Address to your WeatherHawk station’s serial
number. The serial number of your WeatherHawk is located on the underside of the station.
8. Set the date and time for your physical location.
9. Enter the Longitude and Latitude of your station. These can be determined using a GPS system, or a
topographical map.
The latitude and longitude must be entered as decimal numbers. To convert the values to decimal, ignore
the seconds, divide the minutes by 60, then add that value to the degrees.
Example:
Latitude of 41 degrees, 46 minutes, 58 seconds
Decimal value = 41 + (46/60) = 41.78
Remember that South Latitudes, and Longitudes West of Greenwich, England, are negative numbers. For
example, in North America all Latitudes are positive numbers and all Longitudes are negative numbers.
10. Enter the Altitude of your station. Don’t forget to add the height above ground if mounting the station on a
mast, tower, or rooftop. This value is critical for accurate Barometric Pressure measurements, and if entered
directly into the WeatherHawk it must be in meters. If your application software does the necessary
conversion, you may be able to enter it in feet.
11. Disconnect the serial cable from the WeatherHawk and place the dust cover back on the serial port.
12. If your WeatherHawk is wireless (Model 620/621), setup the radio (see “Radio Setup”section below).
13. Install the WeatherHawk weather station at the site. Refer to the Site Installation Guide shipped with your
station for siting information and installation procedures.
Figure 3: The power switch and
Scan/Receive light is located on
the bottom of the WeatherHawk
station.

WeatherHawk®
815 W. 1800 N. Logan Utah 84321-1784, Email: service@weatherhawk.com Copyright © 2004 - 2013
Toll free in USA: 866-670-5982, International: 435-227-9802, FAX: 435-227-9749 Printed November 2012
Figure 6: Radio connections. The serial
cable (left) connects to the port labeled
RS232 and the AC adapter connects to the
port labeled DC Pwr input.
Radio Setup (For wireless Model 620 and 621 systems only)
1. Attach the antenna or cable to the radio connector labeled Antenna (Figures 4 and 5) on the RF4xx.
2. Connect the serial cable male connector to the radio connector labeled RS232 and the female connector to a
computer serial port.
3. Plug the RF4xx AC Adapter into a grounded AC wall outlet.
4. Connect the other end of the AC adapter to the RF4xx connector labeled DC Pwr input. The red Pwr/Tx
status light should illuminate.
5. Confirm that the WeatherHawk weather station has an antenna installed on the connector marked Antenna
on the bottom side of the weather station (Figure 3 above).
6. Start your application software.
7. Monitor the sensor displays. After a few minutes, numeric values should appear if the WeatherHawk and
radio are communicating. Also indicator lights on both the RF4xx radio and the WeatherHawk will
occasionally blink.
If the radio is not communicating properly, you may be
experiencing interference from nearby equipment such as
wireless phones, other spread spectrum radios, or another
WeatherHawk. Changing some settings on your radio and
WeatherHawk station should rectify this situation. The
procedure for changing these settings is provided in the WeatherHawk
Advanced Radio Settings.
8. If your radio is working properly, close the software and turn
the key to the off position. You are now ready to install your
WeatherHawk station at the site (see Site Installation Guide).
Help and Support
For product support, specifications, and installation troubleshooting, refer to the WeatherHawk Site Installation
Guide or the Frequently Asked Questions (FAQ) on our website (www.WeatherHawk.com). Customers may also
call us at 866-670-5982 (toll-free in US) or 435-227-9802 (international) or email us at service@weatherhawk.com.
Note: WeatherHawk®and WeatherHawk XP/X TM are trademarks of Campbell Scientific Inc.
Figure 5: RF4xx antenna connector
Figure 4: The WeatherHawk antenna
may be a flat surface mount antenna
(left), or a whip antenna(right) that
connects directly to the radio, or a tri-
band surface mount antenna (not shown).
This manual suits for next models
4
Table of contents
Other WeatherHawk Weather Station manuals