Weidmuller Printjet User manual

1- 15
16- 30
31- 45
46- 60
61- 75
76- 90
91-105
106-120
121-135
136-150
151-165
166-180
181-195
196-210
211-225
PrintJet
GB
D
F
E
I
NL
S
DK
NOR
FIN
P
HU
PL
RUS
CZ

1
Manual
PrintJet
Contents:
1. Introduction
2. Range of supply
3. Safety precautions
3.1 Safety instructions
3.2 Precautionary measures
A. Working with the PrintJet
B. Handling ink cartridges
C. Suitable location for the printer
D. Connection
E. Print media
4. Basic settings
4.1 Configuring PrintJet drivers
4.2 Basic settings for M-Print
5. PrintJet Operating panel and LED indicators
6. Replacing the ink cartridge
7. Error indication
8. Error-related indicators
8.1 Deteriorating print quality
8.2 The print quality remains poor even after cleaning
8.3 MultiCards are not drawn in / transported through
8.4 MultiCards are not correctly ejected
9. Problems with USB
10. Technical data
11. Ordering data
12. CE Declaration

Sources of information, Installation instructions
This manual will help you set up and use the PrintJet. It contains information for setting up the PrintJet and for installing the PrintJet software.
Manual
This manual offers information for standard operation of the PrintJet. In addition, it contains tips for troubleshooting and information concer-
ning technical data as well as ordering data.
1. Introduction
Installation instructions
This manual contains important information for installing and initial start-up procedures for the PrintJet.
It provides information for setting up the PrintJet and the printer software M-Print.
For further information, useful tips or the latest drivers, log onto:
http://www.weidmueller.de/de/download/software/printjet
Send your questions and suggestions to us at our e-mail address
printjet@weidmueller.de
For more pressing problems, you can reach us on our hotline under the service number:
+49 (0) 52 31 14 12 52
2. Range of supply
Please check to ensure that your PrintJet is complete. Your PrintJet should include the following components:
• PrintJet printer
• Input and output rails
• Parallel printer cable
• Power cord
• Clean Unit (Part no.: 1858950000)
• Installation Manual
• 2 MultiCards (type DEK 5/5)
• CD-ROM (printer drivers, demo software, online manuals)
Important:
The Weidmüller ink cartridge, type number: 1858920000, is required for initial commissioning.
This article must be ordered separately; it is not included in the range of supply.
2

3. Safety precautions
3.1 Safety instructions
• Remove all shipping braces; open the PrintJet cover and remove the transport lock from the print head.
• Read the following instructions carefully before starting up the PrintJet. Observe the warnings and notices on the PrintJet at all times.
• Do not block or cover openings in the enclosure of the PrintJet
• Do not insert any objects into these openings.
• Do not spill any fluids onto the PrintJet.
• The mains voltage must correspond to the system voltage given on the PrintJet type plate.
• Connect the device to a properly earthed and fused socket outlet only. Do not use a socket outlet already being used by devices that are
turned on and off at regular intervals, such as photocopiers or ventilators.
• Do not connect the PrintJet to either a switched or a timer-controlled socket outlet.
• Do not use the computer system close to potential electromagnetic disturbance fields such as loudspeakers or base transceiver stations
for mobile telephones.
• Never use damaged or worn out power cables.
• If you connect the PrintJet to the power supply via an extension cable, ensure that the total nominal current of all of the devices connected
to the extension cable does not exceed the ampere rating for that extension cable. In addition, you should ensure that the total nominal
current of all the devices plugged into the wall-mounted socket outlet does not exceed the ampere rating for that socket outlet.
• Do not carry out repairs to the device yourself.
Unplug the PrintJet and contact a qualified service engineer if any of the following occurs:
• The power cord or plug become worn or damaged
• Fluid has penetrated into the PrintJet.
• The PrintJet is allowed to fall or the enclosure is damaged.
• The PrintJet does not operate normally or the standard of performance varies noticeably.
Caution:
Warning signs to BGV A 8 (VBG 125), German employers liability insurance regulations, & German stan-
dard DIN 4844.
Warning - Mind your hands Warning – Hot surface
Do not reach inside Do not touch
Caution:
Do not open the enclosure!
Do not open the enclosure of the printer!
Risk of injury!
There are no serviceable parts inside the printer.
You will forfeit all rights under the guarantee if you open
the enclosure!
3
Sealing label

3.2 Precautionary measures
Observe the following when using the PrintJet, handling ink cartridges or choosing a location to install the PrintJet:
A. Working with the PrintJet
•Check the wipe and scratch resistance of the ink at regular intervals.
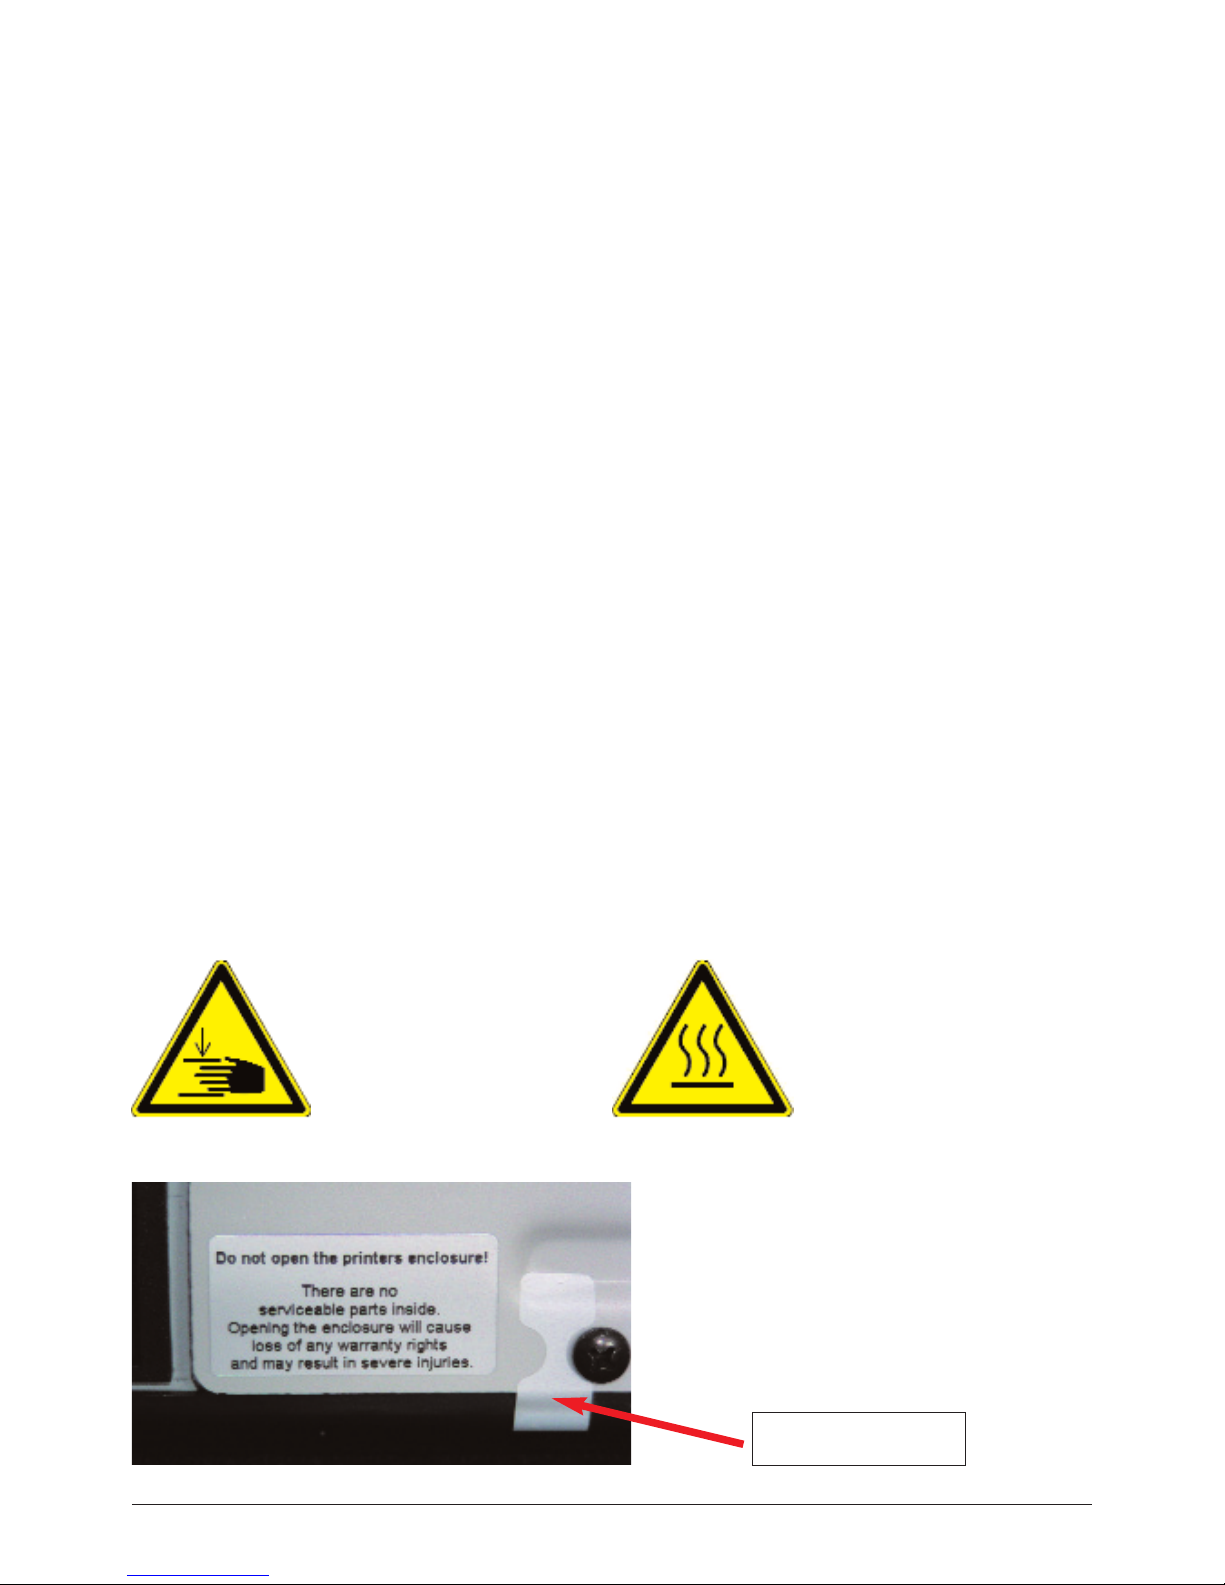
• Do not put your hands inside the PrintJet, and do not touch the ink cartridge when the printer is in operation.
• Applicable in Germany: ensure when connecting the PrintJet to the power supply that the building installation is protected by an appropri-
ate back-up fuse.
• Do not move the print head by hand, as this could damage the PrintJet.
• Remove your printouts immediately after printing from the output rail of the PrintJet.
• Always use the mains switch at the rear of the device to turn the PrintJet on and off.
• Before transporting the PrintJet, ensure that the print head is in the home position (far right-hand side), and that the ink cartridges are
seated correctly.
B. Handling ink cartridges
• Store unused ink cartridges in a cool and dry place.
• Before using an ink cartridge that has been stored in a colder place, allow the cartridge to acclimatise to the room temperature for at least
three hours.
• Install ink cartridges immediately after removing form the packaging. The print quality can be impaired if an ink cartridge is left unpacked
for any length of time before use.
• Do not touch the IC chip on the side of the cartridge. This could impair the operation of the printer as well as printing quality.
• Keep ink cartridges out of reach of children. Never allow ink cartridges to fall into the hands of children. Never allow children to drink from
them.
• Always handle used ink cartridges with care, because a small amount of ink could remain in the ink supply outlet. If you get ink on your
skin, wash it thoroughly with soap and water. Consult a doctor immediately, if after thoroughly rinsing the ink you still feel unwell or have
problems with your vision.
• Do not shake ink cartridges, as this can cause ink to leak.
• Do not use ink cartridges beyond the ‘use by date’ printed on the cartridge packaging. For best results, the ink in the cartridge should be
used within six months of installation.
• Do not take apart or try to refill ink cartridges. This could result in damage to the print head.
• The IC chip in these ink cartridges contains a large amount of cartridge-specific information, for example, the level of ink remaining in the
cartridge. This allows trouble-free replacement of the used ink cartridge for a new one. However, ink is used every time a new ink cartrid-
ge is inserted, because the PrintJet always carries out a reliability check.
• If you wish to remove an ink cartridge for use at a later date, you must protect the ink supply outlet against dust and becoming soiled, and
store the ink cartridge in the same environment as the PrintJet. Please note that a valve is fitted in the ink supply outlet, which means that
neither a cover nor a lid is required. However, you should always handle ink cartridges with care, failure to do so could result in the ink
leaking. Never touch the ink supply outlet of the ink cartridge or the area around it.
C. Suitable location for the PrintJet
• Place the PrintJet on a flat, stable surface larger than base area of the printer. The PrintJet will not operate properly if it is tilted or at an
angle.
• Ensure there is sufficient space to allow the MultiCards to be ejected without hindrance from the PrintJet.
4

• Avoid installing the PrintJet in any location where it is subject to rapid changes in temperature and humidity. Ensure that the PrintJet is not
exposed to direct sunlight, strong light or excessive heat.
• Avoid locations subject to impact shocks and vibrations.
• Do not install the device in dust-filled surroundings.
• When installing, ensure that the PrintJet is sufficiently ventilated on all sides.
• Install the PrintJet near a socket outlet, ensuring that the plug can be easily removed at all times.
D. Connecting the PrintJet
This device is subject to special conditions regarding its connection to the mains supply (EU Member States).
The supply impedance at the point of connection to the public electricity supply must not exceed (0.14 + i 0.09) Ohm. In all
other cases, consult the power supply company before connecting the device to the public supply system. Please remove the
status monitor if connecting the PrintJet to a network.
E. Print media
The PrintJet should only be used for printing Weidmüller - MultiCards.
4. Basic settings
4.1 Printjet: Configuring drivers
With the assistance of the Start menu (Windows 98, 95, 2000, NT und XP).
To launch the PrintJet software, click Start, point to Settings, Printers, and then click Epson Stylus C 62.
Windows 95/98
Select “Epson Stylus C 62”, and then click Properties in the File menu.
Windows 2000
Select “Epson Stylus C 62”, and then click Printer Preferences in the File menu.
Windows NT 4.0
Select “Epson Stylus C 62”, and then click Document Name in the File menu.
Set the following parameters:
5
Best Photo
Plain Paper

Click the Settings button, then click continue
Click OK to confirm your selections.
4.2 Basic settings in M-Print
MultiCards are made from polyamide. Polyamide reacts to fluctuations in the climate conditions (temperature and air humidity), which can
result in changes of up to 1% in the dimensions of the MultiCards. Necessary adjustments can be made in the M-Print configuration editor.
In order to check the settings, switch off the fusing unit.
You can re-use the MultiCard once you have checked the dimensions; to do so, simply wipe away the markings using a damp
cloth.
Select the software M-Print:
File > Print > Settings
Select the printer driver EPSON Stylus C 62
Set the interface to the port where the PrintJet is connected.
Check the settings for the printer’s zero reference point (margins). Please refer to the section ‘Setting the zero reference point’.
6
Continue
Click Advanced
- High Speed
- Black Ink Only
- Edge Smoothing

M-Print settings
Launch M-Print: Click > Start > Programs > M-Print or click the M-Print shortcut.
To view the zero reference point value, click File > Print > Settings.
If necessary, you can alter the zero point settings.
Default values for margins:
The values given are intended as a guide only. They vary according to the operating system used. It is necessary to carry out adjustments to
the settings for the margins and scaling.
Select the printer driver EPSON Stylus C 62
Click accept, and then click Cancel to close the other open window.
Ensure that the PrintJet is connected to your PC and turned on.
Setting the zero reference point
Changes made to the zero reference point are applied to all MultiCard types. Use the configurations editor if you wish to adapt
the values of a MultiCard. Use the Help system in M-Print for assistance.
The graphic displays a MultiCard frame with 5 strips.
Double-click a strip to select the MultiCards.
Carry out fine adjustments using the MultiCard DEK 5/5 included.
Select the type DEK 5/5 from the list and then click OK to confirm your
choice.
Your selection is displayed in the MultiCard frame. Double-click to
launch DEK 5/5. Mark these with the letter X (see example below), and
then print these out.
7

The MultiCards illustrated below offer several examples of possible print results of the PrintJet.
Mit einem Doppelklick auf eine Bezeichnung können Sie nun die Beschriftungskarte auswählen.
Nehmen Sie die Feinabstimmung mit den beiliegenden Beschriftungskarten 1492-M5X5 vor.
Wählen Sie im Menü-Fenster die 1492-M5X5 aus und bestätigen mit OK.
Füllen Sie die Beschriftungskarte mit dem Buchstaben X (siehe Beispiel unten) und drucken diese aus.
Compare your MultiCard with these illustrations. The system needs to be adjusted if the typeface printed on the MultiCard is
incorrectly aligned.
Determine the deviations and alter the values of the margins accordingly. File > Print > Settings.
Vertical margin
Measure the deviation and increase the vertical margin
Measure the deviation and reduce the vertical margin
Horizontal margin
Measure the deviation and increase the horizontal margin
Measure the deviation and reduce the horizontal margin
8
Vertical settings:
The markings were printed on the project
marker surface
Vertical settings::
The markings were printed on the end of the
marker surface
Horizontal settings:
The markings were printed beside the marker
surface.
Horizontal settings:
The markings were printed beside the marker
surface.
A
B
C
D

5. Printer operating panel
Button 1: Setting the fusing unit power ratio and temperature:
This button allows you to adjust the power ratio of the fusing unit to suit different types of markers.
The device is set to 100% power when turned on; the LED for 100% lights up
Press once: The device is set to 80% power when turned on; the LED for 80% lights up
Press twice: The device is set to 60% power; the LED for 60% lights up
Press three times: the fusing unit is turned off, for example, to test the ink nozzle or adjust the print head.
Press four times: the device performs to 100%; the LED for 100% lights up.
Button 2: Replacing the ink cartridge:
Manual control over replacing the ink cartridge.
Moves the print head into position for replacing the ink cartridge when empty, and starts the ink carriage change sequence.
Button 3: Maintenance button:
To manually clean the ink cartridge
Press and release this button again within 3 seconds to draw paper into or eject paper out of the device.
Following the error message "Paper Out”, press this button to continue the printing process once paper has been loaded.
To initiate the print head cleaning process, press this button continuously for 3 seconds when the error indicator LED is not lit up.
Press this button to move the print head to the replacement position when the ink cartridge is empty.
Button 4: Reset button:
For manually resetting the PrintJet when a fault occurs.
If it is not possible to acknowledge a fault in the PrintJet by pressing button 3 or via the status monitor, press the reset button once to reset
the printer. A paper jam is indicated by LED 1 or by the status monitor.
Button 5: On/Off button
Press to turn the printer on or off.
When the printer is on, press this button twice to delete print jobs.
LED 1: Error message (red LED):
There is a fault.
The red LED lights up when there is no MultiCard is in the printer. Place a MultiCard into the feeder and press the maintenance button
to proceed with the printing process.
It lights up when a MultiCard becomes jammed in the printer. Remove all MultiCards from the feeder, then re-insert correctly. When the LED
indicator no longer flashes, turn off the printer and carefully remove the MultiCard from the printer.
It flashes when the black ink cartridge or the Clean Unit is almost empty.
It lights up when either the black ink cartridge or Clean Unit are empty. Replace either the black ink cartridge or Clean Unit as required.
It flashes when the print head moves to the ink-cartridge replacement position. The LED flashes more quickly when the Clean Unit is empty
than when the black ink cartridge is empty.
9
Button 4
LED 4-6
LED 3 Button 5
LED 2
Button 3
LED 1
Button 2
Button 1

It is also possible to determine the level of ink by the speed at which the error indicator LED flashes when the print head moves to
the cartridge replacement position (Please refer to the table below):
Indicator LED Procedure
Replace the black ink cartridge when the error LED
flashes at the same speed as the indicator LED for the mains switch.
Replace the Clean Unit when the error LED flashes
twice as fast as the indicator LED for the mains switch .
Replace the black ink cartridge and the Clean Unit when
the error indicator LED lights up continuously.
LED 2: Operation indicator (green LED):
The PrintJet is ready for operation when the green LED lights up constantly.
It flashes when the printer is receiving data or printing, when an ink cartridge is being replaced or the ink-carriage change sequence is active
or the print head is being cleaned.
LED 3: Overheating indicator
Indicates when the system is overheating. The indicator no longer lights up when the printer is ready for operation. The printer can be restart-
ed as soon as the LED goes out.
LED’s 4-6: Performance indicator
The LED indicates the fusing performance of the system.
10

6. Replacing the ink cartridge
When replacing an ink cartridge, always open both ink cartridge lids.
Ink cartridges are sealed units. Under normal circumstances, ink will not leak out of an ink cartridge. If you get ink on your
hands, wash them thoroughly with soap and water. If you get ink in your eyes, rinse immediately with plenty of water.
Installing ink cartridges
1. Press the Replace ink cartridge button (2).
2. The print head will move to the middle position. Never move the print head manually per hand.
3. Press back the retaining clip of the ink cartridge to be replaced and lift the clamp upwards. Remove the used cartridge.
4. Remove the label with the inscription Entfernen / Remove from the new cartridge.
5. Insert the cartridge into the clamps (with the label showing face-up and the chip facing towards the input rail).
6. Carefully press the clamp downwards until it snaps into place.
7. Close the cover of the printer.
8. Press the Replace ink cartridge button (2).
This activates the ink supply system; this process can take approximately 1 to 2 minutes. The print head will then move to its home position
(far right-hand side), and the operation indicator LED lights up continuously.
Never turn the printer off when the operation indicator LED is flashing!
11
Black ink cartridge Clean Unit

Caution:
• Use only Weidmüller ink cartridges
• Remove used ink cartridges only when you have a replacement available and have prepared its installation. Otherwise, any ink remaining
in the nozzles could dry out.
• Do not refill the ink cartridges. The PrintJet calculates the remaining level of ink in the cartridges with the help of the IC chip on side of the
ink cartridge. The IC chip does not recalculate the remaining level of ink when the cartridge is refilled, so that the available amount of ink
does not change.
Note:
You cannot continue with a print job if the ink cartridge is empty. You must replace the empty cartridge before you can proceed with printing.
• Ink is not only expended when printing MultiCards. It is also used during print head cleaning, when replacing the ink cartridges as well as
during the self-cleaning cycle that takes place every time the PrintJet is turned on.
7. Error indication
Error message: MultiCards not inserted correctly
(the fault will also be displayed in the status monitor)
LED indicator: The red indicator LED 1 lights up constantly and the green indicator LED 2 flashes.
Remedy: Check if the strip has been correctly inserted or if an unknown print job is active in the printer driver. Open the printer
driver and delete the print job.
Error message: Paper jam
(the fault will also be displayed in the status monitor)
LED indicator: The red indicator LED 1 lights up constantly and the green indicator LED 2 flashes.
Remedy: Settings in the printer driver: The PrintJet settings are not correct. The printer settings must be set to:
Best photo
Paper Options: Plain Paper
Colour: Black
For more information, please refer to the Short Installation Guide.
If it is not possible to acknowledge a fault in the PrintJet by pressing button 3 or via the status monitor, press the reset button once to reset
the printer. The fault will be displayed in the status monitor as a Paper Jam.
Strip was transported through: If a MultiCard is inserted into the PrintJet during the drawing-in procedure, the PrintJet will transport the
MultiCard through the device without printing it.
If you should forget to insert a card, allow the PrintJet to enter the "No Paper” fault mode. Then insert a card and press the Maintenance but-
ton to acknowledge. The fault will be displayed in the status monitor.
Error message: In cartridge not recognised
Remedy: Remove the adhesive labels and check if the cartridge was correctly inserted.
Re-insert the ink cartridge.
8. Error-related indicators
8.1 Deteriorating print quality
If the printouts appear to be increasingly pale or there are gaps in the printing, it may be appropriate to clean the print head. This will ensure
that the ink is being correctly emitted through the nozzles.
• Click Start, point to Settings, Printers, and click Epson Stylus C 62, then right-click "Properties” in the Shortcut menu.
• In the window that opens, click "Printer Settings” then click Clean Print Head on the "Maintenance” tab.
8.2 The print quality remains poor even after cleaning
Replace the ink cartridge with a new one, and carry out the print head cleaning procedure twice.
12

Note:
• Black ink is used when the print head is cleaned. Therefore to prevent waste, clean the print head only when the print quality deteriorates,
for example, when the print quality becomes increasingly pale.
• Do not start the print head maintenance function when the printer is printing. This could impair the quality of the printing.
8.3 MultiCards are not drawn in / transported through
Check if the strip was pushed up to the feed-in stop position, and if the input rail is correctly mounted.
Ensure that the MultiCards can move freely on the input rail.
8.4 MultiCards are not correctly ejected
Check if the output rail is correctly mounted.
9. Problems with USB
Read the information in this section if you have problems operating your PrintJet via a USB port. If you terminated the printer driver’s Plug and
Play installation procedure before its completion, it is possible that either the USB-Printer printer driver or the generic PrintJet printer driver
was not correctly installed. Follow the steps listed below to check the installation and install the printer driver again.
1. Turn on the PrintJet. Connect the USB cable to the PrintJet and the computer.
2. Right-click the My Computer symbol on your desktop. Then click Properties
3. Click the Hardware tab
If the printer driver was correctly installed, the EPSON USB-Printer is displayed in the Device Manager menu.
If the EPSON USB-Printer is not displayed in the Device Manager menu, click the plus (+) symbol next to Other Devices to display all instal-
led devices.
If the USB-Printer is displayed under Other Devices, then the USB printer driver was not correctly installed. If EPSON Stylus C 62 is display-
ed, then the Epson printer driver was not correctly installed.
If neither the USB-Printer nor the EPSON Stylus C 62 is displayed under Other Devices, click Refresh or disconnect then reconnect the
USB cable from the PrintJet.
1. In the Other Devices list, click USB-Printer or EPSON Stylus C 62 then click Remove. Click OK to confirm.
2. In the next window displayed, click OK. Click OK to close the System Properties dialog box.
3. Turn off the PrintJet and restart your computer. Re-install all printer drivers observing the instructions in the Setup Manual.
The "PrintJet II” does not operate properly with the USB cable
If your PrintJet does not operate properly with the USB cable, try one or several of the following remedies:
• Use the recommended USB cable.
• If you are using a USB hub, connect the PrintJet to the first hub or connect the PrintJet directly to the USB interface of your PC.
• Windows 98 users: re-install the USB PrintJet printer driver and printer software. To do so, first remove the EPSON printer software using
the Add/Remove Programs dialog box in Control Panel. Remove the EPSON USB printer. Then install the software as described in the
SETUP manual. If the EPSON USB Printer is not included in the Add/Remove Programs dialog box, access the Win9x folder on the CD-
ROM and double-click start.exe.
Parallel interface:
If the operating system automatically initiates hardware recognition, you must complete this recognition procedure correctly
and then install the drivers from the PrintJet CD.
Activate the driver in M-Print.
13

10. Technical data
PrintJet II – Ink-Jet Printer
Application: Printing MultiCard markers
Technology: Ink-jet process
Print quality: Best photo (2880 dpi)
Printer drivers: Win 9X,Win NT, Windows 2000, XP
Print software: Recommended: M-Print 1.60
System requirements: Windows 95/98/NT/2000/XP
Feed: Manual loading
Fusing: Thermal fusing
Interfaces: Centronics and USB
Power supply: AC 230 V / 6 A or AC 115 V / 10 A
top fuse 10 A / fast fuse 230 VAC power circuit of the fusing unit
(12.5 A / fast fuse 115 VAC)
bottom fuse 2.5 A / fast fuse 230/115 VAC printer control
Operating location: Office conditions
Ambient temperature: 20 - 35 °C / 68 - 95 °F
Dimensions (L x W x H) 800 x 450 x 200 mm
Cartridge system: Ink cartridge, black (approx. 210 000 characters, Font: Arial, font size: 6)
Clean Unit (automatic and manual cleaning tool)
Range of supply: Power cord, printer driver, installation guide, CD, Clean Unit, Centronics cable
The average print capacity is approx. 400 MultiCards per month.
11. Ordering data
Designation Catalogue number
PrintJet 230 V: 1858990000
PrintJet 115 V: 1858980000
Replacement cartridge: 1858920000
Clean Unit: 1858950000
Guarantee
Weidmüller approves the following accessories and products for use with the PrintJet:
Designation Catalogue number
PJ Ink Cartridge 1858920000
PJ Clean Unit 1858950000
PrintJet-Loader 1813090000
All Weidmüller MultiCards MC terminal markers, MC cable markers, MC equipment markers
Please refer to our latest Weidmüller Catalogue to determine the type of MultiCard you require.
The use of other accessories or products can result in the following problems:
– poor print quality
– increased occurrences of paper jamming
– premature wearing out of the printer necessitating repairs.
Weidmüller’s guarantee and customer service agreement does not cover faults or damage to the printer resulting from the use of non-appro-
ved or unsuitable accessories or products. Therefore, we strongly recommend that you use the above mentioned accessories and products
only.
14

12. CE Declaration
15

16
Handbuch
PrintJet
Inhalte:
1. Einleitung
2. Lieferumfang
3. Sicherheitsmaßnahmen
3.1 Sicherheitsanweisungen
3.2 Vorsichtsmaßnahmen
A. Arbeiten mit dem PrintJet
B. Umgang mit den Tintenpatronen
C. Standort des PrintJet
D. Anschluss des PrintJet
E. Druckmedien
4. Grundeinstellungen
4.1 PrintJet Treiber einrichten
4.2 Grundeinstellungen in der M-Print
5. PrintJet Bedienfeld und Kontrollleuchten
6. Tintenpatronen auswechseln
7. Fehleranzeigen
8. Fehlererscheinungen
8.1 Druckqualität lässt nach
8.2 Das Druckbild ist trotz Reinigens immer noch blass
8.3 Matten werden nicht eingezogen/weitertransportiert
8.4 Matten werden nicht korrekt ausgegeben
9. USB Probleme
10. Technische Daten
11. Bestelldaten
12. CE-Erklärung

Informationsquellen, Installationsanleitung
Mit diesem Handbuch erhalten Sie Hilfe zur Aufstellung und ersten Benutzung des PrintJet. Es enthält Informationen zum Einstellen des
PrintJet und zur Installation der PrintJet Software.
Handbuch
Dieses Handbuch bietet Informationen zum normalen PrintJet Betrieb. Außerdem enthält es Tipps zur Fehlerbehebung und Informationen über
technische Daten, sowie Bestelldaten.
1. Einleitung
Installationsanweisung
Mit diesem Handbuch erhalten Sie wichtige Informationen zur Aufstellung und Erstinbetriebnahme des PrintJet.
Sie finden hier Informationen über durchzuführende Einstellungen des PrintJet-Druckers und der Drucksoftware M-Print.
Weitere Informationen, Hilfestellungen oder aktuelle Treiber, finden Sie auf unserer Homepage:
http://www.weidmueller.de/de/products/downloads/printjet
Fragen und Anregungen können Sie uns unter der e-mail-Adresse
printjet@weidmueller.de
zusenden.
Bei dringenden Problemen können Sie unsere Hotline unter der Service-Nummer
+49 (0) 52 31 14 12 52
erreichen.
2. Lieferumfang
Bitte überprüfen Sie ihren PrintJet auf Vollständigkeit. Ihr PrintJet sollte folgende Bestandteile beinhalten:
• PrintJet-Drucker
• Ein- und Auslaufstrecke
• Paralleles Druckerkabel
• Netzkabel
• Clean Unit (Teile-Nr.: 1858950000)
• Installationsanleitung
• 2 MultiCard (Typ DEK 5/5)
• CD-Rom (Druckertreiber, Demosoftware, Online Handbücher)
Wichtig:
Für die Erstinbetriebnahme wird die Weidmüller Tintenpatrone Art.-Nr. 1858920000 benötigt.
Dieser Artikel gehört nicht zum Standardlieferumfang und muss separat geordert werden.
17

3. Sicherheitsmaßnahmen
3.1 Sicherheitsanweisungen
• Entfernen Sie alle Transportsicherungen, öffnen Sie den PrintJet Deckel und entfernen Sie die Transportsicherung am Druckkopf.
• Lesen Sie vor Inbetriebnahme des PrintJet die folgenden Anweisungen genau durch. Befolgen Sie darüber hinaus alle auf dem PrintJet
angebrachten Warnungen und Hinweise.
• Die Öffnungen im PrintJet Gehäuse dürfen nicht blockiert oder zugedeckt werden.
• Führen Sie keine Gegenstände durch die Öffnungen ein.
• Achten Sie darauf, dass keine Flüssigkeit in den PrintJet gelangt.
• Die verwendete Netzspannung muss mit der auf dem Typenschild des PrintJet angegebenen Netzspannung übereinstimmen.
• Schließen Sie das Gerät nur an eine ordnungsgemäß geerdete und abgesicherte Steckdose an. Es darf keine Steckdose benutzt werden,
an der bereits, in regelmäßigen Abständen, ein- und ausgeschaltete Geräte wie Fotokopierer oder Ventilatoren angeschlossen sind.
• Schließen Sie den PrintJet nicht an schaltbare oder zeitgesteuerte Steckdosen an.
• Benutzen Sie die Computeranlage nicht in der Nähe potentieller elektromagnetischer Störfelder wie z.B. Lautsprecher oder Basisstationen
von schnurlosen Telefonen.
• Verwenden Sie keine beschädigten oder abgenutzten Stromkabel.
• Wenn Sie den PrintJet über ein Verlängerungskabel anschließen, achten Sie darauf, dass der Gesamtnennstromwert aller im
Verlängerungskabel angeschlossenen Geräte die zulässige Amperebelastung des Verlängerungskabels nicht überschreitet. Achten Sie
zudem darauf, dass der Gesamtnennstromwert aller an der Wandsteckdose angeschlossenen Geräte die zulässige Amperebelastung
dieser Steckdose nicht überschreitet.
• Versuchen Sie niemals das Gerät selbst zu warten.
In folgenden Fällen müssen Sie den PrintJet vom Netz trennen und sich an einen qualifizierten Servicetechniker wenden:
• Das Netzkabel oder der Stecker sind abgenutzt oder beschädigt.
• Flüssigkeit ist in den PrintJet eingedrungen.
• Der PrintJet ist heruntergefallen oder das Gehäuse wurde beschädigt.
• Der PrintJet arbeitet nicht mehr normal bzw. zeigt auffällige Leistungsabweichungen.
Warnsignale (BGV A 8 (VBG 125) & DIN 4844)
Warnung vor Handverletzungen Warnung vor heißer Oberfläche
Bitte nicht hineinfassen Bitte nicht berühren
Achtung:
Gerät nicht öffnen!
Öffnen Sie nicht die Druckerhaube!
Verletzungsgefahr!
Es gibt keine zu wartenden Teile im Inneren des Gerätes.
Durch das Öffnen der Haube verlieren Sie alle
Garantieansprüche!
18
Siegeletikett

3.2 Vorsichtsmaßnahmen
Beachten Sie folgende Punkte, wenn Sie mit dem PrintJet arbeiten, mit Tintenpatronen umgehen oder einen Standort für den
PrintJet auswählen:
A. Arbeiten mit dem PrintJet
•Überprüfen Sie in gewissen Zeitabständen die Wisch- und Kratzfestigkeit der Beschriftung.
• Stecken Sie Ihre Hand nicht in das Innere des PrintJet und berühren Sie während des Druckvorgangs nicht die Tintenpatronen.
• Bei Anschluss des PrintJet an die Stromversorgung (in Deutschland) muss sichergestellt werden, dass die Gebäudeinstallation mit einer
entsprechenden Kurzschlusssicherung abgesichert ist.
• Bewegen Sie den Druckkopf nicht von Hand, der PrintJet kann dadurch beschädigt werden.
• Entnehmen Sie sofort nach dem Drucken Ihre Ausdrucke aus der Auslaufschiene des PrintJet.
• Schalten Sie den PrintJet stets mit Hilfe des Netzschalters am Bedienfeld ein und aus.
• Vergewissern Sie sich vor dem Transport des PrintJet, dass sich der Druckkopf in der Abdeckposition (rechts außen) befindet und dass die
Tintenpatronen richtig eingesetzt sind.
B. Umgang mit den Tintenpatronen
• Lagern Sie nicht benutzte Tintenpatronen kühl und trocken.
• Wenn Sie eine Tintenpatrone verwenden wollen, die Sie zuvor an einem kälteren Ort gelagert haben, lassen Sie die Tintenpatrone vor der
Verwendung mindestens drei Stunden lang auf Raumtemperatur erwärmen.
• Installieren Sie eine Tintenpatrone sofort nach dem Öffnen der Verpackung. Bleibt die Tintenpatrone längere Zeit vor der Benutzung ausge-
packt liegen, kann dieses zu einer Beeinträchtigung der Druckqualität führen.
• Berühren Sie nicht den grünen IC-Chip auf der Patronenseite. Hierdurch können sowohl der Betrieb als auch der Druckbetrieb beeinträch-
tigt werden.
• Bewahren Sie Tintenpatronen außerhalb der Reichweite von Kindern auf. Lassen Sie niemals zu, dass Kinder Tintenpatronen in die Hand
bekommen oder daraus trinken.
• Seien Sie beim Umgang mit benutzten Tintenpatronen vorsichtig, da an der Tintenzuleitungsöffnung noch immer ein wenig Tinte vorhanden
sein kann. Wenn Tinte auf Ihre Haut gerät, reinigen Sie diese gründlich mit Wasser und Seife. Wenn Sie sich nach dem gründlichen
Abspülen immer noch schlecht fühlen oder Sehprobleme haben, suchen Sie sofort einen Arzt auf.
• Eine Tintenpatrone darf nicht geschüttelt werden, da dadurch Tinte austreten kann.
• Benutzen Sie keine Tintenpatrone, deren Haltbarkeitsdatum (auf der Verpackung aufgedruckt) überschritten ist. Um beste Druckresultate zu
erzielen, sollte die Tintenpatrone innerhalb von sechs Monaten nach dem Einsetzen verbraucht werden.
• Versuchen Sie nicht, eine Tintenpatrone zu zerlegen oder nachzufüllen. Dies kann den Druckkopf beschädigen.
• In dieser Tintenpatrone enthält der IC-Chip eine Vielzahl von patronenspezifischen Informationen, wie beispielsweise Informationen über die
verbleibende Tintenmenge. So kann die alte Tintenpatrone ausgewechselt und eine neue ungehindert eingesetzt werden. Jedes Mal, wenn
eine neue Tintenpatrone eingesetzt wird, wird jedoch Tinte verbraucht, da der PrintJet stets eine Verlässlichkeitskontrolle durchführt.
• Wenn Sie eine Tintenpatrone zur späteren Verwendung entnehmen, sollten Sie die Tintenzufuhr vor Staub und Schmutz schützen und die
Patrone in derselben Umgebung wie den PrintJet lagern. Beachten Sie, dass sich ein Ventil in der Tintenzufuhröffnung befindet, so dass
keine Abdeckungen oder Verschlüsse erforderlich sind. Gehen Sie jedoch vorsichtig mit den Patronen um, da es ansonsten zu
Tintenflecken kommen kann. Berühren Sie keinesfalls die Tintenzufuhröffnung der Tintenpatrone oder den Bereich der
Tintenzufuhröffnung.
C. Standort des PrintJet
• Stellen Sie den PrintJet auf eine ebene, stabile Unterlage, die an allen Seiten über die Grundfläche des PrintJet hinausragt. Der PrintJet
arbeitet nicht einwandfrei, wenn er gekippt wird oder schräg steht.
• Lassen Sie genügend Platz vor dem Auslauf des PrintJet frei, damit die MultiCard ungehindert vom PrintJet ausgegeben werden kann.
19
Other manuals for Printjet
2
Table of contents
Languages:
Other Weidmuller Printer manuals