Well CLIPP-HAIR-RAVEN-WL User manual

INSTRUCTION MANUAL
PROFESSIONAL HAIR CLIPPER
Thank you for choosing WELL. Please read carefully the following instructions and keep them
within reach.
Reorder No: CLIPP-HAIR-RAVEN-WL

DESCRIPTION
ACCESSORIES
3 mm
6 mm
9 mm
12 mm
Comb
Scissors
Oil
Brush
Blade lever
On/Off switch
Bottom blade
Top blade

BLADE ALIGNMENT
•Your clippers were carefully examined to ensure that the blades were oiled and aligned
before leaving our factory.
•Blades must be realigned if they have been removed for cleaning or replacement.
•To realign the blades, simply match the upper and bottom blades teeth up, point for point.
(End of top blade teeth should be approximately 1.2mm back from bottom blade, compare
your clipper blades with the sketch).
•If blade alignment is incorrect, add a few drops of oil to the blades, turn clipper on for a
few moments, turn off and unplug.
Loosen screws slightly and adjust.
Tighten screws after blade is aligned.
OIL
•To maintain your clipper in peak condition, the blades should be oiled every few haircuts.
•Do not use hair oil, grease, oil mixed with kerosene or any solvent. As the solvent will
evaporate and leave the thick oil which may slow down the blades motion.

BLADE LEVER
•The lever is conveniently located near your thumb (if you’re right-handed) so it can easily
be adjusted while the clipper is in your hand.
•The lever adds versatility to your clipper by allowing you to gradually change the closeness
of your cut without an attachment comb.
•When the lever is in the uppermost position, the blades will give you the closest cut and
leave the hair very short. Pushing the lever downward gradually increases the cutting
length.
•In its lowest position, the lever will leave the hair approximately the same length as a #1
comb.
•The lever will also extend the use of your blades since a different cutting edge is used in
each setting.
•In addition, if extremely heavy hair cutting has jammed the blades, it will help you remove
hair that has become wedged between the two blades without removing the blades.
•While the clipper is running, rapidly move the lever form ’close cut” to “longer” cut a couple of
times.
Doing this each time after you have finished using your clipper will help to keep the blades clear
of cut hair if your clipper stops cutting and this does not help, your cutting blades are dulled,
Replace them with new blades.
IMPORTANT SAFEGUARDS
When using electrical appliances, especially when children are present, basic safety precautions
should always be followed, including the following:
To reduce the risk of death or injury by electric shock:
•Unplug this appliance before cleaning.
•Do not place or store appliance where it can fall or be pulled into a tub or sink.
•Do not use while bathing or in a shower.
•Do not place in, or drop into, water or other liquid.
•Do not reach for an appliance that has fallen into water. Unplug immediately.
To reduce the risk of burns, electrocution, fire, or injury to persons.
•Use this appliance only for its intended use as described in this manual. Do not use
attachments not recommended by the manufacturer.

•This appliance should never be left unattended when plugged in.
•Close supervision is necessary when this appliance is used by, on, or near children of
invalids.
•Never operate this appliance if it has a damaged cord or plug, if it is not working properly.
•Keep the cord away from heated surfaces.
•Do not pull, twist, or wrap line cord around appliance.
•Never drop or insert any object into any opening on this appliance.
•Before use, make certain blades are aligned properly.
•Do not place appliance on any surface while it is operating.
•Do not use this appliance with a damaged or broken comb or with teeth missing from the
blades as injury may occur.
INSTRUCTIONS FOR HAIR CUTTING
Before starting the hair cut:
1. Inspect the clipper, making sure that it is free of oil between the cutting blade teeth and
turn the unit on to distribute the oil and to make sure it is running smoothly. Wipe off any
excess oil. This should be done after each use. While using the unit, untwist the cord from
time to time to avoid tangling.
2. Seat the person so their head is approximately at your eye level. This allows ease of
visibility while cutting and a relaxed control of the unit.
3. Before cutting always first comb the hair so it is tangle free and as it is naturally worn.
4. Place a towel around the neck and shoulders of the person having the haircut.
REMINDERS
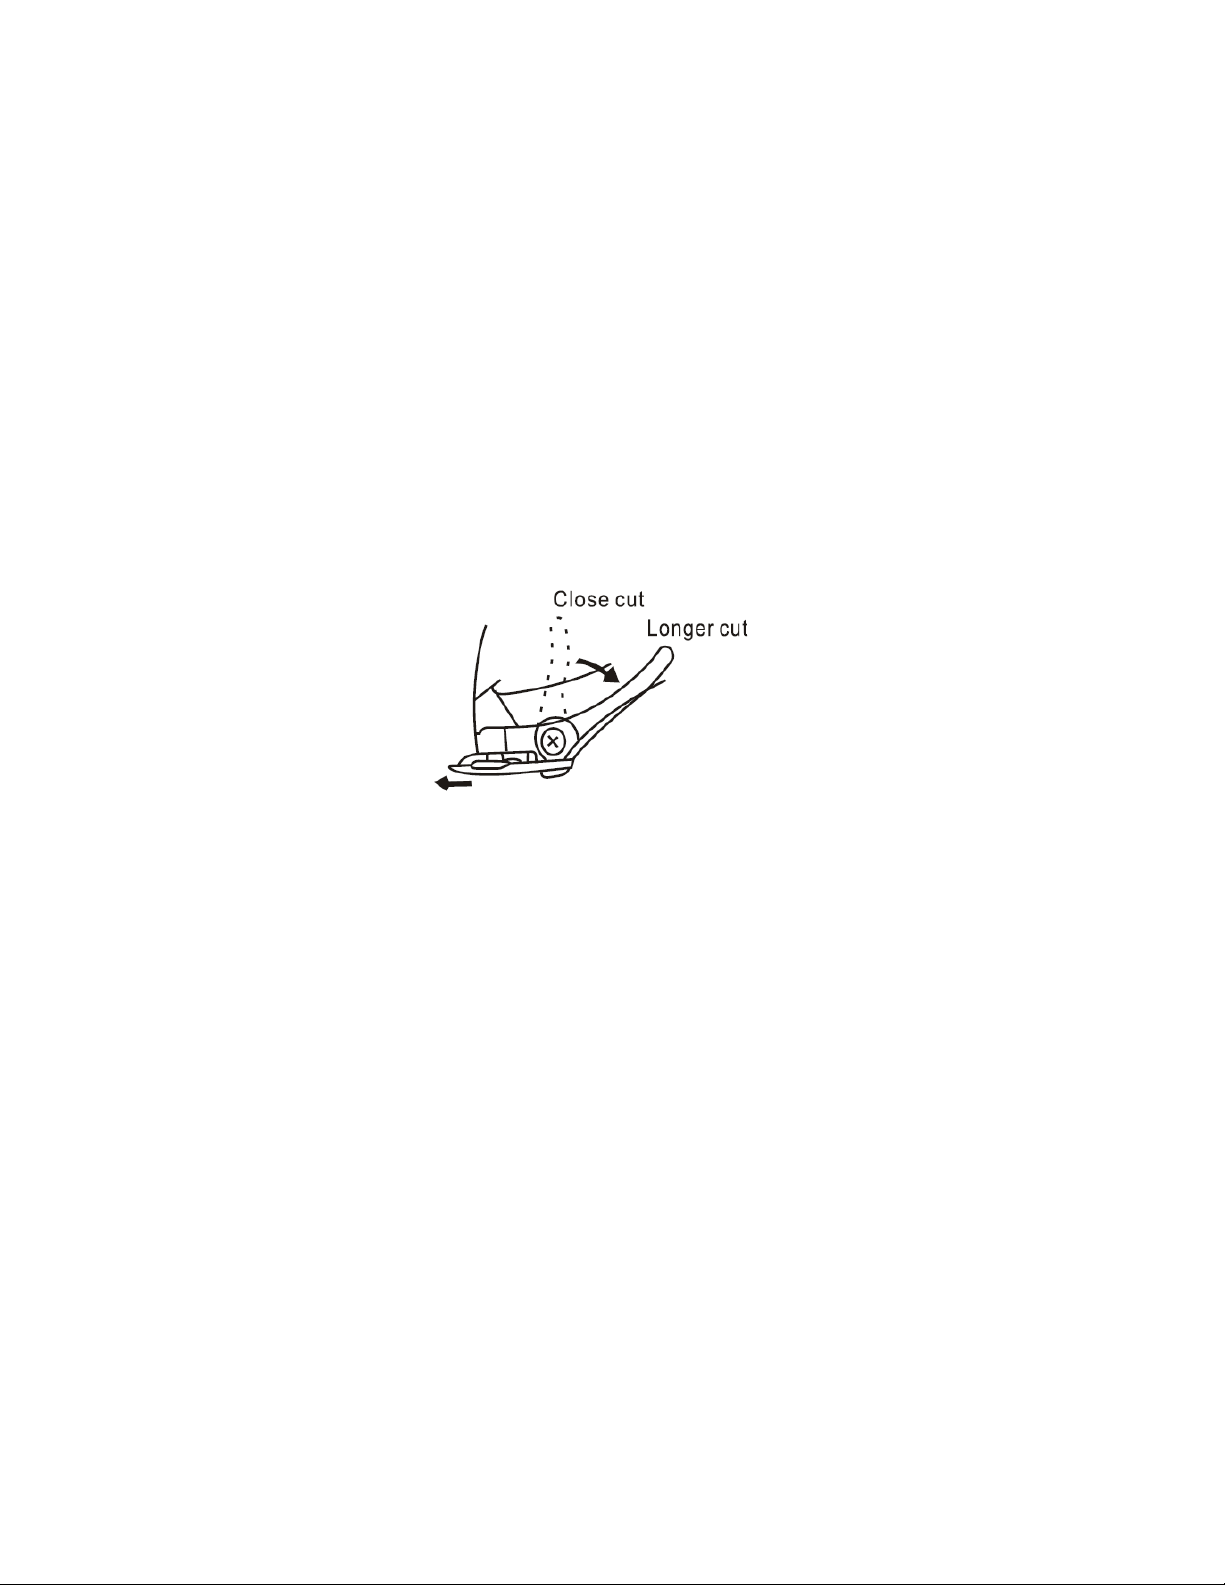
•Cut the hair in a relaxed and slow manner. Use short strokes only to work gradually over
the entire head.
•Always take off a little hair at a time, you can always trim off additional hair later.
•As you work, comb the hair frequently back into the style to which you are cutting.
•When cutting with this hair clipper it is better to leave the hair dry, not wet. With the hair
dry, it is much easier to control the amount of hair being cut.
BEGINNING THE HAIRCUT
Cutting hair requires practice so it is always better to leave the hair longer for the first few haircuts
until you become used to the length from each attachment comb.
ATTACHMENT COMB (see main diagram)
•Attachment Comb #1 leaves 3 mm (1/8 inch) hair length.
•Attachment Comb #2 leaves 6 mm (1/4 inch) hair length.
•Attachment Comb #3 leaves 9 mm (3/8 inch) hair length.

•Attachment Comb #4 leaves 12 mm (1/2 inch) hair length.
Each comb attachment is marked accordingly on its outside middle surface.
•To attach a comb, hold it with its teeth upward and slide it into and along the clipper blade
until the front of the comb firmly seats against the clipper blade.
•To remove the comb, simply pull the comb upward and away from the clipper blade.
•For even cutting, allow the comb attachment/cutter to cut its way through the hair. Do not
force it through quickly. Also remember to comb the hair frequently to remove trimmed
hair and to check for uneven strands.
STEP 1 - NAPE OF THE NECK
1.Attach comb attachment 3 mm or 6 mm.
2. Hold the clipper cutting edge pointed up and begin
the haircut, starting at the center of the head at the base of the neck (see diagram 1).
3. Hold the clipper comfortably in your hand and hold lightly against the head with the comb teeth
pointing upward. Gradually and slowly lift the clipper, working upwards and outwards, through
the hair, trimming just a little at a time.
4.As you cut, gradually lift the hair clipper head towards you. Continue to cut the back area from
the bottom of the neck upwards to the top of the ears.
STEP 2 – BACK OF THE HEAD
Changed to the next longest comb attachment 9 mm or 12 mm (#3 or 4#) and cut the back of the
head (see diagram 2).

STEP 3 – SIDE OF THE HEAD
Change to one of the shorter combs 3 mm or 6 mm, trim sideburns, i.e. the hair directly in front of
the ears.
Then change to one of the longer combs, 9 mm or 12 mm, and continue to cut to the top to the
head (diagram 3).
STEP 4-TOP OF THE HEAD
1. Using comb attachment 9 mm or 12 mm, cut top of head from back to front against the direction
in which the hair normally grows (see diagram 4). In some cases, this may require the reverse, or
cutting from front to back.
2.Comb attachments 3 mm or 6 mm are used to achieve a close crew cut or short cut.
3. For longer hair on top, use the comb provided and lift hair on the top of the head. Cut over the
comb, with the hair lifted or hold the hair between the fingers to lift it and cut it to desired length
(see diagrams 5 and 6). Always work from the back of the head. You can cut the hair shorter
gradually by reducing the space between the comb/fingers. And the head. Comb out trimmed hair
and check for uneven strands.

STEP 5 - THE FINISHING TOUCH
1. Finally, use the taper lever without an attachment comp for close trimming around the base of
the neck, the sides of the neck and the ears.
2. To produce a clean straight line at the sideburns, reverse the hair clipper by turning the reverse
side uppermost (see diagram 7).
3. Press the clipper at right angles to the head, tips of the blades lightly touching the skin and work
downwards. This way you will obtain, as a clean cut as would be given by a razor.
SHORT TAPERED STYLES ‘FLAT TOPS’ AND SHORT CUTS
1. Starting with the longest attachment comb (12 mm), cut from the back of the neck to the crown.
Hold the attachment comb flat against the head and slowly move the clipper through the hair, as
shown (see diagram 8).
2. Use the same procedure from the lower side to the upper side of the head, as illustrated. Then
cut the hair against the direction in which it grows from the front to the crown and then level the
cut with the sides.
3. To give a ‘flat top’ look, the hair on top of the head must be cut over the top of a flat comb rather
than by using the attachment comb.
4. Use closer cutting attachment combs to taper the hair down to the neckline as desired. Comb
hair and check for uneven areas and outlining sideboards and neckline as described previously.

TECHNICAL SPECIFICATIONS
Input voltage: 230V 50Hz
Nominal power: 10W
Powerful AC motor with adjustable blade-control level
Precision cutting blade
Comb sets: 3mm/6mm/9mm/12mm
Low noise
Package content: Hair clipper, 4 comb sets, brush, oil, comb, scissor
Waste electrical and electronic equipment are a special waste category,
collection, storage, transport, treatment and recycling are important
because they can avoid environmental pollution and are harmful to
health. Submitting waste electrical and electronic equipment to special
collection centers makes the waste to be recycled properly and protecting
the environment. Do not forget! Each electric appliance that arrives at the
landfill, the field, pollutes the environment!
Importer & distributor:
SC VITACOM ELECTRONICS SRL
CIF: RO 214527
Tel. 0264-438401*
Table of contents
Other Well Hair Clipper manuals