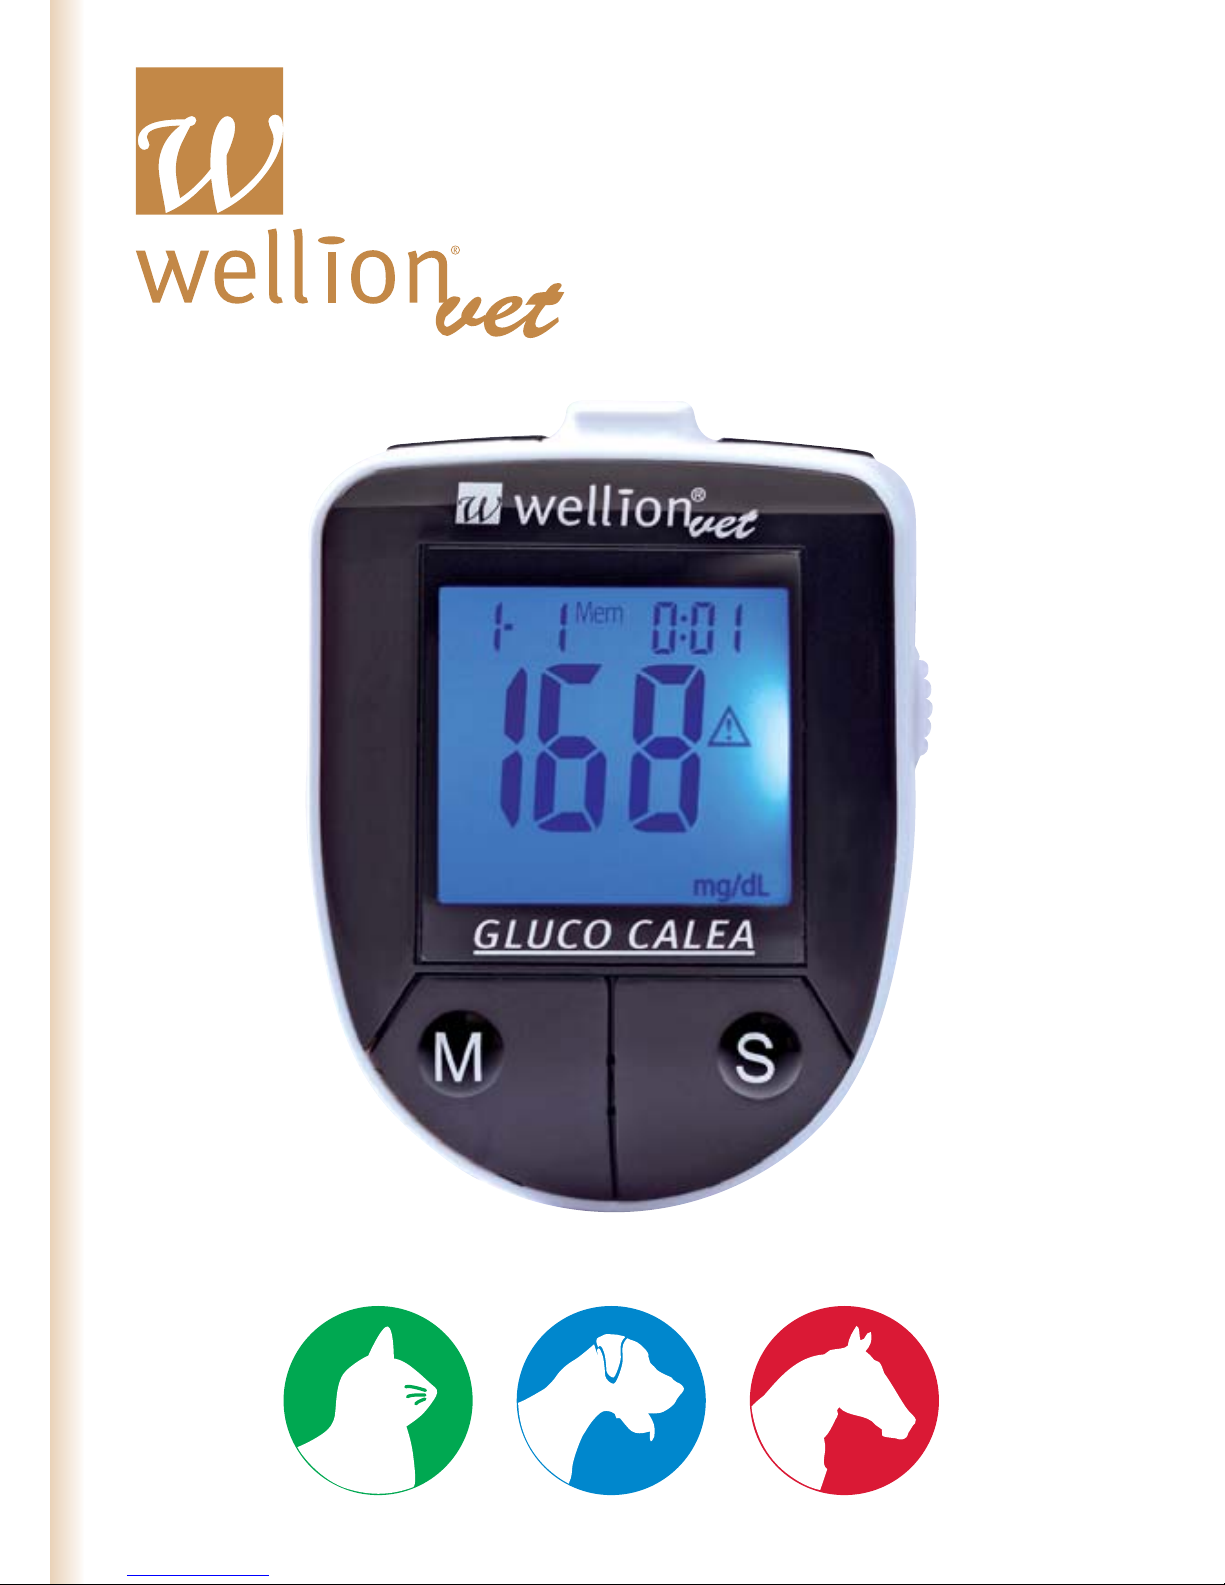
WellionVet Gluco Calea User manual

GLUCO CALEA
OWNERS GUIDE
2

3
Dear Wellion GLUCO CALEA Owner,
Thank you for choosing the Wellion GLUCO CALEA Blood
Glucose Monitoring System that will help you monitoring
the blood sugar levels of your pet. We designed the Wellion
GLUCO CALEA Blood Glucose Monitoring System to be
accurate and easy to use.
Your new Wellion GLUCO CALEA Blood Glucose Monitoring
System is designed with convenience and accuracy in mind
to make your life easier. To ensure the test results are accurate
on every test, we created three unique code chips for the
measurement of blood sugar in a cat, a dog or a horse.
All information needed to use and maintain your new meter
is included in this manual. Please read it carefully.
The Wellion GLUCO CALEA Blood Glucose Monitoring System
is a portable battery operated meter intended for use as an
aid for persons with diabetic pets and by health care profes-
sionals to monitor glucose concentration in whole blood of
cats, dogs and horses.
If you have questions or simply want more informati-
on, please call your veterinarian or visit our website at
www.wellion.at.
4
WHY A PARTICULAR BLOOD GLUCOSE METER
FOR MY CAT, DOG OR HORSE?
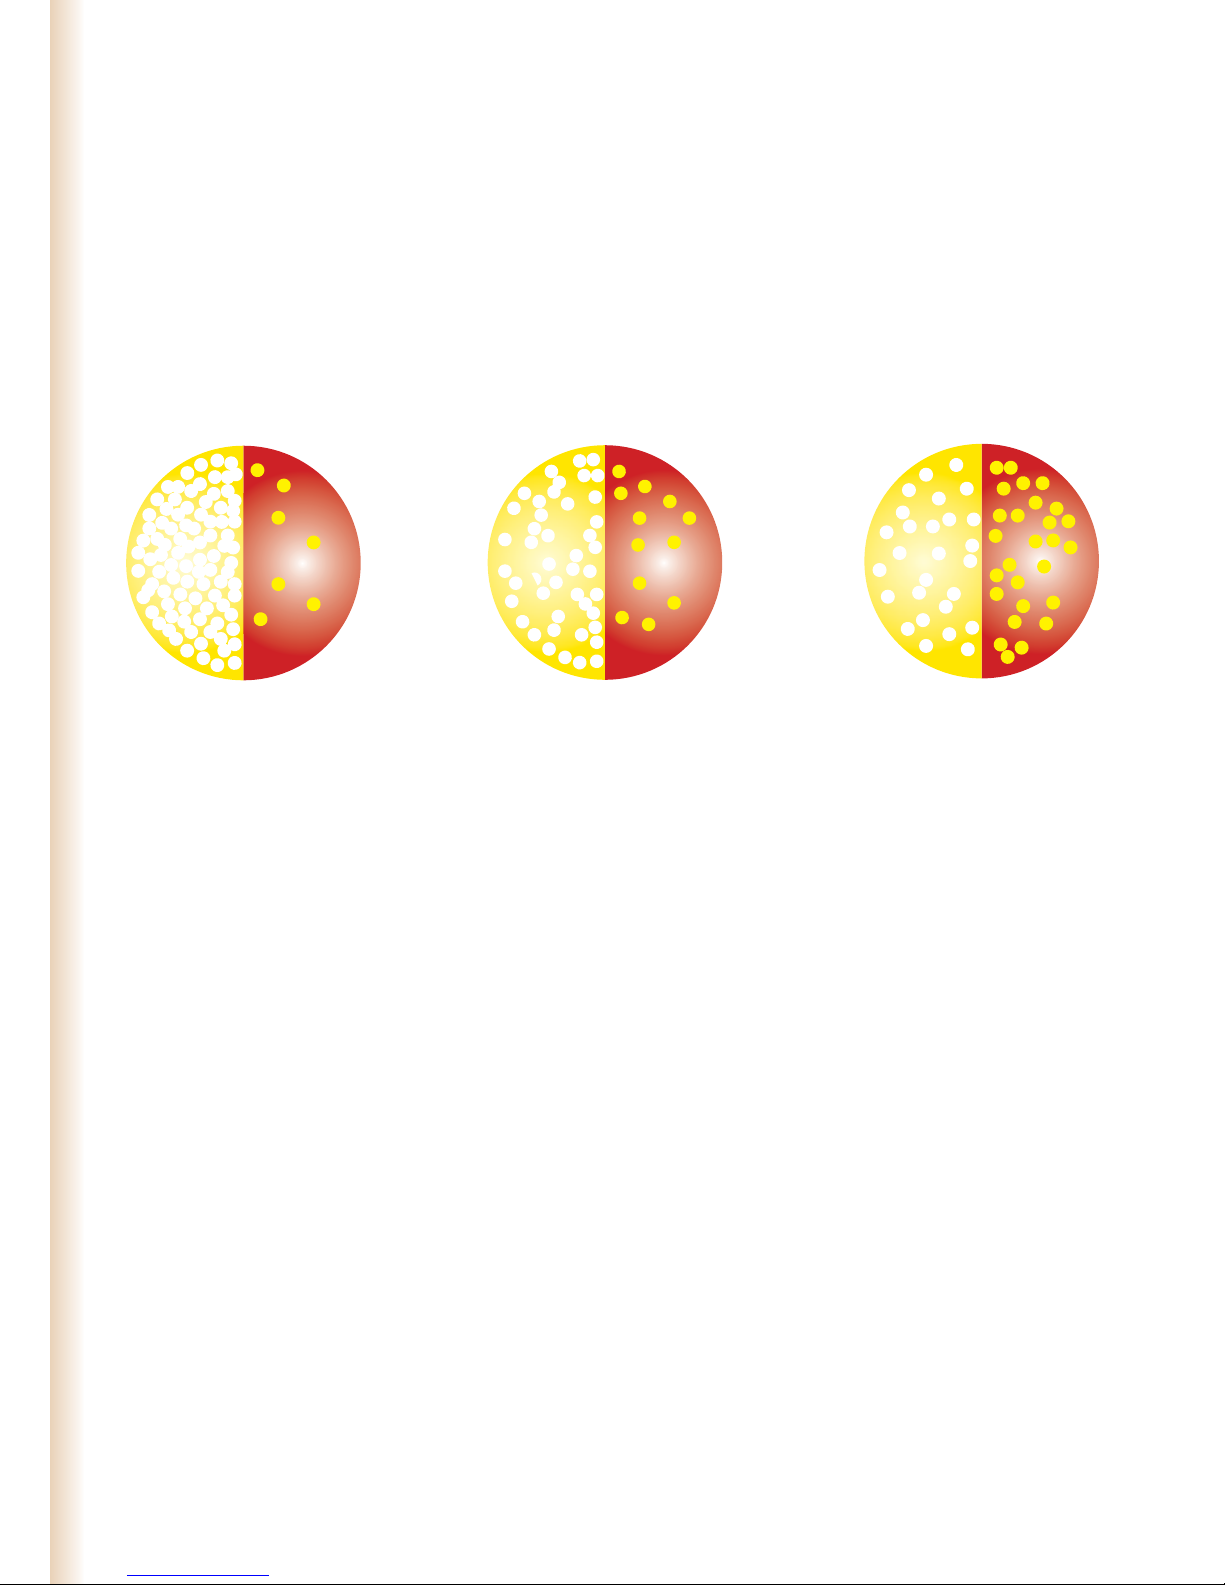
Animals and humans have a dierent composition of blood,
especially the distribution of the glucose in blood plasma and
whole blood is signicantly dierent. In animals the concen-
tration of glucose in plasma is much higher than in humans:
If you use a meter for human blood on a cat, dog or horse, it
may result in inaccurate readings and underestimation of the
blood glucose value.
The human meter is especially calibrated on human blood
and will calculate the accurate human glucose result. But
this is not the same value as it would be for your cat, dog or
horse - to receive an accurate value for your pet you must use
a blood glucose meter developed especially for animals.
Your Wellion GLUCO CALEA meter is calibrated especially for
the blood of cats, dogs and horses.
CAT
About 93% of the glucose
is located in plasma and
7% of the glucose in the
red blood cells
DOG
About 87,5% of the glucose
is located in plasma and
12,5% of the glucose in the
red blood cells
HUMAN
About 58% of the glucose
is located in plasma and
42% of the glucose in the
red blood cells

5
Testing your pet‘s blood glucose at home will help to improve
the diabetes therapy.
Wellion GLUCO CALEA
pet meter Human meter
Human
blood glucose result N/A accurate
Cat
blood glucose result
precise
when coded for cat
can show a false,
low result
Dog
blood glucose result
precise
when coded for dog
can show a false,
low result
Horse
blood glucose result
precise
when coded for horse
can show a false,
low result
A stable diabetic cat should have a blood glucose
range of about 80-150 mg/dL (4,4-8,3 mmol/L) for
most of the day.
A stable diabetic dog should have a blood glucose
range of about 80-150 mg/dL 4,4-8,3 mmol/L) for
most of a 24 hour period.
Contact a veterinary surgeon and follow his or her
treatment advice about the target range for the horse.

6
When your pet is relaxed and able to follow its routine, the
measured blood glucose results will be more accurate. Your
veterinarian can use the consistent data of the measurements
at home together with the measurements in the vet clinic to
optimize the treatment of your pet.
It is important to motivate the animals by means of positive
reinforcement like:
• Perform the blood glucose testing under calm and
relaxed conditions
• Feed a “Goodie” as a reward
• Use a lancing device that only gives a silent “click”

7
UNDERSTANDING YOUR
WELLION GLUCO CALEA BLOOD GLUCOSE KIT
The Wellion GLUCO CALEA Blood Glucose Monitoring System
kit includes the following items:
Wellion GLUCO CALEA blood glucose meter
Wellion Lancing device
10 Wellion Lancets
Compact Pouch
User guide
Wellion GLUCO CALEA test strips can be purchased
separately.
8
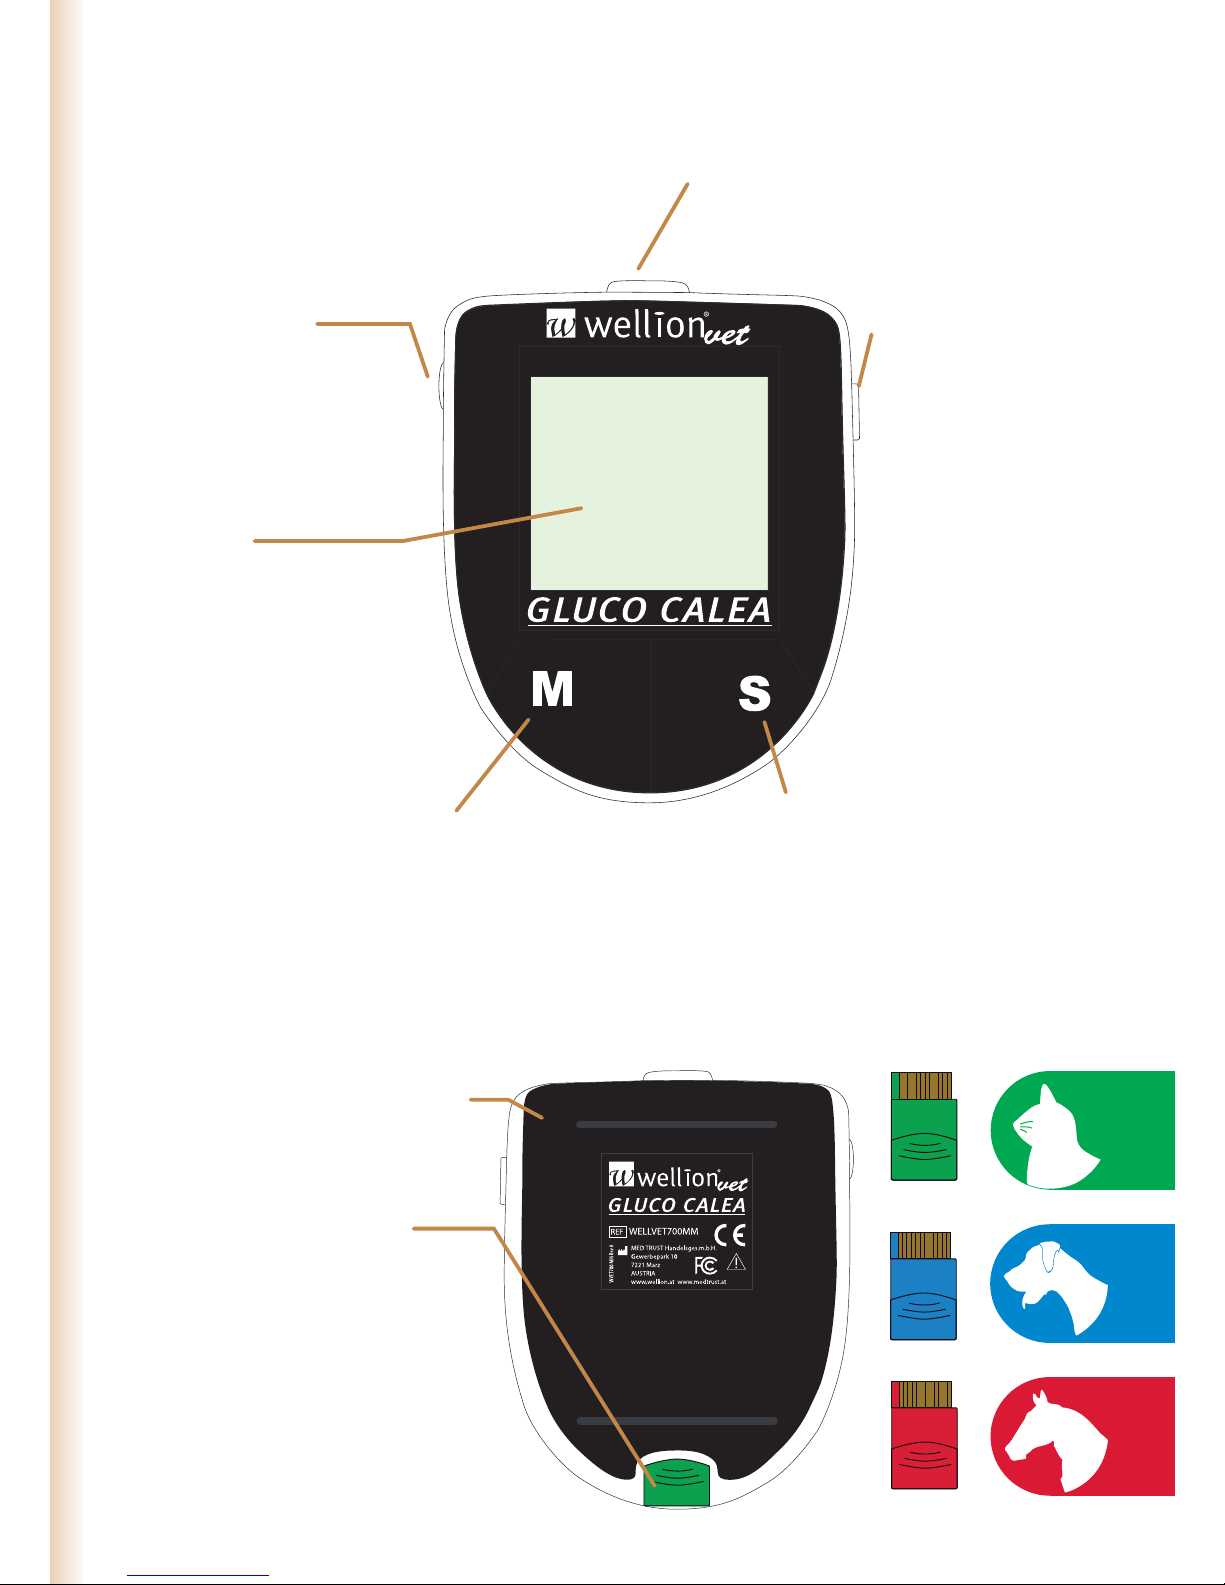
The Wellion GLUCO CALEA meter
Display
Shows the blood
glucose test results,
memory values and
other messages.
Test Strip Port
Insert test strip to
turn on the meter.
M button (menu/mode)
Press to access the memory or the
set up mode. View average results
in memory mode. Press and enter
to set up a specic function in set
up mode.
S Button (select/set)
Press for scrolling through
stored test values and
test averages or numbers
when setting up the
meter.
Strip Ejection
button
To eject the
used strip
slide/move the
button
Light button
Press the button to
turn on the back-
light.
Battery compartment
Holds a 3-Volt lithium
battery (CR-2032).
Unique code chip
Insert the correct code
chip for your pet into the
code chip port. There are
three code chips in the
test strip package for the
measurement in a cat, a
dog or a horse.

9
The Wellion GLUCO CALEA meter display
Date TimeMEM symbol
Shown while
scrolling
through
memory mode
Code symbol
Appears with
the code of the
test strips used.
Blood symbol
and Test strip
symbol
Both symbols
appear when
the meter is
ready for test
and you can
apply the blood
sample to the
test strip.
Unit of
measurement
Warning
symbol
Indicates that
the glucose
result is out of
the range of the
reference value.
Alarm Clock
Icon
Indicates that
the alarm clock
is set.
14 days
Average
Shown while
scrolling
through the
memory.
Reading
Digits show
the test result,
memory and the
averages.
Temperature Icon
Indicates that the
meter is out of the
range of operating
temperature.

10
The Wellion GLUCO CALEA Blood Glucose Test
Strip
The Wellion GLUCO CALEA Test Strips are glucose specic,
biosensor-based test strips that can test glucose in capillary
whole blood of animals (cats, dogs and horses) in only a few
seconds and require a very little blood sample.
To ensure the test results are accurate on every test, we
created three unique code chips for the measurement in a
cat, a dog or a horse (Colorcoding).
This feature eliminates errors in testing caused by incorrect ca-
libration. The test result is plasma referenced for easy compari-
son to lab results. Please make sure that the control window of
the test strip is completely lled with the blood sample in order
to get an accurate and meaningful result.
Contact Points
Insert this end
into the test
strip port on the
meter.
Sampling End
Apply blood here
Control Window
The little window allows you to check if there is
enough blood sipped into the test strip.
Other manuals for Gluco Calea
2
Table of contents


