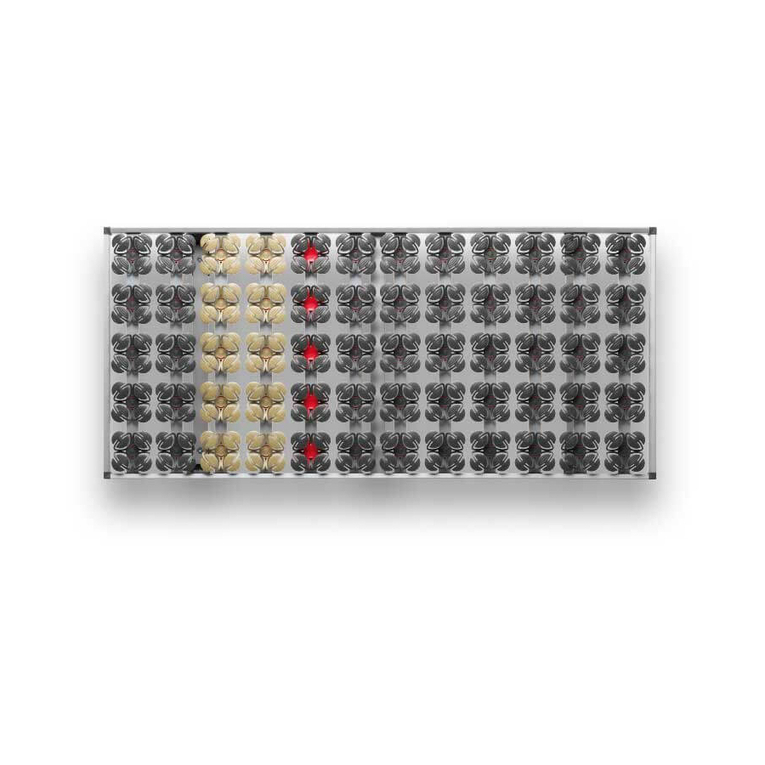
WENATEX wenaFlex Premium Master User manual

Bedienungsanleitung/ Operating Instructions / Manuale d’uso
wenaFlex®Premium Master
mit Kabelhandsender und Notabsenkung
with wired remote control and emergency lowering function
con telecomando a fili e abbassamento d’emergenza
www.wenatex.com

ACHTUNG:
Dieses Gerät kann von Kindern ab 8 Jahren und darüber
sowievon Personen mit verringerten physischen, senso-
rischen oder mentalen Fähigkeiten oder Mangel an
Erfahrung und Wissen benutzt werden, wenn sie beauf-
sichtigt oder bezüglich des sicheren Gebrauchs des
Gerätesunterwiesen wurden und die daraus resultieren-
den Gefahren verstehen.
ATTENTION:
This device can be used by children aged 8 and over or
by persons with reduced physical, sensory or mental
capabilities or persons with lack of experience and
knowledge, as long as they are supervised or have
received instructions on safe use of the device and have
understood potential resulting danger.
ATTENZIONE:
Questo apparecchio può essere utilizzato da bambini di
età superiore agli 8 anni o da persone con limitazioni
siche, sensoriali o mentali o che mancano di esperien-
za solamente sotto sorveglianza o solo se precedente-
mente istruiti riguardo un corretto e sicuro utilizzo
dell’apparecchio e gli eventuali rischi.
2 wenaFlex®Premium Master mit Kabelhandsender

Inhalt
1. Sicherheitshinweise S. 4
2. Vor der ersten Inbetriebnahme S. 5
3. Bedienung Kabelhandsender S. 6
4. Technische Daten S. 6
5. Im Fall einer Störung S. 7
6. Entsorgung S. 7
7. Garantie S. 7
ANHANG: Motorausbau S. 16
EG-Konformitätserklärung S. 20
Deutsch
English Content
1. Safety instructions p. 8
2. Before the initial start-up p. 9
3. Operation with wired remote control p. 10
4. Technical data p. 10
5. In case of failure p. 11
6. Disposal p. 11
7. Guarantee p. 11
APPENDIX: Engine removal p. 16
Declaration of conformity p. 20
Italiano Indice
1. Norme di sicurezza p. 12
2. Prima della messa in funzione iniziale p. 13
3. Utilizzo con telecomando p. 14
4. Specifiche tecniche p. 14
5. In caso di guasto p. 15
6. Smaltimento p. 15
7. Garanzia p. 15
APPENDICE: Smontaggio del motore p. 16
Dichiarazione di conformità p. 20
wenaFlex®Premium Master mit Kabelhandsender 3

1. Sicherheitshinweise
Die Sicherheitshinweise sind unbedingt zu beachten:
• Lesen Sie diese Bedienungsanleitung vor der Verwendung des Bettein-
satzes aufmerksam durch, um eine sichere und sachgemäßeVerwendung
zu gewährleisten.
• WirdderBetteinsatzunsachgemäßbetrieben,könnenPersonengefährdet
und Gegenstände beschädigt werden.
• Der Betteinsatz darf ausschließlich in trockenen Räumen verwendet wer-
den und istvor Feuchtigkeitzu schützen.Setzen Sie den Betteinsatznicht
längerer Zeit der direkten Sonneneinstrahlung aus.
• Dieser elektrisch verstellbare Betteinsatz ist nicht für den Einsatz im
medizinischen Bereich zugelassen.
• DasÖnen oder der Austausch der elektrischenTeile darf nurvon Elektro-
fachpersonal durchgeführt werden.
• Unter angehobenen Teilen des Betteinsatzes dürfen sich keine Personen
oder Gegenstände benden.
• Elektrisch verstellbare Betteinsätze sind keine Spielgeräte für Kinder.
Lassen Sie Kinder mit elektrisch verstellbaren Betteinsätzen nicht
unbeaufsichtigt.
• Reinigung und Benutzer-Wartung dürfen nicht von Kindern ohne
Beaufsichtigung durchgeführt werden.
• Das Antriebssystem darf maximal 2 Minuten durchgehend betrieben
werden. Danach benötigt es eine Pause von mindestens 10 Minuten.
Wird das System 1 Minute durchgehend betrieben, beträgt die Pause
mindestens 5 Minuten.
• Verwenden Sie nur Ersatzteile, die vom Hersteller empfohlen werden.
Nurdiese gewährleisten ausreichende Sicherheit.
• Verbrauchte Batterien sind ordnungsgemäß zu entsorgen.
ACHTUNG: Dieses Gerät kann von Kindern ab 8 Jahren und darüber sowie
von Personen mit verringerten physischen, sensorischen oder mentalen
Fähigkeiten oder Mangelan Erfahrung undWissen benutzt werden, wenn sie
beaufsichtigt oder bezüglich des sicheren Gebrauchs des Gerätes unterwie-
sen wurden und die daraus resultierenden Gefahren verstehen.
Deutsch
4 wenaFlex®Premium Master mit Kabelhandsender

2. Vor der ersten Inbetriebnahme
Überprüfen und beachten Sie folgende Punkte:
• Die Transportsicherungen sind zu entfernen
(z. B.: Folien, Karton und Klebebänder, usw.).
• Sind am Betteinsatz bzw. am Antrieb/Kabel-
handsender Transportschäden sichtbar?
Wenn ja, kontaktieren Sie den Wenatex-Kun-
denservice.
• Legen Sie den Betteinsatz so in Ihr Bett ein,
dass er rundum gleichmäßigen Abstand zum
Bettrahmen aufweist.
• Stimmen Stromart und Netzspannung in Ihrem
Haushalt mit den technischen Daten überein?
• Verwenden Sie den elektrisch verstellbaren
Betteinsatz ausschließlich mit dem mitgelie-
ferten Netzteil Typ E-Power 24 SN.
• Verbinden Sie den Stecker des Kabelhandsen-
ders mit der entsprechenden Buchse am An-
trieb (siehe Abb. 1).*
Abbildung 1
• Nehmen Sie das Netzteil aus der Verpackung
und legenSie die Batterien in das seitliche Fach
ein. Achten Sie auf die richtige Polarität!*
• Verbinden Sie den Stecker des Netzteilkabels
mit der noch freien Buchse am Antrieb (siehe
Abb 2).*
Abbildung 2
• Achten Sie auf sachgemäße Leitungsführung
des Netzanschlusses und des Steuerkabels
zum Kabelhandsender.
• Schützen Sie alle Kabel vor Quetschungen und
anderen Beschädigungen. Ist dies der Fall,
trennen Sie das Netzteil sofort vom Stromnetz!
• Beachten Sie, dass das Netzteil immer frei zu-
gänglich ist, um es bei Gefahr schnell heraus-
ziehen zu können.
• Stecken Sie das Netzteil in die Steckdose.
• Das Netzteil und die Netzanschlussleitung
dürfen nicht abgedeckt werden.
• Tauschen Sie die Batterien im Netzteil aus,
sobald die LED rot leuchtet. Verwenden Sie
neue Batterien nicht zusammen mit alten.
• Der elektrisch verstellbare Betteinsatz dient
ausschließlich zur Veränderung der Lage von
Personen in einem Bett.
• Rückenteil und Fußteil sind in gehobener Posi-
tion nicht geeignet, um darauf zu sitzen oder
zu stehen (siehe Abb. 3).
Abbildung 3
• Achten Sie darauf, dass sich beim Heben und
Senken des Betteinsatzes keine Personen und
Körperextremitäten unter bzw. zwischen den
mechanischen Bestandteilen des Betteinsat-
zes benden. Es besteht Quetschgefahr!
• Reinigen Sie den Betteinsatz (Rahmen, Motor,
Netzteil, Kabelhandsender) nur mit einem
trockenen oder leicht feuchten Tuch. Achtung:
Ziehen Sie vorher den Netzstecker.
Personengefährdung
Es darf keine Flüssigkeit in die Steckverbindun-
gen gelangen (siehe Abb. 4).
Abbildung 4
* Das System wird fertig vorbereitet ausgeliefert! Die oben angeführten Punkte dienen zur Fehlerbehebung.
wenaFlex®Premium Master mit Kabelhandsender 5
Deutsch

Manuelle Notabsenkung
Wenn der Strom ausfällt, während der elektrisch
verstellbare Betteinsatz in angehobener Position
ist, können Sie ihn manuell wieder in die flache
Liegeposition absenken. Wichtig: es darf sich
keine Person im Bett benden. Um an die Notab-
senkung zu kommen entfernen Sie die Matratze
und entnehmen Sie die über dem Motor liegen-
den Federelemente durch Herausdrehen. Ziehen
Sie den roten Hebel der Zone, welche Sie absen-
ken wollen, in Richtung Bettmitte (siehe Abb. 5).
Bei gezogenem Hebel drücken Sie den angeho-
benen Bereich bis in die waagrechte Position
herunter (siehe Abb. 6). Der Betteinsatz kann
nach Wiederinbetriebnahme wieder normal ver-
fahren werden.
3. Bedienung
Abbildung 7
Bedienung Kabelhandsender (siehe Abb. 7)
1Rückenmotor hoch
2Rückenmotor runter
3Beinmotor hoch
4Beinmotor runter
5Rücken- und Beinmotor gleichzeitig hoch
6Rücken- und Beinmotor gleichzeitig runter
Verwenden Sie die Tasten 1 bis 6. So lange Sie
eine Taste drücken, wird der entsprechende An-
trieb bewegt.
Einstellen des manuellen Kopeils
Ziehen Sie an der Grischlaufe am Kopfende. Die
gewünschte Position wird automatisch festge-
stellt, wenn Sie die Grischlaufe loslassen. Sie
haben drei Verstellstufen zur Auswahl. Um das
manuelle Kopeil wieder abzusenken ziehen Sie
san über die dritte Einstellstufe hinaus.
4. Technische Daten
Für alle Spannungen gilt:
Eingangsspannung: 100–240V ~ 1,2A, 50–60 Hz
Ausgangsspannung: 24V; 1,5A
Aussetzbetrieb: 2 min. / 10 min.
Anzahl Motoren: 2
Bauart der Motoren: 24 V DC
Maximallast: 140 kg (gleichmäßig verteilt über
die gesamte Liegefläche)
Blockierkra: 9.000 N
Druckkra: 2 x 4.500 N
Schutzart des kompletten Systems: IP 20
Empfohlene Raumtemperatur: + 10 ° bis + 40 °C
Relative Lufeuchtigkeit: 30–75%
Mechanische Notabsenkung (NAS), gefertigt nach
VDE, Schutzklasse II, geprü durch LGA (Sicherheit)
Technische Änderungen, die der Verbesserung
des Systems dienen, behalten wir uns vor.
Abbildung 6
Abbildung 5
Deutsch
6 wenaFlex®Premium Master mit Kabelhandsender

PROBLEM URSACHE LÖSUNG
Keine Spannung
Keine Steuerspannung
vorhanden
Zuleitungen unterbrochen Zuleitung prüfen
Sicherungen im E-Verteiler defekt
Steckdose bauseits defekt
Sicherungen erneuern
Steckvorrichtung überprüfen/
einstecken
Kabelhandsender
oder Antriebssystem
funktioniert nicht
Kabelhandsender nicht
eingesteckt Steckvorrichtung überprüfen/
einstecken
Antriebssystem nicht eingesteckt
Kabelhandsender defekt 1Kabelhandsender wechseln 1
Netzteil funktioniert nicht Batterien leer Batterien erneuern
Netzteil defekt 2Netzteil wechseln 2
Der Antrieb lässt sich plötzlich
nicht mehr bewegen
Der Antrieb lässt sich nicht mehr
bewegen; es ist jedoch ein
Motorgeräusch hörbar
Kontaktieren Sie den Wenatex-
Kundenservice
Thermoschalter am Trafo im
Motor hat möglicherweise aus-
gelöst (Überlastung)
Das Antriebssystem ca. 20 bis
30 Minuten in Ruhestellung
belassen
¹ Sofern Sie zwei Bettsysteme haben, wechseln Sie einen Kabelhandsender zum Test aus.
² Sofern Sie zwei Bettsysteme haben, wechseln Sie ein Netzteil zum Test aus.
Sollte das Bettsystem immer noch nicht einwandfrei funktionieren, oder Beschädigungen an Kabeln
bzw. Steckern vorliegen, wenden Sie sich bitte an den Wenatex-Kundenservice.
5. Fehlerbehebung – Prüfen Sie, ob …
1. die verwendete Steckdose Strom liefert;
2. das Gerät an das Stromnetz angeschlossen ist;
3. sämtliche Kabel korrekt eingesteckt sind
(siehe Seite 5);
4. die Batterien falsch eingelegt oder leer sind
(siehe Seite 5);
5. die Kabel oder Stecker sichtbare Beschädig-
ungen aufweisen;
6. das Netzteil die korrekte Typenbezeichnung
aufweist.
6. Entsorgung
Der Antrieb, sowie Kabelhandsender und Netzteil
enthalten Elektronikbauteile, Kabel, Metalle,
Kunststoe usw. Die elektrischen Komponenten
sind gemäß den geltenden Umweltvorschrien des
jeweiligen Landes zu entsorgen.
In Deutschland können die elektrischen Kompo-
nentenbei kommunalenSammelstellenabgegeben
werden.
Durch die ordnungsgemäße Entsorgung leisten Sie
einen aktiven Beitrag zum Schutz unserer Umwelt.
Die elektrischen Komponenten dürfen nicht in den
Hausmüll gelangen.
Die Anleitung zum Ausbau der elektrischen Kompo-
nenten nden Sie auf den Seiten 16bis 19.
7. Garantie
Die Firma Wenatex gewährt eine Garantie von fünf
Jahren ab Kaufdatum auf alle Bestandteile Ihres
WenatexSchlafsystems. MitunsererGarantieleistung
wird die laufende Garantiezeit nicht unterbrochen, es
beginnt auch keine neue Garantiefrist zu laufen.
Ausgenommen von der Garantie sind:
• Mängel, die durch unsachgemäße Behandlung
verursacht wurden, z. B. Anwendung von Gewalt,
Überlastung, vom Käufer durchgeführte Verände-
rungen etc.
• Schäden, die durch das Önen von elektrischen
oder elektronischen Bauteilen entstehen (ausge-
nommen Reparaturen durch den Hersteller).
• Mängel, die auf natürlicher Abnützung beruhen,
z. B. Ermüdung von Federelementen, Träger-
leisten oder Kunststoeilen.
Diese Bedienungsanleitung und die Sicherheitshinweise nden Sie auch unter: www.wenatex.com
wenaFlex®Premium Master mit Kabelhandsender 7
Deutsch

1. Safety instructions
Safety instructions must be implicitly observed:
• In order to ensure safe and correct use, please read the operating
instructions carefully before using the bed base.
• If the bed base is used incorrectly, it may present a potential danger to
persons or cause damage to nearby objects.
• The bed base is only allowed to be used in dry rooms and has to be pro-
tected against exposure to moisture. Do not leave the bed base exposed
to direct sunlight over a long period of time.
• This electrically adjustable bed base is notlicensed for use in the medical
eld.
• Electrical parts may only be opened or exchanged by qualied electri-
cians.
• No persons or objects should be located beneath the raised parts of the
bed base.
• Electrically adjustable bed bases are not to be played with or used astoys
by children. Small children should not be le unattended with electri-
cally adjustable bed bases.
• Cleaning anduser maintenance tasksare not allowed to be performed by
children without supervision.
• The drive system is only allowed to be used continuously for a maximum
duration of 2 minutes. Subsequent to this, the system needs a break of
at least 10 minutes. If the system is used continuously for the duration of
1 minute, the system subsequently needs a break of at least 5 minutes.
• Only use spare parts that are recommended by the manufacturer. Only
such parts can ensure a sucient level of safety.
• Used batteries are to be disposed of in an appropriate manner.
ATTENTION: This device can be used by children aged 8 and over or by per-
sons with reduced physical, sensory or mental capabilities or persons with
lack of experience and knowledge, as long as they are supervised or have
received instructions on safe use of the device and have understood poten-
tial resulting danger.
English
8 wenaFlex®Premium Master with wired remote control

2. Before the initial start-up
Check and observe the following points:
• The transport safetydevices are to be removed
(e.g.: foil, carton, adhesive tape etc.).
• Are there any visible signs of transport damage
on the bed base or on the drive/wired remote
control? If so, please contact the Wenatex
Customer Service department.
• Insert the bed base so that the frame has an
even distance all the way around within the
bed frame.
• Is the type of current and supply voltage in your
home in compliance with the relevant techni-
cal data?
• Only use the electrically adjustable bed base
together with the power supply unit included
in the delivery – Type E-Power 24 SN.
• Connect the plug of the wired remote control to
the respective socket on the drive (see illustra-
tion 1).*
Illustration 1
• Remove the power supply unit from the pack-
agingandinsertthe batteriesintothecompart-
ment on the side. Ensure that the batteries are
inserted with the correct polarity!*
• Connect the plug of the power supply cable to
the remaining vacant socket on the drive (see
illustration 2).*
Illustration 2
• Checkto ensure thatthe mains connection and
the control cable to the wired remote control
are correctly wired.
• Protect all cables against crushing or other
forms of potential damage. If any cables are
crushed or damaged, immediately disconnect
the power supply unit from the mains supply!
• Ensure that the power supply unit is always
easily accessible so that it can be pulled out
quickly in case of danger.
• Connect the power supply unit to the electric
socket.
• The power supply unit and the power connec-
tion line are not allowed to be covered.
• Exchange the batteries in the power supply
unit as soon as the LED lights up red. Do not
use a combination of old and new batteries.
• The electrically adjustable bed base is only to
be used for the purpose of changing the posi-
tion of persons in a bed.
• While in a raised position, the back and foot
sections are not suitable for sitting or standing
on (see illustration 3).
Illustration 3
• Ensure that no persons or body extremities
are located beneath or between the mechan-
ical components of the bed base when raising
or lowering any sections of the bed base.
Crushing hazard!
• Only use a dry or slightly damp cloth to clean
the bed base (frame, motor, power supplyunit,
wired remote control). Caution: Pull out the
mains plug beforehand.
Risk of danger to persons
No liquids are allowed to enter the plug and sock-
et connections. (see illustration 4)
Illustration 4
* The system is delivered in a ready-to-use condition. Please observe the points mentioned above in order to avoid or remediate faults.
wenaFlex®Premium Master with wired remote control 9
English

Manual emergency lowering
If a power outage should occur while the adjust-
able bed base is in a raised position, you can
lower it back down to a reclining position again
manually. Important: No person/s should be on
the bed during manual lowering. In order to ac-
cess the emergency lowering feature, remove the
mattress and take outthe spring elements that lie
above the motor by turning them. Pull the red le-
ver, toward the middle of the bed (base), in the
zone that you want to lower (see illustration 5).
While the lever is pulled, push the raised section
down until it reaches a horizontal position (see
illustration 6). Aer restarting, the bed base can
be operated normally again.
3. Operation
Illustration 7
Wired remote control operation (see illustration 7)
1Back motor up
2Back motor down
3Leg motor up
4Leg motor down
5Back and leg motor up simultaneously
6Back and leg motor down simultaneously
Use the keys 1 to 6. When you press a key, the
respective drive is set in motion.
Setting the manual head section
Pull the grip strap at the head end. The head sec-
tion is automatically locked into the desired posi-
tion when you let go of the grip strap. You have a
selection of three adjustment levels. In order to
lower the manual head section again, pull gently
past the third adjustment level.
4. Technical data
The following applies to all voltages:
Input voltage: 100–240V ~ 1,2A, 50–60 Hz
Output voltage: 24V; 1,5A
Intermittent duty: 2 min. / 10 min.
Number of motors: 2
Design of motors: 24 V DC
Maximum load: 140 kg (evenly distributed over
the entire lying surface)
Blocking force: 9.000 N
Compressive force: 2 x 4.500 N
Protection type of complete system: IP 20
Recommended room temperature: + 10 ° to + 40 °C
Relative humidity: 30–75 %
Mechanical lowering system (NAS), manufac-
tured in accordance with VDE, protection class II,
tested by LGA (safety)
We reserve the right to perform technical changes
that serve the purpose of improving the system.
Illustration 6
Illustration 5
English
10 wenaFlex®Premium Master with wired remote control

PROBLEM CAUSE SOLUTION
No voltage
No control voltage is provided
Supply lines interrupted/
disconnected Check supply line
Fuses defect in the
electrical distributor
Customer’s electrical socket defect
Exchange fuses
Check/connect the plug
and socket
Wired remote control or drive
system does not work
Wired remote control
not plugged in Check/connect the plug and
socket
Drive system not plugged in
Wired remote control defect 1Exchange wired remote control 1
Power supply unit doesn’t work batteries empty exchange batteries
power supply unit defect 2exchange power supply unit 2
Suddenly the drive cannot be
set in motion
The drive can no longer be moved;
but motor sound can be heard Contact Wenatex Customer Service
Thermal circuit breaker on the
motor transformer is possibly
actuated (overload)
Leave the drive system in an
inoperative state for approx.
20to 30 minutes
¹ If you have two bed systems, exchange a wired remote control to perform a test.
² If you have two bed systems, exchange a power supply unit to perform a test.
If the bed system stilldoesn’t workproperly, or if there appears to be damage to cablesor plugs, please
contact Wenatex Customer Service.
5. In case of failure – Check wether …
1. the socket in use supplies electricity;
2. the system is connected to the mains supply;
3. all cables are connected correctly
(see page 9);
4. the batteries are inserted incorrectly or empty
(see page 9);
5. the cables or plugs show visible signs of
damage;
6. the power supply unit has the correct type
designation.
6. Disposal
The drive, the wired remote control and the power
supply unit contain electronic components, cables,
metal, plastic etc. The drive, the wired remote con-
trol and the power supply unit have to be disposed
of in accordance with the locally applied environ-
mental regulations of the respective country. The
drive, the wired remote control andthe power supply
unit are not allowed to be disposed of along with
household waste.
The instructions for removing the electrical com-
ponents can be found on pages 16to 19.
7. Guarantee
Wenatex provides a ve year guarantee on all com-
ponents of the Wenatex sleep system, starting as of
the respective date of purchase. Fullment ofa guar-
antee claim does not automatically suspend the
running guarantee period, nor does it mark the be-
ginning of a new guarantee period.
The following are excluded from the guarantee:
• Defects that were caused by inappropriate han-
dling, i.e. use of force, overloading, changes per-
formed by the buyer etc.
• Damages caused by opening up electrical or elec-
tronic components (unless the components were
opened bya technician on behalf of the manufac-
turer).
• Defects caused by natural wear and tear, i.e. ma-
terialfatigueofthe spring elements, supportslats
or plastic parts.
You can also nd these operating instructions and safety instructions on: www.wenatex.com
wenaFlex®Premium Master with wired remote control 11
English

1. Norme di sicurezza
Prestare molta attenzione alle norme di sicurezza:
• Leggere attentamente le istruzioni d’uso della rete a doghe elettrica in
modo da garantirne un corretto e sicuro utilizzo.
• Un non corretto utilizzo della rete può costituire un pericolo per le persone
e danneggiare oggetti.
• La rete deve essere utilizzata solamente in luoghi asciutti e deve essere
protetta dall’umidità. Non esporre prolungatamente la rete ai raggi solari
diretti.
• Questa rete a doghe elettrica non è adatta all’impiego in ambito medico.
• L’apertura o la sostituzione di parti elettriche deve essere eettuata so-
lamente da personale specializzato.
• Persone od oggetti non devono mai trovarsi sotto le parti sollevate della
rete.
• Le reti elettriche non sono giocattoli per bambini. Evitare di lasciare i
bambini senza sorveglianza in presenza di reti elettriche.
• Pulizia,utilizzoemanutenzionenondevonoessereeettuatedabambini
senza sorveglianza.
• L’utilizzo continuo del sistema a motore non deve superare i due minuti.
Dopo un uso continuativo così lungo, attendere almeno 10 minuti prima
un nuovo utilizzo. Se il sistema a motore viene utilizzato continuativa-
mente per un minuto, attendere almeno 5 minuti prima di un nuovo
utilizzo.
• Utilizzare solo pezzi di ricambio consigliati dal produttore. Solo questi
possono garantire una adeguata sicurezza.
• Le pile usate dovranno essere smaltite conformemente alla normativa
vigente.
ATTENZIONE: Questo apparecchio può essere utilizzato da bambini di età
superiore agli 8 anni o da persone con limitazioni siche, sensoriali o men-
tali o che mancano di esperienza solo sotto sorveglianza o solo se prece-
dentemente istruiti riguardo un corretto e sicuro utilizzo dell’apparecchio e
gli eventuali rischi.
Italiano
12 wenaFlex®Premium Master con telecomando a li

2. Prima della messa in funzione iniziale
Vericare e attenersi ai punti seguenti:
• Togliere l’imballaggio di sicurezza (ad es. pel-
licole, cartone, nastro, ecc.).
• Sono visibili danni su rete, motore, telecoman-
do dovuti al trasporto? In caso positivo contat-
tare il servizio clienti Wenatex.
• Appoggiare la rete in modo tale che la distanza
dal giroletto sia la stessa da tutti i quattro i
lati.
• Tensione di alimentazione e tensione di rete
corrispondono a quelle indicate nelle speci-
che tecniche?
• Utilizzare la rete regolabile esclusivamente
con l’alimentatore di rete Typ E-Power 24 SN di
cui è dotata.
• Inserire la spina del telecomando a li nella
rispettiva presa sul motore (vedi g. 1).*
Figura 1
• Estrarre l‘alimentatore dall‘imballaggio e inse-
rire le pile nel vano laterale corrispondente,
prestando attenzione alla corretta polarità!*
• Inserire la spina del telecomando a li nella
presa ancora libera sul motore (vedi g. 2).*
Figura 2
• Fare attenzione alla disposizione del cavo di
connessione alla corrente elettrica e del cavo
del telecomando.
• Proteggere i cavi da schiacciamenti e altri dan-
neggiamenti. Se ciò dovesse accadere, scolle-
gare subito l‘alimentatore dalla rete elettrica!
• Fare in modo che l‘alimentatore sia sempre
facilmente accessibile, in modo da poterlo
estrarre rapidamente in caso di pericolo.
• Collegare l‘alimentatore alla presa.
• Alimentatore e cavo di collegamento alla rete
non devono essere coperti.
• Sostituire le pile dell‘alimentatore non appena
si accende la spia a LED rossa. Non utilizzare
insieme pile nuove e pile vecchie.
• La rete a doghe elettrica deve essere utilizzata
solamente per cambiare la posizione a letto di
una persona.
• Non sedersi o mettersi in piedi sulla sezione
testa o sulla sezione gambe quando si trovano
in posizione rialzata (vedi g. 3).
Figura 3
• Assicurarsi che durante la procedura di solle-
vamento e di abbassamento non si trovino
persone o parti del corpo sotto o in mezzo alle
parti meccaniche della rete. Sussiste rischio di
schiacciamento!
• Pulire la rete a doghe (telaio, motore, alimen-
tatore e telecomando) solo con un panno
asciutto o leggermente umido. Attenzione:
estrarre innanzitutto la spina dalla presa di
corrente.
Pericolo per le persone
Evitare che liquidi penetrino nei collegamenti a
spina (vedi g. 4).
Figura 4
* Il sistema viene fornito pronto per l’uso. La descrizione succitata è fornita allo scopo di scludere eventuali errori.
wenaFlex®Premium Master con telecomando a li 13
Italiano

Abbassamento d‘emergenza manuale
n caso di mancanza di corrente elettrica con la
rete ancora in posizione rialzata, è possibile ri-
portare larete in posizione orizzontale manual-
mente. Importante: nessuna persona deve
trovarsi nel letto. Per raggiungere il sistema di
abbassamento d‘emergenza, togliere il materas-
so ed estrarre tirandoli gli elementi a molla posti
al di sopra del motore. Spostare la leva rossa
della zona che si desidera abbassare, tirandola
verso il centro del letto (vedi g. 5). Con la leva
tirata, premere la zona sollevata no a riportarla
in posizione orizzontale (vedi g. 6). Una volta
rimesso in funzione il sistema, è nuovamente
possibile spostare la rete normalmente.
Figura 7
Utilizzare i tasti dall’1 al 6. Il motore si aziona
nella direzione desiderata per tutta la durata in
cui viene premuto il corrispondente tasto del te-
lecomando.
Regolazione manuale della sezione testa
Tirare la cinghia posta sulla testata. Rilasciando
la cinghia la sezione si blocca automaticamente
nella posizione desiderata. Possono essere sele-
zionati tre diversi livelli di regolazione. Per riab-
bassare la sezione testa manualmente, tirare
dolcemente la cinghia per spostarsi oltre il terzo
livello di regolazione.
4. Scheda tecnica
Valori validi per tutti i tipi di tensione:
Tensione di entrata: 100–240V ~ 1,2A, 50–60 Hz
Tensione di uscita:24V; 1,5A
Funzionamento intermittente: 2 min. / 10 min.
Numero di motori: 2
Tipo di costruzione dei motori: 24 V DC
Carico massimo: 140 kg (uniformemente
distribuito per tutta la supercie di appoggio)
Forza di bloccaggio: 9.000 N
Forza di compressione: 2 x 4.500 N
Tipo di protezione del sistema completo: IP 20
Temperatura ambiente raccomandata:
+ 10 ° no a + 40 °C
Umidità dell‘aria relativa: 30–75 %
Abbassamento d‘emergenza meccanico (NAS),
realizzato secondo norme VDE, classe di prote-
zione II, omologato da LGA (sicurezza).
Con riserva di eventuali modiche tecniche inte-
se al perfezionamento del sistema.
Figura 6
Figura 5
3. Utilizzo
Utilizzo del telecomando a li (vedi g. 7)
1Sollevamento sezione testa
2Abbassamento sezione testa
3Sollevamento sezione gambe
4Abbassamento sezione gambe
5Sollevamento contemporaneo sezione
testa e sezione gambe
6Abbassamento contemporaneo sezione testa
e sezione gambe
Italiano
14 wenaFlex®Premium Master con telecomando a li

PROBLEMA CAUSA SOLUZIONE
Manca corrente
Non c’è corrente per
l’azionamento
Interruzione corrente elettrica Controllare se c’è corrente elettrica
Fusibile difettoso nel quadro
elettrico
Difetto di fabbrica della presa
Sostituire fusibile
Controllare/collegare la spina
alla presa elettrica
Telecomando o sistema a
motore non funzionano
Telecomando a li non collegato Controllare/collegare la spina
alla presa elettrica
Apparecchio non collegato alla
presa elettrica
Telecomando a li difettoso 1Sostituire il telecomando a li 1
L‘alimentatore non funziona Pile scariche Sostituire le pile
Alimentatore difettoso 2Sostituire l‘alimentatore 2
Improvvisamente non è più
possibile azionare la rete
Non è più possibile avviare il mo-
tore, che però emette un rumore.
Contattare il Servizio Clienti
Wenatex
È scattato il termointerruttore
del trasformatore nel motore
(sovraccarico)
Lasciare a riposo il sistema a
motore per 20 – 30 minuti
¹ Se si dispone di due reti, scambiare per prova uno dei due telecomandi a li.
² Se si dispone di due reti, scambiare per prova uno dei due alimentatori.
Se la rete non dovesse ancora funzionare correttamente, o sussistono danni ai cavi o alle spine, si
prega di contattare il Servizio Clienti Wenatex.
5. In caso di guasto – vericare che …
1. la presa utilizzata eroghi corrente;
2. l‘apparecchio sia collegato alla corrente elettrica;
3. tutti i cavi siano inseriti correttamente (vedere
pagina 13);
4. le pile non siano inserite in modo errato o che
non siano scariche (vedere pagina 13);
5. i cavi o le spine non presentino danni visibili;
6. la denominazione del modello di alimentatore
sia quella corretta.
6. Smaltimento
Il motore, iltelecomando a li e l‘alimentatore com-
prendono parti elettroniche, cavi, metalli e parti in
plastica. Per questo devono essere smaltiti secon-
do le normative per la tutela dell‘ambiente del Pa-
ese in cui vengono utilizzati. Il motore, il teleco-
mando a li e l‘alimentatore non devono essere
gettati insieme ai riuti domestici.
Le istruzioni per lo smontaggio dei componenti
elettrici sono riportate alle pagine da 16a 19.
7. Garanzia
Su tutte le componenti del proprio sistema letto, l’a-
zienda Wenatex ore una garanzia di cinque anni a
partire dalla data d’acquisto. Il periodo di garanzia
non viene né interrotto, né decorre exnovo in seguito
a nostri interventi prestati in garanzia.
Esclusi dalla garanzia sono:
• Difetti derivati da un utilizzo improprio, quali ad
es. uso con violenza, sovraccarico, modiche
eseguite dall’acquirente, ecc.
• Difetti derivati dall’apertura di parti elettriche o
elettroniche (ad esclusione di riparazioni esegui-
te dal produttore).
• Difetti derivati da comune usura, quali logora-
mento degli elementi ammortizzanti, dei listelli
portanti e delle parti in plastica.
Il presente manuale d’uso e le norme di sicurezza sono disponibili anche all’indirizzo: www.wenatex.com
wenaFlex®Premium Master con telecomando a li 15
Italiano

wenaFlex®Premium Master Betteinsatz:
Anleitung zum Motor-Ausbau
1. Trennen Sie den wenaFlex®Premium Master
Betteinsatz vom Stromnetz.
2. Entfernen Sie die Matratze, um Zugang zum
wenaFlex®Premium Master zu erhalten.
3. Trennen Sie das Netzteil vom Motor.
4. Entfernen Sie die gekennzeichneten Feder-
elemente (X), um die Trägerleiste zugänglich
zu machen (siehe Abb. 1). Die Federelemente
werden durch eine halbe Drehung in oder
gegen den Uhrzeigersinn entfernt.
5. Entfernen Sie die Trägerleisten (A), indem
Sie die Halterung vom Rahmen (dem Motor
gegenüberliegende Seite) lösen (siehe
Abb.2).
6. Entfernen Sie diezwei roten Abdeckungen (B)
(siehe Abb. 2).
7. Das Metallgestänge (C) kann durch leichtes
Schieben in Pfeilrichtung und gleichzeitiges
Herausführen aus der Halterung (D) entfernt
werden (siehe Abb. 3).
12. Wenden Sie nun den Betteinsatz.
Vorsicht: Kopf- und Fußteil sind frei beweg-
lich (Klemmgefahr!)
Fortsetzung auf Seite 18 >
wenaFlex®Premium Master bed base:
Instructions for removing the engine
1. Disconnect the wenaFlex®Premium Master
bed base from the mains.
2. Remove the mattress to gain access to the
wenaFlex®Premium Master.
3. Disconnect the power supply unit from the
engine.
4. Remove the markedspring elements (X) to gain
access to the support slat (see Figure 1). The
spring elements are removed by turning them
half way either clockwise or anticlockwise.
5. Remove the support slats (A) by removing the
bracket from the frame (the side opposite the
engine) (see Figure 2).
6. Remove the two red covers (B) (see Figure 2).
7. The metal frame (C) can be removed by gen-
tly pushing it in the direction of the arrow
while at the same time sliding it out from the
bracket (D) (see Figure 3).
12. Now turn the bed frame around.
Caution: Head and foot section are freely
movable (risk of jamming!)
Continued on page 18 >
Rete wenaFlex®Premium Master:
istruzioni per lo smontaggio del motore
1. ScollegaredallareteelettricalaretewenaFlex®
Premium Master.
2. Togliere il materasso per poter accedere alla
rete wenaFlex®Premium Master.
3. Scollegare l’alimentatore dal motore.
4. Rimuovere gli elementi ammortizzanti con-
trassegnati (X) per rendere accessibile il li-
stello portante (vedi gura 1). Per rimuovere
gli elementi ammortizzanti, ruotarli di mezzo
giro in senso orario o antiorario.
5. Togliere i listelli portanti (A) staccando il
supporto dal telaio (lato opposto al motore)
(vedi gura 2).
6. Rimuovere le due coperture rosse (B) (vedi
gura 2).
7. Per rimuovere i tiranti metallici (C) è sucien-
te farli scorrere leggermente in direzione del-
la freccia estraendoli contemporaneamente
dal supporto (D) (vedi gura 3).
12. Voltare ora la rete.
Cautela: zona testa e piedi si muovono libe-
ramente (pericolo di schiacciamento!)
Continua a pag. 18 >
16 wenaFlex®Premium Master mit Kabelhandsender ANHANG
Anhang / Appendix / Appendice

Motor / engine / motore
ANHANG wenaFlex®Premium Master mit Kabelhandsender 17
Anhang / Appendix / Appendice

wenaFlex®Premium Master Betteinsatz: Anleitung zum Motor-Ausbau (Fortsetzung)
9. Lösen Sie die zwei gekennzeichneten
Schrauben (siehe Abb. 4), um die Leisten-
halterung zu entfernen.
(Werkzeug: Kreuzschlitz-Schraubendreher)
10. Lösen Sie nun die beiden gekennzeichneten
Schrauben am Motor (siehe Abb. 5).
(Werkzeug: Torx-Schraubendreher TX10)
11. Entfernen Sie nun den Motor vom Rahmen
(Ziehen in Pfeilrichtung – siehe Abb. 5).
Entsorgung: Der Antrieb, sowie Kabelhandsen-
der und Netzteil enthalten Elektronikbauteile,
Kabel, Metalle, Kunststoe usw. Der Antrieb,
sowie Kabelhandsender und Netzteil sind ge-
mäß den geltenden Umweltvorschrien des je-
weiligen Landes zu entsorgen. Der Antrieb, so-
wie Kabelhandsender und Netzteil dürfen nicht
in den Hausmüll gelangen.
wenaFlex®Premium Master bed base: Instructions for removing the engine (continued)
9. To remove the slat bracket, loosen the two
marked screws (see Figure 4).
(tool: Phillips screwdriver)
10. Now loosen the two marked screws on the
engine (see Figure 5).
(tool: Torx screwdriver TX10)
11. Now remove the engine from the frame (pull
in the direction of the arrow – see Figure 5).
Disposal: The drive unit as well as cable hand
transmitter and power supply unit contain elec-
tronic components, cables, metals, plastics etc.
The drive unit as well as the cable hand transmit-
ter and power supply unit must be disposed of
in accordance with the applicable environmen-
tal regulations in your country. The drive unit as
well as the cable hand transmitter and power
supply unit must not be disposed of with house-
hold waste.
Rete wenaFlex®Premium Master: istruzioni per lo smontaggio del motore (segue)
9. Allentare le due viti contrassegnate (vedi
gura 4) per togliere il supporto del listello
(attrezzo: cacciavite a croce).
10. Allentare le due viti contrassegnate sul
motore (vedi gura 5)
(attrezzo: cacciavite Torx TX10).
11. Estrarre ora il motore dal telaio (tirare in di-
rezione della freccia – vedi gura 5).
Smaltimento: l’azionamento, il telecomando e il
cavo contengono elementi elettronici, cavi, me-
talli, materiale plastico, ecc. Per questa ragione
l’azionamento, il telecomando e il cavo devono
essere smaltiti ai sensi delle norme ambientali
vigenti nel rispettivo paese. L’azionamento, il
telecomando e il cavo non possono essere get-
tati tra i riuti domestici.
18 wenaFlex®Premium Master mit Kabelhandsender ANHANG
Anhang / Appendix / Appendice

ANHANG wenaFlex®Premium Master mit Kabelhandsender 19
Anhang / Appendix / Appendice

www.facebook.com/wenatex
www.wenatex.com/blog
Wenatex Das Schlafsystem GmbH · Münchner Bundesstraße 140 · 5020 Salzburg, Austria
Wenatex Das Schlafsystem GmbH · Sägewerkstraße 5 · 83416 Saaldorf-Surheim, Germany
Wenatex Italia S.r.l. · Via Vittorio Veneto 69 · 39042 Bressanone (BZ), Italy
Wenatex AG · Bankstrasse 4 · 8610 Uster, Switzerland
BMAK_EUEU_2009
EG KONFORMITÄTSERKLÄRUNG
Der Hersteller „Wenatex Forschung Entwicklung Produktion GmbH, Schloßstraße 49, 5282 Rans-
hofen“ erklärt hiermit, dass folgendes Produkt: „Betteinsatz elektrisch verstellbar“, Produktbezeich-
nung: „wenaFlex®Premium Master“ allen einschlägigen Bestimmungen der Richtlinie Maschinen
(2006/42/EG) entspricht.
Folgende harmonisierte Normen wurden angewandt: ÖNORM EN ISO 12100:2013
Sicherheit von Maschinen – Allgemeine Gestaltungsleitsätze – Risikobewertung und Risikominderung
Folgende weitere Normen und Richtlinien wurden angewandt:
• 2014/30/EU elektromagnetische Verträglichkeit
• 2014/35/EU Niederspannungsrichtlinie
• EN 60335-1:2012/A11:2014 Sicherheit elektrischer Geräte für den Hausgebrauch und ähnliche Zwecke
Folgende Betriebsbedingungen und Einsatzumgebungen sind vorauszusetzen:
Bedienung nur bei Sichtkontakt.
EC DECLARATION OF CONFORMITY
The manufacturer “WenatexForschung Entwicklung Produktion GmbH,Schloßstraße 49, 5282 Rans-
hofen” hereby declaresthat the following product: “electrically adjustable bedbase”, productname:
“wenaFlex®Premium Master” meets all relevant provisions of the 2006/42/EC machinery directive.
The following harmonised standards were applied: ÖNORM EN ISO 12100:2013
Safety of machinery – General principles for design – Risk assessment and risk reduction
The following additional standards and guidelines were applied:
• 2014/30/EU electromagnetic compatibility
• 2014/35/EU low-voltage directive
• EN 60335-1:2012/A11:2014 safety of household and similar electrical appliances
The product is designed for the following operating conditions and operational environments:
Product may only be operated if it can be seen.
DICHIARAZIONE DI CONFORMITÀ CE
Ilproduttore“WenatexForschungEntwicklungProduktionGmbH,Schloßstraße49,5282Ranshofen”
dichiara con la presente che il prodotto seguente “Rete a doghe a regolazione elettrica”, denomina-
zione prodotto: “wenaFlex®Premium Master” soddisfa tutte le disposizioni in materia della Direttiva
Macchine (2006/42/CE).
Sono state applicate le seguenti norme armonizzate: ÖNORM EN ISO 12100:2013
Sicurezza macchine – Principi di progettazione – Valutazione dei rischi e riduzione dei rischi
Sono state inoltre applicate le seguenti norme e direttive:
• 2014/30/UE Compatibilità elettromagnetica
• 2014/35/UE Direttiva Bassa Tensione
• EN 60335-1:2012/A11:2014 Sicurezza degli apparecchi elettrici d’uso domestico e similare.
Sono da ritenersi note le seguenti condizioni di funzionamento e d’impiego:
da maneggiare solo a vista.
www.wenatex.com
Table of contents
Languages:
Other WENATEX Indoor Furnishing manuals
Popular Indoor Furnishing manuals by other brands

Resource Decor
Resource Decor Emerson Dining Table manual

Living Essentials
Living Essentials Darlene BMHWWH0114 Assembly instruction

Copeland Furniture
Copeland Furniture Keaton Queen instructions

Modular Closets
Modular Closets SHELF TOWER UNIT Assembly and installation manual

Alice's Home
Alice's Home Floki IFKBEDSIDEX2 manual

Otto
Otto 4424 Assembly instructions

DS Produkte
DS Produkte Z 03141 instructions

Next
Next BRONX U52356 Assembly instructions

Epic Office Furniture
Epic Office Furniture Plantation 6-User Desk Assembly instructions

Movian
Movian AMZ0294 25 quick start guide

Coaster
Coaster 101064 Assembly instructions

Sunnydaze Decor
Sunnydaze Decor RCM-859 manual