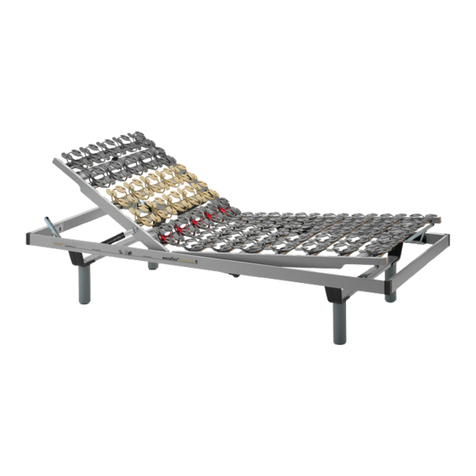
WENATEX Wenaflex Premium M User manual

Bedienungsanleitung/ Operating Instructions / Manuale d’uso
wenaFlex®Premium M
mit Funkhandsender und Notabsenkung
with radio remote control and emergency lowering function
con telecomando senza fili e abbassamento d’emergenza
Symbolfoto · Foto simbolica · Illustration is not binding
www.wenatex.com

ACHTUNG:
Dieses Gerät kann von Kindern ab 8 Jahren und darüber
sowie von Personen mit verringerten physischen, sen-
sorischen oder mentalen Fähigkeiten oder Mangel an
Erfahrung und Wissen benutzt werden, wenn sie be-
aufsichtigt oder bezüglich des sicheren Gebrauchs des
Gerätesunterwiesen wurden und die daraus resultieren-
den Gefahren verstehen.
ATTENTION:
This device can be used by children aged 8 and over or
by persons with reduced physical, sensory or mental
capabilities or persons with lack of experience and
knowledge, as long as they are supervised or have
received instructions on safe use of the device and have
understood potential resulting danger.
ATTENZIONE:
Questo apparecchio può essere utilizzato da bambini di
età superiore agli 8 anni o da persone con limitazioni
siche, sensoriali o mentali o che mancano di esperien-
za solamente sotto sorveglianza o solo se precedente-
mente istruiti riguardo un corretto e sicuro utilizzo
dell’apparecchio e gli eventuali rischi.
2 wenaFlex®Premium M mit Funkhandsender

Deutsch
1. Sicherheitshinweise S. 4
2. Inbetriebnahme und Bedienung S. 5
3. Bedienung mit Funkhandsender
3.1. Hinweise zum Funkbetrieb S. 6
3.2. Inbetriebnahme S. 6
3.3. Programmieren des Funkhandsenders S. 7
3.4. Funktionstasten Funkhandsender S. 7
3.5. Bedienen der Bettverstellung S. 7
3.6. Notabsenkung S. 7
4. Technische Daten
4.1. Technische Daten Antrieb S. 8
4.2. Technische Daten Funkhandsender S. 8
4.3. Technische Daten Funkempfänger S. 8
4.4. Netzfreischaltung S. 8
5. Fehlerbehebung S. 9
6. Entsorgung S. 9
7. Garantie S. 9
ANHANG: Motorausbau S. 22
EG Konformitätserklärung S. 24
Inhalt
1. Safety instructions p. 10
2. Startup and operation p. 11
3. Operation with radio remote control
3.1. Information on radio-controlled
operation p. 12
3.2. Starting up p. 12
3.3. Programming the radio remote
control p. 13
3.4. Radio remote control keys p. 13
3.5. Operating the bed adjustment p. 13
3.6. Emergency lowering p. 13
4. Technical data
4.1. Technical data on the drive p. 14
4.2. Technical data on the radio
remote control p. 14
4.3. Technical data on the radio receiver p. 14
4.4. Mains cut-off p. 14
5. Troubleshooting p. 15
6. Disposal p. 15
7. Guarantee p. 15
APPENDIX: Engine removal p. 22
Declaration of Conformity p. 24
English Content
1. Norme di sicurezza p. 16
2. Messa in funzione e utilizzo p. 17
3. Utilizzo con telecomando senza fili
3.1. Informazioni sul funzionamento
senza fili p. 18
3.2. Messa in funzione p. 18
3.3. Programmazione del telecomando
senza fili p. 19
3.4. Tasti funzione del telecomando
senza fili p. 19
3.5. Comando per la traslazione del letto p. 19
3.6. Abbassamento d’emergenza p. 19
4. Specifiche tecniche
4.1. Dati tecnici azionamento p. 20
4.2. Dati tecnici telecomando senza fili p. 20
4.3. Dati tecnici ricevitore senza fili p. 20
4.4. Disgiuntore di rete p. 20
5. Risoluzione problemi p. 21
6. Smaltimento p. 21
7. Garanzia p. 21
APPENDICE: Smontaggio del motore p. 22
Dichiarazione di conformità p. 24
Italiano Indice
wenaFlex®Premium M mit Funkhandsender 3

1. Sicherheitshinweise
Die Sicherheitshinweise sind unbedingt zu beachten:
• Lesen Sie diese Bedienungsanleitung vor der Verwendung des Bett-
einsatzes aufmerksam durch, um eine sichere und sachgemäße Verwen-
dung zu gewährleisten.
• WirdderBetteinsatzunsachgemäßbetrieben,könnenPersonengefährdet
und Gegenstände beschädigt werden.
• Der Betteinsatz darf ausschließlich in trockenen Räumen verwendet
werden und ist vor Feuchtigkeit zu schützen.
• Den elektrisch verstellbaren Betteinsatz nicht im Freien lagern.
• Dieser elektrisch verstellbare Betteinsatz ist nicht für den Einsatz im
medizinischen Bereich zugelassen.
• Das Önen oder der Austausch der elektrischen Teile darf nur von
Elektrofachpersonal durchgeführt werden.
• Unter angehobenen Teilen des Betteinsatzes dürfen sich keine Personen
oder Gegenstände benden.
• Elektrisch verstellbare Betteinsätze sind keine Spielgeräte für Kinder.
Lassen Sie Kinder mit elektrisch verstellbaren Betteinsätzen nicht
unbeaufsichtigt.
• Reinigung und Benutzer-Wartung dürfen nicht von Kindern ohne
Beaufsichtigung durchgeführt werden.
• Das Antriebssystem darf maximal 2 Minuten durchgehend betrieben
werden. Danach benötigt es eine Pause von mindestens18 Minuten. Wird
das System 1 Minute durchgehend betrieben, beträgt die Pause mindes-
tens 9 Minuten.
• Trennen Sie vor Außerbetriebnahme oder Reinigung das Gerät vom
Versorgungsnetz, um elektrische Schläge auszuschließen.
• Verwenden Sie nur Ersatzteile, die vom Hersteller empfohlen werden. Nur
diese gewährleisten ausreichende Sicherheit.
• Verbrauchte Batterien sind ordnungsgemäß zu entsorgen.
ACHTUNG: Dieses Gerät kann von Kindern ab 8 Jahren und darüber sowie
von Personen mit verringerten physischen, sensorischen oder mentalen
Fähigkeiten oder Mangelan Erfahrung undWissen benutzt werden, wenn sie
beaufsichtigtoderbezüglichdessicherenGebrauchsdesGerätesunterwiesen
wurden und die daraus resultierenden Gefahren verstehen.
Deutsch
4 wenaFlex®Premium M mit Funkhandsender

2. Inbetriebnahme und Bedienung
Bitte überprüfen und beachten Sie folgende
Punkte:
• Nach Lagerung oder Transport bei kalter Witte-
rung oder bei starken Temperaturschwankun-
gen ist das Gerät vor der Inbetriebnahme lang-
sam an die Raumtemperatur des Einsatzortes
anzupassen, um Kondenswasserbildung zu
vermeiden. Hat sich Kondenswasser gebildet,
so darf das Gerät frühestens nach einer Warte-
zeit von 12 Stunden in Betrieb genommen
werden.
• Die Transportsicherungen sind zu entfernen
(z. B. Folien, Karton, Klebebänder, usw.).
• Sind am Betteinsatz bzw. am Antrieb/Funk-
handsender Transportschäden sichtbar?
Wenn ja, kontaktieren Sie den Wenatex-
Kundenservice.
• Prüfen Sie vor der ersten Inbetriebnahme, ob
der Antrieb fest mit dem Gestänge xiert ist.
Wenn nicht, kontaktieren Sie den Wenatex-
Kundenservice.
• Ist die Bettkonstruktion für diesen Betteinsatz
geeignet? (Siehe Abb. 1)
Abbildung 1
• Legen Sie den Betteinsatz so in Ihr Bett ein,
dass er rundum gleichmäßigen Abstand zum
Bettrahmen aufweist.
• Stimmen Stromart und Netzspannung in Ihrem
Haushalt mit den technischen Daten überein?
• Stecken Sie den Netzstecker in die Steckdose.
• Überprüfen Sie, ob der Kabelhandsender
angeschlossen ist.
• Achten Sie auf sachgemäße Leitungsführung
des Netzanschlusses und des Steuerkabels
zum Funkempfänger.
• Überprüfen Sie, ob der Funkempfänger ange-
schlossen ist.
• Schützen Sie alle Kabel vor Quetschungen und
anderen Beschädigungen. Ist dies der Fall,
trennen Sie den Netzstecker sofort vom Strom-
netz!
• Der elektrisch verstellbare Betteinsatz dient
ausschließlich zur Veränderung der Lage von
Personen in einem Bett (siehe Abb. 2).
Abbildung 2
• Kopeil und Fußteilsind in gehobener Position
nicht geeignet, um darauf zu sitzen oder zu
stehen (siehe Abb. 3 und 4).
Abbildung 3 Abbildung 4
• Achten Sie darauf, dass sich beim Heben und
Senken des Betteinsatzes keine Personen und
Körperextremitäten unter bzw. zwischen den
mechanischen Bestandteilen des Betteinsat-
zes benden. Es besteht Quetschgefahr!
• Der elektrisch verstellbare Betteinsatz ist nur
für die zuvor beschriebene Anwendung be-
stimmt. Eine andere Verwendung ist unzuläs-
sig und kann zu Unfällen oder Zerstörung des
Gerätesführen. Diese Anwendungen führen zu
einem sofortigen Erlöschen jeglicher Garantie-
und Gewährleistungsansprüche.
• Der elektrisch verstellbare Betteinsatz darf
nicht zum Heben und Senken von Lasten im
handwerklichen undindustriellenEinsatz oder
im häuslichen Gebrauch verwendet werden.
• Der elektrisch verstellbare Betteinsatz darf
nicht in einer Umgebung, in der mit dem Auf-
treten von entzündlichen oder explosiven
Gasen oder Dämpfen (z. B. Anästhetika) zu
rechnen ist, verwendet werden.
• Der elektrisch verstellbare Betteinsatz darf
nicht in feuchter Umgebung (Oshore-An-
lagen, Meeresbereich) oder im Freien verwen-
det werden.
• Der elektrisch verstellbare Betteinsatz darf
nicht in Flugzeugen und anderen Lufahrzeu-
gen verwendet werden.
• Der elektrisch verstellbare Betteinsatz darf
nicht in Atomkrawerken verwendet werden.
wenaFlex®Premium M mit Funkhandsender 5
Deutsch

• Reinigen Sie den Betteinsatz (Rahmen, Motor,
Gestänge) und den Funkhandsender nur mit
einem trockenen oder leicht feuchten Tuch.
Personengefährdung
• Es darf keine Flüssigkeit in die Steckverbin-
dungen gelangen.
Normalbetrieb
• Beachten Sie die Beschreibung desFunkhand-
senders und die Zeichenerklärung.
• Überprüfen Sie alle 6 Monate die Funktion der
Notabsenkung und erneuern Sie die 9-Volt-
Blockbatterie. (Verwenden Sie nur eine
Alkaline-Batterie!)
Batterie-Notabsenkung
Wenn der Strom ausfällt, während der elektrisch
verstellbare Betteinsatz in angehobener Position
ist, können Sie ihn mitdem Funkhandsender wie-
der in die flache Liegeposition absenken. Voraus-
setzung hierfür ist, dass die 9-Volt-Batterie ange-
schlossen ist. Die Kapazität der Batterie reicht
nur für eine Notabsenkung aus.Tauschen Sie die
Batterie danach aus.
3. Bedienung mit Funkhandsender
3.1. Hinweise zum Funkbetrieb
• Die Reichweite des Funkhandsenders kann
von den jeweiligen örtlichen Bedingungen be-
einflusst werden.
• Andere mit Funk betriebene Geräte können
den Betrieb des Funkhandsenders und des
Funkempfängers beeinträchtigen. Hierzu ge-
hören beispielsweise: Mobilfunk Sendemas-
ten, Mobiltelefone und Funk-Bestellsysteme in
Restaurants.
• Montieren Sie den Empfänger nicht direkt auf
einer Metallplatte, um einen guten Empfang zu
gewährleisten! Halten Sie zu metallischen Ge-
genständen einen Mindestabstandvon 3bis 4
Zentimetern ein.
• Dieser Sender kann in den Ländern der EU
ohne Einschränkungen betrieben werden. Die
Voraussetzungen für den Betrieb in anderen
Ländern können abweichend sein. Wir emp-
fehlen in diesem Fall die Rücksprache mit den
jeweiligen staatlichen Regulierungsbehörden!
3.2. Inbetriebnahme
Das System wird fertig vorbereitet ausgeliefert!
Nur die Batterie für die Notabsenkung muss mit
dem System verbunden werden! Die folgende
Beschreibung dient zur Fehlerbehebung!
• Verbinden Sie die
Batterie für die
Notabsenkung mit
dem System. Dies ist
unbedingt erforder-
lich, da die Batterie
auch für die Netzfrei-
schaltung verwendet
wird. (siehe Abb. 5)
• Önen Sie das
Batteriefach Ihres
Handsenders. Legen
Sie die Batterien in
das Batteriefach ein
und schließen Sie es
dann. Bitte achten Sie
auf die richtige Pola-
rität. (siehe Abb. 6)
• Önen Sie das Bat-
teriefach des Funk-
empfängers. Verbin-
den Sie die beiden
9-V-Blockbatterien
mit den Kontakten
und schließen Sie
das Batteriefach.
(siehe Abb. 7)
• Schließen Sie den Funk-Empfänger (A) an der
Buchse (B) des Verstellantriebs an.
Abbildung 5
Abbildung 6
Abbildung 7
Deutsch
6 wenaFlex®Premium M mit Funkhandsender

• Ziehen Sie das Kabel des Funk-Empfängers
durch die Zugentlastung (C). (siehe Abb.
8und9)
• Stecken Sie zuletzt den Stecker mit der Netz-
freischaltung (D) in die Steckdose. (siehe
Abb.8)
Abbildung 8
Abbildung 9
3.3. Programmieren des Funkhandsenders
• Drücken Sie die rote Pairing-Taste (E) am
Funkempfänger 2-mal
kurz. Die grüne LED (F)
beginnt zu leuchten,
der Funkempfänger ist
jetzt für ca. 10 Sekun-
den im Lernmodus.
(siehe Abb. 10)
• Drücken Sie das
oberste Tastenpaar
(1+2) an Ihrem Hand-
sender und halten
Sie es gedrückt, bis
die LED am Funk-
empfänger erlischt.
(siehe Abb. 11)
• Istdie LED amFunkempfänger erloschen,ist der
Pairing-Vorgang abgeschlossen. DasSystem ist
betriebsbereit.
3.4. Funktionstasten Funkhandsender
(siehe Abb. 12)
1Kopeil hoch
2Kopeil runter
3Fußteil hoch
4Fußteil runter
5Kopf- und Fußteil
gleichzeitig hoch
6Kopf- und Fußteil
gleichzeitig runter
3.5. Bedienen der Bettverstellung
Verwenden Sie die Tasten 1 bis 6. So lange Sie
eine Taste drücken, wird der entsprechende
Antrieb bewegt.
3.6. Notabsenkung
Die Notabsenkung ermöglicht das Einfahren des
Systems zur Basisposition bei einem Stromaus-
fall. Der Antrieb wird über eine 9-V-Blockbatterie
mitSpannung versorgt. Die Batterie istim Gehäu-
se des Antriebs untergebracht. Die Batterie ist für
den Transport gesichert und muss vor der ersten
Inbetriebnahme an den Batterieclip angeschlos-
senwerden.(sieheBeschreibungunterPunkt3.2.)
Hinweis
• Aufgrund der stark begrenzten Kapazität der
Batterie kann nur eine einzige Notabsenkung
ausgeführt werden. Danach ist die Batterie
auszutauschen.
• Es ist darauf zu achten, dass die Batterie im-
mer volle Kapazität hat.
Abbildung 12
Abbildung 10
Abbildung 11
wenaFlex®Premium M mit Funkhandsender 7
Deutsch

Ausführen der Notabsenkung
Um eine Notabsenkung durchzuführen gehen Sie
wie folgt vor:
• Betätigen Sie wie gewohnt die Taste(n) an Ih-
rem Funkhandsender, die Ihr System in die
Basisposition fährt.
4. Technische Daten
4.1. Doppelantrieb inkl. Schaltnetzteil
Hubkra: 2 x 4.500 N
Hub: Rücken 87 mm, Fuß 69 mm
Motorspannung: 24 V DC Gleichstrommotoren
Arbeitsstrom: 3,15 A
Netzfrequenz: 50/60 Hz
Einschaltdauer: 10 %, 2 Min. ein, 18 Min. aus
Batterie Notabsenkung: 9 V Alkaline
Schutzgrad: IP20
Schutzklasse: II
Einbaumaß: 581 mm, +/– 2 mm
Handschalterbuchse: 5-polig
4.2. Funkhandsender
Spannungsversorgung: 3 V DC
Batterien: 2 x 1,5 V AAA; MICRO; LR03
Arbeitsstrom: < 15 mA
Standby-Stromverbrauch: < 5 μA
Frequenzbereich: 2,4 GHz
Abmessungen: 128 x 40 x 17 mm
4.3. Funkempfänger
Spannungsversorgung: 18 V DC
Batterien: 2 x 9 V Alkaline
Arbeitsstrom: < 250 mA
Standby-Stromverbrauch: < 5 mA
Frequenzbereich: 2,4 GHz
Abmessungen: 102 x 58 x 25 mm
4.4. Netzfreischaltung
Die Netzfreischaltung verhindert magnetische
und elektrische Wechselfelder am Bett, es wird
kein Stand-by Transformator benötigt.
Ausschließlich beim Betätigen des Handschal-
ters fließt Strom, zu jeder anderen Zeit bleibt das
Bett spannungsfrei.
Ein mit Gleichstrom geladener Kondensator im
Antrieb führt dem 2-poligen Relais in der Netzfrei-
schaltung Strom zu und schaltet den Transforma-
tor im Antrieb ein.
Dabei wird der Kondensator wieder aufgeladen
und ist für die nächste Betätigung vorbereitet.
Hinweis:
NachlängererNichtbenutzung,kann der Konden-
sator seine Spannung verlieren. Die eingebaute
9V- Batterie der Notabsenkung puert dann
ebenfalls den Kondensator der Netzfreischal-
tung.
Sollte im ganz unwahrscheinlichen Fall auch die
Batterie leer sein, ist selbst dann ein problemlo-
ser Weiterbetrieb möglich.
Drücken Sie die grüne Taste (D) an der Netzfrei-
schaltung (siehe Abb. 8, Seite 7). Der Kondensa-
tor wird dann sofort aufgeladen und die Netzfrei-
schaltung ist wieder einsatzbereit.
Deutsch
8 wenaFlex®Premium M mit Funkhandsender

5. Fehlerbehebung – Was ist zu tun, wenn …?
PROBLEM URSACHE LÖSUNG
Keine Spannung
Keine Steuerspannung
vorhanden
Zuleitungen unterbrochen Zuleitung prüfen
Sicherungen im E-Verteiler
defekt
Steckdose bauseits defekt
Sicherungen erneuern
Steckvorrichtung überprüfen/
einstecken
Funkhandsender
oder Antriebssystem
funktioniert nicht
Funk-Empfänger nicht eingesteckt Steckvorrichtung überprüfen/
einstecken
Antriebssystem nicht eingesteckt
Funkhandsender defekt
Batterien richtig einlegen
Batterien wechseln
Funkhandsender wechseln
Funkfrequenz falsch eingestellt Teach-in-Prozedur erneut
durchführen
Notabsenkung lässt sich
nicht durchführen
Blockbatterie leer Blockbatterie erneuern
Unter dem Betteinsatz
benden sich Gegenstände Freiraum schaen
Der Antrieb lässt sich plötzlich
nicht mehr bewegen
Thermoschalter am Trafo im
Motor wurde möglicherweise
ausgelöst (Überlastung)
Das Antriebssystem
ca. 20 bis 30 Minuten in
Ruhestellung belassen
Kondensator für Netz-
freischaltung ist entladen
Grüne Taste (D) am Netzstecker
drücken (Abb. 8, Seite 7)
Sollte das Bettsystem immer noch nicht einwandfrei funktionieren, oder Beschädigungen an Kabeln
bzw. Steckern vorliegen, wenden Sie sich bitte an den Wenatex- Kundenservice.
7. Garantie
Die Firma Wenatex gewährt eine Garantie von fünf
Jahren ab Kaufdatum auf alle Bestandteile Ihres
Wenatex-Schlafsystems. Mit unserer Garantie-
leistung wird die laufende Garantiezeit nicht un-
terbrochen,esbeginntauchkeineneue Garantie-
frist zu laufen.
Ausgenommen von der Garantie sind:
• Mängel, die durch unsachgemäße Behand-
lung verursacht wurden, z. B. Anwendung von
Gewalt, Überlastung, vom Käufer durchgeführ-
te Veränderungen, etc.
• Schäden, die durch das Önen von elektri-
schen oder elektronischen Bauteilen entste-
hen (ausgenommen Reparaturen durch den
Hersteller).
• Mängel, die auf natürlicher Abnützung beru-
hen, z. B. Ermüdung von Federelementen,
Trägerleisten oder Kunststoeilen.
Diese Bedienungsanleitung und die Sicherheitshinweise nden Sie auch unter: www.wenatex.com
6. Entsorgung
Der Antrieb und der Handsender enthalten Elek-
tronikbauteile, Kabel, Metalle, Kunststoe usw.
Die elektrischen Komponenten sind gemäß den
geltenden Umweltvorschrien des jeweiligen
Landes zu entsorgen.
In Deutschland können die elektrischen Kom-
ponenten bei kommunalen Sammelstellen
kostenfrei abgegeben werden (WEEE-Reg.-Nr.:
DE 81994808).
Durchdie ordnungsgemäße Entsorgung leistenSie
einen aktiven Beitrag zum Schutz unserer Umwelt.
Die elektrischen Komponenten dürfen nicht in
den Hausmüll gelangen. Batterien dürfen nicht
über den Hausmüll entsorgt werden!
Die Anleitung zum Ausbau der elektrischen Kom-
ponenten nden Sie auf den Seiten 22und 23.
wenaFlex®Premium M mit Funkhandsender 9
Deutsch

1. Safety instructions
Safety instructions must be implicitly observed:
• In order to ensure safe and correct use, please read the operating
instructions carefully before using the bed base.
• If the bed base is used incorrectly, it may present a potential danger to
persons or cause damage to nearby objects.
• The bed base is only allowed to be used in dry rooms and has to be pro-
tected against exposure to moisture.
• The electrically adjustable bed base should not be kept outdoors.
• This electrically adjustable bed base in not licensed for use in the medical
eld.
• Electrical parts may only be opened or exchanged by qualied electri-
cians.
• No persons or objects should be located beneath the raised parts of the
bed base.
• Electricallyadjustable bed bases are not to be played with or used astoys
bychildren.Smallchildrenshouldnotbe leunattendedwithelectrically
adjustable bed bases.
• Cleaning anduser maintenance tasksare not allowed to be performed by
children without supervision.
• The drive system is only allowed to be used in continuous operation for a
maximum duration of 2 minutes.Subsequent to such continuous use, the
system needs a break of at least 18 minutes. If the system is used in con-
tinuous operation for a duration of 1 minute, the system subsequently
needs a break of at least 9 minutes.
• Before decommissioning or cleaning, disconnect the device from the
mains power supply in order to eliminate the risk of electric shocks.
• Only use spare parts that are recommended by the manufacturer. Only
such parts can ensure a sucient level of safety.
• Used batteries are to be disposed of in an appropriate manner.
ATTENTION: This device can be used by children aged 8 and over or by
persons with reduced physical, sensory or mental capabilities or persons
with lack of experience and knowledge, as long as they are supervised or
have received instructions on safe use of the device and have understood
potential resulting danger.
English
10 wenaFlex®Premium M with radio remote control

2. Startup and operation
Please check and observe the following points:
• Aer storage or transport in cold conditions or
during extreme temperature fluctuations, the
device needs to be slowly adapted to the room
temperature of the operating environment in
order to avoida development of water conden-
sation before performing startup. If water con-
densation has developed, the device is not
allowed to be put into operation for at least 12
hours.
• The transport safetydevices are to be removed
(i. e.: foil, carton, adhesive tape etc.)
• Are there any visible signs of transport damage
on the bed base or on the drive/radio remote
control? If so, please contact the Wenatex cus-
tomer service department.
• Before performing the initial startup, check to
ensure that the drive is securely xed to the rod
system. If not, please contact the Wenatex
Customer Service Department.
• Is the bed construction suitable for this bed
base? (See illustration 1)
Illustration 1
• Insert the bed base so that the frame has an
even distance all the way around within the
bed frame.
• Is the type of current and supply voltage in your
home in compliance with the relevant techni-
cal data?
• Insert the plug into the electric socket.
• Checkto ensure thatthe mains connection and
the control cable to the radio receiver are
correctly wired.
• Check to ensure that the radio receiver is con-
nected.
• Protect all cables against crushing or other
forms of potential damage. If any cables are
crushed or damaged, immediately disconnect
the mains plug from the power supply system!
• The electrically adjustable bed base is only to
be used for the purpose of changing or
adjusting the position of a person in a bed (see
illustration 2).
Illustration 2
• While in a raised position, the head and foot
sections are not suitable for sitting or standing
on (see illustrations 3 and 4).
Illustration 3 Illustration 4
• Ensure that no persons or body extremities
are located beneath or between the mechan-
ical components of the bed base when raising
or lowering any sections of the bed base.
Crushing hazard!
• The electrically adjustable bed base is only
intended for use as aforementioned. Any other
formofuse is inappropriate/ inadmissible and
can lead to accidents or the destruction of the
device.Such inappropriate use will result in an
immediate termination of any guarantee and
warranty claims.
• The electrically adjustable bed base is not
allowed to be used for liing and lowering
heavy objects in an industrial context or for
work-related activities within the household.
• The electrically adjustable bed base is not
allowed to be used in an environment in which
it may be exposed to inflammable or explosive
gasses or fumes (e.g. anaesthetics).
• The electrically adjustable bed base is not
allowedto be used in damp environments (o-
shore installations, at or directly by the sea) or
outdoors.
• The electrically adjustable bed base is not
allowed to be used within aeroplanes or other
forms of aircra.
• The electrically adjustable bed base is not
allowed to be used at nuclear power stations.
wenaFlex®Premium M with radio remote control 11
English

• Only use a dry or slightly damp cloth to clean
the bed base (frame, motor, rod system) and
the radio remote control.
Risk of danger to persons
• No liquids are allowed to enter the plug and
socket connections.
Normal operation
• Observe the descriptions and the respective
symbols of the radio remote control.
• Checkthe operation ofthe emergency lowering
function every 6 months and then exchange
the 9 volt battery. (Only use an alkaline bat-
tery!)
Battery-operated emergency lowering
If a power outage should occur while the adjust-
able bed base is in a raised position, you can
lower it back down to a reclining position again
with the aid of the radio remote control. The pre-
requisite for this is that the 9 volt battery is prop-
erly connected. The capacity of the battery is
only sucient for one lowering sequence.
Exchange the battery aer using for a lowering
sequence.
3. Operation with radio remote control
3.1. Information on radio-controlled operation
• The range of the radio remote control may pos-
sibly be influenced by the respective local con-
ditions.
• Other radio-operated devices may impair the
operation of the radio remote control and the
radioreceiver.Amongtheseinterferingdevices
are,forinstance:mobilecommunicationtrans-
mitter masts, mobile phones and radio-oper-
ated ordering systems in restaurants.
• In order to ensure a good reception, do not
mount the receiver directly onto a metal sheet
or plate! Keep the receiver at a minimum dis-
tance of 3 to 4 centimetres away from metal
objects.
• This transmitter can be operated in EU countries
withoutrestrictions.The requirementsforuse in
other countries may possibly vary. If this may be
the case,then werecommendconsultationwith
the respective national regulating authority!
3.2. Starting up
The system is delivered in a ready-to-use condi-
tion! Onlythe battery for theemergency lowering
sequence needs to be connected to the system!
Observe the following in order to avoid or reme-
diate faults!
• Connect the battery
for the emergency
lowering sequence
with the system. This
is absolutely neces-
sary because the bat-
tery is also used for
the mains cut-o.
(see illustration 5)
• Open the battery
compartment of the
radio remote control.
Insert batteries into
the compartment and
then close it. Please
ensure that the bat-
teries are inserted
with the correct polar-
ity. (see illustration 6)
• Open the battery
compartment of the
radio receiver. Con-
nect the two 9V block
batteries to the con-
tacts and then close
the battery compart-
ment.
(see illustration 7)
• Connect the radio receiver (A) to the socket (B)
of the adjustment drive.
Illustration 5
Illustration 6
Illustration 7
English
12 wenaFlex®Premium M with radio remote control

• Carefully pull the radio receiver cable through
the strain relief clamp (C). (see illustrations
8and 9)
• Finally, insert the plug with the mains cut-o
(D) into the socket. (see illustration 8)
Illustration 8
Illustration 9
3.3. Programming the radio remote control
• Press 2 times briefly on the red pairing key (E)
on the radio receiver.
The green LED (F)
begins to light up;
the radio receiver is
now in learning mode
for approximately
10seconds.
(see illustration 10)
• Press the top pair of
keys (1+2) on the
radio remote control
and keep them
pressed until the
LED on the radio
receiver goes o.
(see illustration 11)
• When the LED on the radio receiver goes o,
the pairing process is concluded. The system
is ready for operation.
3.4. Radio remote control keys
(see illustration 12)
1Raise head section
2Lower head section
3Raise foot section
4Lower foot section
5Raise head and
footsection
simultaneously
6Lower head and
foot section
simultaneously
3.5. Operating the bed adjustment functions
Use the keys 1 to 6. When you press a key, the
respective drive is set in motion.
3.6. Emergency lowering
The emergency lowering feature enables the sys-
tem to retract to its basic position in case of a
power failure.The drive is supplied with power via
a 9V block battery. The battery is housed within
the drive box. The battery is secured for transport
and has to be connected to the battery clip before
initial startup can be performed. (see information
below point 3.2.)
Note:
• Due to the severely limited capacity of
the battery, only one single emergency
lowering sequence canbe performed. Then the
battery has to be exchanged.
• Ensure that the battery is always fully charged.
Illustration 12
Illustration 10
Illustration 11
wenaFlex®Premium M with radio remote control 13
English

Performance of emergency lowering
In order to perform emergency lowering, proceed
as follows:
• Press the respective key(s) on the hand-held
transmitter that drive(s) the system back to the
basic position.
4. Technical data
4.1. Twin drive incl. switch-mode power supply
Liing force: 2 x 4,500 N
Li: head 87 mm, foot 69 mm
Motor voltage: 24 V DC motors
Operating current: 3.15 A
Power frequency: 50/60 Hz
Power-on time: 10 %, 2 min. on, 18 min. o
Battery-operated emergency lowering:
9 V alkaline
Degree of protection: IP20
Protection class: II
Installation dimension: 581 mm, +/– 2 mm
Handset socket: 5-pole
4.2. Radio remote control
Power supply: 3 V DC
Batteries: 2 x 1.5 V AAA; MICRO; LR03
Operating current: < 15 mA
Standby power consumption: < 5 μA
Frequency range: 2.4 GHz
Dimensions: 128 x 40 x 17 mm
4.3. Radio receiver
Power supply: 18 V DC
Batteries: 2 x 9 V alkaline
Operating current: < 250 mA
Standby power consumption: < 5 mA
Frequency range: 2.4 GHz
Dimensions: 102 x 58 x 25 mm
4.4. Mains cut-o
The mains cut-o feature prevents magnetic and
electrical alternating elds on the bed, whereby
no stand-by transformer is required. Electrical
current only flows when the hand control switch
is activated, otherwise the bed remains de-ener-
gised. A capacitor in the drive, which is charged
with direct current, supplies power to the 2-pole
relay in the mains cut-o and switches on the
transformer in the drive. The capacitor is thereby
recharged and is prepared for the next activation.
Note:
When not in use over longer periods of time, the
capacitor can lose its electrical potential. The in-
stalled 9 V battery of the emergency lowering
feature then also buers the capacitor of the
mains cut-o.
Even in the unlikely case that the battery should
also be empty, further operation can be per-
formed without any problems. Press the green
key (D) on the plug/mains cut-o (see illustration
8, page 13). The capacitor is then immediately
charged and the mains cut-o is ready for opera-
tion again.
English
14 wenaFlex®Premium M with radio remote control

5. Troubleshooting – what to do when …?
6. Disposal
The drive unit and the hand transmitter contain
electronic components, cables, metals, plastics
etc. The drive unit and the hand transmitter must
be disposed in accordance with the applicable
environmental regulations in your country.
The drive unit and the hand transmitter must not
be disposed of with household waste. Batteries
are not allowed to be disposed of along with
household waste!
The instructions for removing the electrical com-
ponents can be found on pages 22and 23.
7. Guarantee
Wenatex provides a ve year guarantee on all
components of the Wenatex sleep system, start-
ing as of the respective date of purchase. Full-
ment of a guarantee claim does not automati-
cally suspend the running guarantee period, nor
does it mark the beginning of a new guarantee
period.
The following are excluded from the guarantee:
• Defects that were caused by inappropriate
handling, i.e. use offorce, overloading, chang-
es performed by the buyer etc.
• Damages caused by opening up electrical or
electronic components (unless the compo-
nents were opened by a technician on behalf
of the manufacturer).
• Defects caused by natural wear and tear, i.e.
material fatigue of the spring elements,
support slats or plastic parts.
You can also nd these operating instructions and safety instructions on: www.wenatex.com
PROBLEM CAUSE SOLUTION
No voltage
No control voltage is provided
Supply lines interrupted/
disconnected Check supply line
Fuses defect in the electrical
distributor
Customer’s electrical socket defect
Exchange fuses
Check/connect plug and socket
connections
Radio remote control
or drive system does not work
Radio remote control not plugged in
Check/connect the plug
and socket
Drive system not plugged in
Radio remote control defect
Insert batteries correctly
Exchange batteries
Exchange radio remote control
Wrong radio frequency setting Repeat teach-in procedure
Emergency lowering function
cannot be performed
Monobloc battery empty Exchange monobloc battery
Objects are located
beneath the bed base Clear space
Suddenly the drive cannot
be set in motion
Thermal circuit breaker on the
motor transformer is possibly
actuated (overload)
Leave the drive system in an
inoperative state for approx.
20to 30 minutes
Capacitor for the mains cut-o
is drained
Press the green key (D) on the
plug/mains cut-o
(illustration 8, page 13)
If the bed system still doesn’t work properly, or if there appears to be damage to cables or connectors,
please contact Wenatex Customer Service
wenaFlex®Premium M with radio remote control 15
English

1. Norme di sicurezza
Prestare molta attenzione alle norme di sicurezza:
• Leggere attentamente le istruzioni d’uso della rete a doghe elettrica in
modo da garantirne un corretto e sicuro utilizzo.
• Un non corretto utilizzo della rete può costituire un pericolo per le persone
e danneggiare oggetti.
• La rete deve essere utilizzata solamente in luoghi asciutti e deve essere
protetta dall’umidità.
• Non collocare all’aperto la rete a regolazione elettrica.
• Questa rete a doghe elettrica non è adatta all’impiego in ambito medico.
• L’apertura o la sostituzione di parti elettriche deve essere eettuata so-
lamente da personale specializzato.
• Persone od oggetti non devono mai trovarsi sotto le parti sollevate della
rete.
• Le reti elettriche non sono giocattoli per bambini. Evitare di lasciare i
bambini senza sorveglianza in presenza di reti elettriche.
• Pulizia, utilizzo e manutenzione non devono essere eettuate da bambi-
ni senza sorveglianza.
• L’utilizzo continuo del sistema a motore non deve superare i due minuti.
Dopo un uso continuativo così lungo, attendere almeno 18 minuti prima
un nuovo utilizzo. Se il sistema a motore viene utilizzato continuativa-
mente per un minuto, attendere almeno 9 minuti prima di un nuovo uti-
lizzo.
• Prima di pulire o mettere fuori servizio l’apparecchio, staccarlo dalla cor-
rente, così da escludere eventuali scosse elettriche.
• Utilizzare solo pezzi di ricambio consigliati dal produttore. Solo questi
possono garantire un’adeguata sicurezza.
• Le pile usate dovranno essere smaltite conformemente alla normativa
vigente.
ATTENZIONE: Questo apparecchio può essere utilizzato da bambini di età
superiore agli 8 anni o da persone con limitazioni siche, sensoriali o men-
tali o che mancano di esperienza solo sotto sorveglianza o solo se prece-
dentemente istruiti riguardo un corretto e sicuro utilizzo dell’apparecchio e
gli eventuali rischi.
Italiano
16 wenaFlex®Premium M con telecomando senza li

2. Messa in funzione e utilizzo
Prestare attenzione e osservare i punti seguenti:
• Una volta che l’apparecchio è stato posiziona-
to o trasportato in condizioni meteo avverse o
sotto l’eetto di forti oscillazioni termiche, ri-
portarlo lentamente alla temperatura ambien-
te del luogo d’impiego prima di rimetterlo in
funzione, così da evitare la formazione di con-
densa. Se si è formata della condensa, l’appa-
recchio può essere messo in funzione soltanto
al termine di un tempo di attesa di almeno
12ore.
• Togliere l’imballaggio di sicurezza (ad es. pel-
licole, cartone, nastro, ecc.).
• Sono visibili danni su rete, motore o teleco-
mando dovuti al trasporto? In caso positivo
contattare il servizio clienti Wenatex.
• Prima della messa in funzione vericare che il
motore sia ssato alla rete. In caso negativo,
contattare il servizio clienti Wenatex.
• Il giroletto posseduto è adatto a questo tipo di
rete? (vedi g. 1)
Figura 1
• Appoggiare la rete in modo tale che la distanza
dal giroletto sia la stessa da tutti i quattro i lati.
• Tensione di alimentazione e tensione di rete
corrispondono a quelle indicate nelle speci-
che tecniche?
• Inserire la spina nella presa della corrente.
• Vericare che la linea elettrica e il cavo di
comando siano correttamente collegati al
ricevitore senza li.
• Vericare che il ricevitore radio sia collegato.
• Proteggere i cavi da schiacciamenti e altri dan-
neggiamenti. Se ciò succedesse, scollegare
subito la spina dalla rete elettrica!
• La rete a doghe elettrica deve essere utilizzata
solamente per cambiare la posizione a letto di
una persona (vedi g. 2).
Figura 2
• Non sedersi o mettersi in piedi sulla sezione
testa o sulla sezione gambe quando si trovano
in posizione rialzata (vedi gg. 3 e 4).
Figura 3 Figura 4
• Assicurarsi che durante la procedura di solle-
vamento e di abbassamento non si trovino
persone o parti del corpo sotto o in mezzo alle
parti meccaniche della rete. Sussiste rischio di
schiacciamento!
• La rete a regolazione elettrica è indicata solo
per l’uso descritto in precedenza. Non sono
ammessi altri impieghi, che potrebbero provo-
care incidenti o danneggiamenti dell’apparec-
chio e che comportano l’immediata decaden-
za di qualsiasi diritto di garanzia.
• La rete a regolazione elettrica non deve essere
utilizzata per sollevare o abbassare carichi
nell’ambito di attività artigianali, industriali o
domestiche.
• La rete a regolazione elettrica non deve essere
utilizzata in ambienti in cui si manipolano gas
o vapori inammabili o esplosivi (ad es. ane-
stetici).
• La rete a regolazione elettrica non può essere
utilizzata in ambienti umidi (impianti oshore,
in prossimità del mare) o all’aperto.
• La rete a regolazione elettrica non deve essere
utilizzata su aerei o altri aeromobili.
• La rete a regolazione elettrica non deve essere
utilizzata in centrali nucleari.
wenaFlex®Premium M con con telecomando senza li 17
Italiano

• Pulire la rete a doghe (telaio, motore, alimen-
tatore) solo con un panno asciutto o legger-
mente umido.
Pericolo per le persone
• Evitare che liquidi penetrino nei collegamenti
a spina.
Normale utilizzo
• Leggere attentamente le istruzioni del teleco-
mando e i simboli sui pulsanti.
• Vericare ogni 6 mesi la funzione dell’abbas-
samento d’emergenza e sostituire le pile da 9
volt (utilizzare solamente pile alcaline!).
Abbassamento d’emergenza a pile
Nel caso in cui mancasse la corrente elettrica e la
rete si trovasse in posizione rialzata, è possibile,
tramite il tasto per l’abbassamento d’emergenza
sul ricevitore radio, riportare la rete in posizione
orizzontale a condizione che siano state inserite
le pile da 9 volt. La carica delle pile è suciente
per un solo abbassamento d’emergenza. Dopo-
diché è necessario sostituirle.
3. Utilizzo con telecomando senza li
3.1. Informazioni sul funzionamento senza li
• Il raggio d’azione del telecomando senza li
può essere influenzato dalle condizioni del
luogo in cui è utilizzato.
• Altri apparecchi radio in funzione, quali ripeti-
tori telefonici, cellulari o sistemi d’ordinazione
via radio nei ristoranti possono pregiudicare il
funzionamento del telecomando e del ricevito-
re radio.
• Non montare il ricevitore direttamente su un
piano di metallo per garantire un buon segna-
le! Tenere il ricevitore ad una distanza minima
di 3 – 4 centimetri da oggetti di metallo.
• Il funzionamento di questo telecomando è pre-
visto all’interno dei paesi della UE senza limi-
tazioni. Diversi possono essere i requisiti ri-
chiesti per azionarlo in altri paesi. In questo
caso consigliamo di contattare le autorità di
regolamentazione dei rispettivi stati!
3.2. Messa in funzione
Il sistema viene fornito pronto per l’uso. Solo la
batteria per l’abbassamento d’emergenza deve
essere collegata al sistema. La descrizione che
segue è fornita allo scopo di escludere eventuali
errori.
• Collegare al sistema
la batteria per l’ab-
bassamento d’emer-
genza. Questa opera-
zione è indispensabile
in quanto la batteria
viene utilizzata an-
che per il disgiuntore
di rete (vedi g. 5).
• Aprire il vano porta-
batteria del teleco-
mando. Inserire le
batterie nel vano e ri-
chiudere. Prestare at-
tenzione alla corretta
polarità (vedi g. 6).
• Aprire il vano porta-
batteria del ricevitore
senza li. Collegare
le due batterie rettan-
golari da 9 volt ai
contatti e chiudere il
vano (vedi g. 7).
• Collegare il ricevitore senza li (A) alla presa
(B) del dispositivo di traslazione.
Figura 5
Figura 6
Figura 7
Italiano
18 wenaFlex®Premium M con con telecomando senza li

• Passare il cavo del ricevitore senza li attraver-
so il serracavo (C) (vedi gg. 8 e 9).
• Inne inserire la spina con il disgiuntore di
rete (D) nella presa (vedi g. 8).
Figura 8
Figura 9
3.3. Programmazione del telecomando senza li
• Premere brevemente per 2 volte il pulsante
rosso di accoppiamento (E) posto sul ricevito-
re senza li. Il LED ver-
de (F) si accende e il ri-
cevitore senza li
rimane per circa 10 se-
condi in modalità di
apprendimento (vedi
g. 10).
• Premere i due tasti
posti più in alto (1+2)
sul telecomando e te-
nerli premuti nché il
LED sul ricevitore sen-
za li non si spegne
(vedi g. 11).
• Se il LED sul ricevitore senza li è spento, la
procedura di accoppiamento è conclusa. Ilsi-
stema è pronto per l’uso.
3.4. Tasti funzione telecomando senza li
(vedi g. 12)
1 Zona testa in alto
2Zona testa in basso
3Zona piedi in alto
4Zona piedi in basso
5Zona testa e piedi
insieme in alto
6Zona testa e piedi
insieme in basso
3.5. Azionare regolazione
Utilizzare i tasti dall’1 al 6. Il motore si aziona
nella direzione desiderata per tutta la durata in
cui viene premuto il corrispondente tasto del te-
lecomando.
3.6. Abbassamento d’emergenza
L’abbassamento d’emergenza consente al siste-
ma di rientrare nella posizione di partenza in caso
di avaria di corrente. L’azionamento è alimentato
da una batteria rettangolare da 9 volt. La batteria
è alloggiata nell’involucro dell’azionamento ed è
assicurata per il trasporto. Deve essere collegata
alla clip prima della messa in funzione iniziale
(vedi descrizione al punto 3.2).
Nota
• A causa della limitata capacità della batteria,
è possibile eettuare un solo abbassamento
d’emergenza, dopodiché la batteria deve
essere sostituita.
• Fare in modo che la batteria sia sempre com-
pletamente carica.
Figura 12
Figura 10
Figura 11
wenaFlex®Premium M con con telecomando senza li 19
Italiano

Esecuzione dell’abbassamento d’emergenza
Per eseguire un abbassamento d’emergenza se-
guire la procedura qui descritta:
• Azionare come di consueto il/i tasto/i sul tele-
comando senza li, che porta/no il sistema in
posizione di partenza.
4. Scheda tecnica
4.1. Doppio azionamento compreso alimentato-
re a commutazione
Forza di sollevamento: 2 x 4.500 N
Corsa: schiena 87 mm, piedi 69 mm
Tensione motore: 24 V CC motori a corrente
continua
Corrente di lavoro: 3.15 A
Frequenza di rete: 50/60 Hz
Durata di accensione: 10%, 2 min on, 18 min o
Batteria abbassamento d’emergenza:
9 V alcalina
Grado di protezione: IP20
Classe di protezione: II
Dimensioni di montaggio: 581 mm, +/– 2 mm
Presa telecomando: a 5 poli
4.2. Telecomando senza li
Alimentazione di tensione: 3 V CC
Batterie: 2 x 1,5 V AAA; MICRO; LRo3
Corrente di lavoro: < 15 mA
Consumo di corrente in stand-by: < 5 µA
Gamma di frequenza: 2,4 GHz
Dimensioni: 128 x 40 x 17 mm
4.3. Ricevitore senza li
Alimentazione di tensione: 18 V CC
Batterie: 2 x 9 V alcaline
Corrente di lavoro: < 250 mA
Consumo di corrente in stand-by: < 5 µA
Gamma di frequenza: 2,4 GHz
Dimensioni: 102 x 58 x 25 mm
4.4. Disgiuntore di rete
Il disgiuntore di rete impedisce la formazione di
campi elettrici e magnetici alternati nel letto. Non
è necessario un trasformatore stand-by. La cor-
rente defluisce solo azionando il telecomando, in
ogni altro caso il letto non è sotto di tensione.
Un condensatore caricato a corrente continua
all’interno dell’azionamento alimenta il relè
bipolare nel disgiuntore di rete e attiva il trasfor-
matore nell’azionamento. In questo modo il con-
densatore si ricarica ed è pronto per il successivo
azionamento.
Nota:
in caso di prolungato inutilizzo il condensatore
può perdere tensione. La batteria da 9 V inserita
nell’abbassamento d’emergenza ha quindi un
eetto tampone anche per il condensatore del
disgiuntore di rete.
Nel caso quanto mai improbabile che anche la
batteria sia scarica, l’apparecchio può comunque
continuare a funzionare senza problemi.
Premere il tasto verde (D) sul disgiuntore di rete
(vedi g. 8, pag. 19). Il condensatore viene subito
ricaricato e il disgiuntore di rete è nuovamente
pronto per l’uso.
Italiano
20 wenaFlex®Premium M con con telecomando senza li
Other manuals for Wenaflex Premium M
1
Table of contents
Languages:
Other WENATEX Indoor Furnishing manuals
Popular Indoor Furnishing manuals by other brands

Happy Beds
Happy Beds Phoenix manual

HAMPTON BAY
HAMPTON BAY GENEVA FBS60431-BA Use and care guide

West Elm
West Elm Box Frame Console 4434627 Assembly instructions

Links
Links LOVI 20 90 08 02 Assembling Instruction

Polywood
Polywood Chinoiserie MSTGD190 Assembly instructions

Happy Beds
Happy Beds Lisbon 4FT6 Assembly instructions