2
• Press and hold the“ "button for 5 seconds during the
power-on process
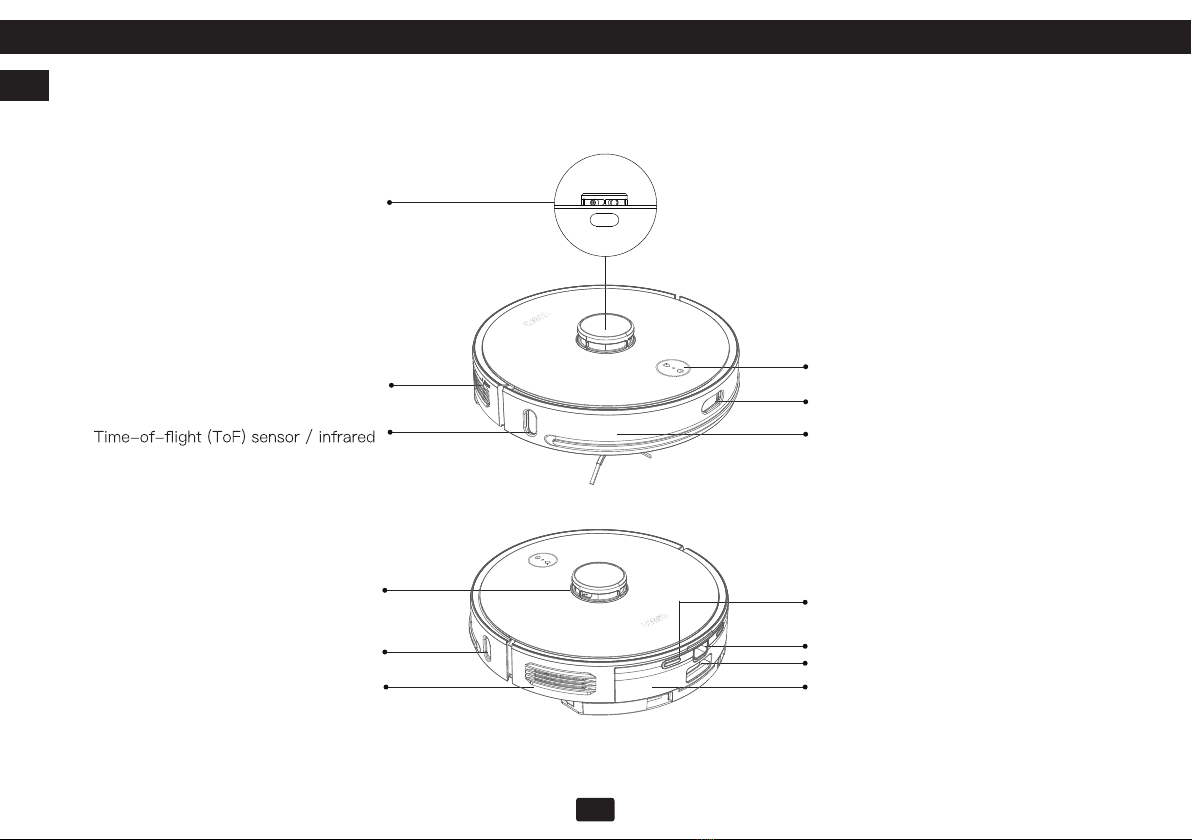
Robot
Start/Stop Button
WiFi indicator
Recharge button
Force-shutdown button
Dust collector pairing mode
•
• Short press to start / pause cleaning
•
• Solid white light: The network is connected
• Short press to start/pause recharging
• Solid blue light: Working normally/pause/standby
•
• Flashing yellow light: Low battery/recharging
• Flashing green light: Charging
• Solid green light: Fully charged
•
•
•
• While the power is on, press and hold the and keys
simultaneously for 5 seconds