Wharfedale Pro WDP3397B User manual

PORTABLE DVD PLAYER
WITH 9” LCD SCREEN
OWNER'S MANUAL
2
R
WDP3397B

- 1 -
SAFETYINSTRUCTIONS
* SEE BOTTOM OF UNIT FOR
GRAPHIC SYMBOLS *
The lightning flash with an arrowhead symbol,
withintheequilateraltriangle,isintendedtoalertthe
user to the presence of uninsulated "dangerous
voltage"withintheproduct'senclosurethatmaybe
of sufficient magnitude to cause an electric shock.
WARNING: TO REDUCE THE RISK OF ELECTRIC
SHOCK, DO NOT REMOVE COVER (OR
BACK).NOUSER-SERVICEABLEPARTS
INSIDE. REFER SERVICING TO
QUALIFIEDSERVICEPERSONNEL.
WARNING: TO PREVENT FIRE OR SHOCK HAZARD, DO NOT EXPOSE THIS APPLIANCE TO RAIN OR
MOISTURE.
Notes on Copyright
It is forbidden by law to copy, broadcast, show, broadcast on cable, play in public, rent copyrighted material without
permission.
Apparatus Claims of U.S. Patent Nos. 4,631,603; 4,577,216; 4,819,098 and 4,907,093 licensed for limited viewing uses only.
DVD video discs are copy protected, and any recordings made from these discs will be distorted. This product
incorporates copyright protection technology that is protected by method claims of certain U.S. patents and other
intellectual property rights owned by Macrovision Corporation and other rights owners. Use of this copyright protection
technology must be authorized by Macrovision Corporation, and is intended for home and other limited viewing uses
only, unless otherwise authorized by Macrovision Corporation. Reverse engineering or disassembly is prohibited.
On Placement
• Do not use the unit in places which are extremely hot, cold, dusty, or humid.
On Safety
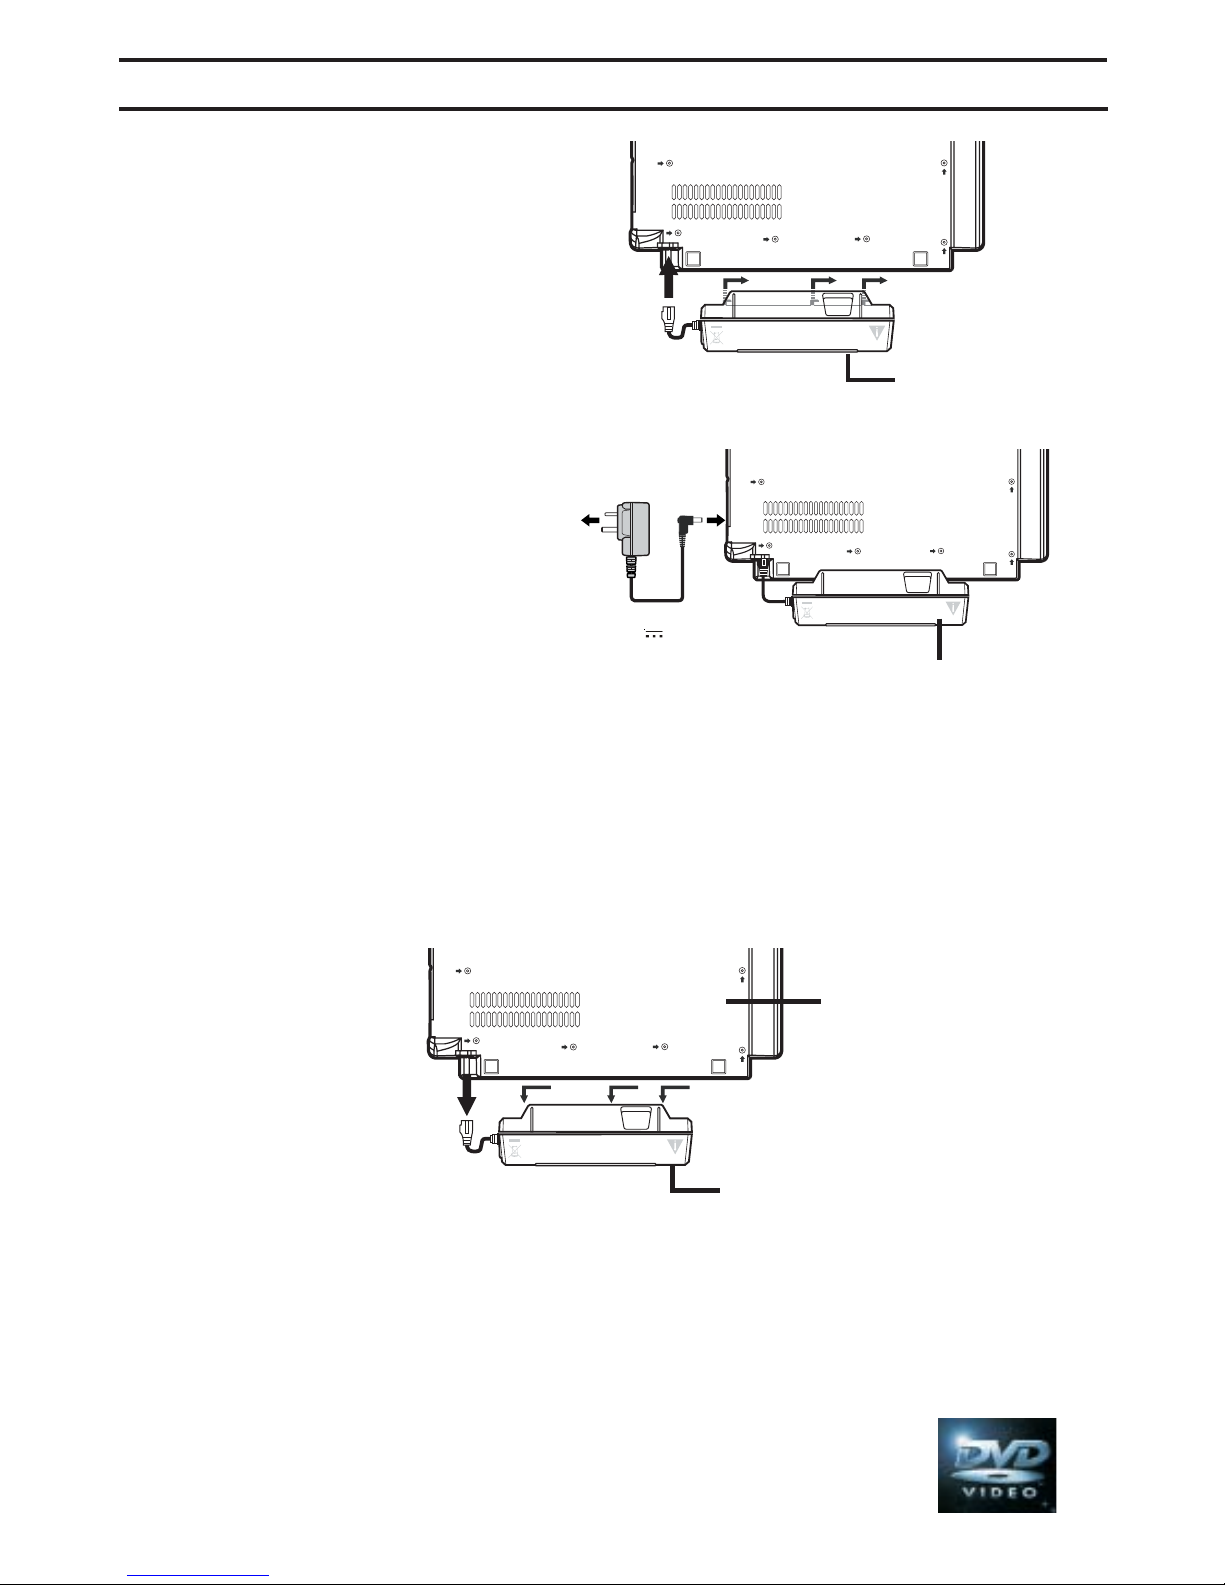
• When connecting or disconnecting the AC adaptor, grip the plug and not the cord itself. Pulling the cord may
damage it and create a hazard.
• When you are not going to use the unit for a long period of time, disconnect the AC adaptor.
On Condensation
• When left in a heated room where it is warm and damp, water droplets or condensation may form inside the unit.
When there is condensation inside the unit, the unit may not function normally. Let the unit stand for 1 to 2 hours
before turning the power on, or gradually heat the room up and dry the unit before use.
Rating Plate Location
• The rating plate is located on the bottom of unit.
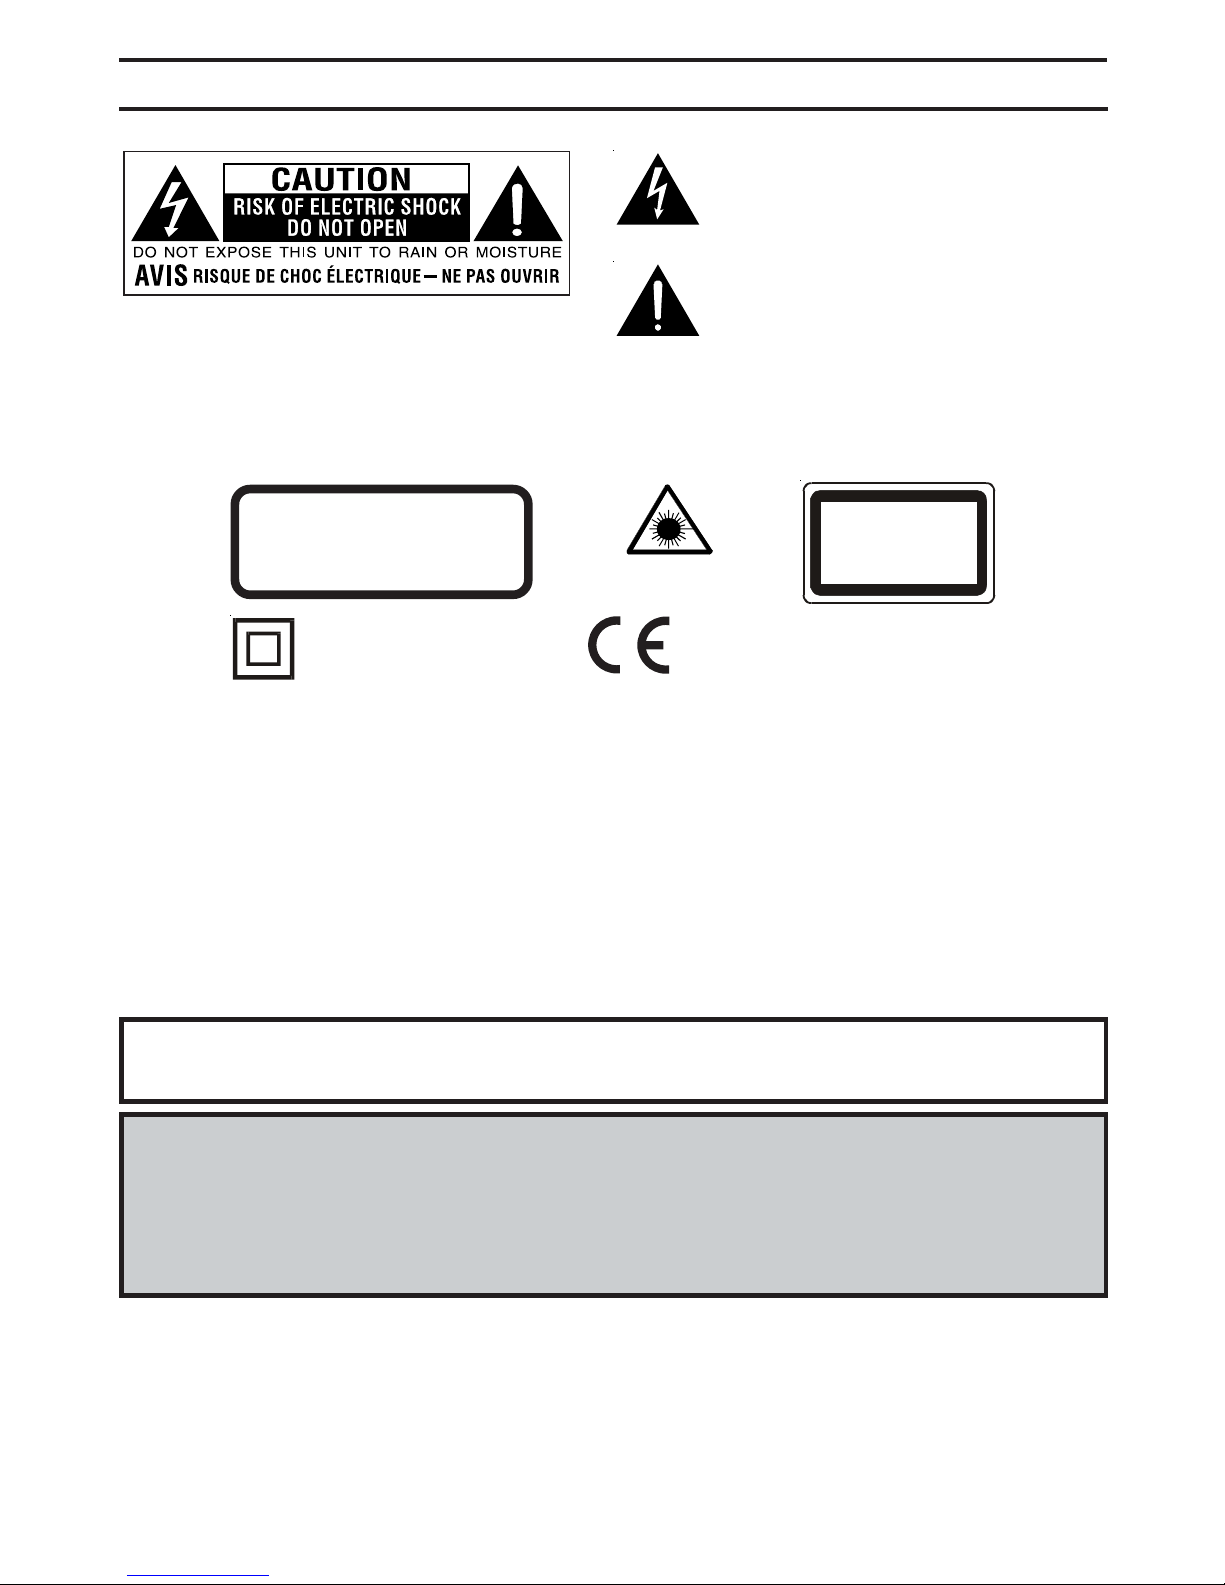
CLASS 1 LASER PRODUCT
APPAREIL À LASER DE CLASSE 1
PRODUCTO LASER DE CLASE 1
PRODUTO LASER CLASSE 1
The symbol for Class II
(Double lnsulation)
This product contains a
low power laser device.
CAUTION
INVISIBLELASERRADIATIONWHEN
OPENANDINTERLOCKSDEFEATED.
AVOIDEXPOSURETOBEAM
Theexclamationpointwithintheequilateraltriangle
is intended to alert the user to the presence of
important operating and maintenance (servicing)
instructions in this owner manual.
Thissymbolmeansthattheunitcomplies
with European safely and electrical
interferencedirectives.
WARNING:
• No objects filled with liquids, such as vases, shall be placed on the apparatus.
• The mains plug is used as the disconnect device and it shall remain readily operable.
SAFETY WARNING
• Should any trouble occur, disconnect the AC adaptor and refer servicing to a qualified technician.
• Onnoaccountshouldthisunitbeusedbythedriver ofamovingmotorvehicle,orleftunsecuredinthe
vehicle whilst driving.
Ifthisunitisbeingusedbyapassengerinyourvehicle,besurethatitissecuredorheldsafely,anddoes
not obstruct any safety device (i.e. airbag, seat belt etc.) this is fitted.

- 2 -
IMPORTANTSAFETYINSTRUCTIONS
SAFE USE OF YOUR EQUIPMENT
Here are a few tips to help you do this:
READ this instruction manual before you attempt to use the equipment.
NEVER fit make shift stands or legs with woodscrews. Use only approved supports and fasteners specially
designed for the equipment.
NEVER let anyone, especially children, push objects into holes, ventilation slots or any other opening; this could
result in electric shock!
ALWAYS disconnect the AC adaptor when you are not going to use the unit for a long period of time.
ENSURE that all electrical connections (including the AC adaptor, extension leads and connections between
piecesofequipment)areproperly made in accordance with theinstructionsgiven.Switch off the main supply when
making or changing connections.
CONSULT your dealer if you are ever in doubt about the installation, operation or safety of your equipment.
DON'T continue to operate the equipment if it is damaged in any way or if it does not function normally.
Disconnect the AC adaptor and consult your dealer.
DON'T leave equipment switched on when it is unattended unless it is part of it's normal function to operate in
your absence, for example a video cassette recorder with timed recording facility.
LISTEN to headphones at moderate volume levels; high volume levels can permanently damage your hearing.
WARNING:
• AC adaptor is used as the disconnect device. It shall remain readily operable and should not be obstructed
during intended use. To be completely disconnected the apparatus from supply mains, the AC adaptor of the
apparatus shall be disconnected from the mains socket outlet completely.
• When the signal lamp LED is off, it indicates that the apparatus is completely disconnected from the mains.
• Never use a power adaptor that is damaged, rout power lead in a safe manner and make sure it is not
subjected to trapping or pinching. If the power lead is damaged refer to a qualified service agent.

- 3 -
TABLEOFCONTENTS
Special Functions ................................. 13
Displayfunction...................................................13
Locatingaspecifictitle ........................................13
Locatingaspecifictitle/chapter/track................13
Locatingaspecifictime.......................................13
CD / DVD programmable memory ....... 14
DVDprogrammablememory..............................14
CDprogrammablememory................................14
RepeatPlayback....................................14
Repeatingatitle/chapter(DVD)...........................14
Repeatingasingletrack/wholedisc(CD)..........14
Repeatingaspecificsection(DVD)....................14
Playing Picture Files ............................. 15
PlayingaPicturefiledisc.....................................15
Customizing the Function Settings
..............................................................15-16
LANGUAGESETUP..................................................15
VIDEOSETUP...........................................................15
SYSTEMSETUP.......................................................16
RATINGsetup...........................................................16
Language Code List for Disc Language
..................................................................17
Maintenance.......................................... 18
CleaningtheDisc...................................................18
CleaningtheUnit...................................................18
ImportantNote.......................................................18
Trouble Shooting Guide ....................... 19
Safety Precautions ..................................1
ImportantSafetyInstructions .................2
TableOfContents ....................................3
DiscFormats............................................4
Accessories...............................................5
RemoteControl........................................5
Control Reference Guide .................... 6-7
Power Supply ....................................... 8-9
UsingtheACadaptor..............................................8
Using therechargeablebattery...........................9
Turningontheunit................................................9
Connection................................................10
ConnectingtheunittoaTV................................10
Usingheadphones/earphones..........................10
SoundSystem........................................10
Playing a Disc ................................... 11-12
PlayingaDisc.......................................................11
Pausingplayback(stillmode).............................11
Stoppingplayback.................................................11
Skippingtoadifferenttrack.................................11
FastFoward/FastReverse...................................11
Skip(Forward/Reverse).......................................11
Audioselection.......................................................12
Subtitleselection...................................................12
Angleselection.......................................................12

- 4 -
The unit can playback discs bearing any of the following marks:
Region Management Information
Region Management Information: This unit is designed and manufactured to respond to the Region
Management Information that is encoded on DVD discs. If the Region number printed on the DVD disc does
not correspond to the Region number of this unit, this unit cannot play that disc.
The region number of this unit is 2.
Disc Function or Operation that is Not Available
When the symbol appears on the TV screen, it indicates that the function or operation attempted is not
available at that time. This occurs because the DVD disc manufacturer determines the specific functions.
Certain functions may not be available on some discs. Be sure to read the documentation provided with the
disc.
T
Chapter 1 Chapter 1Chapter 2 Chapter 2Chapter 3
DVDs
[8cm(3")/12cm(5”) disc]
Audio CDs
[8cm(3")12cm(5”) disc]
Notes on Unauthorized Discs
You may not be able to play back some DVD discs on this unit if they were purchased from outside your
geographic area or made for business purposes.
Title, Chapter and Tracks
• DVDsaredividedinto“titles”and“chapters”.Ifthedisc
has more than one movie on it, each movie would be a
separate “title”. “Chapters” are sections of titles.
• AudioCDsaredividedinto “tracks”. A“track” isusually
one song on an Audio CD.
Note:
• Numbers identify each title, chapter, and track on a disc. Most discs have these numbers recorded on them,
but some do not.
Track 1 Track 2 Track 3 Track 4 Track 5
Icons Used on DVDs
Sample lcons Language selections for audio
Language selections for subtitles
Screen aspect ratio
Multiple camera angles
Region code indicator
Note:
• WhenplayingbackaCD-G(Graphics)orCDEXTRAdisc,theaudioportionwillbeplayed,butthegraphicimages
will not be shown.
DISCFORMATS
2
Compatible
2
2
2
1.English
2.French
1.English
2.French
LB

- 5 -
ACCESSORIES
REMOTECONTROL
IF YOU REQUIRE ANY OTHER ACCESSORIES FOR THIS PRODUCT
PLEASECALL01302872207
MONDAY TO FRIDAY 9 AM TO 5 PM
Remote control (with battery) ..................................................................................x1
AC adaptor ..............................................................................................................x1
Rechargeable battery ..............................................................................................x1
Please check and identify the supplied accessories.
TECHNICAL HELP ON THE OPERATION OF THIS
PRODUCT IS AVAILABLE
MONDAY TO FRIDAY 1 PM TO 9 PM
PLEASECALL08453075537
Using the Remote Control
• PointtheRemoteControlat the REMOTE SENSOR
located on the unit.
• When there is a strong ambient light source, the
performanceoftheinfraredREMOTESENSORmay
be degraded, causing unreliable operation.
• The recommended effective distance for remote
operation is about 16 feet (5 meters).
BATTERY REPLACEMENT
When battery becomes weak, the operating distance
of the Remote Control will greatly reduced and you will
need to replace the battery.
Notes:
• If the Remote Control is not to be used for a long
time, remove the battery to avoid damage caused by
battery leakage corrosion.
• WARNING: Do not dispose of battery in fire, battery
may explode or leak.
TO CHANGE REMOTE BATTERY
1. Open the battery door.
2. Insert one CR2025 (3V) size battery.
Waste electrical and electronic
products must not be disposed of
with household waste. Please refer
to the retailer from whom you
purchased this item for disposal
instructions.
Argos MK9 2NW
Take out the PVC sheet before operating the
Remote Control.

- 6 -
CONTROLREFERENCEGUIDE
Remote Control
1) TVMODEbutton
Select the mode you prefer, Letter Box, Pan Scan
or Wide Screen.
2) PREVbutton
Move back through titles, chapters or tracks on a
disc.
3) / SEARCHbuttons
SEARCH:Fast reverse playback.
SEARCH:Fast forward playback.
4) GOTObutton
Skip directly to a location on a DVD.
5) Cursor ( , , , )buttons
Use to highlight selections on a menu screen and
adjust certain settings.
ENTERbutton
Confirm selections on a menu screen.
6) MEMORYbutton
In stop mode, enter the number of a selected
chapter or track.
7) Number (0 - 9) buttons
Use when creating programmes, and entering a
parental level password. Also use to select a CD
trackdirectly.
8) SETUP button
In stop mode, open and close the SETUP menu.
REPEATA-B button
Perform point-to-point repeat playback on a DVD
or CD.
REPEATDISCbutton
Repeat chapter or title of a DVD.
Repeat single track or whole CD.
9) SUBTITLEbutton
Select one of the subtitle languages programmed
on a DVD.
RETURNbutton
Return to the normal operation after using the
SETUP menu of a DVD.
10)AUDIObutton
Selectoneoftheaudio sound tracks programmed
on a DVD or select the audio output mode on an
AUDIO CD.
11)ANGLEbutton
Switches between multiple camera angles when
the DVD you are playing has multiple camera
angles recorded.
12)DISPLAYbutton
Change disc status information displayed on the
screen.
13) STOPbutton
Stop playing a disc.
PLAYbutton
Press to start or resume playback a disc.
PAUSEbutton
Pause playback, frame advance.
14) NEXTbutton
Move forward through titles, chapters or tracks on
a disc.
15)MENUbutton
Open and close DVD menu.
SUBTITLE/
RETURN
M
6
5
4
98 07
3
2
ENTER
MEMORY DISPLAY
AUDIO
MENU
PREV SEARCH
GOTO
TV MODE
NEXT
STOP PAUSE
PLAY
ANGLE
SETUP
A-B DISC
REPEAT
1
2
3
4
5
6
7
8
9
10
11
12
13
14
15

- 7 -
CONTROLREFERENCEGUIDE
Unit
1) DC IN 9V/Car Plug 12V jack
Connect the car plug or AC adaptor.
2) AUDIOOUTL/Rjacks
3) VIDEOOUTjack
4) VOLUMEcontrols
Adjust the volume.
5) Headphone jack
6) PAUSE button
Press to pause playback of a disc. Each time you
subsequently press the PAUSE button the picture
advances one frame at a time. Press the PLAY
button to resume playback at normal speed.
button
Press buttontogo backtothe previous chapters
/tracks.
button
Press button to advance chapters / tracks.
STOP button
Stop playing a disc.
PLAY button
Press to start or resume playing a disc.
/ buttons
SEARCH:Fast reverse playback.
SEARCH:Fast forward playback.
7) STANDBY/ONswitch
8) Remote sensor
Receive the remote control signal.
9) CHARGINGindicator
Charge the rechargeable battery before using it for
the first time. The normal charging time is at least
4-5hours. Thegreen charginglightwillgooutwhen
the battery becomes fully charged.
10) STANDBY/ONindicator
WhentheSTANDBY/ONswitchisintheONposition,
the light will illuminate.
11) DiscDoor
Close door by gently pushing down.
12) BRIGHTNESSbutton
Adjust the lightness or darkness of the screen
colour.
Screen switch
WIDE : Wide screen
NORMAL : Normal screen
123 45
678910 11 12

- 8 -
POWERSUPPLY
A. Using the AC adaptor
This AC adaptor operates on AC between 100V and 240V.
• The supplied AC adaptor is suitable for use on AC mains supplies of 100-240 Volts AC and should only
be connected to a mains supply within these parameters.
Cautions:
• The included AC adaptor is for use with this unit only. Do not use it with other equipment.
• When the unit is not going to be used for long time, disconnect the AC adaptor from the AC outlet.
IMPORTANT
• Be sure to use it near the wall outlet. If a malfunction occurs, disconnect the plug from the wall outlet at once.
• When the AC adaptor is plugged in, the apparatus is not completely disconnected from the mains, even
when the power is turned off.
WARNING:
• AC adaptor is used as the disconnect device. It shall remain readily operable and should not be obstructed
during intended use. To be completely disconnected the apparatus from supply mains, the AC adaptor of the
apparatus shall be disconnected from the mains socket outlet completely.
• When the signal lamp LED is off, it indicates that the apparatus is completely disconnected from the mains.
Left side of unit
1To DC IN 9V-12V jack
To AC outlet
2
AC ADAPTOR
DC 9V 1.5A

- 9 -
CAUTION:
DANGER
Li-ion
RECHARGEABLE
BATTERY PACK
Use the supplied AC adaptor.
Never dispose of in fire or heat up.
Do not use in high temperature or near heat sources.
Never connect the positive and negative poles with metal.
Do not open the cover, refer servicing only to qualified service personnel.
Turning on the unit
1.Slide the STANDBY/ON switch on the front of the unit to the "ON" position.
2.The DVD logo (start-up picture) will appear on the screen.
Using the rechargeable battery
• To install rechargeable battery, slide it
in the corresponding direction on the
rear of the unit.
Warnings:
• The battery can only be recharged when the unit is OFF and using the AC adaptor supplied.
• The rechargeable battery cannot be recharged either by using 12V car-plug or when the unit is ON.
Cautions:
• When the unit is not going to be used for long time, disconnect the AC adaptor from the AC outlet.
• When the AC adaptor is plugged in, the apparatus is not completely disconnected from the main, even when
the power is turned off.
To recharge the battery
•Charge the rechargeable battery
before using it for the first time. The
normal charging time is at least 4-5
hours. The green charging light will go
out when the battery becomes fully
charged.
•Cannot be charged by car power
adaptor.
Condition and attention:
• The battery life is about 2 hours. When battery is low, player will stop playing.
• Do not short-circuit the terminals.
• Recharge the battery when you are ready to use it again.
• While using the rechargeable battery, the environmental temperature should be 5°C (41°F) to 35°C (95°F).
• To get the longest service life of the rechargeable battery, charge at indoor-temperature.
• Never dispose the battery in fire or water. Never heat up the rechargeable battery.
• Do not open the rechargeable battery, refer servicing only to qualified service personnel.
POWERSUPPLY
• Recharging is complete when charging
indicator goes out. Unplug the AC
adaptor, then unplug the rechargeable
battery.
2
INSTALL BATTERY
PLUG INTO THE
BATTERY SOCKET
1
Slide it in the
corresponding
direction on the
rear of the unit.
RECHARGEABLE BATTERY
RECHARGEABLEBATTERY(Li-ion7.4V)
43
TO DC IN 9V / CAR
PLUG 12V JACK
TO AC
OUTLET
AC ADAPTOR
(DC 9V 1.5A)
Disconnecting the rechargeable battery from the unit
BOTTOMOF
THE UNIT
RECHARGEABLEBATTERY
5
DISCONNECT THE
PLUG FROM THE UNIT 6Slide it in the
corresponding direction
on the rear of the unit.
BOTTOM OFTHE UNIT
BOTTOM OFTHE UNIT

- 10 -
CONNECTIONS
A. Connecting the unit to a TV
• If your TV hasAudio/Video inputs, you can connect the unit to your TV using anAudio/Video cable (not supplied).
• Pull down the TFT cover when the playback mode is chosen.
Watching a DVD on your TV
1.Turn on the unit.
2.Turn on the TV and follow the instructions included with it to play the DVD.
B. Using Headphones / Earphones
• Turn down the volume before connection, and
then adjust the level.
• When headphones / earphones are connected,
no sound will be emitted from the unit's speaker.
Note: When headphones are connected to the unit,
the speakers are automatically disabled.
Caution:
• Avoid listening to sound at levels which may be harmful to your ears.
Manufactured under license from Dolby Laboratories.
'Dolby' and the double-D symbol are trademarks of Dolby Laboratories.
Dolby Digital
Dolby Digital is a technology developed by Dolby Laboratories. Soundtracks encoded in Dolby Digital can
reproduce from one to 5.1 discrete channels of excellent quality audio.
The unit automatically recognizes the Dolby Digital bitstream and provides a downmix suitable for two-channel
listening. An additional Dolby Digital decoder is required for reproduction of the discrete multi-channel soundtracks
available on many DVDs.
SOUNDSYSTEM
LEFT SIDE OF UNIT
To AUDIO/VIDEO
OUT Jacks AUDIO/VIDEO
CABLE
TV
Headphones/
EARphones
(3.5mm
diameterplug)
LEFT SIDE OF UNIT

- 11 -
PLAYINGADISC
This owner’s manual explains the basic instructions for operating this unit. Some DVDs are produced in
a manner that allows specific or limited operation during playback. Therefore, this unit may not respond
to all operating commands. THIS IS NOTA DEFECT. Please refer to the instructions accompanying the
specific DVD in question for more information about the options available on that DVD.
“ ” may appear on the screen during operation. A “ ” means that the desired operation is not
permitted by the unit or disc.
Playing a Disc
1.Slide the STANDBY/ON switch on the front of the unit to the ON position.
SeeCUSTOMIZINGTHEFUNCTION SETTINGSbeforeproceedingtostep2.
2.Open the disc door.
3.Hold the disc by its sides and carefully place it onto the spindle with the label
side facing up, pushing gently until you hear a “click”.
4.Close the disc door.
It takes a short while for your unit to load the disc. After loading, the unit will
automatically either bring you to the main menu of the DVD, or start playing
the DVD.
5.If the unit does not automatically start playing the DVD, press the PLAY
button.
Pausing playback (still mode)
Press the
II
PAUSE button. To resume normal playback, press the PLAY button.
Each time you press the
II
PAUSE button, the picture advances one frame.
Stopping playback
Press the STOP button at the location where you want to interrupt playback. To resume playback at the position
where the disc was stopped, press the PLAY button.
If you press the STOP button twice, the unit’s memory will be cleared and pressing the PLAY button will reset
the disc to the beginning.
Skipping to a different track
• Press the PREV button repeatedly to skip to the start of the current or previous track.
• Press the NEXT button to skip to the next track.
• For audio CDs, use the number buttons on the remote control to jump immediately to the desired track number.
Fast Forward/Fast Reverse
1.Press the SEARCH or SEARCH button when a disc is playing.
•The disc begins a fast scan at two times normal (x2) speed.
•Four speeds are available. Each time the SEARCH button is pressed, the speed of the fast scan changes in
the following sequence:
2.Press the PLAY button when you reach the desired point to resume playback at normal speed.
Basic playback
DVD CD
SKIP (Forward / Reverse)
While you are playing a disc, press the NEXT button to move to the beginning of the next chapter or track.
Press the PREV button to move to the previous chapter or track and automatically start playing it.
x 2 x 4 x 8 x 20

- 12 -
Audio selection
On some discs, the sound is recorded in two or more formats. Follow the directions below to select the type of
playback.
Notes :
• If only one audio format is recorded, the number does not change.
• About two seconds later, playback continues in the new audio format.
1.While a disc is playing, press the AUDIO button to show the current audio format number.
2.Press the AUDIO button repeatedly to select the desired audio format.
DVD
Subtitle selection
1.While a DVD is playing, press the SUBTITLE / RETURN button to display the current language setting, as
shown in the example below.
2.Press the SUBTITLE / RETURN button repeatedly to select the desired subtitle language.
Notes :
• If only one language is recorded, the language does not change.
• About two seconds later, playback continues with the new subtitle you selected.
• The number of languages recorded differs depending on the disc.
• If no button is pressed within a few seconds, playback continues without changing the current subtitle.
• This function can only be used for discs on which subtitles have been recorded in multiple languages.
• On some DVDs, subtitles are activated from the main menu of the DVD. Press the MENU button to activate the
main menu.
PLAYINGADISC
Angle selection
Some DVDs contain scenes which have been shot from a number of different angles. For these discs, the same
scene can be viewed from each of these different angles.
Notes:
• This function can only be used for discs on which scenes shot from multiple angles have been recorded.
• If only one angle is recorded, “
: [ 1/1 ]
” is displayed.
1.While you are playing a DVD with different angles recorded, press the ANGLE button to view the number of the
current angle available.
2.Press the ANGLE button repeatedly to change the scene to the next recorded angle.
• After approx. two seconds, playback will continue from the new angle you selected.
• If no button is pressed within 10 seconds, playback continues without changing the current angle.
Sequence of angle shots
(Example)
: 1/3ENG 6CHD
: 2/3 ESP
: [ 2/3 ]
:[ 1/3 ] :[ 2/3 ] :[ 3/3 ]

- 13 -
SPECIALFUNCTIONS
Locating a specific title
If a DVD contains title numbers, you can locate a specific title by directly selecting its title number.
1.In stop mode, press the GOTO button.
2.Press or button to highlight a specific field and press the corresponding number button(s) for the title you
want.
3.Press the ENTER button to confirm. The unit will start playback about 3 seconds later.
Locating a specific title / chapter / track
If you know the title/chapter/track number for the title/chapter/track that you want to play, you can locate it by directly
selecting that number.
1.Press the GOTO button to search for your desired title/chapter/track.
2.Press or button to highlight a title/chapter/track and press the corresponding number button(s) for the
chapter you want.
3.Press the ENTER button to confirm. The unit will start playback about 3 seconds later.
Locating a specific time
You can move to a specific location by entering its corresponding time (hours, minutes, seconds)
1.Press the GOTO button.
2.Press or button to highlight time.
3.Press the corresponding number buttons for the setting point you want.
4.Press the ENTER button to confirm. The unit will start playback about 3 seconds later.
Notes :
• Some discs may not respond to this process.
• Some scenes may not be located as precisely as you specified.
• This method for accessing specific locations is available only within the current title of the DVD disc.
DVD
DVD CD
DISPLAY function
Using DISPLAY, you can check and change the current settings of the following items:ANGLE,AUDIO and SUBTITLE.
• While the disc is playing, press the DISPLAY button to display the screen shown below.
DVD
Title Chapter Elapsed time
TT 1/21 CH 6/29 00:07:18
Audio Subtitle Angle
TT 1/21 CH 11/29 -00:30:28
R
Title Chapter Remainingtime
TT 1/21 CH 11/29 -01:00:28
T
Title Chapter Total time
1/3 ENG 2/3 ESP OFF
6D
00:00:00
TT 0/21CH 029/0290
00:00:00
TRK 0 / 120
00:00:00
TT 00/34CH
X
0 /02900
0 :00:001
TT 00/21 CH 029/029

- 14 -
CD/DVDPROGRAMMABLEMEMORY
Programmable memory
The two types of programmed playback provided by this unit are title/chapter programmed playback and track
programmed playback.
Title / Chapter programmed playback DVD
1.Press the MEMORY button while the disc is stopped.
2.Enter the title numbers in
- -
. Use or button to highlight your desired
chapter and enter the chapter numbers in
- -
.
3.Use , , or button to move to another field.
4.Repeat steps 2 to 3.
5.Press the PLAY button to start the programmed playback.Or navigate to the
PLAY option at the bottom of the menu page and press enter.
Track programmed playback CD
1.Press the MEMORY button while the disc is stopped.
2.Enter the track numbers in
- - -
.
3.Use , , or button to move to another field.
4.Repeat steps 2 to 3.
5.Press the PLAY button to start the programmed playback.
You can play a specific title or chapter repeatedly.
(Title repeat, chapter repeat, A-B repeat)
Repeating a chapter
You can play the same chapter repeatedly.
1.While the disc is playing, press the REPEAT DISC button until the “
REP: CHAPTER
” indicator displays on the screen. The
current chapter is played repeatedly.
Repeating a title
You can play the same title repeatedly.
2.While the disc is playing, press the REPEAT DISC button until the “
REP : TITLE
” indicator displays on the screen. The
current title is played repeatedly.
To resume normal playback
3.While the disc is playing, press the REPEAT DISC button until the “
REP: OFF
” indicator displays on the screen.
You can play a single track or the whole DVD repeatedly.
Repeating a single track
You can play the same track repeatedly.
1.While the disc is playing, press the REPEAT DISC button until the “
REP : REP 1
” indicator displays on the screen. The
current track is played repeatedly.
Repeating a whole disc
2.While the disc is playing, press the REPEAT DISC button until the “
REP : REP ALL
” indicator displays on the screen. The
whole disc is played repeatedly.
To resume normal playback
3.Press the REPEAT DISC button until the “
REP: OFF
” indicator displays on the screen.
Repeating a specific section
You can play a specific section repeatedly.
1.While the disc is playing, press the REPEAT A-B button at the beginning of the section ((
REPEAT A-
) is displayed) you
want to play repeatedly.
2.Press the REPEAT A-B button again at the end of the section ((
REPEAT A-B
) is displayed).
3.The unit will immediately begin replaying your selection.
To resume normal playback
4.While the disc is playing, press the REPEAT A-B button until the “
A-B CANCEL
” indicator displays on the screen.
Notes:
• A-B repeat can only be used within the same title. If the start and end of the section to be repeated are in different
titles, A-B repeat is cancelled.
• The A-B repeat function does not operate in scenes where different camera angles are recorded.
REPEATPLAYBACK
CD
DVD
Title Chapter
PROG
2 - - : - - 6 - - : - - 10 - - : - - 14 - - : - -
3 - - : - - 7 - - : - - 11 - - : - - 15 - - : - -
1 - - : - - 5 - - : - - 9 - - : - - 13 - - : - -
4 - - : - - 8 - - : - - 12 - - : - - 16 - - : - -
T C T C T C T C
PLAY CLEAR
Track
PROG
1 - - - - 5 - - - - 9 - - - - 13 - - - -
2 - - - - 6 - - - - 10 - - - - 14 - - - -
3 - - - - 7 - - - - 11 - - - - 15 - - - -
4 - - - - 8 - - - - 12 - - - - 16 - - - -
PLAY CLEAR

- 15 -
PLAYINGPICTUREFILES
LANGUAGE SETUP
1.Press the SETUP button in stop mode.
2.Use button to change the highlight cursor. Use or button to select a
language, then press the ENTER button. The screen will change to your
selected language immediately.
3.Toexitthe SETUPMENUand returntothenormalscreen,press the RETURN
or SETUP button.
VIDEO SETUP
1.Press the SETUP button in stop mode.
2.Use button to LANGUAGE SETUP, then press or button repeatedly
until the VIDEO SETUP appear.
3.Use or button to select the option (BRIGHTNESS or CONTRAST), then
pressthe button.Use or button to adjust,thenpress the ENTER button.
(The screen will change to your selected setting.)
4.Repeat step 2 and 3 above to adjust other options.
5.Toexitthe SETUPMENUand returnto thenormal screen,pressthe RETURN
or SETUP button.
LANGUAGE SETUP
OSD LANGUAGE DEUTSCH
FRANçAIS
ESPA OL
Ñ
ITALIANO
ENGLISH
SVENSKA
PORTUGU S
Ê
VIDEO SETUP
BRIGHTNESS
CONTRAST
CUSTOMIZINGTHEFUNCTIONSETTINGS
This unit can play Picture files recorded on CD-R and CD-RW discs.
Playing a Picture file disc
1.Open the disc door.
2.Hold a Picture file disc by its edge and gently push it onto the spindle with the
label side facing up you until you hear a “click”.
3.Close the disc door.
4.The unit will load the disc and automatically display the contents of the disc
on the screen briefly, then will beginning to play the first Picture files. These
files will then be played back one by one.
5.From stop mode, press or button to select to play a PICTURE file.
6.Press the , , or CURSOR button to view and select the files that you
want to play, then press the ENTER button to confirm the selected file.
Notes:
• You can press the
II
PAUSE button to interrupt playback, and press the PLAY button to resume playback.
• You also can use the GOTO function or use the numbered buttons to enter a photo number and quickly select any
image.
• Press the ANGLE button on the remote control to rotate the picture orientation by 90°.
• Programmed playback function is not available for playing Picture file discs.
0021.JPG 1/25
0 1 .FLOWER
0 2. CAR
0 1 . 0 0 2 1
0 2 . 0 0 2 2
0 3 . 00 2 3
0 4 . 00 2 4
0 5 . 00 2 5
0 6 . 00 2 6
0 7 . 00 2 7
0 8 . 00 2 8
0 9 . 00 2 9
10.0030

- 16 -
CUSTOMIZINGTHEFUNCTIONSETTINGS
Rating
DVD discs equipped with a password function and are rated according to their content. The contents allowed by
parental lock level and the way a DVD disc is controlled may vary from disc to disc.For example, if the disc allows, you
could lock-out violent scenes unsuitable for children or you could lock out playback of the disc altogether.
Note :
It takes 3-5 seconds to reset the unit to the factory default.
You cannot play DVD discs rated higher than the level you selected unless you cancel the parental lock
function.
The parental lock levels are equivalent to the following ratings.
Level 1 : Kid Safe Level 5 : PG-R
Level 2 : G Level 6 : R
Level 3 : PG Level 7 : NC-17
Level 4 : PG-13 Level 8 : Adult
The Parental lock is active.
SYSTEM SETUP
1.Press the SETUP button in stop mode.
2.Use button to LANGUAGE SETUP, then press or button repeatedly until
the SYSTEM SETUP appear.
3.Use or button to select the option (TV TYPE, PASSWORD, RATING or
DEFAULT), then press the button.Use or button to adjust, then press the
ENTER button. (The screen will change to your selected setting.)
4.Repeat step 2 and 3 above to adjust other option.
5.To exit the SETUP MENU and return to the normal screen, press the RETURN
or SETUP button.
Password
Use or button to shift and select Password, enter your 4-digit security code and then press the ENTER button.
Default
Pressing ENTER with this function selected puts setting back to their basic state, except for password and rating.
Cut off when a wide-screen
video image is played.
WIDE SCREEN
LETTER BOX
PAN SCAN
Indicates Parental lock is NOT active.
If you forget the password, you can erase your current password by pressing number
button 8 on the remote four times, then press the ENTER button to confirm the setting (PASSWORD : 8 8 8 8).
Notes :
• The visible picture size is preset on the DVD disc. Therefore the playback
picture of some DVD discs may not conform to the picture size you select.
• When you play DVD discs recorded in the 4:3 aspect ratio, the playback
picture will always appears in the 4:3 aspect ratio regardless of theTV shape
setting in the function setup menu.
• The WIDE/NORMAL switch on the right hand edge of the display panel also
changes the aspect ratio of the visible picture on the wide screen LCD display
panel.
Pan Scan
• When wide-screen video is played, this mode clips the right and left sides of
the image so that it can be viewed on a conventional screen.
• Some wide-screen DVDs that do not permit Pan Scan mode playback are
automatically played in letterbox mode (black bands top and bottom).
Letter Box
• When wide-screen video is played in this mode on a conventional screen,
black bands appear at the top and bottom of the screen.
Wide-screen
• This is the correct mode for playing wide-screen videos on a wide-screen TV.
TV Type
SYSTEM SETUP
TVTYPE
PASSWORD
RATING
DEFAULT

- 17 -
LANGUAGECODELISTFORDISCLANGUAGE
Code
AA
AB
AF
AM
AR
AS
AY
AZ
BA
BE
BG
BH
BI
BN
BO
BR
CA
CO
CS
CY
DA
DE
DZ
EL
EN
EO
ES
ET
EU
FA
FI
FJ
FO
FR
Code
FY
GA
GB
GL
GN
GU
HA
HI
HR
HU
HY
IA
IE
IK
IN
IS
IT
IW
JA
JI
JW
KA
KK
KL
KM
KN
KO
KS
KU
KY
LA
LN
LO
LT
LV
Language Name
Frisian
Irish
Scots Gaelic
Galician
Guarani
Gujarati
Hausa
Hindi
Croatian
Hungarian
Armenian
Interlingua
Interlingue
Inupiak
Indonesian
Icelandic
Italian
Hebrew
Japanese
Yiddish
Javanese
Georgian
Kazakh
Greenlandic
Cambodian
Kannada
Korean
Kashmiri
Kurdish
Kirghiz
Latin
Lingala
Laothian
Lithuanian
Latvian, Lettish
Language Name
Malagasy
Maori
Macedonian
Malayalam
Mongolian
Moldavian
Marathi
Malay
Maltese
Burmese
Nauru
Nepali
Dutch
Norwegian
Occitan
(Afan) Oromo
Oriya
Panjabi
Polish
Pashto, Pushto
Portuguese
Quechua
Rhaeto-
Romance
Kirundi
Romanian
Russian
Kinyarwanda
Sanskrit
Sindhi
Sangho
Serbo-
Croatian
Singhalese
Slovak
Language Name
Slovenian
Samoan
Shona
Somali
Albanian
Serbian
Siswat
Sesotho
Sundanese
Swedish
Swahili
Tamil
Telugu
Tajik
Thai
Tigrinya
Turkmen
Tagalog
Setswana
Tonga
Turish
Tsonga
Tatar
Twi
Ukrainian
Urdu
Uzbek
Vietnamese
Volapük
Wolof
Xhosa
Yoruba
Chinese
Zulu
Code
MG
MI
MK
ML
MN
MO
MR
MS
MT
MY
NA
NE
NL
NO
OC
OM
OR
PA
PL
PS
PT
QU
RM
RN
RO
RU
RW
SA
SD
SG
SH
SI
SK
Code
SL
SM
SN
SO
SQ
SR
SS
ST
SU
SV
SW
TA
TE
TG
TH
TI
TK
TL
TN
TO
TR
TS
TT
TW
UK
UR
UZ
VI
VO
WO
XH
YO
ZH
ZU
Language Name
Afar
Abkhazian
Afrikaans
Ameharic
Arabic
Assamese
Aymara
Azerbaijani
Bashkir
Byerlorussian
Bulgarian
Bihari
Bislama
Bengali
Bangla
Tibetan
Breton
Catalan
Corsican
Czech
Welsh
Danish
German
Bhutani
Greek
English
Esperanto
Spanish
Estonian
Basque
Persian
Finnish
Fiji
Faroese
French

- 18 -
Cleaning the Disc
A defective or soiled disc inserted into the unit can cause sound to drop out during playback.
Handle the disc by holding its inner and outer edges.
• Do NOT touch the surface of the unlabeled side of the disc.
• Do NOT stick paper or tape on the surface.
• Do NOT expose the disc to direct sunlight or excessive heat.
• Cleanthediscbefore playback. Wipethedisc from thecentreoutwardwith a cleaning
cloth.
• NEVER use solvents such as benzine or alcohol to clean the disc.
• Do NOT use irregular shape discs (example : heart shaped, octagonal, etc.). They may cause malfunctions.
Cleaning the unit
• Be sure to turn the unit off and disconnect the AC adaptor before maintaining the unit.
• Wipe the unit with a dry soft cloth. If the surfaces are extremely dirty, wipe clean with a cloth which has been
dipped in a weak soap-and-water solution and wrung out thoroughly, then wipe with a dry cloth.
• Never use alcohol, benzine, thinner, cleaning fluid or other chemicals. Do NOT use compressed air to remove
dust.
Important Note
• Before transporting the unit, remove any disc from the disc compartment.
MAINTENANCE

- 19 -
TROUBLESHOOTINGGUIDE
Specifications and external appearance are subject to change without notice.
SYMPTOM CAUSE (AND REMEDY)
• The region number of the disc doesn't match the region number of this unit.
1 2 3 456
• Clean the disc.
• The disc is scratched.
The picture is not
clear
No picture
• Make sure that you select DVD mode.
• The system is in pause mode. Press the PLAY button to return to normal play mode.
• The unit is in fast-forward or fast-reverse mode.Press the PLAY button to return to normal
play mode.
• Make sure that AUDIO / VIDEO output connections are correct.
• The DTS DVD disc cannot be decoded to have speaker output.
• The unit is too hot, shut off the unit for 30 minutes to cool it down.
The remote control
does not function.
• Check that the AC adaptor is connected.
• The unit is not turned on.
No power.
DVD
No sound or only a
very low-level sound
is heard.
• The plugs and jacks are dirty.Wipe them with a cloth slightly moistened with alcohol.
• Clean the disc.
• There is no disc inside ("No Disc" appears on the screen).
• Insert the disc correctly with the playback side facing down.
• Clean the disc.
• A non-PAL disc has been inserted.The unit and disc region number are incompatible.
• Condensation may have formed inside the unit due to a sudden change in temperature.
Wait about an hour for it to clear and try again.
The disc does not
play.
Severe hum or noise
is heard.
• Remove any obstacles between the remote and the unit.
• Use the remote near the unit.
• Point the remote at the remote sensor on the unit.
• Replace the battery in the remote with a new one.
811-390391W011
Product Guarantee
This product is guaranteed against manufacturing defects for a period of 1 Year.
This does not cover the product where the fault is due to misuse, abuse, use in contravention of the instructions,
or where the product has been the subject of unauthorised modifications or alterations, or has been the
subject of commercial use.
In the event of a problem with the product within the guarantee period please return it to your nearest store.
If the item is shown to have had an inherent defect present at the time of sale, the store will provide you with
a replacement.
Your statutory rights remain unaffected.
Guarantor; Home Retail Group, 489 – 499 Avebury Boulevard, Central Milton Keynes MK9 2NW
Table of contents