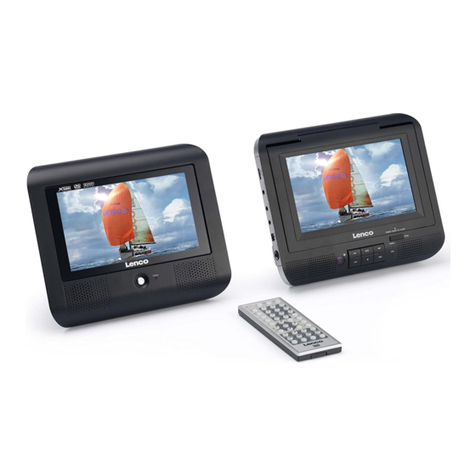
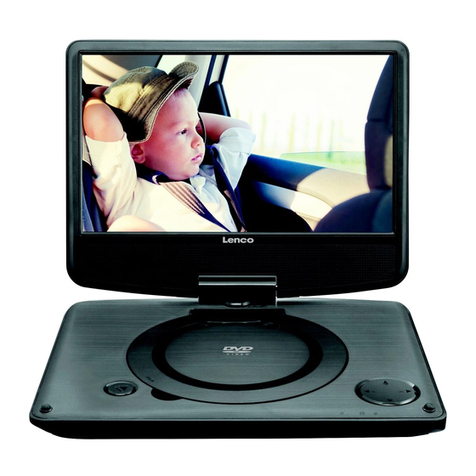
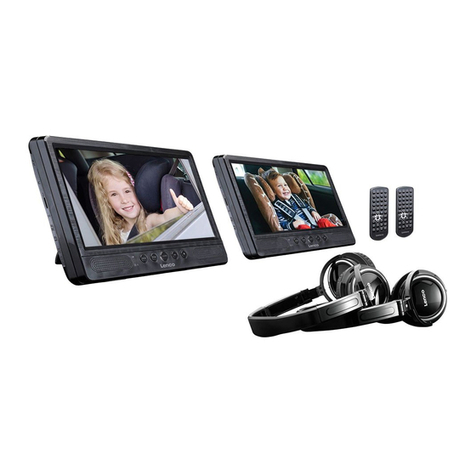
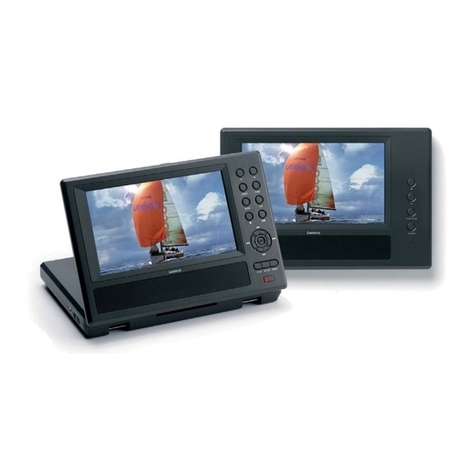
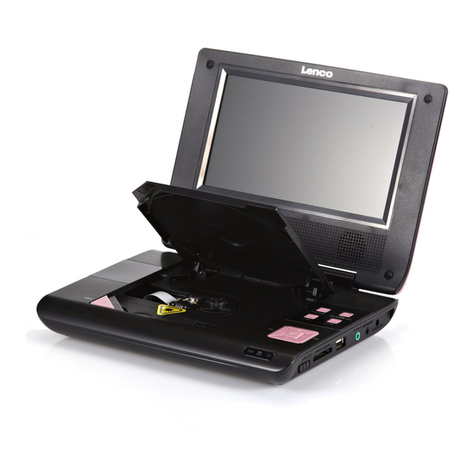
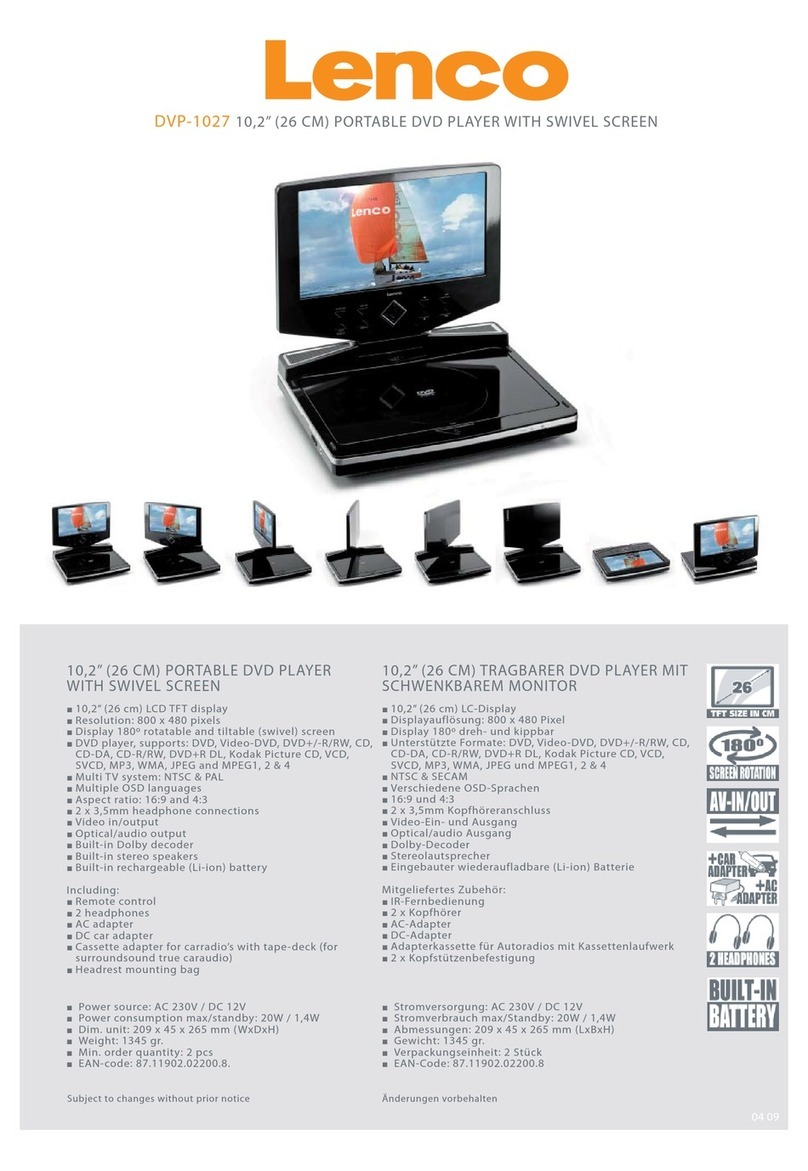
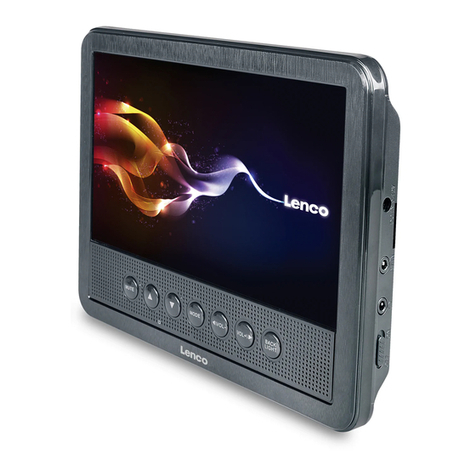
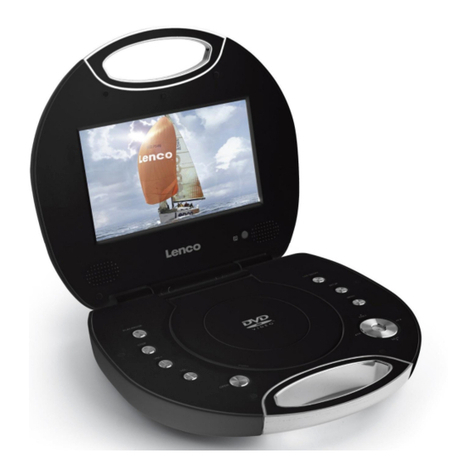
LENCO DVP-928 User manual

USER MANUAL PORTABLE DVD
HANDLEIDING DRAAGBARE DVD-SPELER
BEDIENUNGSANLEITUNG TRAGBARER DVD-PLAYER
MODE D'EMPLOI LECTEUR DVD PORTABLE
MANUAL DEL USUARIO DVD PORTÁTIL
MANUALE UTENTE DVD PORTATILE
Model: DVP-928
1

Index
English----------------------------------------- ----------------03
Nederlands------------------------------------------------------------------------------------------------------------------------------------ 13
Deutsch-----------------------------------------------------------------------------------------------------------------------------------------23
Français--------------------------------------------------------------------------------------------------------------------------------------- 33
Español---------------------------------------------------------------------------------------------------------------------------------------- 43
Italiano---------------------------------------------------------------------------------------------------------------------------------------- 53
-------------------------------------------------------------------------------
2

Important Safety Instructions
Warning: To reduce the risk of electric shock, do not remove the cover or back. There are no user-serviceable parts
inside. Refer servicing to qualified personnel.
Warning: To prevent fire or electric shock hazard, do not expose the unit to rain or moisture.
Do not expose the Adaptor and portable DVD to water (dripping or splashing) and no objects filled with liquids,
such as vases, should be placed on the unit.
Keep the portable DVD away from direct sunlight and heat source such as radiators or stoves.
Do not block the ventilation openings. Slots and openings on the unit are provided for ventilation. The openings
should never be blocked by placing your portable DVD on a cushion, sofa or other similar surface.
Do not place the portable DVD on unstable cart, stand, tripod, bracket or table. The unit may fall, resulting in
possible damage or injury.
Never place heavy or sharp objects on the LCD panel or frame.
Only use the AC adapter included with portable DVD. Using any other adapter will void your warranty.
The plug of AC adaptor is used as the disconnect device, the disconnect device shall remain readily operable.
Unplug the power from the outlet when the unit is not in use.
Attention should be drawn to the environmental aspects of battery disposal.
CAUTION: Danger of explosion if battery is incorrectly replaced. Replace only with the same or equivalent type.
WARNNING: The battery (battery or batteries or battery pack) shall not be exposed to excessive heat such as
sunshine, fire or the like.
WARNNING: Excessive sound pressure from earphones or headphones can cause hearing loss.
WARNNING: Only use attachments/accessories specified provided by the manufacturer, the portable DVD is supplied
by AC adapter, the AC adapter is used as disconnect device, the disconnect device shall remain readily operable.
Caution: Danger of explosion if battery is incorrectly replaced, replaced only with the same or equivalent type
(Lithium battery)
This marking indicates that this product should not be disposed with other household wastes throughout
the EU. To prevent possible harm to the environment or human health from uncontrolled waste disposal,
recycle it responsibly to promote the sustainable reuse of material resources. To return your used device,
please use the return and collection systems or contact the retailer where the product was purchased.
They can take this product for environmental safe recycling.
At maximum volume, continued listening of device the ear of user.
3

Safety Precautions
Warning: This digital video disc player employs a laser system.
Use of controls,adjustments, or the performance of procedures other than those specified herein may result in
hazardous radiation Exposure.
Warning: To prevent direct exposure to laser beam,do not open the enclosure.Visible laser radiation when open.
Warning: Never stare directly into the laser beam.
Caution: Do not install this product in a confined space such as a book case or similar unit.
Warning: when the unit using by child, parents must make sure to let the child understand all contents in Instruction
book how battery using to guarantee using battery correctly all the time.
Warning: when find battery overheat, swell or dour, please stop using battery and contact service centre for getting
replacement.
Warning: do not charging battery on the place of insufficient ventilation such as: mattress, sofa, cushion , soft mat......
Warning: we will not take any responsibility if user incorrectly use battery, not following our warning instruction label
on the battery case.
warning:The USB memory stick should be plugged in the unit directly.USB extension cable should not be used to avoid
failing of data transferring and interference caused.
WARNING: When using the headphone: Prolonged exposure to loud sounds may lead to temporary or permanent
hearing loss.
When participating in the traffic listening to a personal player can make the listener less aware of potential dangers
such as approaching cars.
Power supply adaptor(For EU only).
Manufacturer:Shenzhen Mass Power Electronics Limited.
Model number:SEF0900100E1BA
Use only the power supply listed in the user instructions.
Notes on Copyrights:
It is forbidden by law to copy, broadcast, show,broadcast via cable, play in public, or rent copyrighted material without
permission.
This product features the copy protection function developed by Macrovision.Copy protection signals are recorded on
some discs.
When recording and playing the pictures of these discs picture noise will appear.This product incorporates copyright
protection technology that is protected by method claims of certain U.S. Patents and other intellectual property rights
owned by Macrovision Corporation and other rights owners.Use of this copyright protection technology must be
authorized by Macrovision Corporation, and is intended for home and other limited viewing uses only unless
otherwise authorized by macrovision Corporation. Reverse engineering or disassembly is prohibited.
4

Mounting in the Vehicle
Use the supplied car mounting straps to install the main unit and monitor on the back of the vehicle's headrests.Tightly
wrap the mounting strap around the headrest.
Please kindly note that Unit A corresponds with Remote control A and Unit B corresponds with Remote control B.
5

Identification of Controls
1.SD/MS/MMC
2. POWER ON/OFF
3. HEADPHONE OUT JACKS
4. VIDEO/AUDIO OUT
5. VIDEO/AUDIO IN
6.USB
7. DC OUT
8. DC IN 9-12V
9. ENTER
10. UP/DOWN/LEFT/RIGHT
11. SOURCE
Insert the battery
1.Open the battery door
When using the remote control for the first time do not forget to remove the plastic card.
NOTES:Remove battery during storage or when you are not using the DVD player for a long time.
WARNING
Do not ingest the battery, Chemical Burn Hazard (The remote control supplied with) This product contains a coin
/button cell battery. If the coin/button cell battery is swallowed, it can cause severe internal burns in just 2 hours and
can lead to death.Keep new and used batteries away from children. If the battery compartment does not close securely,
stop using the product and keep it away from children. If you think batteries might have been swallowed or placed
inside any part of the body, seek immediate medical attention.
To prevent possible hearing damage, do not listen at high volume levels for long periods.
2.Insert battery.
6

Remote control unit
1. SOURCE
DVD/CARD/USB.
2. MUTE
Disable Audio output.
3.0-9 NUMBER BUTTON
Selects numbered items in a menu.
4.DISPLAY
To display the playtime and status information.
5.10+ BUTTON
In order to select a track 10 or greater, first press 10+, For example;select track 12, first press 10+, and then press
number 2 button.
6. MENU/PBC
Return to DVD root menu(DVD).
PBC on/off switch (VCD) .
7.AUDIO
DVD:Press AUDIO repeatedly during playback to hear a different audio language or audio track, if avilable.
MP3/CD/VCD:Press AUDIO repeatedly during playback to hear a different audio channel ( Left,Right,Mix,Stereo).
8.PLAY/PAUSE
Press PLAY/PAUSE once to pause playback, pressing PLAY/PAUSE second time will resume the playback.
9.STOP
When this buttom is pressed once, the unit records the stopped point,from where playback will resume if PLAY( )is
pressed after wards. But if STOP button is pressd again instead of PLAY( ) button, there will be no resume function.
10.MODE
Set LCD parameter(adjust bightness, contrast,and saturation).
11.VOL+
Adjust volume
12.Forward Skip
Go to next chapter/ track.
13.Reverse Skip
Go to previous chapter/ track to the beginning.
14. BUTTON
Press BUTTON allow skipping ahead at 5-level speed(X2->X4->X8->X16->X32->PLAY), press PLAY button return to
normal playback.
15. BUTTON
Press BUTTON allow skipping back at 5-level speed(X2->X4->X8->X16->X32 PLAY), press PLAY button r -> eturn to
normal playback.
16.STEP
Step the motion in DVD mode.
17.SEARCH
Goto time point , title or chapter you want in DVD Mode.
7

18.SUBTITLE
Press SUBTITLE repeatedly during playback to hear a different subtitle languages.
19.ANGLE
DVD:Press ANGLE will change the view angle, on DVDs that support this feature.
20.TITLE
Return to DVD title menu.
21.ENTER
Confirms menu selection.
22.SETUP
Accesses or removes setup menu.
23.VOL-
24.REPEAT
Press REPEAT during playback to select a desired repeat mode.
DVD: you can play select repeat chapter/title/off.
CD/VCD: you can select repeat single/all/off.
MP3: you can select repeat single/folder/off.
25.SLOW
Press Slow button repeatedly to enter slow playback, and cycle between different speeds. The speeds are
1/2,1/4,1/8,1/16,and normal.
26.PROGRAM
DVD/VCD:The program function enables you to store your favourite tracks from the disc. Press PROGRAM button ,then
PROGRAM MENU will appear on screen, now you can use the number key to direct input the titles,chapters or tracks
number and select PLAY option. TO resume normal playback, press PROGRAM
and select clear program option on the program menu,press PROGRAM again to exit program menu.
27.ZOOM
DVD/VCD: Use ZOOM to enlarge or shrink the video image.
1.Press ZOOM during playback or still playback to activate the Zoom function. The square frame appears briefly in the
right bottom of the picture.
2. Each press of the ZOOM button changes the TV screen in the following sequence:
2X size->3X size->4X size->1/2 size->1/3 size->1/4 size->normal size
JPEG: Use ZOOM to enlarge or shrink the picture.
1.Press 'ZOOM' .
2,Used " " to enlarge,or " " to shorten the picture.
Use the button to move through the zoomed picture.
SETUP Menu Setting
General Setup Page
Press SETUP button to get the setup menu. Use direction buttons to select the preferred item. After finishing
settings, press
SETUP again to normal display.
The following menu items can be changed:
General Setup Page
8

TV DISPLAY: selects the aspect ratio of the playback picture.
4:3 PANSCAN: if you have a normal TV and want both sides of the picture to be trimmed or formatted to fit your TV
screen.
4:3 LETTERBOX: if you have a normal TV. In this case, a wide picture with black bands on the upper and lower portions
of the TV screen will be displayed.
16:9: wide screen display.
TFT DISPLAY: Selects the TFT display to 16:9 or 4:3.
Angle Mark
Displays current angle setting information on the right hand corner of the TFT screen if available on the disc.
OSD Language
You can select your own preferred language seetings.
Closed Captions
Closed captions are data that are hidden in the video signal of some discs.Before you select this function,please
ensure that the disc contains closed captions information and your TV set also has this function.
Screen Saver
This function is used to turn the screen saver On or Off.
Auto Standby
This function is used to select auto standby settings after 3 or 4 hours. 3 HOURS: the unit will turn to standby mode
after 3 hours if there is no interaction from user within this period of time.
4 HOURS: the unit will turn to standby mode after 4 hours if there is no interaction from user within this period of time.
OFF: the auto standby function is disabled, and unit will stay in “on” mode even if no interaction from user.
Audio Setup Page
Downmix
This options allows you to set the stereo analog output of your DVD Player.
→LT/RT : Select this option if your DVD Player is connected to a Dolby Pro Logic decoder.
→Stereo :Select this option when output delivers sound from only the two front speakers.
Dolby digital
The options included in Dolby Digital Setup are: 'Dual Mono 'and 'Dynamic '.
Dual Mono
→Stereo :Left mono sound will send output signals to Left speaker and Right mono sound will send output signals to
Right speaker.
→L-Mono :Left mono sound will send output signals to Left speaker and Right speaker.
→R-Mono :Right mono sound will send output signals to Left speaker and Right speaker.
→Mix-Mono:Left and Right mixed mono sound will send output signals to Left and Right speakers.
Dynamic
Dynamic range compression
9

Video Setup Page
Brightness,Contrast,Hue,Saturation:setting the video quality.
Preference Page
TV Type
Selecting the colour system that corresponds to your TV when AV outputs.
This DVD Player is compatible with both NTSC and PAL.
PAL- Select this if the connected TV is PAL system.It will change the video signal of a NTSC disc and output in PAL
format.
NTSC-Select this if the connected TV is NTSC system.It will change the video signal of a PAL disc and output in NTSC
format.
Auto:Chang the video signal output automatic according to the playing disk format.
Audio:Selects a language for audio (if available).
Subtitle:Selects a language for subtitle (if available).
Disc Menu:Selects a language for disc menu (if available).
Default:Back to the factory setting.
10

Parameters and specifications
Electronical parameters
Battery Parameters
Battery Specifications:
Output:7.4V
Storage and work circumstances:
1. Storage circumstances Temperature Humidity
2.Work circumstances Temperature Humidity
6 months
1 week -20°C ~ +65°C 65±20%
Standard charge 0°C ~ +45°C 65±20%
Standard discharge -20°C ~ +65°C 65±20%
-20°C ~ +45°C 65±20%
Item Standard requirement
Power requirements
Power consumption
Operating humidity
VIDEO OUT
AUDIO OUT
Audio
Output
: AC 100-240 V , 50/60 Hz
: < 15W
: 5 % to 90 %
: 1 Vp-p(75Ω)
: 1.0 Vrms (1 KHz, 0 dB)
: Speaker:1WX2,Headphones output
Laser
Signal system
Frequency response
Signal-to-noise ratio
Dynamic range
: Semiconductor laser, wavelength 650 nm
: NTSC / PAL
: 20Hz to 20 kHz(1dB)
: More than 80 dB (ANALOG OUT connectors only)
: More than 80 dB (DVD/CD)
System
Note: Design and specifications are subject to change prior notice.
11

Guarantee
Lenco offers service and warranty in accordance with the European law, which means that in case of repairs (both
during and after the warranty period) you should contact your local dealer.
Important note: It is not possible to send products that need repairs to Lenco directly.
Important note: If this unit is opened or accessed by a non-official service center in any way, the warranty expires.
This device is not suitable for professional use. In case of professional use, all warranty obligations of the
manufacturer will be voided.
Disclaimer
Updates to Firmware and/or hardware components are made regularly. Therefore some of the instruction,
specifications and pictures in this documentation may differ slightly from your particular situation. All items described
in this guide for illustration purposes only and may not apply to particular situation. No legal right or entitlements may
be obtained from the description made in this manual.
Hereby, Lenco Benelux BV; Thermiekstraat la, 6361 HB Nuth, The Netherlands, declares that this product is in
compliance with the essential requirements and other relevant provisions of Directive 1999/5/EC.
The declaration of conformity may be consulted via
Service
For more information and helpdesk support, please visit www.lenco.com
Lenco Benelux BV; Thermiekstraat la, 6361 HB, The Netherlands.
Disposal of the Old Device
This symbol indicates that the relevant electrical product or battery should not be disposed of as
general household waste in Europe. To ensure the correct waste treatment of the product and
battery, please dispose them in accordance to any applicable local laws of requirement for disposal of
electrical equipment or batteries. In so doing, you will help to conserve natural resources and
improve standards of environmental protection in treatment and disposal of electrical waste (Waste
Electrical and Electronic Equipment Directive).
CE Marking
Products with the CE marking comply with the EMC Directive (2014/30/EU) and the Low Voltage
Directive (2014/35/EU) issued by the Commission of the European Community.
12

Belangrijke veiligheidsinstructies
Waarschuwing: Verwijder de behuizing of de achterkant niet om het risico van elektrische schokken te verminderen. Er
zitten geen door de gebruiker te onderhouden onderdelen in dit apparaat. Laat onderhoud over aan gekwalificeerd
personeel.
Waarschuwing: Stel het apparaat niet bloot aan regen of vocht om brandgevaar of elektrisch schokgevaar te
voorkomen.
Stel de adapter en de draagbare DVD-speler niet bloot aan water (druppend en spattend) en plaats geen voorwerpen
gevuld met water, zoals vazen, op het apparaat.
Houd de draagbare DVD-speler uit de buurt van direct zonlicht en warmtebronnen, zoals radiatoren of kachels.
Blokkeer de ventilatieopeningen niet. Er zitten sleuven en openingen in het apparaat voor ventilatie. Deze openingen
dienen nooit geblokkeerd te worden door uw DVD-speler op een kussen, sofa of andere soortgelijke ondergrond te
zetten.
Plaats de draagbare DVD-speler niet op een onstabiel wagentje, standaard, driepoot, beugel of tafel. Het apparaat
kan vallen en beschadigd raken of mensen verwonden.
Plaats nooit zware of scherpe voorwerpen op het LCDpaneel of frame.
Gebruik alleen de meegeleverde AC-adapter met de draagbare DVD-speler. Het gebruik van andere adapters zal uw
garantie ongeldig maken.
De stekker van de AC-adapter wordt gebruikt om het apparaat van het lichtnet te ontkoppelen, zorg ervoor dat de
stekker goed bereikbaar blijft.
Haal de stekker uit het stopcontact als het apparaat niet wordt gebruikt.
Denk aan het milieu bij het weggooien van batterijen.
LET OP: Explosiegevaar als de batterij onjuist wordt geplaatst. Vervang de batterij alleen door een batterij van
hetzelfde of een soortgelijk type.
WAARSCHUWING: De batterij (batterij, batterijen of accu) moet niet worden blootgesteld aan extreme warmte zoals
zonlicht, vuur of dergelijke.
WAARSCHUWING: Overmatige geluidsdruk van hoofdtelefoons of oortelefoons kan leiden tot gehoorverlies.
WAARSCHUWING: Gebruik alleen koppelstukken/accessoires die worden gespecificeerd door de fabrikant. De
draagbare DVD-speler wordt geleverd met een AC-adapter, deze AC-adapter kan worden gebruikt om
het apparaat te ontkoppelen van het lichtnet, zorg ervoor dat de adapter eenvoudig bereikbaar blijft.
Let op: Explosiegevaar als de batterij onjuist is vervangen, alleen vervangen door een batterij van hetzelfde of
soortgelijk type (Lithium batterij)
Deze markering geeft aan dat dit product niet mag worden weggegooid met het overige huisvuil in de
gehele EU. Om schade aan het milieu en de menselijke gezondheid door ongecontroleerde
afvalverwijdering te voorkomen, moet u op een verantwoorde manier recyclen en zo duurzaam
hergebruik van grondstoffen te bevorderen. Breng uw gebruikte product terug naar een inzamelpunt
of neem contact op met de dealer waar u het product heeft gekocht. Zij kunnen dit product
aannemen voor milieuvriendelijke recycling.
Langdurig naar het apparaat luisteren op maximaal volume kan leiden tot gehoorschade.
13

Veiligheidsmaatregelen
Waarschuwing: Deze dvd-speler maakt gebruik van een lasersysteem. Gebruik van bediening, aanpassingen, of het
uitvoeren van procedures anders dan die vermeld in deze handleiding kunnen resulteren in blootstelling aan
gevaarlijke straling.
Waarschuwing: Open de behuizing niet om directe blootstelling aan de laserstraal te voorkomen. Zichtbare
laserstraling wanneer geopend.
Waarschuwing: Kijk nooit rechtstreeks in de laserstraal.
Let op: Installeer dit product niet in een afgesloten ruimte, zoals een boekenkast of soortgelijke plek.
Waarschuwing: als het apparaat wordt gebruikt door een kind, dan moeten ouders ervoor zorgen dat het kind alle
inhoud van de handleiding kent. Het kind moet begrijpen hoe met batterijen om te gaan om te garanderen dat de
batterijen te allen tijde correct worden gebruikt.
Waarschuwing: als de batterijen oververhitten, uitzetten of geuren, stop dan het gebruik van batterijen en neem
contact op met het service center voor vervanging.
Waarschuwing: Laad de batterij niet op, op plaatsen met onvoldoende ventilatie, zoals op een matras, kussen, zachte
map, etc.
Waarschuwing: we zullen geen verantwoordelijkheid aanvaarden als de gebruiker de batterij onjuist gebruikt en
onze waarschuwingslabel op de batterijbehuizing niet volgt.
Waarschuwing: De USB-geheugenstick moet rechtstreeks in het apparaat worden gestoken. Vermijd heb gebruik van
een USB-verlengkabel om het mislukken van dataoverdracht en interferentie tegen te gaan.
WAARSCHUWING: Bij gebruik van de hoofdtelefoon:Langdurige blootstelling aan luide geluiden kunnen leiden tot
tijdelijke of permanent gehoorbeschadiging. Bij deelname aan het verkeer kan het luisteren naar een persoonlijke
speler de luisteraar minder bewust maken van mogelijke gevaren, zoals naderende auto’s.
Netadapter(Alleen voor de EU)
Fabrikant:Shenzhen Mass Power Electronics Limited
Modelnummer: SEF0900100E1BA
Gebruik uitsluitend de netadapter die in de handleiding is vermeld.
Opmerkingen over copyright:
Het is bij wet verboden om auteursrechtelijk beschermd materiaal zonder toestemming te kopiëren, tonen, uit te
zenden, uit te zenden via kabel, af te spelen in publiek of te verhuren.
Dit product beschikt over een kopieerbeveiligingstechnologie ontwikkeld door Macrovision. Op sommige disks zijn
kopieerbeschermingssignalen opgenomen. Bij het opnemen en afspelen van beelden op deze disks zal er beeldruis
verschijnen. Dit product bevat copyrighttechnologie die wordt beschermd door claims van bepaalde Amerikaanse
patenten en andere intellectuele-eigendomsrechten van Macrovision Corporation en andere eigenaren van rechten.
Gebruik van deze kopieerbeveiliging technologie moet worden geautoriseerd door Macrovision Corporation, en is
bedoeld voor thuisgebruik en ander beperkt gebruik, tenzij anders geautoriseerd door Macrovision Corporation.
Reverse engineering of demontage is niet toegestaan.
Waarschuwing
RISICO VAN ELEKTRISCHE SCHOK
NIET OPENEN
Heffing
krachtige invloed temperatuur hoger
dan 40 graden
14

Montage in voertuig
Gebruik de meegeleverde bevestigingsbanden om het hoofdapparaat en de monitor op de achterkant van de
hoofdsteunen van het voertuig te installeren. Wikkel de bevestigingsbanden strak rond de hoofdsteun.
Houdt u er rekening mee dat Unit A werkt met afstandsbediening A en Unit B werkt met afstandsbediening B.
15

De bedieningselementen
1.SD/MS/MMC
2. AAN/UIT-KNOP
3. HOOFDTELEFOONUITGANG
4. VIDEO/AUDIO UITGANG
5. AV INGANG
6.USB
7. DC UITGANG
8. DC INGANG 9-12V
9. ENTER
10. OMHOOG/OMLAAG/LINKS/RECHTS
11. SOURCE
De batterij plaatsen
1.Open de batterijdeur. 2. Plaats de batterij.
Vergeet niet de plastic kaart te verwijderen als u de afstandsbediening voor het eerst gebruikt.
OPMERKINGEN:
Verwijder de batterij als u het apparaat opbergt of als u de DVD-speler niet gebruikt voor een lange tijd.
WAARSCHUWING
Batterij niet inslikken, risico op chemische brandwonden (De afstandsbediening meegeleverd met) Dit product bevat
een munt/knoopcelbatterij. Als deze knoopcelbatterij wordt ingeslikt, kan dit binnen slechts 2 uur tot ernstige interne
brandwonden en fataal letsel leiden.
Houd nieuwe en gebruikte batterijen buiten bereik van kinderen.
Als de batterijhouder niet goed kan worden gesloten, dient u het product niet meer te gebruiken en buiten bereik van
kinderen te houden.
Als u denkt dat batterijen zijn ingeslikt of binnenin een willekeurig lichaamsdeel terecht zijn gekomen, dient u
onmiddellijk medische hulp te zoeken.
Luister nooit voor lange tijd op hoge volumeniveaus, om mogelijke gehoorbeschadiging te voorkomen.
16

Afstandsbediening
1. SOURCE
DVD/KAART/USB.
2. MUTE
Schakel met deze knop het geluid uit.
3.0-9 NUMERIEKE TOETSEN
Selecteer met deze toetsen genummerde items in een menu.
4.DISPLAY
Druk op deze knop om de afspeeltijd en statusinformatie te tonen.
5.10+
Druk op deze knop om een track hoger dan 10 te selecteren eerst op 10+, bijvoorbeeld; om track 12 te selecteren, druk
eerst op 10+,en vervolgens op 2.
6. MENU/PBC
Druk om deze knop om terug te keren naar het hoofdmenu van de DVD (DVD).Met deze toets kunt u ook PBC aan-
/uitzetten (VCD) .
7.AUDIO
DVD:Druk tijdens het afspelen herhaaldelijk op AUDIO om een andere audiotaal of audiotrack te beluisteren, indien
beschikbaar.
MP3/CD/VCD:Druk tijdens het afspelen herhaaldelijk op AUDIO om een ander audiokanaal te beluisteren(
Links,Rechts,Mix,Stereo).
8.PLAY/PAUSE
Druk één keer op PLAY/PAUSE om het afspelen te pauzeren,druk nogmaals op PLAY/ PAUSE om het afspelen te
hervatten.
9.STOP
Druk één keer op deze knop om het afspelen tijdelijk te stoppen. Het afspelen kan later hervat worden door op PLAY
te drukken. Als er echter nogmaals op de STOP knop wordt gedrukt, in plaats van op de PLAY knop, dan kan het
afspelen niet meer worden hervat.
10.MODE
Stel met deze knop de LCD-parameters in(helderheid, contrast en verzadiging).
11.VOL+
Stel met deze knoppen het volume in.
12.Vooruit
Druk op deze knop om naar het volgende hoofdstuk/de volgende track te gaan.
13.Terug
Druk op deze knop om naar het vorige hoofdstuk of begin van een track te gaan.
14.
Druk op om vooruit te spoelen, dit kan met 5 snelheden (X2->X4-> X8->X16->X32->AFSPELEN), druk op de PLAY-
knop om het afspelen op normale snelheid te hervatten.
15.
Druk op om achteruit te spoelen, dit kan met 5 snelheden (X2->X4-> X8->X16->X32-> AFSPELEN), druk op de PLAY-
knop om het afspelen op normale snelheid te hervatten.
16.STEP
Druk op deze knop om in DVD-modus met stappen vooruit te spelen.
17

17.SEARCH
Druk op deze knop om naar een specifieke tijd, titel of hoofdstuk te gaan in DVD-modus.
18.SUBTITLE
Druk tijdens het afspelen herhaaldelijk op SUBTITLE om de ondertiteltaal te veranderen.
19.ANGLE
DVD:Druk op ANGLE om de kijkhoek te veranderen, dit werkt alleen bij DVD's die deze functie ondersteunen.
20.TITLE
Druk op deze toets om terug te keren naar het titelmenu van de DVD.
21.ENTER
Druk op deze toets om de menuselectie te bevestigen.
22.SETUP
Druk op deze toets om het hoofdmenu te openen of sluiten.
23.VOLAjuste
el volumen.
24.REPEAT
Druk tijdens het afspelen op REPEAT om de gewenste herhaalmodus te selecteren.
DVD:u kunt hoofdstuk herhalen/titel herhalen/herhalen uitschakelen.
CD/VCD:u kunt enkel herhalen/alle herhalen/herhalen uitschakelen.
Mp3: u kunt enkel herhalen/map herhalen/herhalen uitschakelen.
25.SLOW
Druk herhaaldelijk op de Slow-knop om langzaam af te spelen en door de verschillende snelheden te bladeren. De
beschikbare snelheden zijn 1/2,1/4,1/8,1/16 en normaal afspelen.
26.PROGRAM
DVD/VCD:De programmafunctie maakt het mogelijk om uw favoriete tracks op een disk op te slaan. Druk op de
PROGRAM-knop, vervolgens zal het PROGRAMMAMENU verschijnen op het scherm, u kunt nu met behulp van de
numerieke toetsen rechtstreeks de titels, hoofdstukken of tracknummers invoeren en de PLAY-optie selecteren.
Druk om nogmaals afspelen te hervatten op PROGRAM en selecteer de programma wissen optie in het
programmamenu. Druk nogmaals op PROGRAM om het programmamenu te verlaten.
27.ZOOM
DVD/VCD:Use ZOOM to enlarge or shrink the video image.
1.Press ZOOM during playback or still playback to activate the Zoom function. The square frame appears briefly in the
right bottom of the picture.
2. Each press of the ZOOM button changes the TV screen in the following sequence:
2X size->3X size->4X size->1/2 size->1/3 size->1/4 size->normal size
JPEG: Use ZOOM to enlarge or shrink the picture.
1.Press 'ZOOM' .
2,Used " " to enlarge,or “ " to shorten the picture.
Use the button to move through the zoomed picture.
SETUP Menu-instellingen
Pagina algemene instellingen
Druk op de SETUP knop om het instellingenmenu te openen.
Gebruik de navigatietoetsen om het gewenste item te selecteren. Druk na het instellen van de instellingen
nogmaals op SETUP om terug te keren naar de normale weergave.
De volgende menu-items kunnen worden ingesteld:
Pagina algemene instellingen
18

TV DISPLAY: selecteer de beeldverhouding van het afspeelbeeld.
4:3 PANSCAN: selecteer deze optie als u een normale TV heeft en het beeld op volledig scherm wilt bekijken, de
zijkanten worden van het beeld afgesneden om het op het beeld van uw TV te laten passen.
4:3 LETTERBOX: selecteer deze optie als u een normale TV heeft en het volledige beeld wilt zien. In dit geval wordt het
gehele beeld op het scherm getoond, maar verschijnen er twee zwarte balken aan de boven- en onderkant van het TV-
scherm.
16:9:breedbeeldweergave.
TV Weergave: slelects de beeldverhouding van het panel.
Angle Mark
Toon de informatie over de huidige beeldhoek, indien beschikbaar op de disk, aan de rechterkant van het TFT-scherm.
OSD Language
Hier kunt u de taal instellen voor de menu's op het scherm.
Closed Captions
Closed captions zijn gegevens die zijn verborgen in het videosignaal van sommige disks. Zorg er voordat u deze functie
selecteert voor dat de disk closed captions bevat en uw TV deze functie ook ondersteunt.
Screen Saver
Deze functie wordt gebruikt om de schermbeveiliging aan of uit te zetten.
Auto Standby
Deze functie wordt gebruikt om het apparaat na 3 of 4 uur automatisch in de standby-stand te zetten.
3 UUR: het apparaat gaat na 3 uur automatisch in de standby-stand als er geen interactie met de gebruiker heeft
plaatsgevonden in deze periode.
4 UUR: het apparaat gaat na 4 uur automatisch in de standby-stand als er geen interactie met de gebruiker heeft
plaatsgevonden in deze periode.
UIT: de automatische standby-functie is uitgeschakeld en het apparaat
blijft ingeschakeld, zelfs als er geen interactie met de gebruiker is.
Pagina audio-instellingen
Downmix
Met deze optie kunt u het signaal uit de analoge stereo-uitgang van uw DVD-speler instellen.
→LT/RT :Selecteer deze optie als uw DVD-speler is aangesloten op een Dolby Pro Logic decoder.
→Stereo :Selecteer deze optie als de uitgang is aangesloten op twee luidsprekers.
Dolby digital
De opties waar u uit kunt kiezen bij Dolby Digital Setup zijn: 'Dual Mono ' en 'Dynamic’
Dual Mono
Stereo :Het linker monogeluid wordt naar de linker luidspreker gestuurd en het rechter monogeluid wordt naar de
rechter luidspreker gestuurd.
L-Mono :Het linker monogeluid wordt naar de linker en
rechter luidspreker gestuurd.
R-Mono :Het rechter monogeluid wordt naar de linker en rechter luidspreker gestuurd.
Mix-Mono:Een mix van het linker en rechter monogeluid wordt naar de linker en rechter luidspreker gestuurd.
Dynamic
Dynamisch bereik compressie.
19

Pagina video-instellingen
Helderheid, contrast, tint, verzadiging: instellen van de videokwaliteit.
Voorkeurspagina
TV Type
Selecteer het kleurensysteem van uw TV. Deze DVD-speler is compatibel met NTSC en PAL.
PAL-Selecteer deze optie als de aangesloten TV een
PAL-kleurensysteem heeft. Dit zal het videosignaal van een
NTSC-disk omzetten en als PAL-formaat naar de TV sturen.
NTSC-Selecteer deze optie als de aangesloten TV een
NTSC-kleurensysteem heeft. Dit zal het videosignaal van een PAL-disk omzetten en als NTSC-formaat naar de TV
sturen.
Auto:Verander het videosignaal automatisch aan de hand van het diskformaat van de disk die wordt afgespeeld.
Audio:Selecteer een audiotaal (indien beschikbaar).
Subtitle:Selecteer een ondertiteltaal (indien beschikbaar).
Disc Menu:Selecteer een menutaal voor de disk (indien beschikbaar).
Default:Herstel de instellingen naar de fabrieksinstellingen.
20
Table of contents
Languages:
Other LENCO Portable DVD Player manuals

LENCO
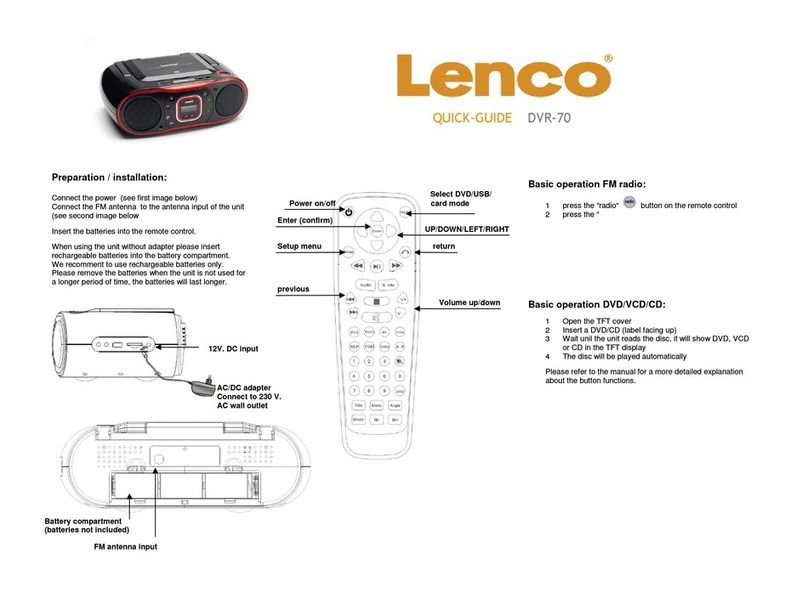
LENCO DVP-751 User manual

LENCO
LENCO DTVR-700 User manual

LENCO
LENCO DVP-1047 User manual

LENCO
LENCO DVP-1022 User manual

LENCO
LENCO TDV-900b User manual

LENCO
LENCO DVP-70 User manual

LENCO
LENCO DVP-1034 User manual

LENCO
LENCO DTVR-700 User manual

LENCO
LENCO DVP-75 User manual

LENCO
LENCO MES-415 User manual

LENCO
LENCO DVP-9411 User manual

LENCO
LENCO DVP-747 User manual

LENCO
LENCO MES-219 MPEG4 - User manual

LENCO
LENCO MES-224 User manual

LENCO
LENCO DVP-852 User manual

LENCO
LENCO DVP-940 User manual

LENCO
LENCO DVP-733 User manual

LENCO
LENCO DVP-901BK User manual

LENCO
LENCO DTVR-700 User manual

LENCO
LENCO DVP-9412 User manual