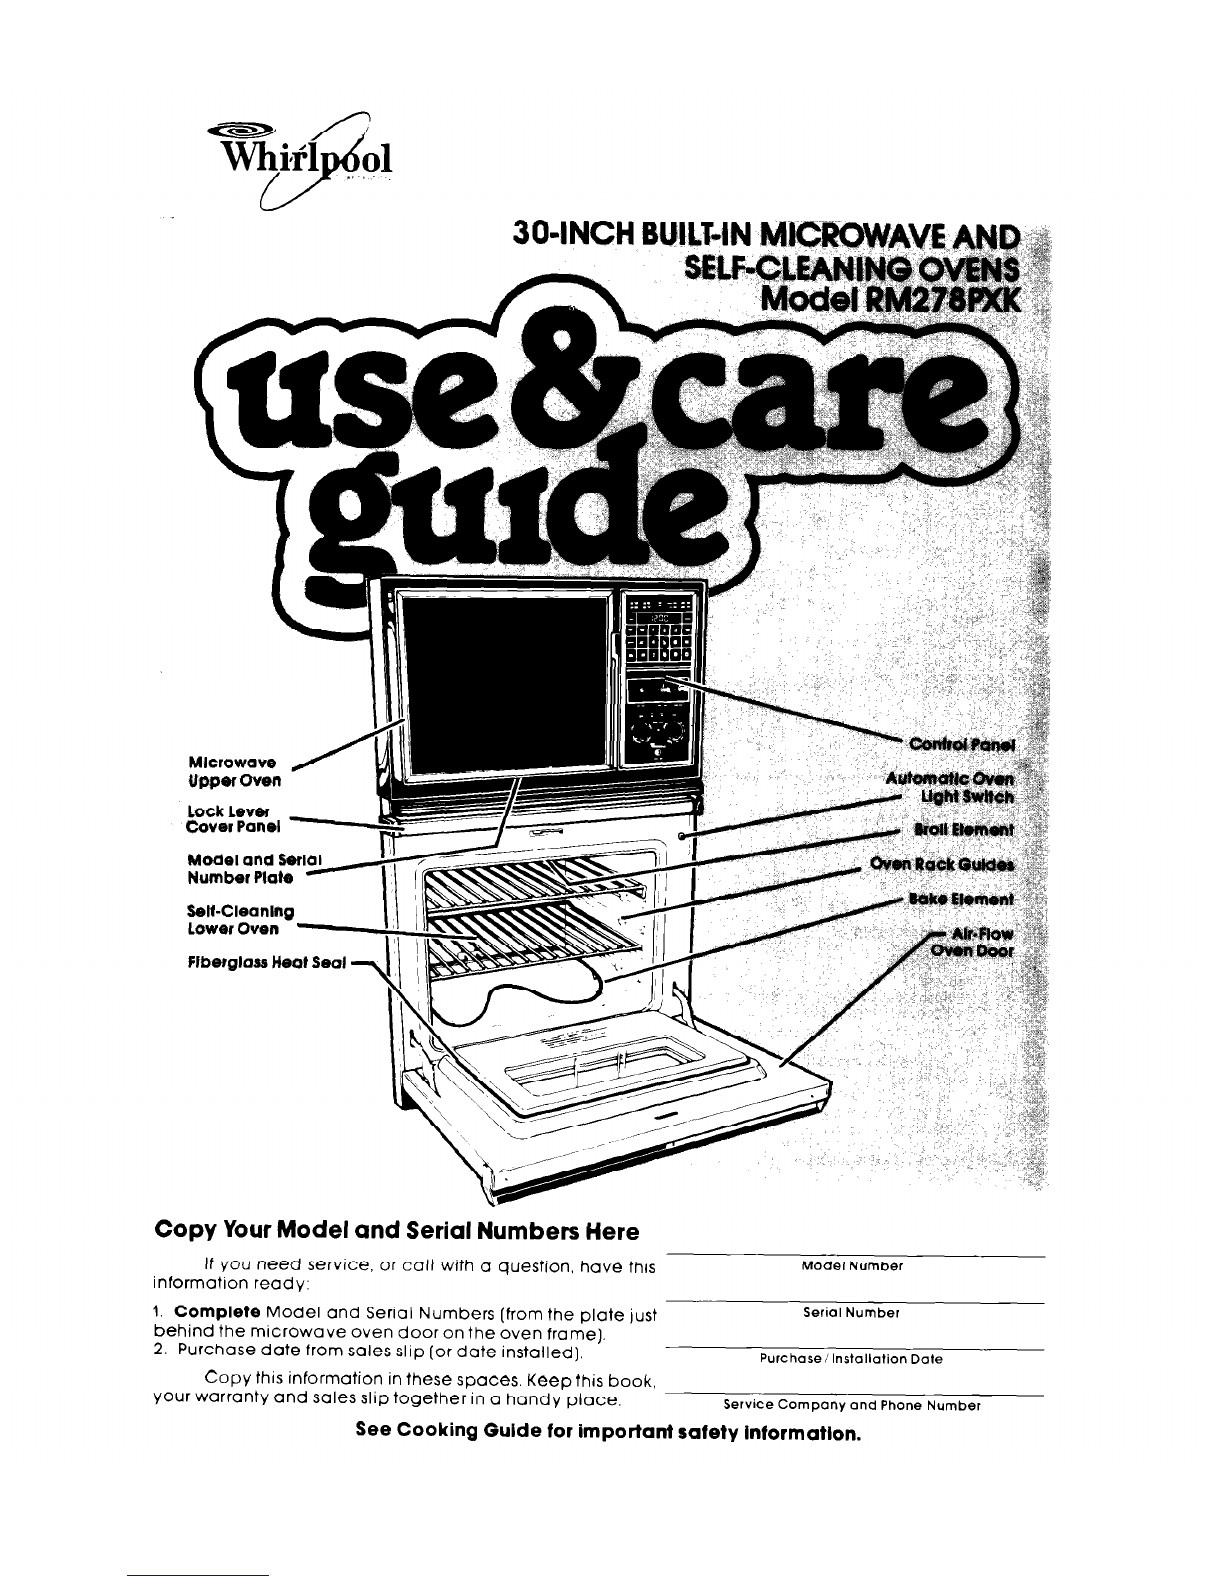
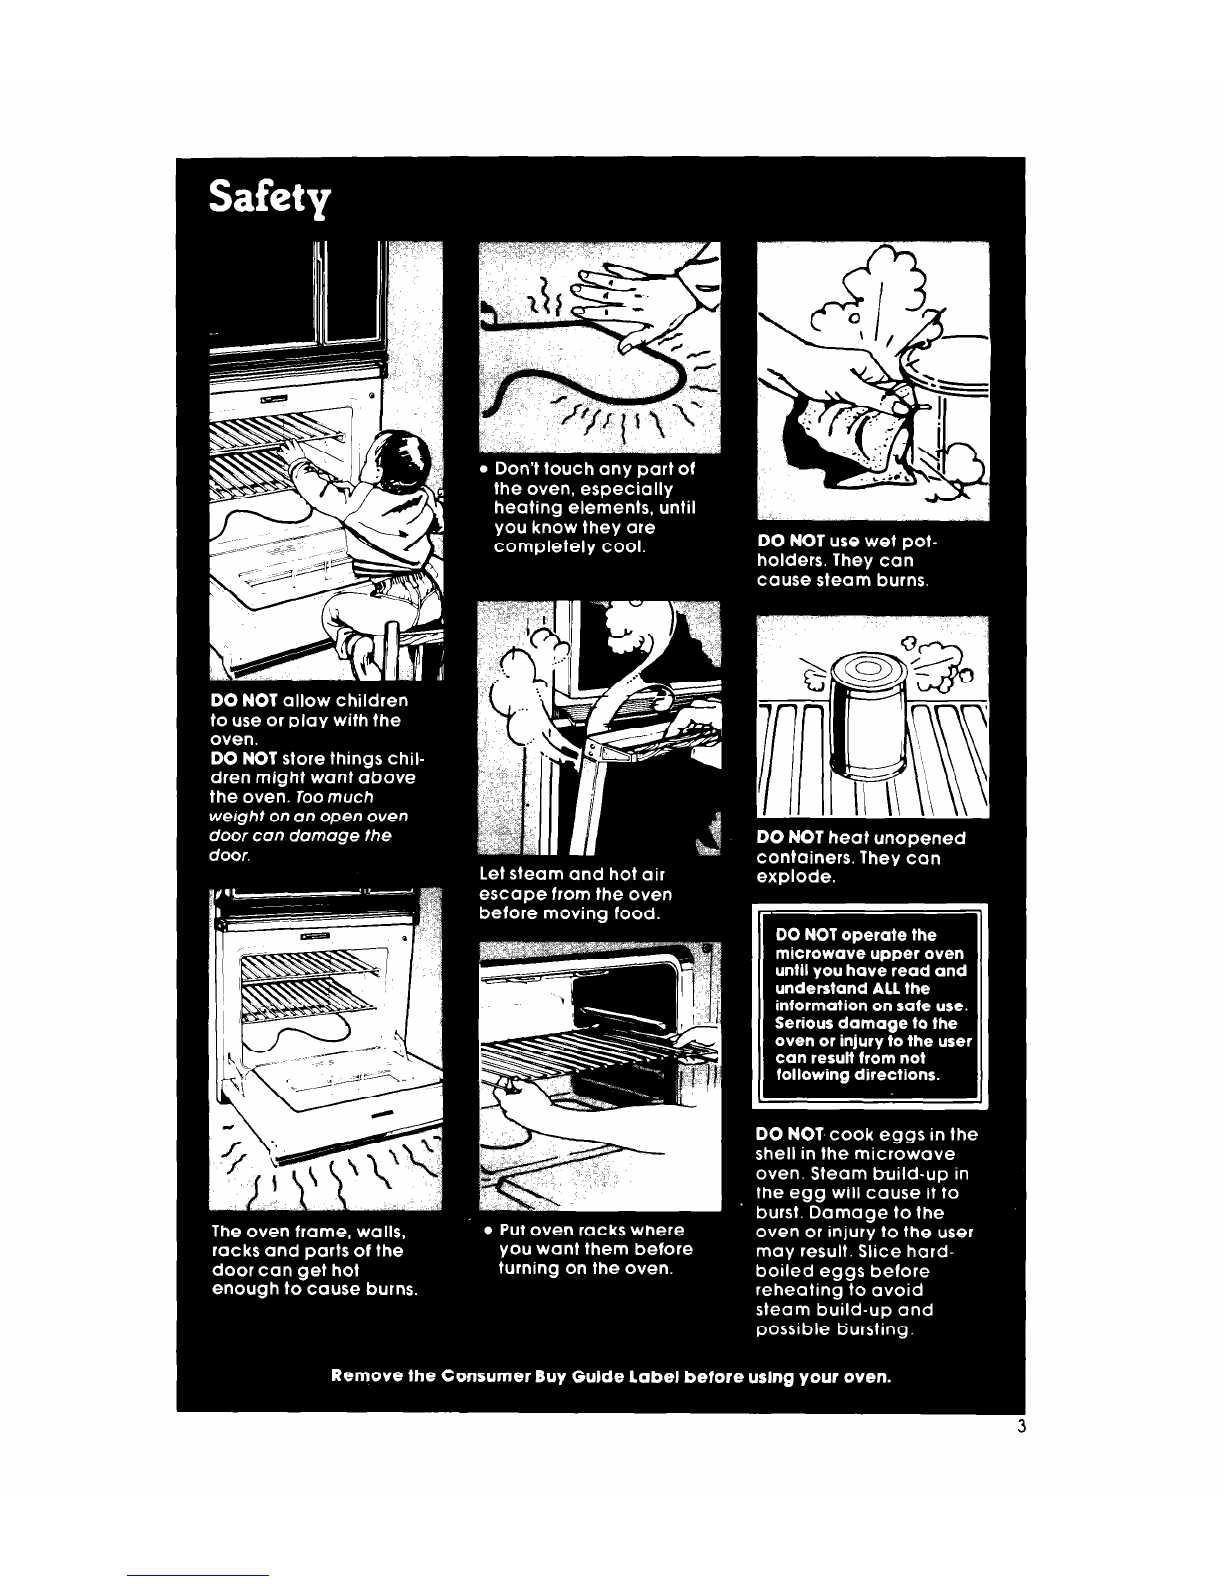
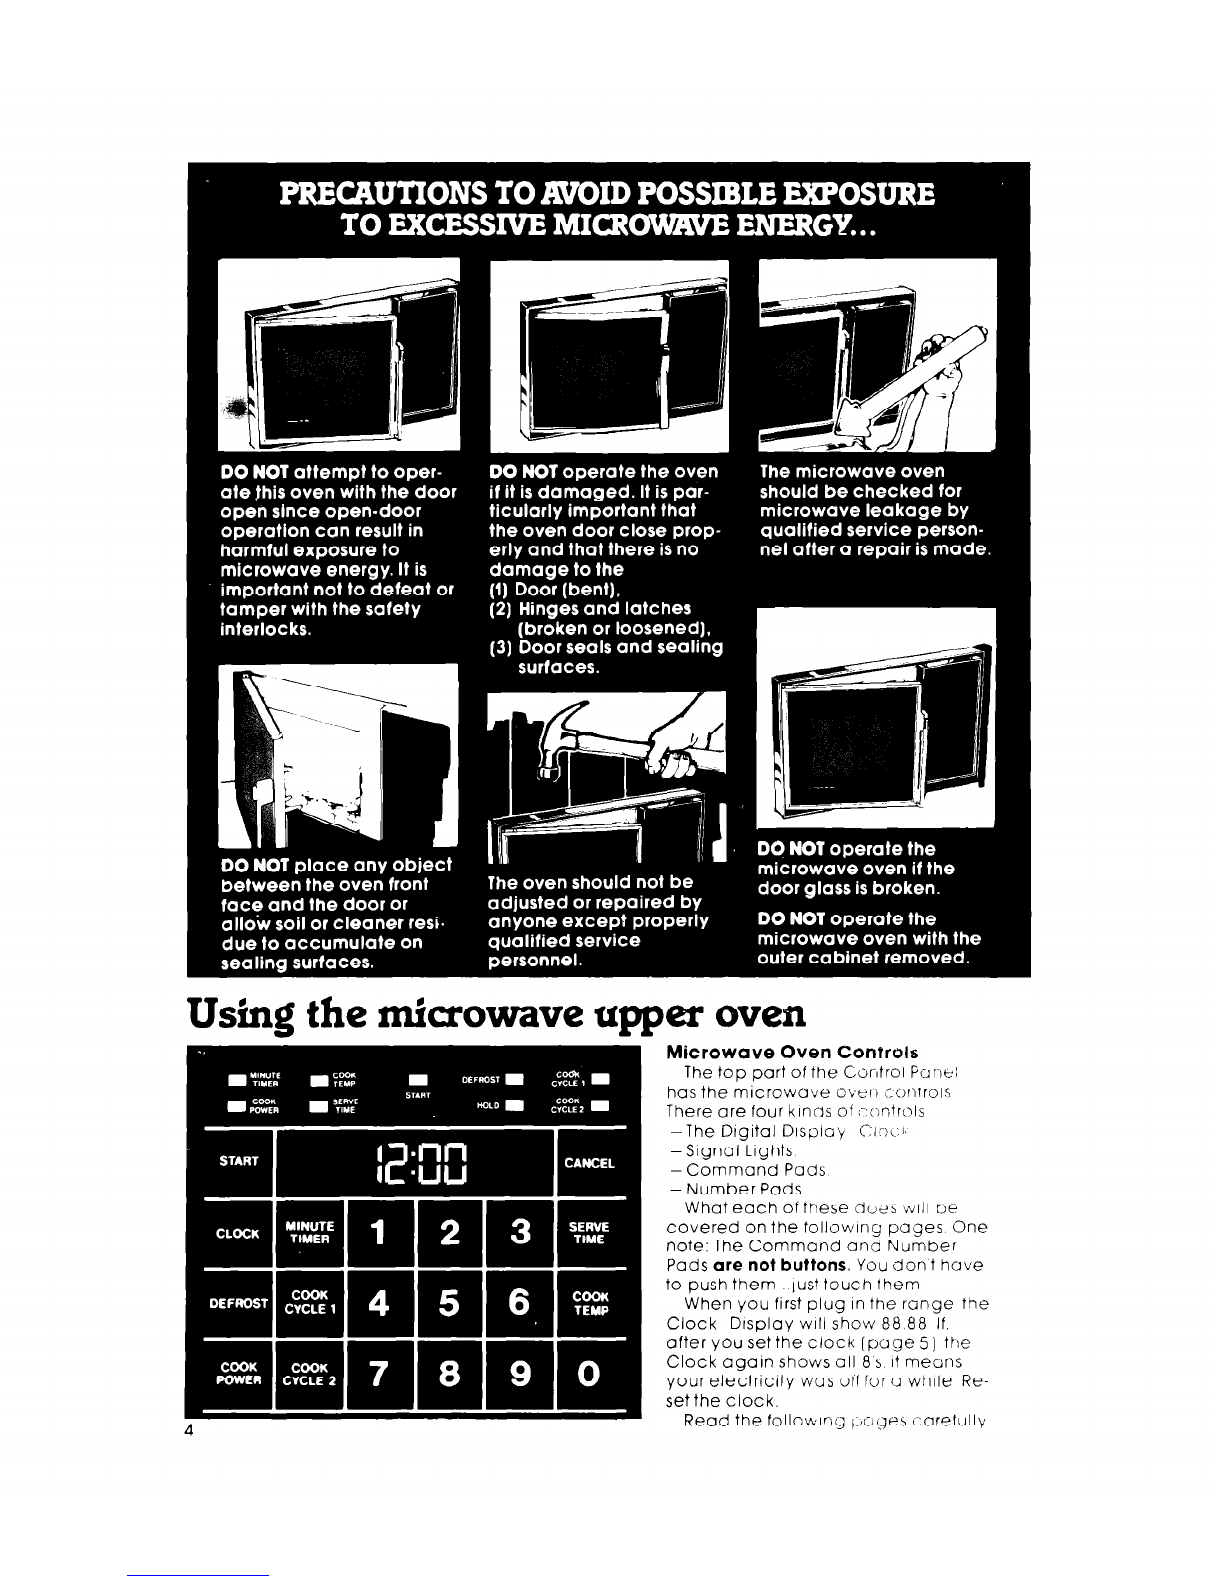
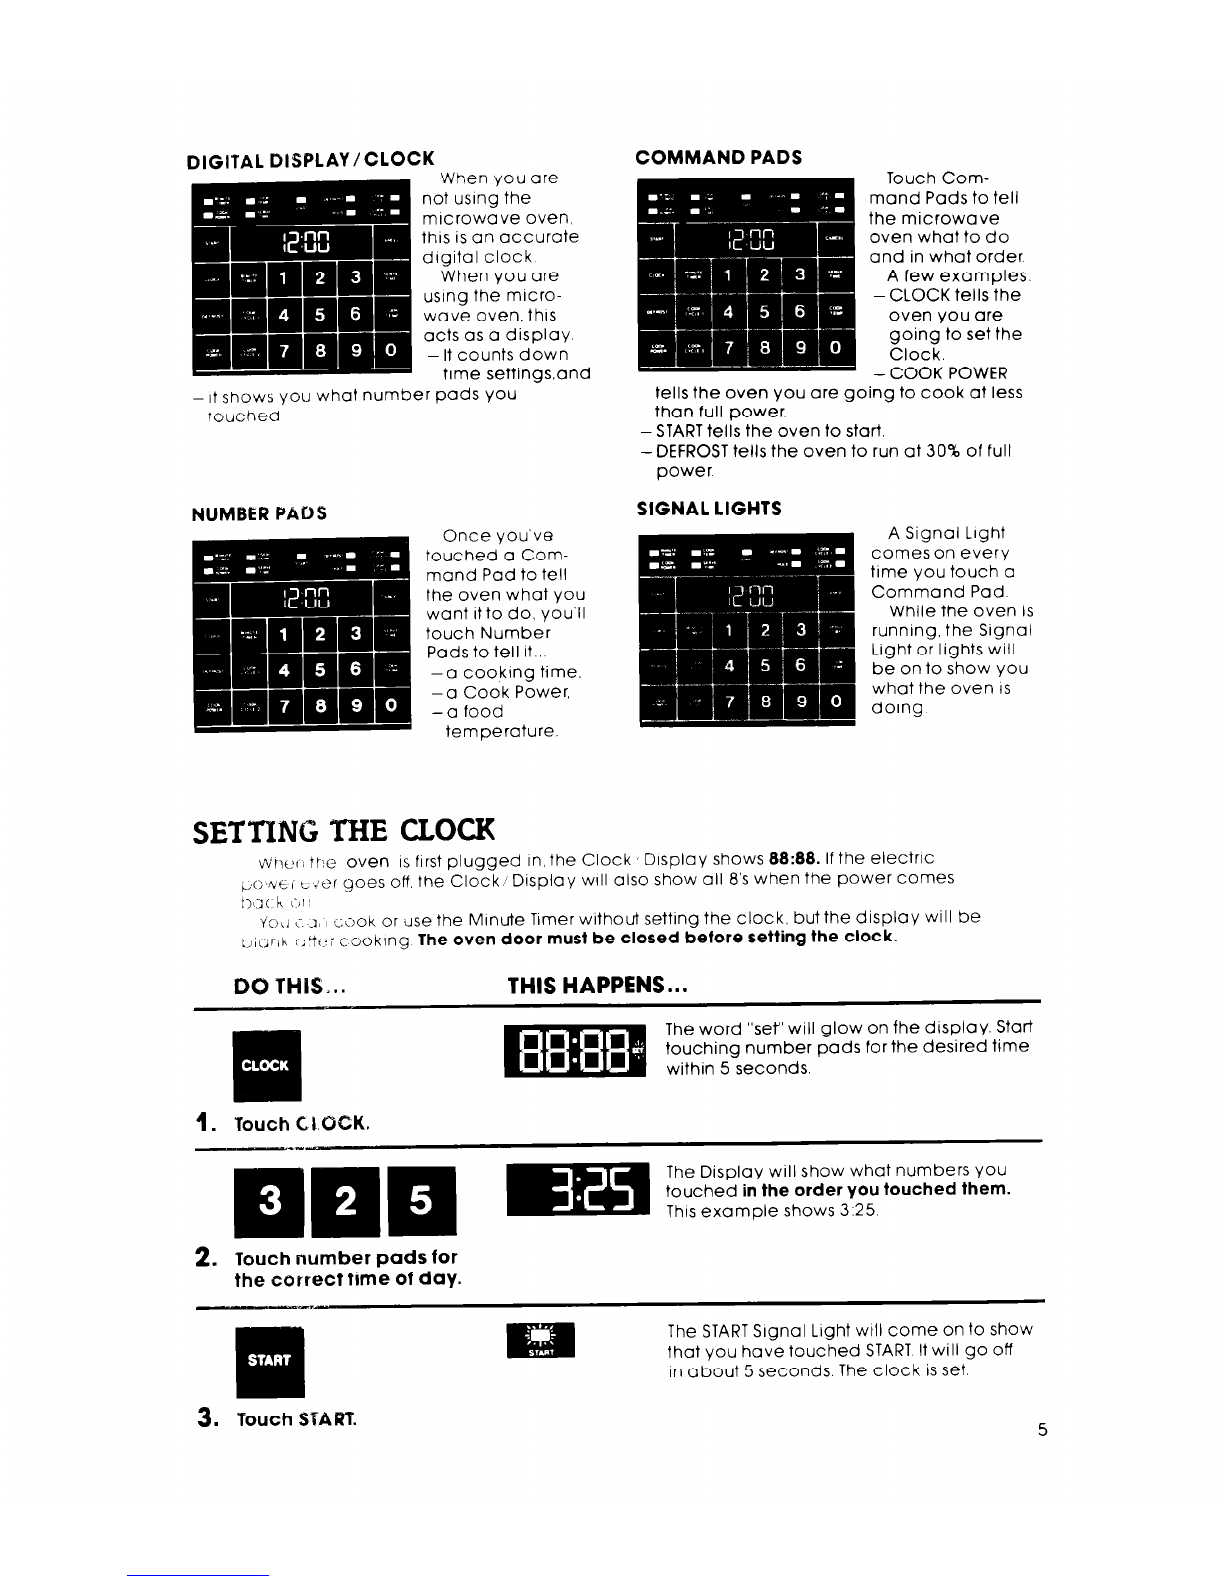
Whirlpool RM778PXT User manual
Other Whirlpool Microwave Oven manuals

Whirlpool
Whirlpool VT 266 User manual

Whirlpool
Whirlpool MWD319 User manual

Whirlpool
Whirlpool WOC75EC7H User manual

Whirlpool
Whirlpool MW3500XW User manual

Whirlpool
Whirlpool AVM 510 User manual

Whirlpool
Whirlpool UMH50008HS User manual

Whirlpool
Whirlpool GH8155XJ User manual

Whirlpool
Whirlpool GH7145 Owner's manual

Whirlpool
Whirlpool YMT4110SKQ1 User manual

Whirlpool
Whirlpool AMW 812 IXL Operating and maintenance manual

Whirlpool
Whirlpool MT4155SPT User instructions

Whirlpool
Whirlpool MW850EXP User manual

Whirlpool
Whirlpool MT4155SPB0 User manual

Whirlpool
Whirlpool COOK20 MWP 201 User manual

Whirlpool
Whirlpool AMW 545 User manual

Whirlpool
Whirlpool WMH32517AB Instruction Manual

Whirlpool
Whirlpool MW8901XS User manual

Whirlpool
Whirlpool AMW 848 Operating and maintenance manual

Whirlpool
Whirlpool AMW 407 IX User manual

Whirlpool
Whirlpool MH1170XSB2 User manual


M Service manual")