manuals.online logo
Brands
  1. Home
  2. •
  3. Brands
  4. •
  5. Whirlpool
  6. •
  7. Ventilation Hood
  8. •
  9. Whirlpool VC883 Instruction Manual

Whirlpool VC883 Instruction Manual

及
使
用
褒 明
书
H
3
if
Xt
www.
whiripool.com.hk
ji
EEI
HEL
2
fit
安装
2
”其
他
注意 事项
RRR
3
1282818
操作
4
清洗
5
|
БЕРЕТ
ㆍ
SEMA
(SBR.
BEZAS)
RABTA
+
必须
放置
在
小
孩
接触
不
到
的
地
方
;
ㆍ
安装
必须
由
专业
技术
人
员 负
责
;
ㆍ
核查
额定
铬
牌
上
的
额定
重
原
必
须
符合
家
用
志愿
;
ㆍ
安装
前
,
瑚
检查
下
列
配件
一
排
毛管
接头
、
易
拆
式
油 杯
、
易
拆
式
摩
打
七
油
器
;
ㆍ
接
通电
源
,
并
属
马 过
和
照明
系统
,
检查
操作
情况
;
ㆍ
警告
!
本
电器
必须
接
杜
地
粮
l
安装
1.
位
置
:
PY
BOARD
»
TRESS
MARR
AS
MATAR
(
BEE
250m
Æ
)
+
/WiiihlSl§09448
°
2,
定
位
:
ㆍ
垂直
量度
抽
油
烃
机
网
架
至
续
面
顶部
之
安装
高
度
。
此
安装
高 度 不
得
少
於
65cm
,建议
的
安装
高
度
在
65
至
75cm
ZR
;
ㆍ
避免
左右
或
向
前
倾斜
*
311
ㆍ
理
话
使
用
6
英寸
直径
的
排
氟
管
,
MEDRE
IRAR
°
如果
使
用
5
英寸
的
排
气管
,
可
以
便
用
包装
中
所
附
的
接
显
“
ㆍ
为
了
增强
抽 油
类
机
的
效果
,
排
氢
管
的
长
度
应
偿
BN
(RAZER)
ш.
ro)
АД)
MAREKE
EER
AE
LAT
997122
жаи
RESE
.
BK-BRERASEN
BSH
٠
建议
ĦABTA:
AFEEF
RARE
通过
,
如
果
排
气管
必须
穿
过
糖
壁
,
应
特别
留心
糖
22051618
+
852
218585
AR
;
.
UR
OA
١
RRA
п:
AREER
+
ZUR
RRS
的
位
置
;
在
选择
的
将
壁
中
杂
和
两口
网
条
,
外
需
3mm
《最
多
)
+
CERES
لم181󰾯
;
YARIS
RITAR
F
>
HER
S
t
A
HEIST
E
١
4
إلا󰾯
RITA
,
调
校 至
水
平
位
置
;
遵循
附送
的
排
毛管
接头
上
的
安装
指引
,
将
排
气管
接头
器
接
在
抽
油
类
杰 上
和
窗
/
糖
BE
(DURA
5
英
十
或
6
英寸
的
排
毛
操作
_
功能
简介
具有
一
按
完成
(38
PAR)
自动
清洗
内 部
功能
清洗
,
省
仓
所
有
清洗
抽
泊
类
楼
的
烦
腾
*
.
ÍK
Û
Ж.
调整
转速
ల
表示
高
速
口
表
TRE
O
表示
低速
,
循环
操作
*
.
EMR
RE
THRE
Es
按
O
Re
шл
لكا󰾯
+
FREES
+
可
使
用
O
AR.
ЮМЫН,
1
1249511
+
కశక:
+
Б
XEBERANE
程式
(
油 束
时间
5-99
2238)
.
WHER
#
O
号
键
2
次
,
会
显示
EI
MEAR
锥
提示
程式
,
当
屏幕
队
烧
时,
可
使
用
D
SESE
IDR
THES
AS
+
PREPS
RNS
HDS
차
ㆍ
MARL
+
ADM
ASR
ASI
(188230
1-99
7738)
+
.
自动
清洗
操作
ÍR
б
号
键
MARITA
BAXX
'
Æ
mir
EI
,清洗
程式
38
PEN
+
低
水 位
提示
,
当
水
位
过
低
时
,
屏
幕
显示
БИТИ,
RTO
TAU
+
须
加
注
TAJER
+
18128591
ERN
‹
.
党
水
位
太
低
时
按
©
号
键
无
动作
*
١
EARP
ASI
30
小
时
种 ,
如
无
FRØKEEI
内
煤
,
提醒
独特
之
处
:
VIR»
一
按
即
可
自
ㆍ
具有
速度
控制
功能
*
ㆍ
左
或
右
独立
厚
打
控制
ШИШЕ
ㆍ
者
食客
并
提示
功能
ㆍ
具有
一
按
虹
央
功 能
0
هم
هم
按
2
次
:
左
摩
打
操作
按
3
次
:
右
摩
打
操
作
D
"BR"
2:
用
於
塌
速
操作
,
模
式
为 高
中
一
低
,
循环
损
作
(也
作
铀
整
时
间
的
按键
)
bida
1.
可
选择
定时
关机
程式
2.
可
选择
并
铃
提示
程式
amann
D
"АЖ":
自动
清洗
,38
秒
内
完成
程序
D
功能
显示 屏幕
三
、
功
能
操作
及
显示
膏
明
A.
摩
打
操作
1,
按
DRN
O
RR
AĦMAR
EIR
TEAS
2.
RORE:
WERT
RU
Bae
EO
Ax
ARETE)
لحا󰾯
表示
AG
TEM
清洗
|
4.
一
按
自动
清洗
功能
说明
A.
HER
:
1
本
机
将
用
市
售
证 房
专用
的
除
油
清
澡
间
与
水
混合
后
(
比例
1:5
›
注入
机 器
内
水
箱 备
В,
ЖЕТЕ
ЕНЕ
2
RE,
77581842)
»
过
到
清洗
内
部
的
功能
,可
永保
抽
油
SHABAR
ㆍ
ERM
MERE
BØ
°
B.
WERB
:
1.
ARRAS
'
%JIIA)BXRIEJiE7E2)f
BHA
清水
混合
。
(ELD
TARA:
7K1:5)
2,
将
水
壹
从
机
器
之
注入
口
倒
人
清
澡
剂
,
抽
油
类
机
内
有
隐藏
式
水
箱
,
容量
与
水
杯
相同
*
ARMA
ki
°
4
“в
”
ЧЕРТ,
机 器
自动
喷
出
清
澡
BM
'
清
洗
机
器
内
部
°
5
9
171
م2󰾯
98
MERTER
+
以
防
Mã
©
C,
注
意
事项
及
警告
标示
:
1,
请
使
用
市
售
之
府
房
专用
除
油
清
党
剂
*(
意见
提供
:
EAR
BAR
|
(ЕИ!)
2,
请
按照
陆
机
附
有
的
水
变
上
指示
添加
清
党
划
与
水
(比例
1:5)
~
3,
建
议
消
费
者
最
多
每
日
清洗
抽
油
短
机
一
次
即
可
,
亦 可
按
需
要
减少
清洗
次
数
以
节省
清
개회
-
ABS
›
ТАБАН
ЕазЖ&,
JUD
EEK
+
2048283)
HHS}
-
SERIE
١
20/2)8)54818)8E7-3E7/44
ㆍ
LIDS
°
18117
2401748
+
以
防止
嘲 水 孔
堵
住
*
水
误
份
量
与
内
水
箱
相
同
,
均
可
用
5
~
6
次
,
可
於
每
次
用
星
后 ,
再
从
新
倒
进
新
清
涡
ЖИЕ,
以
防
过
满
。
如
内
水 箱
过
满
'
水
会
自动
排出
机
外
直
落
盛 油
杯
Nona
RE
|
1.
RRA
HLROMSH
;
2.
ERA
AROMA
+
لاه󰾯
4518
RSE
NDE
ARA
°
3.
144147117209244
+
TTAB
3
:
RRA
+
DART
ER
-
4,
FRIAS
IDES
+
THREE
RIE)
SRF
ORNS
°
完成
后
,
按
顺
时
针
方
向
旋转
,
即
可
重新
装
回
原
位
*
5,
抽
油
类
机
中
央
的
盛
油
杯
可
拆卸
作
定期
清
Æ
6.
TERRIER
ЙЛ
١
ARGNA
+
以
قله󰾯
81181818175
ㆍ
其
他
注意
事项
1,
为
避免
危险
,
EMERG
+
/RHI#IÃ/ÑWif583E
A
А
ЖТ
°
2.
215188
كن󰾯
ERRARE
EA
EAM
ARERR
VARHEE
ELH
o
3.
MARRERO
+
نا󰾯
E2
RAN
ЖГ,
BARET
ㆍ
4,
如
果
未
遵照
指
本
抽
油
类
机
避免
接近
火
源
“
a
安装
时
请
将
电源
关上
“
>
1% 85
3715
Ж
VC883
155
公斤
B
18
公斤
×200×712
615x
277
X
T96
220-240V,
50Hz
ЕЕ
150mm
60W
౧౬
140W
售后
服务
©
香港
维修
服务
中
心
:
客
务
志
器
维修
有
限
公司
EMB
ili
220-248
号
基
浊
工业
中
心
1710
E
SAAR
;
2406 9138
惠而浦
乃
美国
惠而浦
1011000!
U.S.A
303218515
=
IFU0209VC883
VC883
7
Installation
/
User
VC883
Manual
<=>
ilpóol
HOME
JR
APPLIANCES
www.whirlpool.com.
hk.
CONTENT
Cleaning
Maintenance
Others
Specification
Ponny
Before
using
the
hood
Installation
Procedure
Operation
Berore
عدولا󰾯
THE
Hoop
Packaging
materials
(plastic
bags,
polystyrene,
etc)
must
be
kept
out
of
children's
reach,
as
they
are
potentially
dangerous.
Installation
must
be
carried
out
by
a
qualified
technician;
Check
the
voltage
on
the
rating
plate
which
should
corresponds
to
the
voltage
in
your
home;
Check
the
following
accessories
before
installation:
=
Exhaust
duct
adapter,
detachable
oil
cup,
detachable
motor
oil
retainers;
Connect
the
power
and
switch
on
the
motors
and
lighting
system
to
check
the
operation;
Warning!
This
appliance
must
be
earthed!
INSTALLATION
1.
Location:
Air
turbulence
from
window/door
may
reduce
the
effectiveness
of
hood
as
smoke
from
cook
top
may
not
flow
to
the
effective
suction
zone(25cm
from
hood)
2.
Position:
+
The
installation
height
is
measured
vertically
from
center
of
fan
grille
of
hood
to
the
top
of
the
stove.
The
minimum
installation
height
should
no
the
less
than
65
cm
and
the
recommended
height
is
to
75
om;
+
Avoid
left-right
or
front-dropped
inclination
+
The
appliance
shall
be
positioned
in
such
a
way
that
the
plug
is
accessible.
65
-
75
cm
3.
Exhaust
duct
ㆍ
6-inch
diameter
exhaust
duct
is
recommended
to
use
in
order
to
maximize
suction
efficiency.
In
case
of
S-inch
exhaust
duct,
an
adapter
as
enclosed
in
the
packaging
can
be
used;
:
In
order
to
increase
the
efficiency
of
hood,
the
length
of
exhaust
duct
must
be
minimized.
Exhaused
air
tube
A
3mm
(maximum
limit)
Drill a
hole
for
the
air
tube
Drive
2
steel nails
in,
on
3,
the
upper
comer
of
both
2
sides
of
the
hood
Adjust
the
hang
hood
and
prepare
to
install
PROCEDURE
Find
a
suitable
installation
position
of
hood
which
should
be
next
to
a
window
and
can
be
cut
to
let
the
exhaust
duct
pass
through:
If
the
exhaust
duct
has
to
pass
through
the
wall,
particular
attention
must
be
paid
to
the
structure
of
the
wall
as
steel
reinforcement
may
be
embedded;
Mark
the
location
of
exhaust
outlet
hole,
then
cut/arill
the
hole
with
care;
Fix
the
position
of
hood
and
mark
the
position
of
the
two
hanging
hooks;
.
Drive
2
steel
nails
into
the
selected
wall
with
3
mm
(maximum)
space
leave
behind
for
hanging
the
hood;
Adjust
the
hanging
hooks
on
both
sides
of
the
hood
and
hang
the
hood
on
the
steel
nails,
then
adjust
the
hood
from
side
to
side
and
from
front
and
back
to
a
horizontal
position;
Follow
the
instruction
print
on
the
enclosed
exhaust
duct
adapter
and
connect
the
exhaust
duct
adapter
to
the
hood
and
window
/
wall
(5-inch
or
6-inch
duct
can
be
used);
OPERATION
Features
One
touch
automatic
internal
cleaning
function
(in
38
seconds).
Characteristic:
The
automatic
cleaning
function
can
simply
be
done
by
one
touch
function
without
dissembling
888
0000
‘peed
Power
Light
омо
LeivRight
high
speed,
CZ]
indicating
medium
speed
and
J
indicating
low
speed
in
cycle
operation.
B.
Delay
off
and
Alarm
Indication
Operation
1
Delay
off
Press
key
©
to
display
ㅁㅁ
When
the
icon
flashes
for
5
seconds,
key
CD
may
be
used
to
set
delay
of,
When
the
screen
stops
flashing,
the
unit
enters
delay
off
program
(Adjusting
time
5-99
minutes)
2.
Alarm
indication
Press
key
G)
twice
to
display
CE
entering
alarm
indication
program.
When
the
screen
fashes,
key
(D
may
be
used
to
adjust
indication
time,
the
screen
flashes
for
about
$
seconds.
The
unit
enters
alarm
indication
program
when
the
screen
stops
flashing,
(Adjusting
time
1-88
minutes)
С.
Automatic
Cleaning
Operation
1.
Press
key
©
to
display
and
carry
out
automatic
cleaning
program.
(EE)
displays
on
the
screen,
‘cleaning
program
will
complete
in
38
seconds.
2.
Low
water
level
indication:
When
the
water
level
is
too
low,
[==]
displays
on
the
screen
and
flashes,
indicating
that
the
water
level
is
too
low,
Cleaning
agent
should
be
added
before
restarting
cleaning
procedure.
3.
When
the
water
level
is
too
low,
key
()
cannot
operate
4.
After
using
the
cookerhood
for
30
hours,
if
auto
clean
function
is
not
operated,
Ez)
displays
on
the
screen
and
flashes
to
remind
you
for
the
cleaning.
the
machine.
Speed
Control
Button
Left
or
Right
Separate
Control
Motor
Delay
Off
Function
Cooking
Alam
Function
One
touch
On
/
Off
Button.
-©
-©
Avo
Ao,
Timer
Control
Panel
Description
of
Keys
D
Power
0౧/0౯
Button:
Fan
motor
starts
when
the
unit
is
switched
on,
both
left
and
right
motors
run
simultaneously.
All
operations
(tan,
lighting,
cleaning,
timing,
alarm
etc.)
are
stopped
when
the
unit
is-
switched
off.
@
‘Light’
Button:
ON-OFF
key
of
lighting.
(B'Left-Righf'
Buton:
Press
1
time:
running
both
left
and
right
motors
Press
2
times:
running
left
motor
Press
3
times:
running
right
motor
(D
"Speed"
Button:
For
operating
fan
speed
in
high,
medium
and
low
levels
(cycle
operation)
(can
be
used
for
time
setting)
C
Timer"
Button:
1.
to
select
timer
stort
program.
2.
canbe
selected
for
alam
indcaton
program
@
"Cleaning’
Button:
Automatic
cleaning,
the
cleaning
procedure
will
complete
in
38
seconds.
@
Function
Display
Screen
Functions
Operation
and
Display
Description
Motor
Operation
Press
key
D
or
D
,
LETE]
displays
on
the
screen,
indicating
that
the
motor
starts
running.
Press
key
C)
to
adjustthetan
speed
of
separate
motor.
[indicates
separate
running
of
left
motor,
డవ
indicates
separate
running
of
right
motor,
E=]
indicates
cyclic
adjustment
of
both
running
motors.
Press
key
(D
to
adjust
fan
speed,
with
ГТ]
indicating
>
epee
operaion
1.
CLEANING
4.
One
Touch
Automatic
Cleaning
Programme:
A.
Functions:
1.
The
cookerhood
shall
be
cleaned
by
using
the
special
cookerhood
cleaner
available
in
the
market.
After
the
cleaner
is
mixed
with
water
(ratio
1:5),
the
cleaner
mixture
shall
be
poured
into
the
cleaner
storage
unit
and
stored
in
the
cookerhood
for
cleaning
later.
The
cleaning
process
works
on the
centrifugal
force
and
cleaning
power
generated
by
revolving
the
motors
at
high
speed,
it
keeps
the
inside
of
the
cookerhood
clean
and
prolongs
the
life
of
the
cookerhood.
B.
Operating
Instructions:
1.
Mix
the
cleaner
and
water
by
pouring
water
`
and
the
cleaner
to
the
marked
level
of
the
NT
`
provided
jar.
(cleaner:
water
ratio
—
1:5)
`N
||
JAR
2.
Pour
the
cleaner
mixture
from
the
jar
into
ا󰾯
the
hidden
cleaner
storage
unit
of
the
cookerhood
through
the
water
hole
as
shown
in
the
picture.
The
volume
of
the
Cisaner-
cleaner
storage
unit
is
identical
to
the
5
volume
of
the
jar.
3.
lf
cleaner mixture
comes
out
from
the
excess
water
hole
down
into
the
oil
retainer,
it
means
the
cleaner
storage
unit
is
full
and
no
more
cleaner
mixture
shall
be
poured
into
the
unit.
4.
Press
the
'AutoClean'
Button
to
start
the
motors
and
the
cleaner
will
be
discharged
automatically
and
cleans
the
inside
of
the
cookerhood.
5.
The
oil
retainer
shall
be
taken
out
to
remove
the
dirty
oil
once
the
dirty
oil
reaches
the
marked
line
to
prevent
spillage
Water
inlet
Excess
water
0.
Precautions:
1.
Only
special
cookerhood
cleaner
available
in
the
market
shall
be
used
(Recommended
agent:
Kao
Magiclean
Household
/
Kitchen
cleaner)
Follow
the
cleaner
and
water
mixture
ratio
marked
on the
supplied
jar
(ratio
1:5)
3.
Consumers
are
advised
to
clean
the
cookerhood
once
a
day.
lt
may
be
cleaned
less
frequently
according
to
individual
needs,
4.
When
filling
the
cookerhood
with
the
cleaner
mixture,
use
only
the
special
jar
provided
with
the
cookerhood
and
take
precautions
not
to
overfill
the
cleaner
storage
unit.
5.
Check
the
oil
retainer
during
the
cleaning
process
to
prevent
oil
spillage.
Do
not
allow
dirty
oil
to
exceed
the
marked
level,
6.
Do
not
put
any
other
substances
into
the
cleaner
compartment
unit
as
this
will
cause
blockage
of
its
injection
hole.
7.
The
cleaner
storing
unit
and
the
supplied
jar
are
of
identical
size.
The
cleaner
mixture
stored
can
be
used
for
5
to
6
times.
The
cleaner
storage
unit
may
be
refilled
by
diluted
cleaner
mixture
every
time
after
use.
To
prevent
overfiling,
excess
cleaner
mixture
will
be
discharged
into
the
oil
retainer
automatically.
ю
Clockwise
to
install
Anti-clockwise
to
detach
MAINTENANCE
.
Always
disconnect
from
power
supply
before
cleaning
Clean
both
exterior
and
interior
of
the
hood
at
regular
intervals
can
keep
the
hood
more
long
lasting.
Do
not
use
abrasive
cleanser.
Fan
protection
grille
can
be
detached
for
cleaning
by
removing
the
screws
with
a
screwdriver,
It
must
be
reinstalled
after
clean.
Oil
retainers
on
the
grille
can
also
be
detached
for
cleaning
by
turning
the
retainer
in
anti-clockwise
direction
and
re-
install
at
clockwise
direction,
..
The
ой
cup
in
the
centre
of
the
hood
for
holding
grease
can
be
detached
and
cleaned
regularly.
‚
Make
a
habit
to
turn
on
the
hood
before
the
stove
to
avoid
high
heat
in
the
kitchen,
OTHERS
1.
Repair
service
including
replacement
of
light
bulb
and
main
cord
shall
only
be
carried
out
by
manufacturer,
its
service
agent
or
a
qualified
technician.
It
is
danger
for
anyone
other
than
the
above
mentioned
people
to
perform
repair
service.
2.
Hazardous
smoke/fume
generated
from
burning
Towngas/L.P.
gas
or/and
cooking
must
be
discharged
outside
the
kitchen
through
the
exhaust
pipe.
3.
Air
ventilation
inside
kitchen
must
be
maintained
in
good
condition
when
range
hood
is
using
4.
1115
dangerous
if
cleaning
is
not
carried
out
in
accordance
with
the
instructions
specified
in
this
user
manual.
5.
Do
not
directly
flame
the
range
hood.
6.
During
installation,
power
supply
must
be
disconnected
SPECIFICATIONS
Model
VC883
Weights
NW
15.5
kg
GW
18
kg
Dimension(mm)(D
x
H
x
W)
537
x
200
౫712
Packing
Dimension(D
x
H
x
W)
615
x
277
౫796
Electrical
Specification
220-240V,
50Hz
Transmission
Twin
Motor
Diameter
Outlet
Pipe
150mm
Lighting
System
60W,
Bulb
Load
of
Motor
140W
AFTER-SALES
SERVICE
:
Hong
Kong
Service
Centre:
CONSUMER
APPLIANCES
SERVICE
LIMITED
Room
1710,
17/F.,
Tsuen
Wan
Industrial
Cente,
<>
220
-
248
Texaco
Road,
Tsuen
Wan,
-
Hong
Kong
IT
Tel.:
2406-9138
APPLIANCES
Whirlpool
is
a
registered
trademark
of
Whirlpool
U.S.A.
IFU0209VC883.
VC883

Other Whirlpool Ventilation Hood manuals
Whirlpool RHH 2300 SERIES User manual

Whirlpool

Whirlpool RHH 2300 SERIES User manual

Whirlpool GZ7736XGS1 User manual

Whirlpool

Whirlpool GZ7736XGS1 User manual

Whirlpool RH2000 Series User manual

Whirlpool

Whirlpool RH2000 Series User manual

Whirlpool RH4830 Series Manual

Whirlpool

Whirlpool RH4830 Series Manual

Whirlpool AKR914CIXM User manual

Whirlpool

Whirlpool AKR914CIXM User manual

Whirlpool RH2330XJ User manual

Whirlpool

Whirlpool RH2330XJ User manual

Whirlpool UXT5230ADB Parts list manual

Whirlpool

Whirlpool UXT5230ADB Parts list manual

Whirlpool AKTT600/IX Installation guide

Whirlpool

Whirlpool AKTT600/IX Installation guide

Whirlpool WMH78519L User manual

Whirlpool

Whirlpool WMH78519L User manual

Whirlpool WVU37UC4F User manual

Whirlpool

Whirlpool WVU37UC4F User manual

Whirlpool UXT2030AAW User manual

Whirlpool

Whirlpool UXT2030AAW User manual

Whirlpool RJH 3330-1 User manual

Whirlpool

Whirlpool RJH 3330-1 User manual

Whirlpool WVW75UC6DS Product information sheet

Whirlpool

Whirlpool WVW75UC6DS Product information sheet

Whirlpool UXT5230AY Product information sheet

Whirlpool

Whirlpool UXT5230AY Product information sheet

Whirlpool AKR 039 Operating instructions

Whirlpool

Whirlpool AKR 039 Operating instructions

Whirlpool RGH 8300-1 User manual

Whirlpool

Whirlpool RGH 8300-1 User manual

Whirlpool WSLCSE 65 AS GR/1 User manual

Whirlpool

Whirlpool WSLCSE 65 AS GR/1 User manual

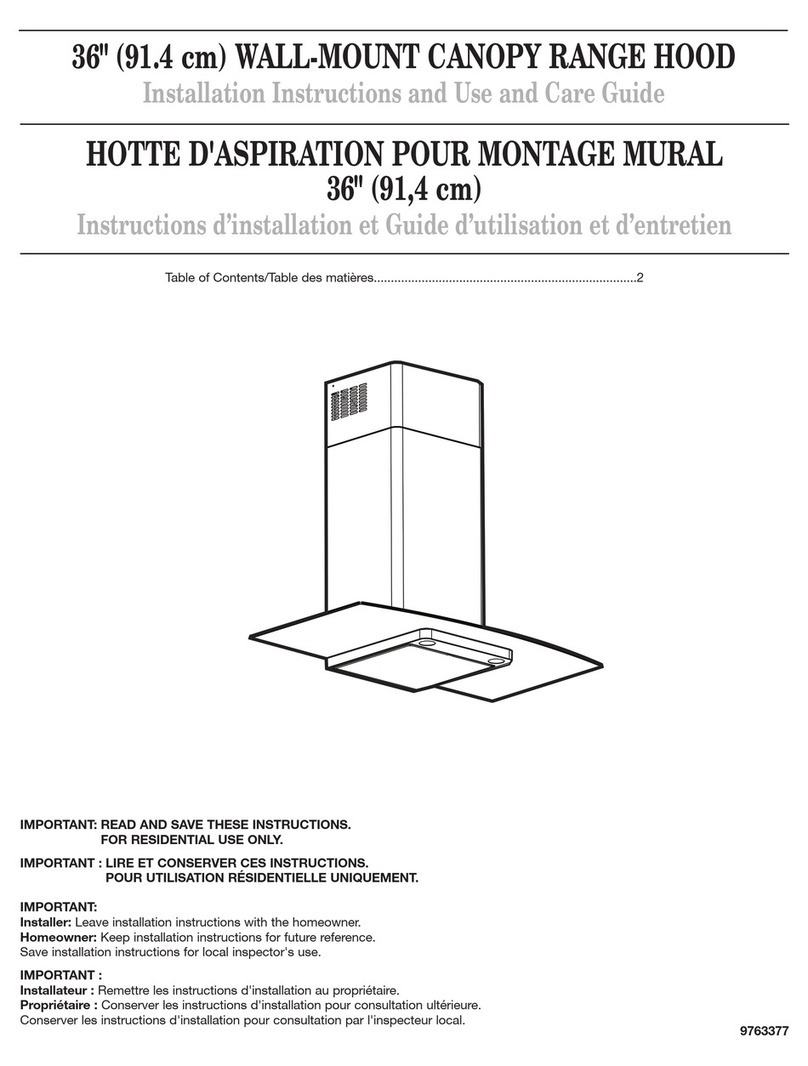
Whirlpool 36" (91.4 cm) WALL-MOUNT CANOPY RANGE HOOD Manual
Whirlpool

Whirlpool 36" (91.4 cm) WALL-MOUNT CANOPY RANGE HOOD Manual

Whirlpool 4317332 User manual

Whirlpool

Whirlpool 4317332 User manual

Whirlpool AKR 465/IX Operating instructions

Whirlpool

Whirlpool AKR 465/IX Operating instructions

Whirlpool UXT5236ADB Parts list manual

Whirlpool

Whirlpool UXT5236ADB Parts list manual

Whirlpool AKR 951/1 IX User manual

Whirlpool

Whirlpool AKR 951/1 IX User manual

Whirlpool RH8330 SERIES Manual

Whirlpool

Whirlpool RH8330 SERIES Manual

Whirlpool RH2000 Series User manual

Whirlpool

Whirlpool RH2000 Series User manual

Popular Ventilation Hood manuals by other brands

Solido Divero Diago 100560 operating instructions

Solido

Solido Divero Diago 100560 operating instructions

Beco CTB 6407 XH user manual

Beco

Beco CTB 6407 XH user manual

Electrolux EJIB369TDJS instruction manual

Electrolux

Electrolux EJIB369TDJS instruction manual

Haier HPH90ILX1 Quick reference guide

Haier

Haier HPH90ILX1 Quick reference guide

KitchenAid KHTU705RSS2 parts list

KitchenAid

KitchenAid KHTU705RSS2 parts list

Howdens HJA2231 User's installation guide

Howdens

Howdens HJA2231 User's installation guide

Electrolux EFA90245X installation manual

Electrolux

Electrolux EFA90245X installation manual

IKEA BF570 Installation and Maintenance

IKEA

IKEA BF570 Installation and Maintenance

Zanussi ZB 350 Instruction booklet

Zanussi

Zanussi ZB 350 Instruction booklet

Electrolux EFC 928 user manual

Electrolux

Electrolux EFC 928 user manual

Beko HNU51311SH user manual

Beko

Beko HNU51311SH user manual

Cafe CVW7361 owner's manual

Cafe

Cafe CVW7361 owner's manual

Miele DA 6700 D Operating and installation instructions

Miele

Miele DA 6700 D Operating and installation instructions

Atag WU7011HM Instructions for use

Atag

Atag WU7011HM Instructions for use

Elba EH-J9031ST(SS) owner's manual

Elba

Elba EH-J9031ST(SS) owner's manual

Parmco T7-6S-1 Installation and operating instructions

Parmco

Parmco T7-6S-1 Installation and operating instructions

Bosch DHD9605UC/01 installation instructions

Bosch

Bosch DHD9605UC/01 installation instructions

KitchenAid KIRD862VSS Installation Instructions and Use & Care Guide

KitchenAid

KitchenAid KIRD862VSS Installation Instructions and Use & Care Guide

manuals.online logo
manuals.online logoBrands
  • About & Mission
  • Contact us
  • Privacy Policy
  • Terms and Conditions

Copyright 2025 Manuals.Online. All Rights Reserved.