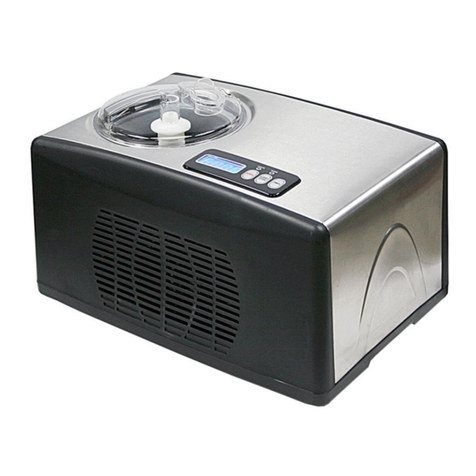
Whynter ICM-15S User manual

User Manual
Compact Ice-cream Maker
Model No.: ICM-15S
It is important that you read these instructions before using your compact ice-cream maker and
we strongly recommend that you keep them in a safe place for future reference.

1
IMPORTANT SAFETY INSTRUCTIONS………………………………………………. ….2
PREPARING YOUR ICE MAKER FOR USE
IMPORTANT SAFETY TIPS………………………………………………………………………3
GETTING TO KNOW YOUR UNIT…………………………………………………………
………………………………………………………….4
.4
OPERATING PROCEDURES & MAINTENANCE
UNPACKING
UNPACKING YOUR
YOUR ICE
ICE MAKER
MAKER…………………
………………….
.……………………………………………
…………………………………………….
..
.6
6
CONNECTING
CONNECTING YOUR
YOUR ICE
ICE MAKER
MAKER………………
……………….
.………
……….
.……………………………………
……………………………………..6
..6
CLEANING
CLEANING AND
AND MAINTAINING
MAINTAINING YOUR
YOUR ICE
ICE MAKER
MAKER…
….
.…………………………………………
………………………………………….
.6
6
USING YOUR ICE MAKER…………………………………………………………………7
TROUBLESHOOTING
TROUBLESHOOTING……………………………
…………………………….
.……………………………………………
……………………………………………..10
..10

2
DANGER
WARNING
!
Your safety and the safety of others are very important.
We have provided many important safety messages manual and your appliance.
Always read and obey all safety massages.
This is the safety alert symbol:
!
All safety messages will follow the safety alert symbol and the word “DANGER” or “WARNING”.
These words mean:
You can be killed or seriously injured if you don’t immediate follow instructions.
All safety messages will tell you what the potential hazard is, tell you how to reduce the chance
of injury, and tell you what can happen if the instructions are not followed.
TABLE OF CONTENTSIMPORTANT SAFETY INSTRUCTIONSPREPARING YOUR ICE MAKER FOR USE
!

3
When using electrical appliances, basic safety precautions should be followed to reduce the
risk of fire, electric shock, and injury to persons or property. Read all instructions before using
any appliance.
This appliance can be used by children aged from 8 years and above and persons with
reduced physical, sensory or mental capabilities or lack of experience and knowledge if they
have been given supervision or instruction concerning use of the appliance in a safe way and
understand the hazards involved. Children shall not play with the appliance. Cleaning and user
maintenance shall not be made by children without supervision.
Do not operate this,or any other appliance with a damaged cord.
If the supply cord is damaged, it must be replaced by the manufacturer or its service agent
or a similarly qualified person in order to avoid a hazard.
This ice-cream maker must be positioned so that the plug is accessible.
Connect to properly polarized outlets only. No other appliance should be plugged into the
same outlet. Be sure that the plug is fully inserted into the receptacle.
Do not run the power cord over carpeting or other heat insulators. Do not cover the cord.
Keep cord away from traffic areas, and do not submerge in water.
We do not recommend the use of an extension cord, as it may overheat and become a risk
of fire. If you must use an extension cord, use No.14AWG minimum size and rated no less
than 1875 watts.
Unplug the ice-cream maker before cleaning or making any repairs or servicing.
Exercise caution and use reasonable supervision when appliance is used near children.
Do not use your ice-cream maker outdoors. Place the ice-cream maker away from direct
sunlight and make sure that there is at least 4inches (10 cm) of space between the back of
your unit and wall. Keep a minimum distance of 4inches (10 cm) on each side of your unit
free. Keep the enough air circulation around your unit.
Do not clean your ice-cream maker with flammable fluids. The fumes can create a fire
hazard or explosion.
Do not tip over.
If the ice-cream maker is brought in from outside in wintertime, give it a few hours to warm
up to room temperature before plugging it in.
Children should be supervised to ensure that they do not play with the appliance.
This appliance must be earthed.
Do not store explosive substances such as aerosol cans with a flammable propellant in this
appliance.
This appliance is intended to be used in household and similar applications such as
– staff kitchen areas in shops, offices and other working environments;
– farm houses and by clients in hotels, motels and other residential type environments;

4
– bed and breakfast type environments;
–catering and similar non-retail applications.
DANGER – Risk Of Fire or Explosion. Flammable Refrigerant Used. Do Not Use
Mechanical Devices To Defrost Ice Maker. Do Not Puncture Refrigerant Tubing.
DANGER – Risk Of Fire Or Explosion. Flammable Refrigerant Used. To Be
Repaired Only By Trained Service Personnel. Do Not Puncture Refrigerant Tubing.
CAUTION – Risk Of Fire Or Explosion. Flammable Refrigerant Used. Consult Repair
Manual/Owner’s Guide Before Attempting To Install or Service This Product. All Safety
Precautions Must be Followed.
CAUTION – Risk Of Fire Or Explosion. Dispose Of Property In Accordance With Federal Or
Local Regulations. Flammable Refrigerant Used .
CAUTION-Risk Of Fire Or Explosion Due To Puncture Of Refrigerant Tubing; Follow
Handling Instructions Carefully. Flammable Refrigerant Used.
The ice maker should be installed in accordance with the safety standard for Refrigeration
Systems, ASHRAE15. The ice maker shall not be installed in corridors or hallways of public
buildings.
If the unit is with problem need to be maintained, that replacing with like components and
that servicing shall be done by factory authorized service personnel, so as to minimize the
risk of possible ignition due to incorrect parts or improper service.
IMPORTANT:
The wires in this mains lead are colored in accordance with the following code:
Green or Green with a strip Yellow: Grounding
White: Neutral
Black: Live
WANING: To avoid a hazard due to instability of the appliance, it must be placed at an even
or flat surface.
WARNING: When positioning the appliance ensure the supply cord is not trapped or
damaged.
WARNING: Do not locate multiple portable socket-outlets or portable power supplies at the
rear of the appliance.

5
General instruction
1. Measuring Cup
2. Touchpad Control Panel with LED display
3. Ice Cream Shovel
4. Rotation shaft of stir motor
5. Transparent cover
6. Ice Cream Scoop
7. Mixing Paddle
8. Power plug.
9. Mixing Bowl with Lift-Out Handle
10. Hot Air outlet
11. Cold Air inlet
Hard Ice Cream
STIRTIME+
Milkshake Soft Ice cream
TIME-
START
STOP
Position of control panel & function
Hard Ice
Cream
STIRTIME+
Milkshake Soft Ice
cream
TIME-
START
STOP
GETTING TO KNOW YOUR UNIT

6
DANGER
Touch Control Panel:
A. Button to select milkshake function
B. Button to select soft ice-cream function
C. Button to select hard ice-cream function
D. Button to increase the ice cream making time
E. Button to decrease the ice cream making time
F. Button to select stir function
G. Button to turn on/off the unit.
H. LED display window
I. LED Light for work state and system warning indicator
UNPACKING YOUR ICE-CREAM MAKER
1. Remove the exterior and interior packaging. Check if all the parts, such as the paddle,
ice-cream mixing bowl, and ice-cream scoop etc., are inside. If any parts are missing,
please contact our customer service.
2. Clean the ice-cream mixing bowl, paddle, and ice-cream scoop first.
3. Put the unit on a level & flat counter top, and without direct sunlight and other sources of
heat (i.e.: stove, furnace, radiator).
4. Make sure that there is at least 10mm gap between the back & LH/RH sides with the wall.
5. Allow one hour for the refrigerant fluid to settle before plugging in the unit.
6. The appliance must be positioned so that the plug is accessible.
CONNECTING YOUR ICE-CREAM MAKER
* Improper use of the grounded plug can result in the risk of electrical shock. If the
power cord is damaged please call our customer service.
1. This unit should be properly grounded for your safety. The power cord of this appliance is
equipped with a grounding plug which mates with standard grounding wall outlets to
minimize the possibility of electric shock.
2. Plug your appliance into an exclusive, properly installed, grounding wall outlet. Do not
under any circumstances; damage the grounding means of the plug under any
circumstances. Any questions concerning power and/or grounding should be directed
toward a certified electrician.
3. This appliance requires a standard 110-120Volt, 60Hz electrical outlet with good grounding
means.
4. DO NOT immerse the compressor/motor base in water.
OPERATING PROCEDURES & MAINTENANCE
!

7
CLEANING
CLEANING AND
AND MAINTAINING
MAINTAINING YOUR
YOUR ICE
ICE-CREAM
-CREAM MAKER
MAKER
Before using your ice-cream maker, it is strongly recommended to clean it thoroughly.
1. Turn the transparent cover by counterclockwise, be sure the arrow on lid is lined up with the
lock icon on the base, and then you can take the cover out.
2. Take out the paddle and ice-cream mixing bowl.
3. Use a dry, clean, soft cloth to clean the internal wall of the ice-cream making house
smoothly, no need to use water or wet cloth to clean it.
4. The outside of the unit should be cleaned regularly with a mild detergent solution and warm
water. DO NOT immerse the compressor/motor base in water. It will wet the inside electrical
parts and cause the electrical safety problem.
5. Then you can put the transparent cover, paddle, ice-making mixing bowl, and the ice-cream
scoop into the water, and use the wet and soft cloth to clean them. Then dry them before
running the unit. Warning: Don’t use the abrasive tool to wipe them.
6. Dry all the parts and exterior with a clean soft cloth.
7. Put back all the parts to the original position.
8. When the machine is not to be used for a long time, clean & dry all the parts and the unit.

8
How to make the ice-cream
Please prepare the material of the ice-cream per your personal food recipe or the
attached recipe paper. No need to put the material and the ice-cream mixing bowl
into freezer for freezing ahead, this ice-cream maker can freeze the material and
make the ice-cream directly.
Please follow the step:
1/Put your ice-cream materials inside the ice-cream mixing bowl and also with
some warm water, then stir smoothly and mix it uniformly.
2/Put the ice-cream mixing bowl filled with material into the ice-cream making
house.
3/Install the paddle on the rotating shaft.

9
4/Put back the transparent cover and turn it clockwise to install tightly. Then
plug in the unit.
5/Press the Milkshake/Soft Ice Cream/Hard Ice Cream or stir button to select
the function, then press the START/STOP button to start or stop the function, also
can press the TIME+ or TIME- button to change the duration time a little during the
making process.
STIRTIM E +
M ilk sh ake Soft Ice
cream
TIM E -
STA RT
ST O P
Hard Ice
cream
6/ You can add some other favorite ingredient during making process.

10
7/In order to dig out the sphere ice-cream from the bowl by the sphere
ice-cream device after the hard ice-cream is made, please take out the paddle
when making the hard ice-cream. Use the ice-cream scoop to wipe down the soft
ice-cream from the surface of paddle and then make hard ice cream.
8/Once the ice-cream making process completed, you can enjoy it at once. If you
don’t finish, you can put the ice-cream mixing bowl back in the ice-cream making
housing to keep cool.
WARNING:
1/With the ice-cream making time passed, the ice-cream become more
harder, the stir motor will be locked and the paddle will stop rotating. It is
normal, but when the unit enters the hard ice-cream making process, the
internal control system will buzz to remind you, please take out the paddle.
2/ Be sure don't pour ice-cream material volume exceeding 60% of the ice
cream mixing bowl maximum capacity. Otherwise it will overflow the bowl.

11
3/ When making the soft ice-cream, it may frost between the ice-cream
mixing bowl and the ice-cream making house, please wait several minutes to
let the frost melt, then take out the ice-cream mixing bowl.
4/ When making the hard ice-cream, it may frost between the ice-cream
mixing bowl and the ice-cream making house, please wait longer to let the
frost melt, then take out the ice-cream mixing bowl.
Instruction for operation the control panel
1、Plug your ice-cream maker into the main power outlet, all the LED lights will be on for 3
seconds, after that,the light will be on, LED display window will show “35:00”, some of
the lights in circle will be on. The program defaults to soft ice cream function.
STIRTIME+
Milkshake Soft Ice
cream
TIME-
START
STOP
Hard Ice
cream
2、You can let the paddle work only first to blend the ice-cream material
completely.
Press the “Stir” button , the LED display window will display like the following
picture. It means the default time for paddle work is 5 minutes, you can press the
“Start/Stop” button to start/stop stirring, and also you can use the “TIME+” or
“TIME-” button to change the paddle working time, one time is 3 minutes.
STIRTIME+
Milkshake Soft Ice
cream
TIME-
START
STOP
Hard Ice
cream

12
If you don’t need the paddle work first to blend the ice-cream material, just move
to the next step.
3、The default set is soft ice-cream function, the light is on. You can also press the
”button to change to hard ice-cream function, press the button to change to
milkshake function, as the same way, press the button to change to stir function
only.
4、Press the “START/STOP” button to turn on the unit, the unit will start to work
according to the above setting program. Press the “START/STOP” button for
two seconds, you will stop the function.
During the compressor running, you can also press the Stir button to Start or
Stop the paddle rotating.
After starting to make the soft ice-cream, it will run according to the default time
varied with the ambient temperature. And you can press the “TIME+” or
“TIME-” button to change the ice-cream making duration time according to
your personal taste.
Following pictures show how these functions work:
When Stir set:
STIRTIME+
Milkshake Soft Ice
cream
TIME-
START
STOP
Hard Ice
cream
STIRTIME+
Milkshake Soft Ice
cream
TIME-
START
STOP
Hard Ice
cream
STIRTIME+
Milkshake Soft Ice
cream
TIME-
START
STOP
Hard Ice
cream

13
When Milkshake set:
STIRTIME+
Milkshake Soft Ice
cream
TIME-
START
STOP
Hard Ice
cream
STIRTIME+
Milkshake Soft Ice
cream
TIME-
START
STOP
Hard Ice
cream
STIRTIME+
Milkshake Soft Ice
cream
TIME-
START
STOP
Hard Ice
cream
STIRTIME+
Milkshake Soft Ice
cream
TIME-
START
STOP
Hard Ice
cream
When Soft ice-cream set:
STIRTIME+
Milkshake Soft Ice
cream
TIME-
START
STOP
Hard Ice
cream
STIRTIME+
Milkshake Soft Ice
cream
TIME-
START
STOP
Hard Ice
cream
STIRTIME+
Milkshake Soft Ice
cream
TIME-
START
STOP
Hard Ice
cream
STIRTIME+
Milkshake Soft Ice
cream
TIME-
START
STOP
Hard Ice
cream

14
When Hard ice-cream set:
STIRTIME+
Milkshake Soft Ice
cream
TIME-
START
STOP
Hard Ice
cream
STIRTIME+
Milkshake Soft Ice
cream
TIME-
START
STOP
Hard Ice
cream
STIRTIME+
Milkshake Soft Ice
cream
TIME-
START
STOP
Hard Ice
cream
STIRTIME+
Milkshake Soft Ice
cream
TIME-
START
STOP
Hard Ice
cream
STIRTIME+
Milkshake Soft Ice
cream
TIME-
START
STOP
Hard Ice
cream
STIRTIME+
Milkshake Soft Ice
cream
TIME-
START
STOP
Hard Ice
cream
During Hard ice-cream set, the buzz will sound for 30 seconds, and at same time all
the nights in circle will flash 30 seconds, and the LED display window will flash 30
seconds too. Please take out the paddle, otherwise, the paddle will be frozen up
with the ice cream.
Note 1: During the Soft ice-cream or the Hard ice-cream or the Milkshake
making process, you can set the “TIME+” or “TIME-” button to change the
ice-cream making duration time according to your taste.
Note 2: To stop the function, you have to press the “START/STOP” button
for two seconds.
Note 3: After count down, the unit start timing, during this time, compressor
work intermittently to keep temperature from rising.
5、It’s better to enjoy ice cream at once the whole process is completed, or pull
out the ice-cream mixing bowl and store in your fridge to avoid melting.
6、Press the Start/Stop button at any point in the Mixing/Cooling cycle to pause
the time and mixing. You can add more material into the bowl. To restart, press
the Start/Stop button again to continue.

15
PROBLEM
POSSIBLE CAUSE
SOLUTION
The ice-cream mixing bowl
can’t be taken out.
The water between the
ice-cream mixing bowl and
the ice-cream making
house frozen.
Wait for several mins, and then
take the mixing bowl out.
Make sure mixing bowl and the
base are dry before making ice
cream.
The duration time is not
over, but the paddle stop
rotating.
The ice-cream becomes
harder, the stir motor stuck.
Turn off the unit, take out the
ice-cream mixing bowl and scoop
out the ice-cream. Restart the
unit, then the paddle will recover
to rotate.
The ice-cream mixing bowl
can’t be put into the
ice-cream making housing.
The ice-cream mixing bowl
maybe deformed
Verify with the service department
and buy a new mixing bowl.
When just starting to run,
the serious noise happens
from the paddle or the
paddle is locked.
The ice-cream mixing bowl
maybe deform because of
not proper using
Verify with the service department
and buy a new mixing bowl.
TROUBLESHOOTING
Table of contents
Other Whynter Ice Cream Maker manuals
Whynter
Whynter ICM-15LS User manual
Whynter
Whynter 2 Quart IC-2L User manual

Whynter
Whynter 2 Quart IC-2L User manual
Whynter
Whynter 2 Quart IC-2L User manual
Whynter
Whynter ICM-220SSY User manual
Whynter
Whynter ICM-220CGY User manual
Whynter
Whynter ICM-201SB User manual
Whynter
Whynter ICM-128BPS User manual
Whynter
Whynter ICM-128WS User manual
Whynter
Whynter ICM-255SSY User manual
Popular Ice Cream Maker manuals by other brands

Wilfa
Wilfa Vanilje XL operating instructions
Bravetti
Bravetti BRAVETTI PLATINUM PRO KP170H owner's manual
Rommelsbacher
Rommelsbacher IM 12 instruction manual

Stoelting
Stoelting Ross CC303W operating manual

Cuisinart
Cuisinart ICE-100 INSTRUCTION AND RECIPE BOOKLET
DeLonghi
DeLonghi IC8500 Instructions for use
