ENTER
DVD Playback Function
5
DVD Playback Function
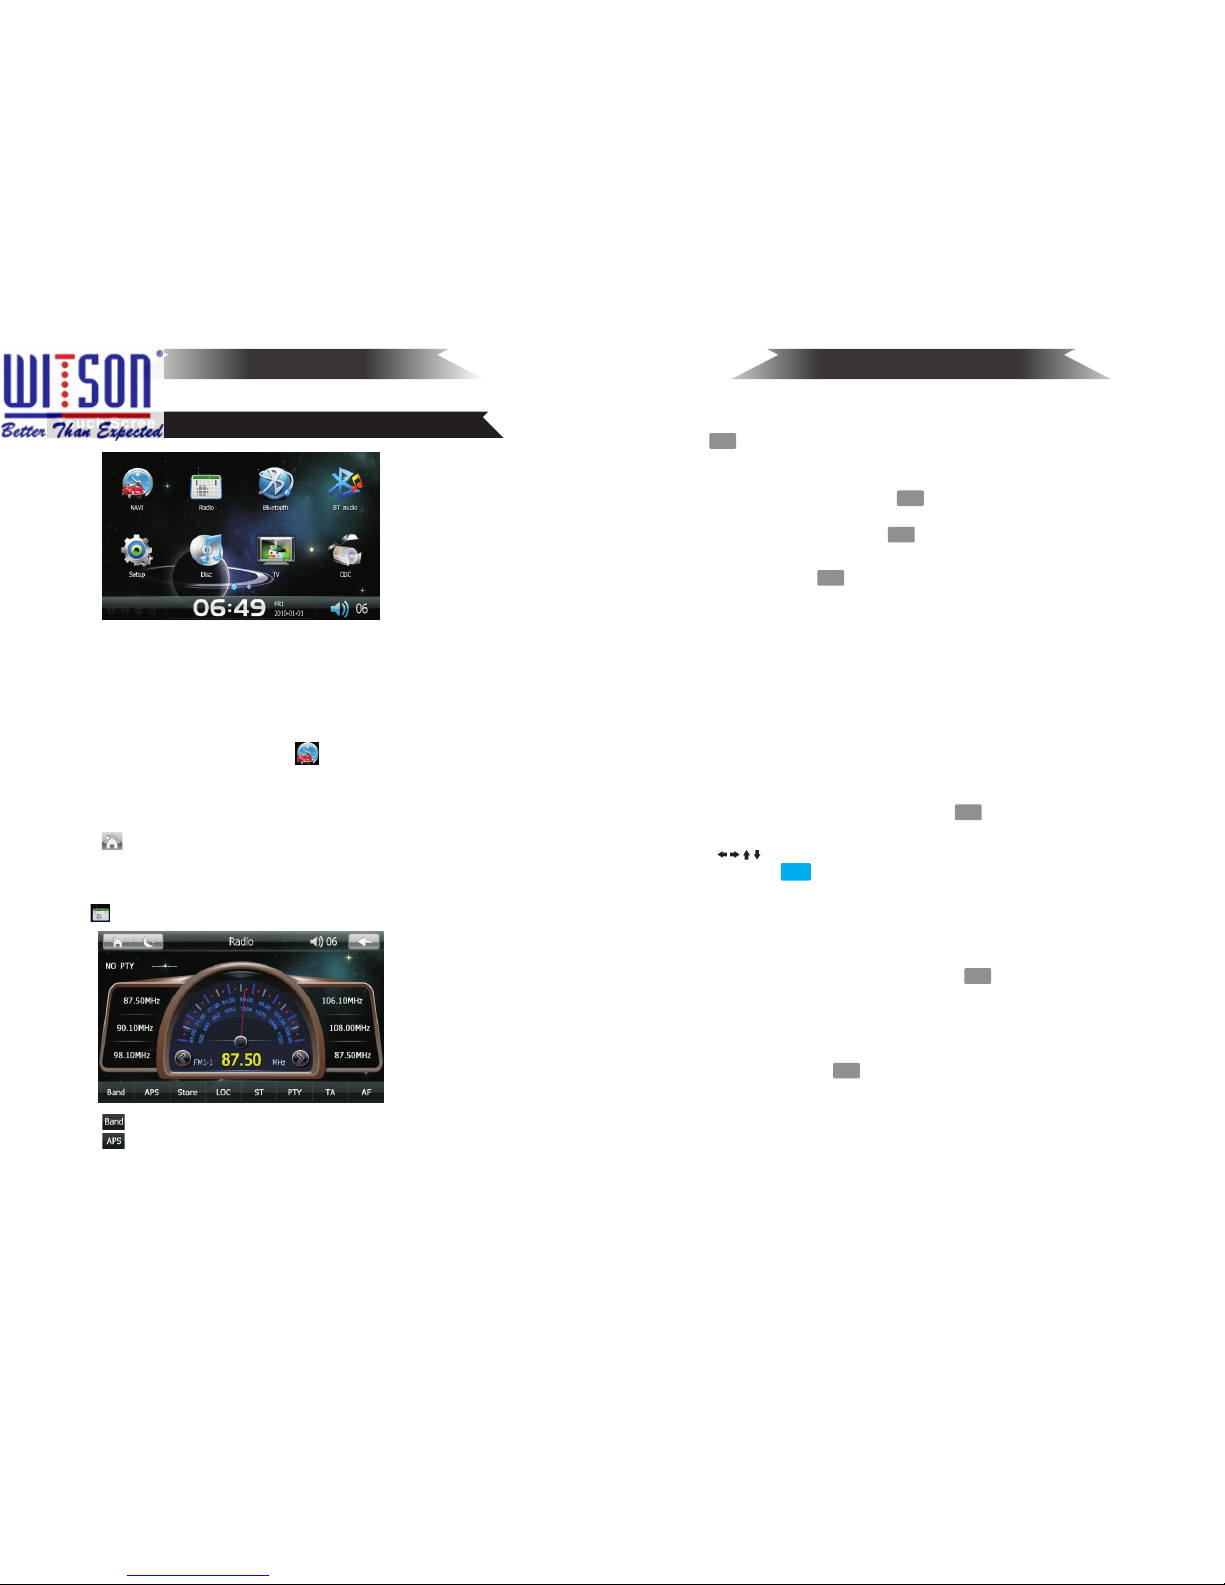
(2) Scan / Automatic Storage Stations
Press AMS button to scan the storage station in the band (every 7
seconds). When scan the appropriate station, click on the frequency
of station, then it will play the selected radio station.
Press AMS button for 3 seconds will start the automatic memory
function, radio will search the station from low frequency to high
frequency, and start to search and store the station automatically,
store strong signal station first, then store weak signal stations.
(3) Storage
Press storage button, the radio will start automatic storage function,
store and display the station on the frequency band at the right of the
display screen.
(4)Manual earch
1.Manual search: Twist TUNE knob clockwise to search for high-
frequency station, counter-clockwise rotation is for searching low-
frequency station. Press the [PLAY ]button to pause playing, press
again to return playing.
(1) Basic Playback
(a) When playing the disc, insert a disc from the mouth into the disc
(label side up), then playback starts automatically.
(b) During other mode, if the unit is equipped with a disc (at this time
it is strictly prohibited to insert the second disc),press DVD button to
switch to disc mode, the unit will play audio-visual programs in the
disc automatically.
(2) Eject Button
During reading mode, press button to eject the disc . The disc will
automatically re-load to the unit if the disc is not taken out in 10
seconds.
(3) Skip /Back To The Other Track
To skip to the previous or next track, twist TUNE knob clockwise to
next track, counter-clockwise rotation is for previous track.
(4) M P 3 Selection Playback
(a) Selection playback method one:
During MP3 playing mode, press the
select the previous track, press select the next track, after
selection , press on the remote control to play.
on the remote control to
(b) Selections broadcast Method Two:
After MP3 disc enter playing mode, you can select any track to play
by clicking the track on the screen directly or pressing (0 - 9) or 10 +
keys on the remote control.
(5) U S B / S D Playback
When insert the USB / SD card into the unit, the system will
recognize and play all of its audio / video programs and pictures
automatically.
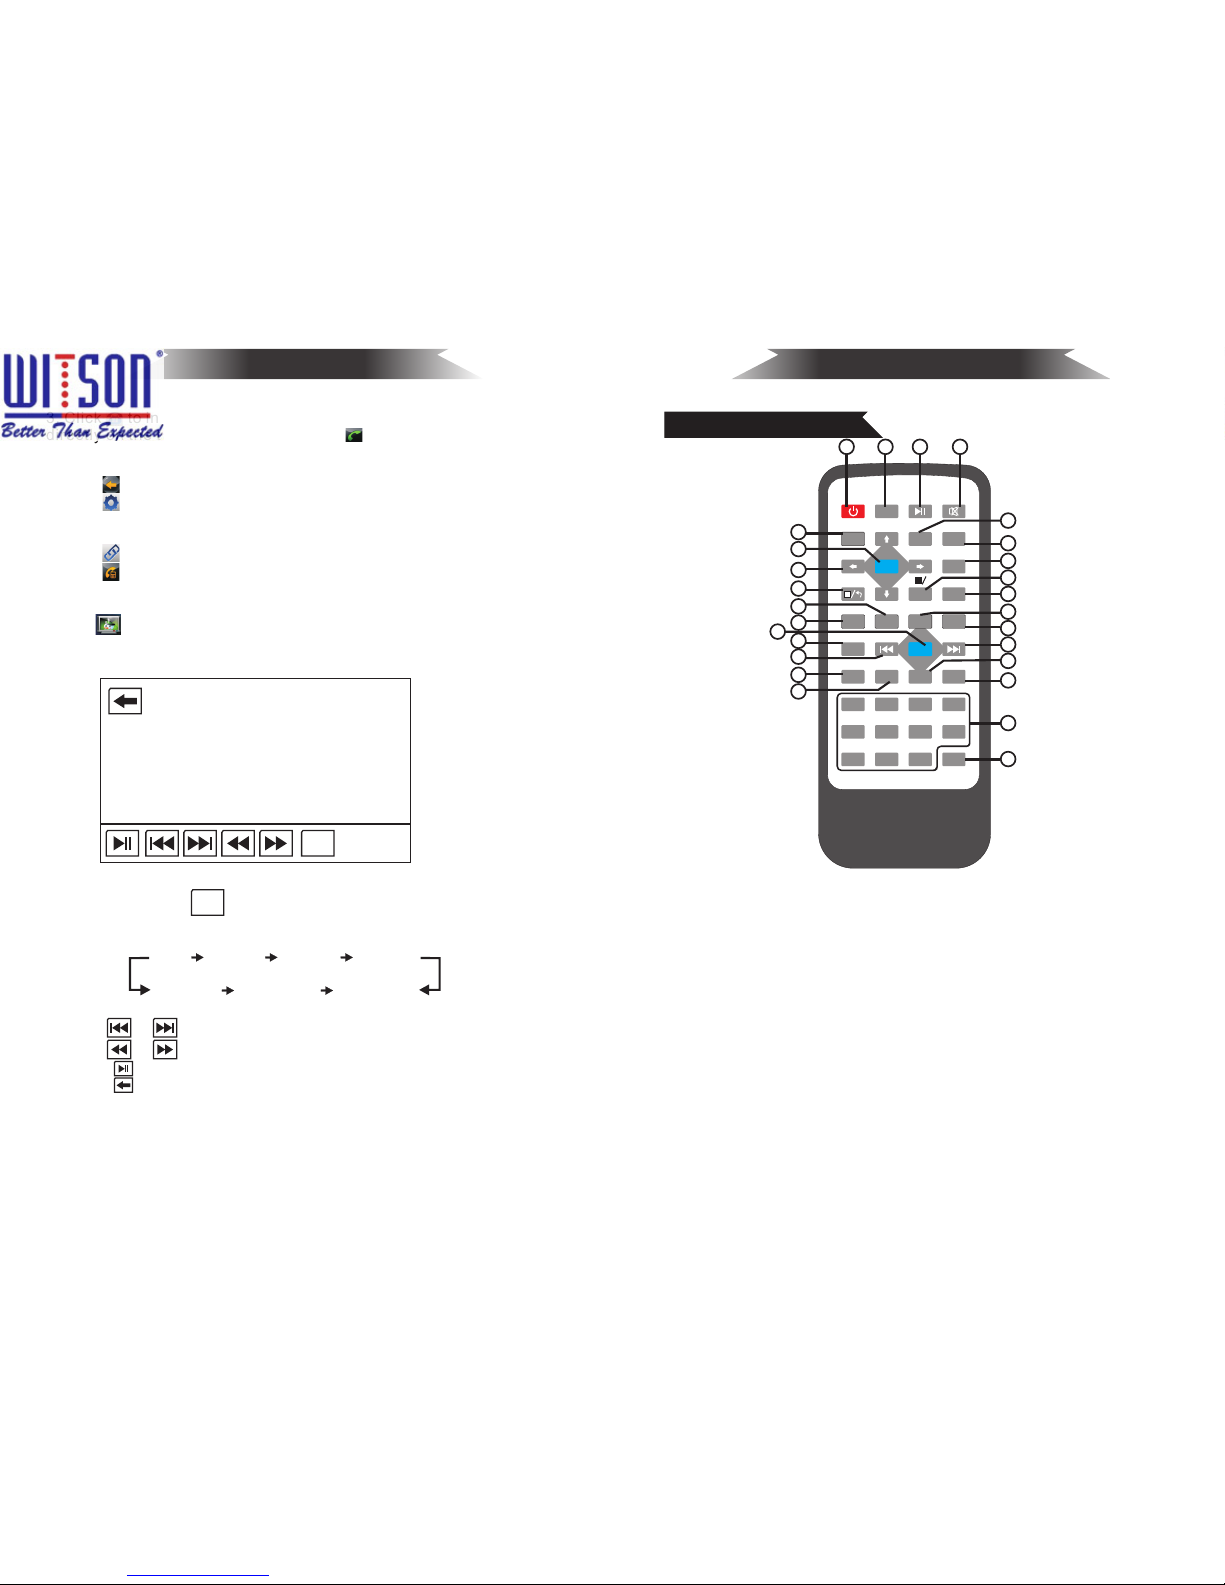
20. Audio Setting
SEL
Short press button, interface display as below:
21. Tuning / Selecting/ Fast-forward Button
22. PBC Playback
PBC
ENTER
23. OSD Button
OSD
24. Volume Decrease B utton
VOL-
Press button to reduce the volume.
25. AUDIO Effect Setting Button
AUDIO
AUDIO
26. Number button
During the Radio mode, short press for the next song, long
press for the fast –forward function.
During the playing mode, short press this button select next
track, long press to fast forward: fast-forward 2X - fast-
forward 4X - fast-forward 8X - fast-forward 20X - play.
When the unit has a disc or first time put the disc into the unit,it will
play the disc in order automatically. When play the DVD disc, press
button, then the screen displays the DVD menu on the upper
right corner of the screnn. Select your desired track or last/next page
by pressing "← → ↑ ↓" , then click to confirm the selection.
During playback mode, press button to display the contents of the
current disc on the screen (such as track number, playing time).
(A) During VCD/CD playback mode, short press button repeatedly
to change the channel and display it in cycle on the upper left corner
of the screen: MONO L - MONO R - STEREO.
(B)During multilingual DVD playback sate, short press button
repeatedly to change language, meanwhile it will display it in cycle
on the top left of the screen.
During radio mode, you can select one of the 6 stored station by
pressing any one of the numeric button1 - 6 .
During DVD / USB / SD playback mode , you can select any track
directly by using 26 numeric button . For example, if you need the
15th track, you can press button "10 + " and press button "5", the
corresponding track(15th) will be played.
Note: When button "10+" is first pressed, it works as 10+. It works as
20+ when pressed at the second time, the first time...30+...and so on.
24
Remote Control Usage