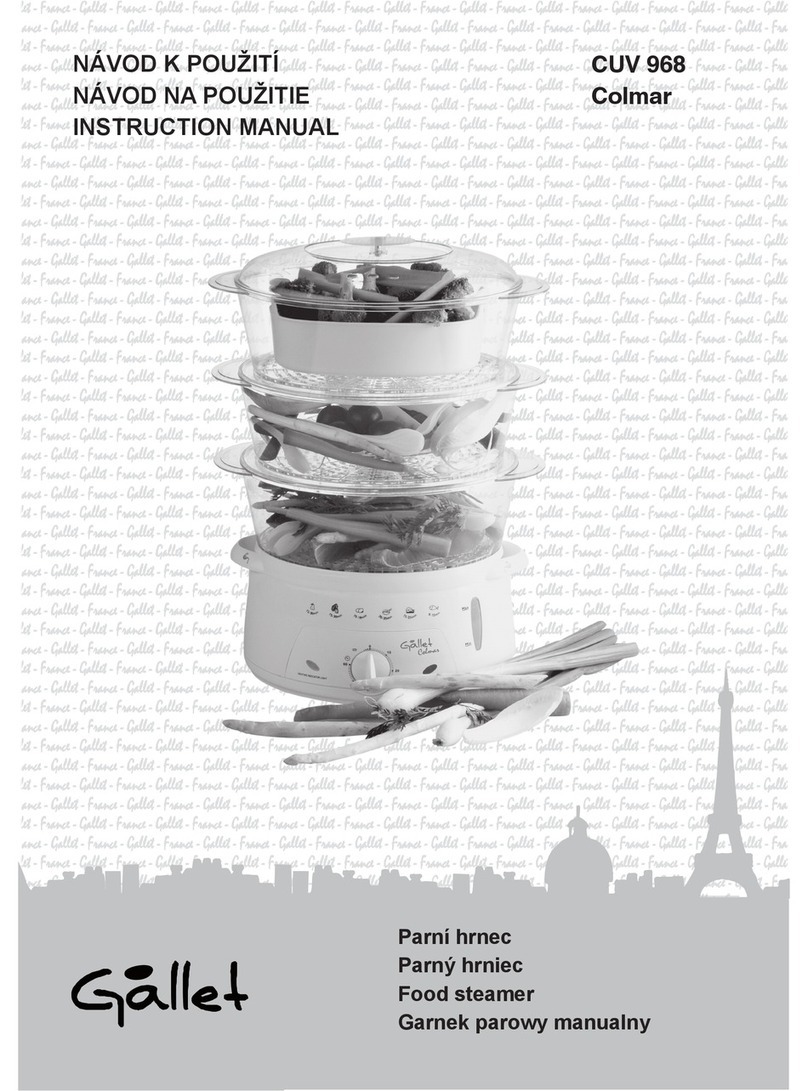
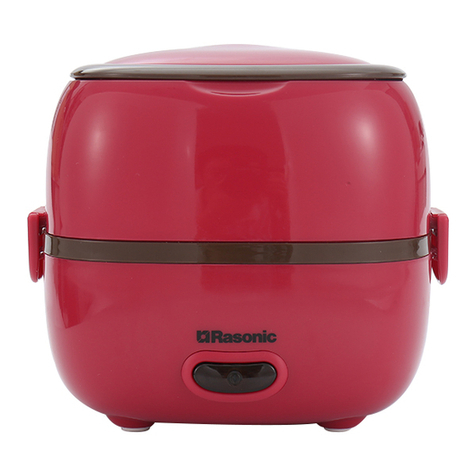
Wolf Steamer Owner's manual

STEAMER MODULE
USE & CARE INFORMATION
MÓDULODE VAPORIZADOR GUÍA DE USO Y MANTENIMIENTO
CUIT VAPEUR GUIDE D’UTILISATION ET D’ENTRETIEN
MODULO PER LA COTTURA A VAPORE
INFORMAZIONI SU USO E MANUTENZIONE

3
ENGLISH
Introducing the Wolf Steamer Module 5
Safety Instructions and Precautions 6
Wolf Steamer Module Features 8
Wolf Steamer Module Use & Care 9
Wolf Troubleshooting Guide 16
Wolf Service Information 17
ESPÃNOL
Presentación del módulo de
vaporizador de Wolf 19
Precauciones e instrucciones
de seguridad 20
Características del módulo de
vaporizador de Wolf 22
Uso y mantenimiento del módulo
de vaporizador de Wolf 23
Guía de localización y solución
de problemas de Wolf 30
Información de mantenimiento de Wolf 31
FRANÇAIS
Présentation du cuit vapeur Wolf 33
Instructions et mesures de sécurité 34
Caractéristiques du cuit vapeur Wolf 36
Utilisation et entretien du cuit vapeur Wolf 37
Guide de dépistage des pannes Wolf 44
Service après-vente Wolf 45
ITALIANO
Presentazione del modulo Wolf
per la cottura a vapore 47
Precauzioni e istruzioni di sicurezza 48
Caratteristiche del modulo Wolf
per la cottura a vapore 50
Uso e manutenzione del modulo
Wolf per la cottura a vapore 51
Guida alla soluzione dei problemi Wolf 58
Informazioni sull’assistenza Wolf 59

As you read this Use & Care Information,
take particular note of the CAUTION and
WARNING symbols when they appear.
This information is important for safe and
efficient use of the Wolf equipment.
In addition, this Use & Care Information may
signal an IMPORTANT NOTE which highlights
information that is especially important.
signals a situation where minor injury or
product damage may occur if you do not
follow instructions.
states a hazard that may cause serious
injury or death if precautions are not
followed.
WOLF®is a registered trademark of Wolf Appliance Company, Inc.

5
THANK YOU
Your purchase of a Wolf electric steamer
module attests to the importance you place
upon the quality and performance of your
cooking equipment. We understand this
importance and have designed and built your
cooktop module with quality materials and
workmanship to give you years of depend-
able service.
We know you are eager to start cooking, but
before you do, please take some time to read
this Use & Care Information. Whether you are
abeginning cook or an expert chef, it will be
to your benefit to familiarize yourself with the
safety practices, features, operation and care
recommendations of the Wolf electric steamer
module.
.
INTRODUCING THE WOLF STEAMER MODULE
If service is necessary, refer to the model and
serial number of the steamer module. Both
numbers are listed on the product rating plate
located on the underside of the module. Refer
to the illustration below.
IMPORTANT NOTE:
Installation and service
must be performed by a qualified installer or
service agency.
IMPORTANT NOTE:
Aventilation hood is
recommended (but not required) for use with
the Wolf electric steamer module.
This steamer module must be installed
at least 381 mm away from a Wolf fryer
module, as contact between water and
hot oil may cause burns from steam and
hot oil.
Rating plate location
Location of rating
plate under module
CONTACT
INFORMATION
Website:
wolfappliance.com

6
SAFETY INSTRUCTIONS AND PRECAUTIONS
WHAT TO DO
IMPORTANT NOTE: Read all
instructions before using this
appliance.
Read this Use & Care Information
carefully before using your new
steamer module to reduce the risk of
fire, electric shock or injury to
persons.
Make certain your unit is properly
installed and grounded by qualified
personnel.
Use sturdy, properly insulated
gloves or pot holders. Dish towels or
other substitutes can become entan-
gled, causing burns. Keep pot
holders dry. Wet pot holders create
steam and cause burns. Keep pot
holders away from open flames
when lifting or moving utensils.
Use only the insert pans that
accompany the steamer module,
unless otherwise stated in the Use
& Care Information.
To eliminate the risk of burns or
fire when reaching over heated
surface units, cabinet storage
space located above the surface
units should be avoided. If
cabinet storage is to be provided,
the risk can be reduced by
installing a ventilation hood that
projects horizontally a minimum
of 127 mm beyond the bottom
cabinets.
This steamer module must be
installed at least 381 mm away
from a Wolf fryer module, as
contact between water and hot
oil may cause burns from steam
and hot oil.

7
WHAT NOT TO DO
Children should not be left alone or
unattended in an area where the
steamer module is being used.
Never allow them to sit, stand or
play on or around the steamer at
any time. Do not store items of
interest to children around or below
the steamer.
When using the steamer module, do
not touch the steamer or immediate
surrounding areas. These surfaces
become extremely hot and could
cause burns. Be certain that all
controls areturned off by touching
the touch pad and that the
unit has cooled before touching or
cleaning any surfaces.
Never leave the steamer module
unattended.
Do not heat unopened glass or
metal containers of food in the
steamer module. Pressure may build
up and cause the container to burst,
resulting in serious personal harm
or damage to the steamer.
Do not repair or replace any part
of the steamer module unless
specifically recommended in litera-
ture accompanying this appliance.
All service is to be referred to a Wolf
authorized service center.
Do not line the steamer module
with aluminum foil.
Do not operate the steamer module
empty. Always have liquid in the
steamer basin first.
Do not use the steamer module for
warming a room.
This appliance is for household use
only and must not be put to any
other use.
This appliance is suitable for use
with water or other soup-based
liquids. This appliance must not be
used for deep-frying.
Do not store combustible, flamma-
ble or explosive materials near
steamer or adjacent cabinets or let
grease or other flammable
substances accumulate on the
steamer.
8
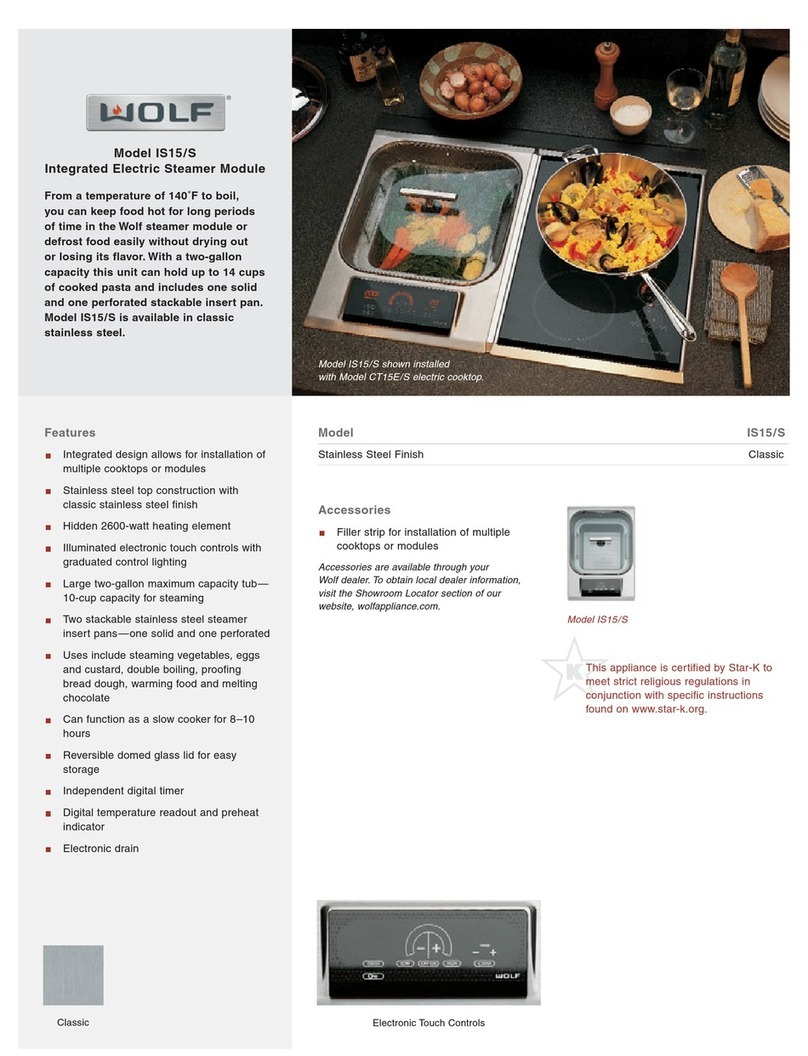
STEAMER MODULE FEATURES
Integrated design allows for use with
multiple modules or cooktop units
Stainless steel top construction with classic
stainless steel finish
Hidden 2600-watt heating element
Illuminated electronic touch controls with
graduated control lighting
Large 7.6 L maximum capacity tub—2.4 L
capacity for steaming
Two stackable stainless steel steamer insert
pans—one solid and one perforated
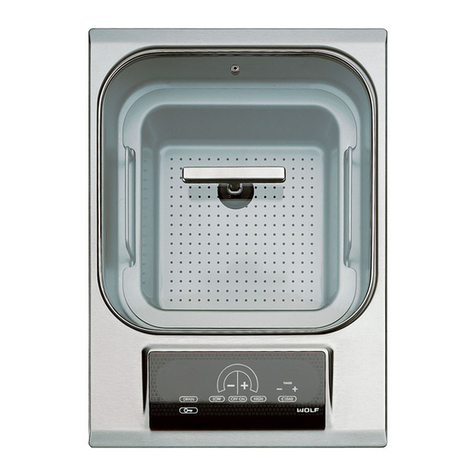
WOLF STEAMER MODULE FEATURES
Model ICBIS15/S
Model ICBIS15/S
Electric Steamer Module
Hidden 2600-watt
heating element
Reversible
domed glass lid
Illuminated electronic
touch controls
Deep drawn pan
Can function as a slow cooker for 8–10
hours
Reversible domed glass lid for easy storage
Independent digital timer
Digital temperature readout and preheat
indicator
Child safety lock mode
Electronic drain
CE certified
This appliance is certified by Star-K
to meet strict religious regulations in
conjunction with specific instructions
found on www.star-k.org.
Minimum water
level line Graduated control
lighting

9
WOLF STEAMER MODULE USE & CARE
VENTILATION OPTIONS
IMPORTANT NOTE:
It is recommended that
you operate the Wolf electric steamer module
with either a Wolf cooktop or Pro ventilation
hood or hood liner. Contact your Wolf dealer
for details.
Cooktop Wall Hood –
762 mm or 914 mm
widths in classic stainless steel.
Cooktop Island Hood –
1067 mm width in
classic stainless steel.
Pro Wall Hood –
559 mm, 610 mm or
686 mm depths and 762 mm to 1676 mm
widths in classic stainless steel.
Pro Island Hood –
914 mm to 1676 mm
widths in classic stainless steel.
Pro Hood Liner –
available in widths to
accommodate 914 mm to 1524 mm hoods.
All hoods have welded seams, sealed halogen
lighting and removable, dishwasher-safe filters.
IMPORTANT NOTE:
Wolf does not recom-
mend the use of downdraft ventilation with the
electric steamer module.
STEAMER MODULE
The Wolf electric steamer module allows
steam to surround the food that is being
cooked to prevent a loss of nutrients.
Steaming also allows food to retain its shape,
color and aroma.
The Wolf steamer module has an electronic
temperature control that closely regulates the
water temperature for optimal cooking
performance. The temperature range is 60˚C
to HIGH.
STEAMER MODULE ASSEMBLY
For storage, position the solid insert pan on
top and place both insert pans into the
steamer basin with handles aligned. The
domed glass lid can be inverted to keep a low
profile for storage. Refer to the illustration
below.
For stacked alignment, rotate the solid insert
pan 90 degrees to the perforated.
Solid insertpan
Drain outlet
Perforated insert pan
Domed glass lid
Steamer basin
Steamer module assembly
ACCESSORIES
Optional
accessories are
available through
your Wolf dealer.

STEAMER MODULE OPERATION
BEFORE USING FOR THE FIRST TIME
Clean your steamer module thoroughly with
hot water and a mild detergent. Rinse and dry
with a soft cloth. This removes any residual oil
and grease left on the surface from the manu-
facturing process.
Refer to Care Recommendations on page 15.
Apply a stainless steel polish to protect the
finish and add luster.
During the initial period of use, you may smell
alight burning odor or see light smoke. Both
these conditions are normal with a new
cooktop module.
10
MODES OF OPERATION
LOCK MODE
In
Lock mode
,all touch pad operations on
the control panel are disabled and the heating
element is deenergized. A steady glowing light
inthe touch pad indicates that the unit
is locked. Refer to the illustration below for
location of the touch pad.
To lock the control panel, touch and hold
the symbol for 3 seconds. The unit
will beep three times and the light in the
touch pad will illuminate. The
control unit is now in
Lock mode
.
To unlock the control panel, touch and hold
the symbol for 3 seconds. The unit
will beep twice and the light in the
touch pad will go out. The control unit is
now in
Idle mode
.
IMPORTANT NOTE:
When the unit is powered
up for the first time or if there has been a
power outage, the steamer module will default
to
Lock mode
.
IDLE MODE
After unlocking the control panel as described
in Lock Mode, the unit enters the
Idle mode
of
operation. The valid touch pad operations are
,,,”
+
”or ”
–
”and the
Lock mode
.
WOLF STEAMER MODULE USE & CARE
Water or liquid must be added to the
steamer basin before turning the unit on.
Serious injury or damage to the steamer
module may result when pouring liquid
into a heated steamer basin.
Do not use abrasive cleaners; they will
permanently scratch the surface.
Temperature
LED display
Lock ”key”
touch pad
Power indicator
bar graph
DRAIN
touch pad
Temperature
adjustment
OFF ON
touch pad
Timer LED
display
CLEAR
touch pad
Touch control panel

11
STEAMER MODULE OPERATION
SETTING CONTROLS
The control panel of your electric steamer
module is illuminated and features touch
controls with graduated control lighting and
temperature display. Refer to the illustrations
below.
To activate the steamer module, first touch the
touch pad on the touch control panel.
The power indicator bar graph will begin to
blink and show a half-power status. To
complete the activation, one of the following
must be done while the bar graph is still
blinking:
Touch the ”
+
”symbol to set the
temperatureto 80˚C and complete the acti-
vation.
Touch the ”
–
”symbol to set the
temperatureto 80˚C and complete the acti-
vation.
Touch to set the temperature to full
power and complete the activation.
Touch to set the temperature to 60˚C
and complete the activation.
WOLF STEAMER MODULE USE & CARE
To change the power level setting once the
unit is activated and the bar graph lights are
nolonger blinking:
Touch the ”
+
”symbol to increase the
temperature set point.
Touch the ”
–
”symbol to decrease the
temperature set point.
Touch to increase the temperature
set point to full power.
Touch to decrease the temperature
set point to 60˚C.
Touch to turn the unit off.
Touch control panel
touch pad
”+” and ”–”
symbols
touch pad
touch pad
Temperature readout display
Temperature
display

12
TIMER OPERATION
The control panel of the steamer module has
an independent 99-minute timer. Refer to the
illustration below. This function can be used
with or without the unit in operation. However,
the steamer must not be in
Lock mode
.
To start the timer, touch the ”
+
”or ”
–
”
symbol until the correct amount of time is
shown in the timer display. The timer will
begin its countdown after a 2 second delay.
Awarning beep will sound when the timer
has 1 minute left and begins to countdown
in seconds starting at 59.
Asignal will beep when time has expired
and will continue to beep every 30 seconds.
Touch to reset the timer.
WOLF STEAMER MODULE USE & CARE
Timer controls
Timer
display
AUTOMATIC DRAIN OPERATION
IMPORTANT NOTE:
The steamer module
must be installed with a drain connection and
access to the drain through the base cabinet.
The touch pad operation is functional
only while the unit is in
Idle mode
.The unit
must be unlocked and not in operation. Refer
to the illustration below.
To activate the drain:
1)
Touch for 3 seconds. The unit will
beep, the light in the touch pad will
illuminate and the drain valve will open for
aperiod of 2 minutes. This should be
enough time to drain a full capacity of
water. This operation may be repeated as
many times as needed to completely drain
the steamer basin.
2)
Touch again while in the drain
mode operation to shut the drain valve. The
light in the touch pad will go out.
If you do not have a fixed drain connec-
tion, use caution when draining hot water
from the steamer basin to avoid burns.
Use a heat-resistant receptacle with a
minimum 7.6 L capacity. The doors of the
base cabinet must be locked.
Touch control panel
touch pad
touch pad
”+” and ”–”
symbols

13
WOLF STEAMER MODULE USE & CARE
NO WATER IN STEAMER BASIN
Ifthere is no water in the steamer basin and
the steamer module is turned on, the unit will
beep three times, the light in the ”
key
” touch
pad will flash and the word “
Lo
”will appear in
the temperature display. Power to the heating
element will be automatically turned off and
the unit will enter
Lock mode
.
Add water to the steamer basin. Touch
to reset the control and begin normal opera-
tion once the unit exits
Lock mode
.
IMPORTANT NOTE:
If the unit has entered
into this safety feature, it may require a few
minutes for the electronic sensors to stabilize
after water has been added.
DRAIN STRAINER
Ascreen drain strainer is installed into the
drain outlet to keep food particles from
clogging the drain valve. The strainer should
remain in the drain outlet during normal use
and cleaning. Lift the drain strainer out and
rinse after each use to remove food particles.
WATER LEVEL SAFETY FEATURE
WATER LOW IN STEAMER BASIN
During extended use, water in the steamer
basin may boil off to a level that could damage
the unit. If this occurs, the unit will beep three
times, the light in the ”
key
”touch pad will
flash and the word “
Lo
” will appear in the
temperature display. Power to the heating
element will be automatically turned off and
the unit will enter
Lock mode
.
Add water to the steamer basin to a level
above the minimum water level line. Touch
to reset the control and begin normal
operation once the unit exits
Lock mode
.
IMPORTANT NOTE:
If the unit has entered
into this safety feature, it may requireafew
minutes for the electronic sensors to stabilize
after water has been added.
Minimum water
level line

14
STEAMING TIPS
The steamer module can be used with
either the solid or perforated insert pan.
Always preheat the steamer module except
when slow cooking.
It is recommended that you keep the
domed glass lid on the steamer module
during cooking time. This allows foods to
cook quicker and keeps heat and water
condensation run off underneath the
glass lid.
When steaming food, use a minimum of
2.4 L and a maximum 2.8 L water in the
steamer basin.
Remove large particles of food before
draining the steamer basin.
If water is added during the cooking cycle,
the safety mode may be initiated. Refer to
Water Level Safety Featureon page 13.
Use the perforated insert pan as a bamboo
steamer. Place food in the insert pan and
cover.
Be sure to empty and clean the steamer
basin after each use. Food and mineral
deposits can cause corrosion.
WOLF STEAMER MODULE USE & CARE
STEAMING OPERATION
1)
Fill the steamer basin with water or soup
stock until level with the minimum water
level line.
2)
Cover the steamer basin with the glass lid
to speed the heating process.
3)
Touch to turn the unit on.
4)
Touch to set the temperature and
preheat.
5)
When preheating, the actual temperature
and set point will toggle back and forth.
Once the set point is reached, the steamer
will beep once, the display will show the set
point temperature, and preheat will disap-
pear from the temperature display.
6)
Once preheat is finished, add food to the
perforated insertpan and place the pan in
the steamer basin. Cover with the glass lid
and steam to desired doneness.
7)
Remove the insert pan from the steamer
basin using dry pot holders.
8)
Touch to turn the unit off.
When placing an insert pan into the
steamer basin after steaming has begun,
use dry pot holders to protect hands
from steam burns. When hot, do not place the glass lid on a
cold surface or under cold running water.
It may crack. Replace the glass lid if it is
damaged.

15
WOLF STEAMER MODULE USE & CARE
CARE RECOMMENDATIONS
COMPONENT CARE RECOMMENDATION
Domed Glass Lid
Glass
CAUTION:
Make sure the steamer module is off and all surfaces are cool
before cleaning any part of the unit.
The reversible domed glass lid can be placed in the dishwasher or cleaned
with warm soapy water, then rinsed and thoroughly dried.
Exterior Cleaning:
Use a soft, nonabrasive stainless steel cleaner like Signa-
ture Polish and apply with a soft lint-free cloth. To bring out the natural
luster, lightly wipe the surface with a water-dampened microfiber cloth,
followed with a drymicrofiber cloth. All work should follow the same grain
direction as the finish. Best results are obtained by keeping the cloth in
continuous contact with the metal.
For best results, wipe up spills and spatters as they occur and immediately
after the module has cooled. If splatters are allowed to dry, they may perma-
nently damage or stain the finish.
CAUTION:
Do not use abrasive cleaners (e.g., Scotch-Brite or Soft Scrub);
they will permanently scratch the surface.
After emptying the water from the steamer basin, pour 3.8 L water with dish
soap into the empty basin. Scrub with a nylon brush. Rinse well and drain.
Dry thoroughly.
Hard water calcium deposits:
Clean with white vinegar and water or a
cleaner designed to remove minerals. Let mixture stand in the steamer basin,
then scrub with a nylon brush or dishcloth. Rinse well.
Soft water salt deposits:
Wipe out with a wet cloth. Rinse well.
WARNING:
Pay particular attention to the drain outlet and manual valve
when emptying, as water may be hot. Allow unit to cool.
Both the solid and perforated insert pans can be cleaned by hand with warm
soapy water or placed in the dishwasher.
Use warm soapy water with a soft cloth to remove fingerprints and residual
food and water stains from the control panel. Apply cleaner to the cloth
before wiping panel. Do not use aggressive commercial cleaners, as they
may damage the assembly.
Steamer Module
Frame
Stainless steel
Steamer Basin
Stainless steel
InsertPans
Stainless steel
Control Panel
Ceran glass

TROUBLESHOOTING GUIDE
PROBLEM PROBABLE CAUSE CORRECTION
Nothing works
Steamer module is not Have electrician verify that
connected to proper electrical proper voltage is being applied
circuit. to steamer module.
Fuse is blown or circuit Have electrician replace fuse or
breaker is tripped. reset circuit breaker.
No electricity supplied to Have electrician check house
steamer module. power supply.
Steamer module is in Unlock the control panel
Lock mode. (see page 8).
”Lo” appears in
Steamer module was started Follow instructions for Water
temperature display
with no water. Level Safety Feature on page 13.
Steamer basin water level Follow instructions for Water
is too low. Level Safety Feature on page 13.
16
WOLF TROUBLESHOOTING GUIDE

17
WOLF SERVICE INFORMATION
BEFORE CALLING FOR SERVICE
Before calling your Wolf dealer or regional
distributor, refer to the Troubleshooting Guide
on page 16. Check the household fuse or
circuit breaker to see if it has been blown or
tripped and that the electrical connection to
theappliance has not been disconnected. A
power outage may also have caused a disrup-
tion in service.
CONTACT
INFORMATION
Website:
wolfappliance.com
The information and images are the copyright
property of Wolf Appliance Company, Inc.,
an affiliate of Sub-Zero Freezer Company, Inc.
Neither this book nor any information or images
contained herein may be copied or used in
whole or in part without the express written
permission of Wolf Appliance Company, Inc.,
an affiliate of Sub-Zero Freezer Company, Inc.
©Wolf Appliance Company, Inc. all rights
reserved.
SERVICE INFORMATION
When requesting information, literature,
replacement parts or service, always refer to
the model and serial number of your steamer
module. Both numbers are listed on the
product rating plate located on the underside
of the module. Refer to the illustration on
page 5. Record the rating plate information
below for future reference.
Model Number
Serial Number
Installation Date
Wolf Dealer and Phone

Cuando lea esta guía de uso y mantenimiento,
deberá prestar especial atención cuando
aparezcan los símbolos de PRECAUCIÓN y
AVISO. Esta información es importante
para utilizar de forma segura y eficaz el
equipo de Wolf.
Además, esta guía de uso y mantenimiento
puede incluir una NOTAIMPORTANTE
para resaltar información especialmente
importante.
indica una situación en la que se pueden
sufrir heridas leves o provocar daños
secundarios al producto si no se siguen
las instrucciones.
indica peligro de que se produzcan
heridas personales graves o incluso
puede provocar la muerte si no se
siguen las precauciones advertidas.
WOLF®es una marca comercial registrada de Wolf Appliance Company, Inc.

19
GRACIAS
La compra de un módulo de vaporizador
eléctrico de Wolf confirma la importancia que
usted da a la calidad y al rendimiento de su
equipo de cocina. Entendemos esta importan-
cia y hemos diseñado y creado el módulo de
vaporizador con materiales y mano de obra de
primera calidad para proporcionarle un
servicio seguro y eficaz durante muchos años.
Sabemos que está deseando empezar a
cocinar pero, antes de hacerlo, debe leer
esta guía de uso y mantenimiento. Tanto si
es un cocinero novato como si es un chef
experto, le resultará útil familiarizarse con
las prácticas de seguridad, las funciones, el
funcionamiento y las recomendaciones de
mantenimiento del módulo de vaporizador
eléctrico de Wolf.
PRESENTACIÓN DEL MÓDULO DE VAPORIZADOR DE WOLF
Cuando necesite solicitar asistencia técnica,
debe proporcionar la referencia del modelo
yel número de serie del módulo de vapor-
izador. Esta información se muestra en la placa
de datos de voltaje del producto situada en la
parte inferior del módulo. Observe la siguiente
ilustración.
NOTA IMPORTANTE:
La instalación y las
tareas de mantenimiento deben ser realizadas
por un instalador cualificado o por un centro
de asistencia técnica.
NOTA IMPORTANTE:
Se recomienda utilizar
una campana extractora con el módulo de
vaporizador eléctrico de Wolf, aunque no es
obligatorio.
Este módulo de vaporizador debe insta-
larse manteniendo una distancia de al
menos 381 mm respecto al módulo de
freír de Wolf ya que el contacto entre el
agua y el aceite caliente puede causar
quemaduras provocadas por el vapor
y el aceite caliente.
Ubicación de la placa de voltaje
Ubicación de la
placa de datos de
voltaje debajo del
módulo
INFORMACIÓN
DE CONTACTO
Página Web:
wolfappliance.com

20
PRECAUCIONES E INSTRUCCIONES DE
SEGURIDAD
QUÉ DEBE HACER
NOTA IMPORTANTE: Lea las
instrucciones antes de utilizar
este aparato.
Lea con detenimiento esta guía
de uso y mantenimiento antes
de utilizar el nuevo módulo de
vaporizador para reducir el riesgo
de que se produzca un incendio,
una descarga eléctrica o de sufrir
lesiones personales.
Asegúrese de que la unidad ha
sido instalada y conectada a tierra
de manera correcta por un técnico
cualificado.
Utilice guantes o elementos
aislantes adecuados. Los paños
de cocina u otrotipo de bayetas
pueden enredarse y provocar
quemaduras. Los elementos aislantes
deben mantenerse secos. Los
elementos aislantes húmedos crean
vapor y pueden causar quemaduras.
Mantenga los elementos aislantes
lejos del foco de calor cuando levante
omueva los utensilios.
Utilice sólo las bandejas que
se incluyen con el módulo de
vaporizador, salvo que se indique
lo contrario en la guía de uso
ymantenimiento.
Para eliminar el riesgo de
sufrir quemaduras o de que se
produzca un incendio al tocar
superficies calientes, debe evitar
que haya armarios situados por
encima de las unidades. Si va
a colocar armarios, el riesgo se
puede reducir instalando una
campana de extracción que
sobresalga horizontalmente un
mínimo de 127 mm de la parte
inferior de los armarios.
Este módulo de vaporizador
debe instalarse manteniendo una
distancia de al menos 381 mm
respecto al módulo de freír de
Wolf ya que el contacto entre el
agua y el aceite caliente puede
causar quemaduras provocadas
por el vapor y el aceite caliente.

21
QUÉ NO DEBE HACER
No debe dejar a los niños solos o
descuidados en un área en la que
se esté utilizando un módulo de
vaporizador. No permita que los
niños se sienten, estén de pie ni
jueguen en o alrededor del vapor-
izador en ningún momento. No
almacene artículos que puedan
atraer a los niños alrededor o
debajo del vaporizador.
Cuando esté utilizando el módulo
de vaporizador, no toque el módulo
ni las áreas circundantes. Estas
superficies pueden llegar a calentar
se en extremo y pueden causar
quemaduras. Asegúrese de que todos
los mandos están apagados tocando
el mando digital y compruebe
que la unidad se ha enfriado antes
de tocar o limpiar las superficies.
No deje nunca desatendido el
módulo de vaporizador.
No caliente en el módulo de
vaporizador recipientes de alimentos
de metal o cristal que no estén
abiertos. Si lo hace, se puede crear
una presión que puede hacer que el
recipiente explote, pudiendo causar
heridas físicas graves o estropear el
módulo de vaporizador.
No repare ni cambie ninguna pieza
del módulo de vaporizador amenos
que se recomiende específicamente
en los documentos que se proporcio-
nan con este aparato. Todas las
tareas de mantenimiento deben ser
realizadas por un centro de asistencia
técnica autorizado de Wolf.
No forre el módulo de vaporizador
con papel de aluminio.
No ponga en funcionamiento el
módulo de vaporizador si está vacío.
Siempre debe haber líquido en la
cubeta del vaporizador.
No utilice el módulo de vaporizador
para calentar una habitación.
Este aparato es sólo para uso
doméstico yno debe ser utilizado
con ningún otropropósito.
Este aparato se puede utilizar con
agua o con caldos. Este aparato
no debe utilizarse para freír.
No almacene materiales com-
bustibles, inflamables o explosivos
cerca del módulo de vaporizador o
cerca de los armarios circundantes
ni deje que se acumule grasa u
otras sustancias inflamables en
el vaporizador.
This manual suits for next models
1
Table of contents
Languages:
Other Wolf Electric Steamer manuals