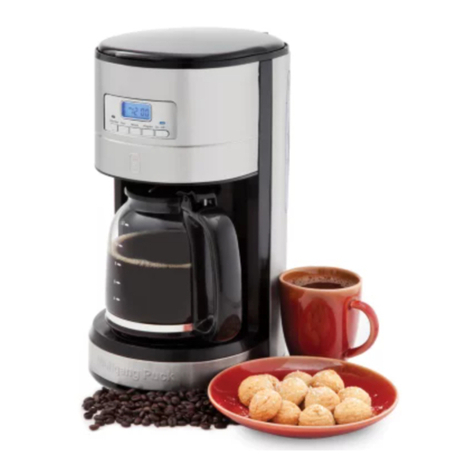
Wolfgang Puck BDCM0010 Bistro collection User manual

1
Wolfgang Puck
Electronic Programmable Coffeemaker
Use and Care
IMPORTANT NOTICE
PLEASE DO NOT RETURN TO STORE.
If you have any problems with this unit,
contact Consumer Relations for service
PHONE: 1-800-275-8273 or
visit our website at wppotsandpans.com
Please read operating instructions
before using this product.
Please keep original box and packing materials
in the event that service is required.
W.P. APPLIANCES, INC. Toll Free (800) 275-8273
Website: www.wppotsandpans.com
All trademarks, service marks and trade names (collectively the “Marks”) are proprietary
to Wolfgang Puck World Wide.
Model BDCM0010 Printed in China REV 1.0
HSNCoffeeMaker_manual 4/19/07 10:49 PM Page 1

1 2
IMPORTANT SAFEGUARDS
When using electrical appliances, basic safety precautions should always
be followed, including the following:
1Read all instructions carefully.
2Do not touch hot surfaces. Use handles or knobs.
3To protect against electrical shock, do not immerse cord, plug or unit
in water or other liquid.
4Close supervision is necessary when any appliance is used by or
near children.
5Unplug from outlet when from outlet when not in use and before
cleaning. Allow to cool before putting on or taking off parts and
before cleaning the appliance.
6Do not operate any appliance with a damaged cord or plug or
after the appliance malfunctions, or has been damaged in any
manner. Return appliance to the nearest authorized service facility
for examination, repair or adjustment.
7The use of accessory attachments not recommended
by the appliance manufacturer may result in fire, electric shock,
or personal injury.
8Do not use outdoors.
9Do not let cord hang over edge of table or counter, or touch hot
surfaces, including the stove.
10 Do not place on or near a hot gas or electric burner, or in a
heated oven.
11 To disconnect, turn any control to “off’’, then remove plug from
electrical outlet.
12 Never use warm or hot water to fill the water reservoir. Use cold
water only.
13 Scalding may occur if the cover is lifted or removed during the
brewing cycle.
14 Do not use this appliance for other than intended use.
15 Snap the lid securely to the carafe before serving.
16 Never use the carafe on a range top or in a conventional
or microwave oven.
17 Do not set a hot carafe on a wet or cold surface.
18 Do not use a cracked carafe, or a carafe that has a loose
or weakened handle.
19 Do not clean the coffee maker with scouring powders, steel wool
pads, or other abrasive materials.
20 TO REDUCE THE RISK OF FIRE OR ELECTRIC SHOCK DO NOT
REMOVE THE BOTTOM COVER. NO USER-SERVICEABLE PARTS
INSIDE. REPAIR SHOULD BE DONE BY AUTHORIZED SERVICE
PERSONNEL ONLY.TO REDUCE THE RISK OF FIRE OR ELECTRIC
SHOCK DO NOT REMOVE THE BOTTOM COVER. NO USER-
SERVICEABLE PARTS INSIDE. REPAIR SHOULD BE DONE BY
AUTHORIZED SERVICE PERSONNEL ONLY.
SAVE THESE INSTRUCTIONS
HOUSEHOLD USE ONLY
A short power-supply cord is provided to reduce the hazards
resulting from entanglement or tripping over a longer cord. An extension
cord may be used with care; however be sure the marked electrical
rating is equal to or greater than the rating of this appliance. The
extension cord should be positioned such that it does not drape over
the counter or tabletop where it can be pulled on by children or tripped
over. The electrical rating of this appliance is listed on the bottom
panel of the unit.
This appliance has a polarized plug (one blade is wider than the other).
As a safety feature, this plug will fit in a polarized outlet only one way.
If it still does not fit, contact a qualified electrician. Do not attempt to
defeat this safety feature.
Before Your First Use
Carefully unpack the coffeemaker and remove all packaging materials.
Caution: Do not immerse the coffeemaker housing in water or
other liquid.
To remove any dust that may have accumulated on the removable
parts during packaging, wash the carafe, lid, filter basket, and coffee
filter with warm, soapy water. Rinse and dry. Do not use harsh or
abrasive cleansers. If necessary, wipe the coffeemaker housing with
a clean, damp cloth.
Note: We recommend that prior to brewing your first pot of coffee, you
“brew” cold water only, without ground coffee or a paper filter. This will
remove any dust that may have settled inside the coffeemaker.
Important: Use only cold water - the automatic brewing system has
been designed to work only with cold water.
HSNCoffeeMaker_manual 4/19/07 10:49 PM Page 1

3
Table of Contents
Important Safeguards 1
Before Your First Use 2
Know Your Electronic Programmable Coffeemaker 5
Know Your Coffeemaker’s Control Panel 7
Using Your Coffeemaker 8
Pause & Pour Feature 9
Auto Shutoff 9
Inserting the Water Filter 10
Setting the Clock 10
Using the Programmable Timer 11
Presetting the Brewing Cycle 11
Care and Cleaning 11
Decalcifying 12
Recipes 13
Limited Warranty 22
Contact Information back cover
Wolfgang Puck,
owner of the famous
Spago restaurants and
one of the most influential
chef-restauranteurs in
America, is credited with
reviving California’s rich
culinary heritage. His
cooking innovations,
a result of blending fresh
California ingredients with his classical French techniques, are enjoyed
by world leaders, stars and fellow chefs alike. He established other
trend-setting restaurants like Postrio in San Francisco, Chinois on
Main in Santa Monica, Vert and Trattoria del Lupo, and his latest creation,
Cut, a gourmet steakhouse in the Beverly Wilshire Hotel. Home chefs
can also share Mr. Puck’s talents through his cookbooks and, of
course, through his appliances!
HSNCoffeeMaker_manual 4/19/07 10:49 PM Page 3

5 6
Know Your Electronic
Programmable Coffeemaker
Permanent
Coffee Filter
Coffeemaker Housing
Programmable LCD Clock Timer
Water Filter Stem
Glass Carafe
Coffee Filter Holder
Water Filter Holder
Water Window
Coffeemaker Housing Lid
(reveals Water
Reservoir
and Coffee Filter Holder)
Warming Plate
Photo above may differ slightly from actual product
HSNCoffeeMaker_manual 4/19/07 10:49 PM Page 5

7 8
Know Your Coffeemaker’s
Control Panel
Using Your Coffeemaker
1Place your drip coffeemaker on a flat, level surface, such as a
countertop. Plug unit into a 120 volt 60Hz AC-only outlet.
2Lift the top cover of the coffeemaker straight up.
3Ensure water filter is fully seated in water reservoir filter holder.
4Your coffeemaker comes equipped with a permanent coffee filter;
however, a cone paper filter may be used instead if desired (8- to 12-
cup size). Place the desired amount of ground coffee into the filter.
See the chart below to determine the amount of coffee to use.
Recommended amounts of coffee
Number of Cups Recommended
2 2 Tbsp.
4 4 Tbsp.
6 6 Tbsp.
8 1/2 Cup
10 1/2 Cup + 2 Tbsp.
12 3/4 Cup
Note: We recommend using coffee ground specifically for automatic
drip coffeemakers. After using your coffeemaker a few times, adjust
the amount to suit your own taste.
5Fill glass carafe with cold water up to the marked level for the
desired amount of coffee. For 10 cups of coffee, fill carafe up to
about 1 inch below the carafe lid assembly with cold water. Pour
water from carafe into water reservoir. Close the top cover of the
coffeemaker until it snaps into place. Place glass carafe, with lid in
place, on the warming plate.
Important: Do not operate your coffeemaker if the filter basket does
not close completely. Use only cold water; the automatic brewing
system has been designed to work only with cold water.
Note: An overflow hole is located at the back of the water reservoir
to prevent overfilling. Do not fill the reservoir past this hole.
6Press the ON/OFF button once. The blue power indicator light will
illuminate indicating that your coffeemaker has begun the brewing
cycle. If you wish to use the timer to preset the coffeemaker, see the
section on “Using the Timer”. In a few minutes, your coffeemaker will
be finished brewing fresh coffee.
Note: If brewing only 4 cups of coffee use the 1-4 cup button. This
feature will adjusts the flow of water through the coffee grounds to
prevent you from getting a bitter or weak brew when making smaller
amounts of coffee.
1 Brew Button - Press
this to immediately begin
brewing cycle.
2 On Light – Illuminates
when coffeemaker is brewing
or in Keep Warm mode.
3 1 - 4 Cup Button –
Adjusts the flow of water
through the coffee grounds
to prevent you from getting
a bitter or weak brew when
making smaller amounts of
coffee.
4 1 - 4 Light - Illuminates
when this feature is selected.
5 LCD Display - Indicates Current Time, Keep Warm Elapsed Time, or
Delay Program Timer.
6 Minute Button – This button advances the minute display
for the clock and timer. See the section on “Setting the Clock” for
proper use.
7 Program Light – Indicates that the coffeemaker is in timer mode,
awaiting preset brew time.
8 Program Button – This button allows you to preset the brewing
cycle to begin at a selected time. See the section on “Using the
Timer” for proper use.
9 Hour Button – This button advances the hour display for the clock
and timer. See the section “Setting the Clock” for proper use.
10 PM Indicator - Illuminates when in PM mode.
1
2
3
4
5
6
7
8
9
10
Figure 1
HSNCoffeeMaker_manual 4/19/07 10:49 PM Page 7
Table of contents
Other Wolfgang Puck Coffee Maker manuals

Wolfgang Puck
Wolfgang Puck CCDCM030 Installation instructions

Wolfgang Puck
Wolfgang Puck BCM00020 User manual

Wolfgang Puck
Wolfgang Puck BRCCM1000 Installation instructions

Wolfgang Puck
Wolfgang Puck BCM00015 User manual

Wolfgang Puck
Wolfgang Puck BIFCM010 User manual

Wolfgang Puck
Wolfgang Puck Bistro BECR0010 User manual
Popular Coffee Maker manuals by other brands

Bunn
Bunn LCA-1 Installation & operating guide

Chris Coffee Service
Chris Coffee Service Silvano owner's manual

Black & Decker
Black & Decker BLACK DECKER HOME DE790 Use and care book

Saeco
Saeco Vienna Plus Sup 018M operating instructions

INCAPTO
INCAPTO BXCO1470E Instructions for use

Bosch
Bosch TASSIMO finesse TAS16B Series user manual