9. JOG WHEEL
Contiene varias funciones como las siguientes:
- Control de velocidad
Girando la rueda en modo play, variará la velocidad de
ejecución. Girando en sentido horario, la incrementará
y antihorario, la reduce.
- Búsqueda
Girando la rueda en modo pausa. El reproductor irá
hacia delante o atrás hasta el punto deseado. La
velocidad de búsqueda depende de la velocidad de
giro de la rueda. Puede ir incluso frame a frame.
19. LOOP ( 2 conjuntos)
Consta de los botones A, B/LOOP EXIT y RELOOP.
1. BOTON A - “Punto de inicio” (Punto A. Cue1 puede
set un punto de inicio). Después de configurar el punto
A, el LED rojo se enciende.
2. B/LOOP/EXIT - “Punto final” (Punto B). Presiónelo para
configurar el punto B y comenzar el loop automáticamente
La luz de loop aparece en pantalla y parpadean los 3 LEDs.
Presione esta tecla otra vez para salir del LOOP.
3. BOTON RELOOP - Si desea volver al modo de reproducción
LOOP, presione este botón.
4. Cambie el “Punto de inicio” y “Punto final” presionando la
tecla A B/LOOP/EXIT otra vez.
5. El intervalo entre los puntos A y B deber ser superior a 20
frames, de otra manera, el punto B se cancelará y la
función LOOP desaparecerá.
20. BOTON SAMPLER
Sampler es un tipo de efecto de sonido que graba música
desde la pista. Mientra se ejecuta un disco, puede usar el
sampler para mezclarlo con la música. Puede escuchar dos
audiciones a la vez.
A. Para crear un sampler, necesita configurar el loop (Vaya al
punto 19 para más información)
B. Mientras está en modo loop, presione la tecla SAM para
configurar la memoria sampler, entonces la tecla SAM
parpadeará.
C. Mientras se ejecuta el disco, si desea usar el sample, presione
la tecla SAM hasta que se encienda la luz, si ésta parpadea
no se encuentra en modo sampler.
D. Para borrar la memoria presione los botones SAM y TIME
a la vez.
E. Tenga en cuenta que el sampler sólo puede grabar 8 seg.
desde el punto A, si graba más de 8 segundos, la
unidad cortará el sobrarnte.
21. Efecto de Sonido
1. Control de efecto de sonido
Girando la rueda para ajustar los parámetros o conseguir
los efectos “Scratch” y “Reverse”.
2. Efecto de sonido
Para seleccionar el que desea de entre 5 tipos, gire la rueda
esto hace que cambie la música. Los 5 efectos son:
SCRATCH: Gire la rueda hacia adelante o atrás como el
scratching de un giradiscos.
FLANGER: Suena como un avión despegando. Si gira la
rueda en sentido horario el efecto es más largo y en
sentido antihorario, más corto.
REVERB: Gire la rueda para lograr diferentes sonidos.
FILTER: Hay graves y agudos. Girar la rueda en sentido
antihorario, corta los graves y mantiene los agudos. En el
otro sentido, corta los agudos y mantiene los graves.
REVERSE: La música se ejecuta al revés. Girando la
rueda, cambiamos la velocidad de ejecución como el PITCH
BEND.
A. Encienda la unidad. El num. 1 parpadea.
B. Presione el botón SELECT, el LED se mueve en orden
1-2-3-4-5 hasta el efecto deseado.
C. Presione la tecla ON/OFF para encender el LED que
parpadea y activar el efecto de sonido.
D. Gira la rueda para ajustar los parámetros del efecto.
E. Presione el botón ON/OFF para desactivar el efecto.
-
- 17
22. ON/OFF (Efecto de Sonido)
Presione este botón para activar o desactivar el efecto de
sonido. Mientras está activado, el LED bajo el número
se enciende, parpadeará mientras esté inactivo.
23. BRAKE
Para cambiar la velocidad entre PAUSE y START, gire
el dial para ajustar la velocidad. La pantalla muestra
BRAKE después de presionar el botón. Este efecto puede
ser ejecutado por separado o en combinación con otros.
24. RELAY
Si una de las unidades está en play y la otra en pause, al
pulsar la tecla, pausará la que reproduce y ejecuta la que
se encontraba en pausa.
25. BOTON PROGRAM
Puede programar la pista que desee. Mientras la unidad
está detenida, presione la tecla PROG para entrar en el
modo memoria, presione los botones de salto para poder
seleccionar la pista, presione la tecla PROG otra vez para
completar la configuración. Puede programar un máximo
de 30 pistas. Mientras ejecuta pistas programadas, el LED
de PROGRAM se enciende. Mientras la unidad está
detenida, abra la bandeja o apague la unidad, el programa
saldrá.
26. BOTON BPM
Puede lograr el número de BPM automáticamente o de
forma manual. Presione la tecla BPM para activar el control
automático de BPM. BEAT aparece en la pantalla. Presione
la tecla BPM por 3 segundos para habilitar el BEAT manual
vez durante 3 segundos para salir del modo.
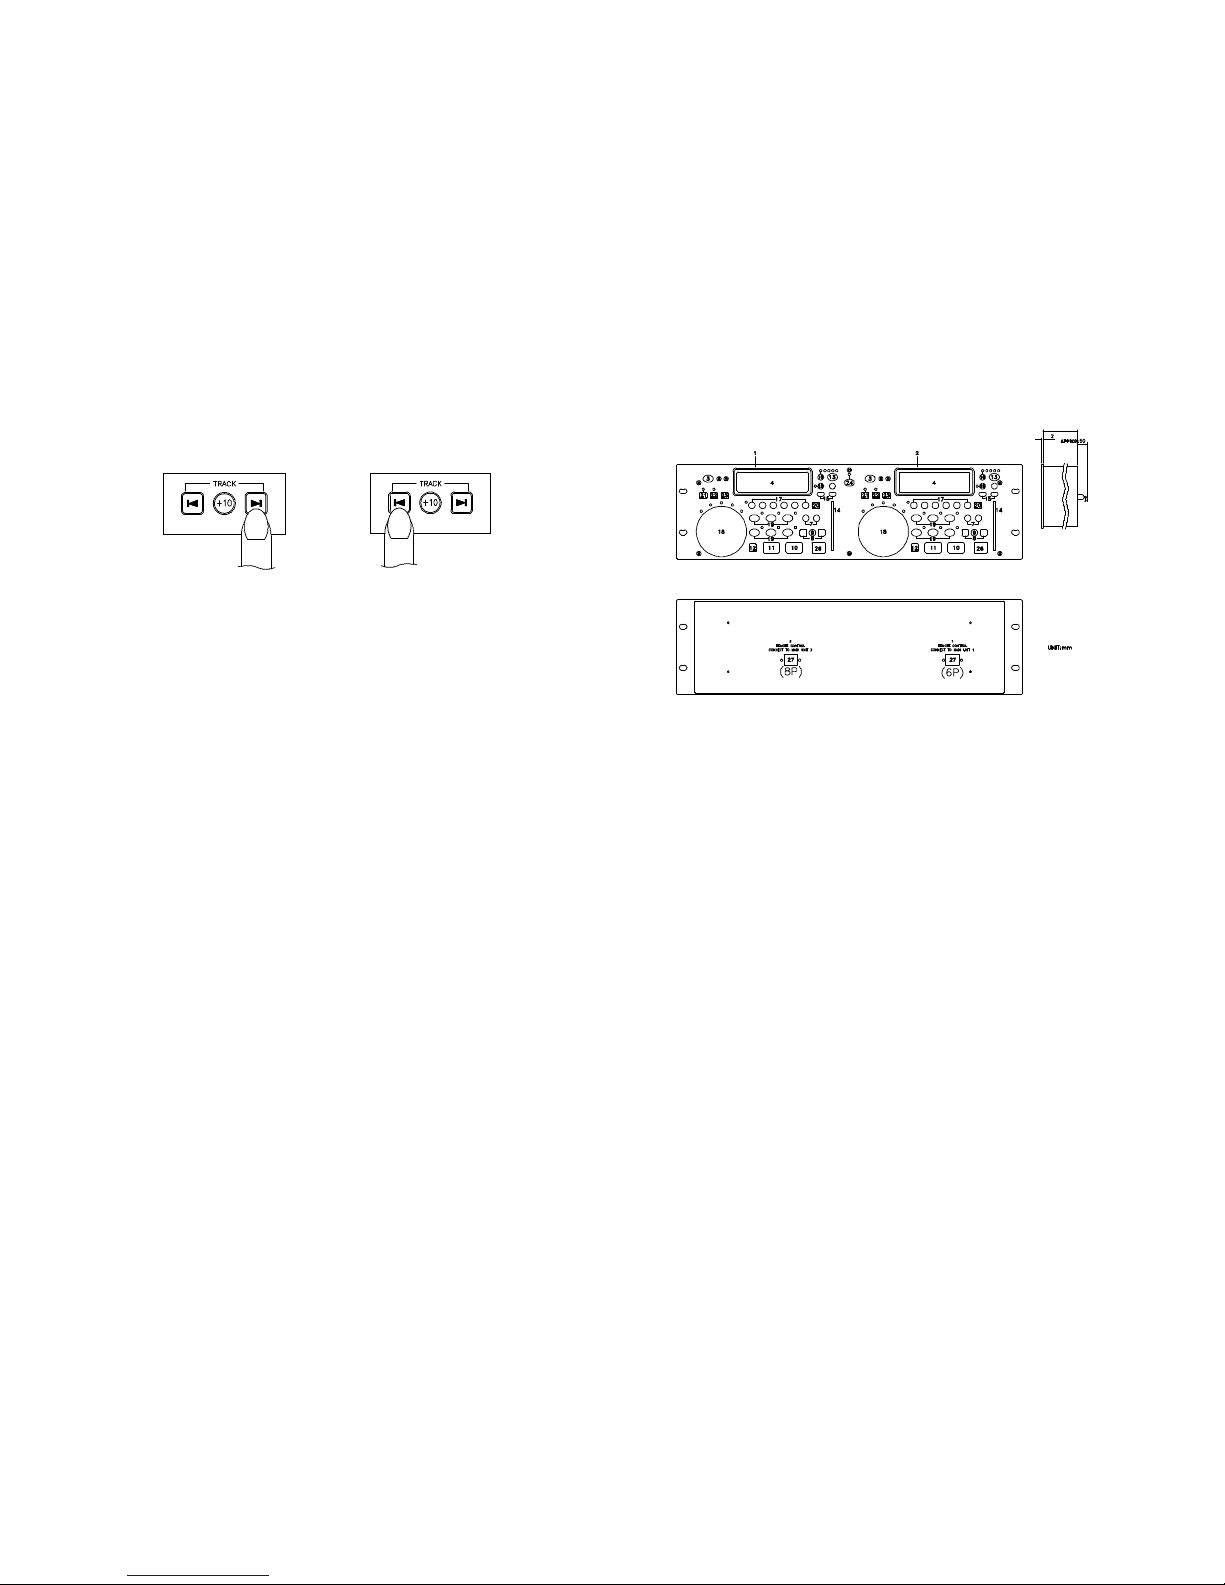
27. PUERTOS DE CONEXION
Los terminales de 8 y 6 pin le permiten la conexión de la
unidad de control a la principal.
28. SLEEP
Deja la unidad sin uso durante 30 minutos, la unidad se
apagará automáticamente.
29. IDENTIFICACION DE DISCO
Recuerda las 5 memorias CUE guardadas cada vez que
el disco es recargado. Cada disco dispone de 5 puntos y
un max. de 255 discos.
A. Configure primero los punto de cue.
B. Presione el botón MEMO por 3 segundos para memorizar
los puntos cue. Si el LED verde se enciende, se
completa la configuración.
C. Si recarga un disco otra vez y quiere volver a cargar
los puntos cue, necesita presionar la tecla MEMO
durante 3 segundos, se enciende el LED verde. Entonces
la unidad, carga los puntos cue automáticamente.
NOTA: No importa si memoriza los puntos cue en la unidad 1 o 2
puede cargarlas desde cualquier unidad. El aparato
puede buscar los puntos automáticamente.
Hay 2 formas de memorizar los CUE. Diríjase a punto 17
o 29.
- 8 -
BASIC OPERATION
Loading and Ejecting the Disc
Open the disc tray
When the disc tray is closed, press the OPEN/CLOSE
button to open the disc tray (This may be done on either
the player or the remote control side.)
Place a disc in the disc tray
Press the OPEN/CLOSE button to close the disc tray.
The disc tray will close and the preparation for disc play
will begin.
When preparation is completed, the total tracks number &
total playing time will display.
To the desired track