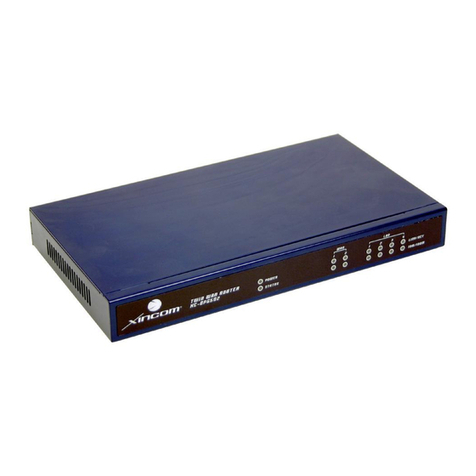
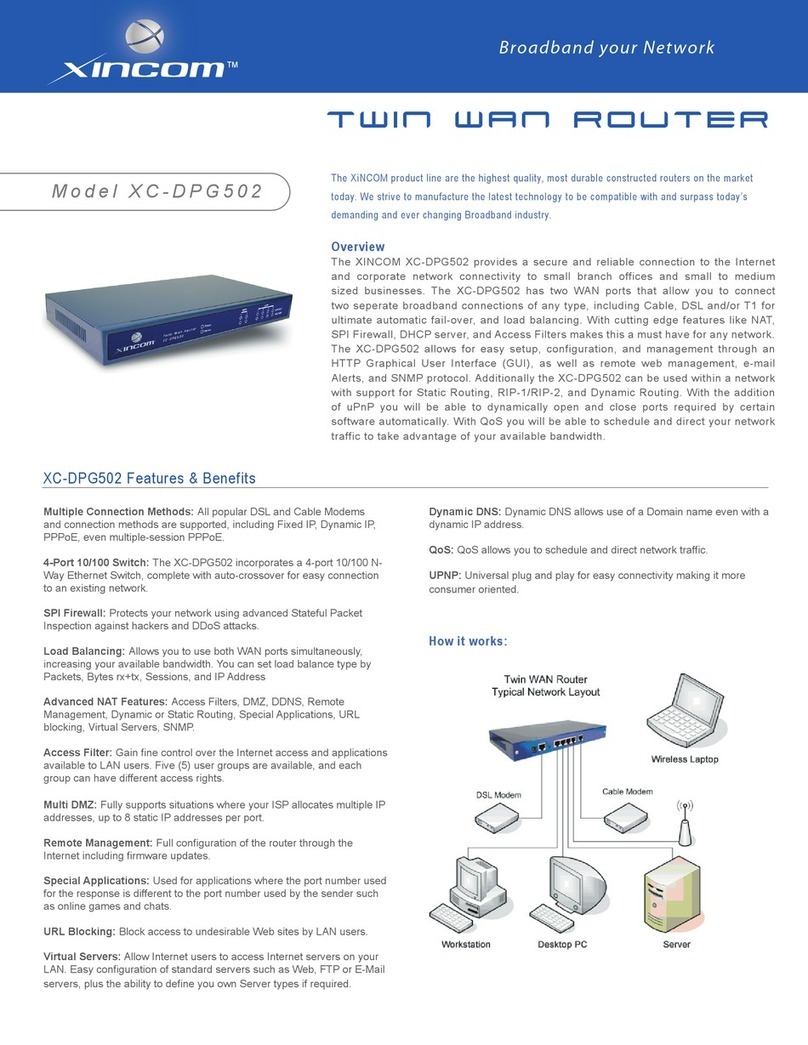
XiNCOM Twin WAN XC-DPG502 User manual

User Guide
Twin WAN Series
TM
By WINS International,
LL
C

Twin WAN Series – User Guide | v1
Overview............................................................................................................................. 3
Introduction......................................................................................................................... 3
Twin WAN Features....................................................................................................... 4
Physical Details............................................................................................................... 7
Chapter 1 – Basic Setup...................................................................................................... 9
Section 1: Overview........................................................................................................ 9
Section 2: Configuring your LAN ................................................................................ 10
Section 3: Connecting two broadband modems............................................................ 14
Section 4: Configuring for Internet Access .................................................................. 15
Section 5: Configuring PCs on your LAN.................................................................... 18
Chapter 2 – Advanced Port............................................................................................... 21
Section 1: Overview...................................................................................................... 21
Section 2: Port Options................................................................................................. 22
Section 3: Load Balance ............................................................................................... 24
Section 4: Advanced PPPoE......................................................................................... 27
Section 5: Advanced PPTP........................................................................................... 28
Chapter 3 – Advanced Setup............................................................................................. 29
Section 1: Host IP ......................................................................................................... 29
Section 2: Routing......................................................................................................... 32
Section 3: Virtual Server............................................................................................... 36
Section 5: Special Applications.................................................................................... 40
Section 6: Dynamic DNS.............................................................................................. 42
Section 7: Multi DMZ & UPnP.................................................................................... 45
Section 8: NAT............................................................................................................. 47
Section 9: Advanced Feature........................................................................................ 48
Chapter 4 –Security........................................................................................................... 51
Section 1: Block URL................................................................................................... 51
Section 2: Access Filter ................................................................................................ 52
Section 3: Session Limit ............................................................................................... 54
Section 4: Firewall Exception (SysFilter Exception).................................................... 55
Chapter 5 – VPN Configuration ....................................................................................... 56
Section 1: Overview...................................................................................................... 56
Section 2: Global Settings (IKE).................................................................................. 57
Section 3: Policy Setup................................................................................................. 62
Section 3: Policy Setup (continued).............................................................................. 69
Chapter 6 – Quality of Service.......................................................................................... 72
Chapter 7 – DNS Configuration ....................................................................................... 75
Section 1: Overview...................................................................................................... 75
Section 2: How it Works............................................................................................... 77
Section 3: DNS Configuration...................................................................................... 79
MX Record.................................................................................................................... 82
Section 4: Map Host URL............................................................................................. 83
Chapter 8 - Management Assistant................................................................................... 85
Section 1: Admin Password Console............................................................................ 85
Section 2: Email Alert................................................................................................... 86
Section 3: SNMP (Simple Network Management Protocol)........................................ 88
Copyright © 2005 WINS International, LLC dba XiNCOM | All rights reserved. 1

Twin WAN Series – User Guide | v1
Section 4: Syslog Overview.......................................................................................... 89
Section 5: Upgrade Firmware....................................................................................... 91
Chapter 9 – Network Info................................................................................................. 95
Section 1: Operation & Status Overview...................................................................... 95
Section 2: WAN & NAT Status.................................................................................... 98
Section 3: Restoring Factory Defaults........................................................................ 100
Appendices...................................................................................................................... 101
Appendix A: Specifications........................................................................................ 101
Appendix B: Windows TCP/IP Setup......................................................................... 102
Copyright © 2005 WINS International, LLC dba XiNCOM | All rights reserved. 2

Twin WAN Series – User Guide | v1
Overview
Introduction
The XINCOM Twin WAN Series provides a secure and reliable connection to the
Internet and corporate network connectivity to small branch offices and small to medium
sized businesses. These networking gateways have dual WAN ports that allow you to
connect two separate broadband connections of any type, including Cable, DSL and/or
T1 for ultimate automatic failover and load balancing.
Use TWO ISPs for expanded bandwidth and redundancy
Using two separate ISPs provides redundant connectivity to the Internet. In the event that
one ISP goes down, the Twin WAN Gateway auto-fails over to the other ISP service.
Redundancy to the Internet provides a truly uninterrupted connection for a business’s
customers while maintaining uptime and productivity for its employees.
Robust Security Features
The Twin WAN Series also features NAT, a Stateful Packet Inspection (SPI) Firewall,
DHCP server, Access Filters, and a built-in VPN endpoint (VPN models only) to secure a
business’s network services. The Quality of Service (QoS) feature schedules and directs a
network’s traffic to take advantage of available bandwidth. UPnP support can
dynamically open and close ports required by certain software automatically. Increased
bandwidth and redundant connectivity to the Internet provides cost-effective bandwidth
solutions to expensive leased telecommunication lines for your network infrastructure.
Package Contents
•Twin WAN Router or Gateway
•Power Adapter (5V)
•Quick Installation Guide
•One companion CD-ROM
•Two CAT RJ-45 Ethernet Cables
•Rack Mounts for a standard 19” server rack
Copyright © 2005 WINS International, LLC dba XiNCOM | All rights reserved. 3

Twin WAN Series – User Guide | v1
Twin WAN Features
Multiple Connection Methods
All popular DSL and Cable Modems and connection methods are supported, including
Fixed IP, Dynamic IP, PPPoE, even multiple-session PPPoE.
2 x 10/100 WAN Ports
The Twin WAN Gateway incorporates dual 10/100 WAN ports, complete with auto-
crossover for easy connection to an existing network. All popular DSL and Cable
Modems and connection methods are supported, including Fixed IP, Dynamic IP, PPPoE,
even multiple-session PPPoE.
4-Port 10/100 Switch
The Twin WAN Gateway incorporates a 4-port 10/100 N-Way Ethernet Switch, complete
with auto crossover for easy connection to an existing network.
Built-in VPN Endpoint (503 & 603 models only)
Full VPN Endpoint with support for up to 30 VPN tunnels using the IPsec encryption
protocol.
Authoritative DNS to IP Gateway (602 & 603 models only)
The Twin WAN Gateways are an authoritative DNS to IP gateway that resolves a domain
name to its respective IP addresses. This new capability allows for inbound failover and
load balancing for servers located behind the gateway. Using dual WAN ports
simultaneously increases available bandwidth for both uploads and download requests.
You can set load balance type by Packets, Bytes rx+tx and Sessions.
Automatic Failover
If one broadband connection goes down all traffic is automatically re-routed through the
second broadband connection.
Stateful Packet Inspection (SPI) Firewall
Protects your network using advanced SPI against malicious and DDoS attacks.
Advanced NAT features
Access Filters, DMZ, DDNS, Remote Management, Dynamic or Static Routing, Special
Applications, Virtual Servers, SNMPv1.
Access Filters
Gain fine control over the Internet access and applications available to LAN users with a
powerful URL Blocking Engine. Five (5) user groups are available, and each group can
have different access rights.
Copyright © 2005 WINS International, LLC dba XiNCOM | All rights reserved. 4

Twin WAN Series – User Guide | v1
Block URL
Use this feature to block access to undesirable Web sites by LAN users. You can even
have different settings for different groups of PCs.
DHCP Server Support
Dynamic Host Configuration Protocol provides a dynamic IP address to PCs and other
devices upon request. The Twin WAN Gateway can act as a DHCP Server for devices on
your local LAN.
Multi Segment LAN Support
LANs containing one or more segments are supported via the Twin WAN Gateway’s
built-in static routing table.
ARP proxy
The ARP proxy feature allows you to assign an external (Internet) IP address to the Twin
WAN Gateway’s LAN port. This allows Servers on your LAN to have external (Internet)
IP addresses.
Remote Management
The Twin WAN Gateway can be managed from any PC on your LAN. The Twin WAN
Gateway can also be configured remotely via the Internet.
Password Protected Configuration
Optional password protection is provided to prevent unauthorized users from modifying
the Twin WAN Gateway’s configuration data and settings.
HTTP Firmware Upgrade and backup
The web management feature allows you to use HTTP to upgrade new firmware and
backup system configuration from local or remote locations.
Email Alert
The Twin WAN Gateway will send an alert via email to the system administrator in the
event a single or both WAN connections go down.
Syslog
Generates real time system information on the web page or sends to a particular
computer. This is used for monitoring and diagnosis purposes.
DNS Configuration
This sets the inbound load balancing features for the XC-DPG603. Users have to
construct a DNS server in order to enable the inbound load balancing capabilities.
Copyright © 2005 WINS International, LLC dba XiNCOM | All rights reserved. 5

Twin WAN Series – User Guide | v1
Map Host URL
In addition to the DNS configuration, Map Host URL allows for users to select a URL to
map to the IP address of a local host.
QoS Configuration
You will be able to schedule and direct your network traffic to take advantage of your
available bandwidth. This function allows for specified packets with higher priority to
pass-through such as Internet phone, video conference, and other real-time applications.
Universal Plug & Play (UPnP)
The UPnP feature dynamically opens and close ports required by certain software
automatically.
Copyright © 2005 WINS International, LLC dba XiNCOM | All rights reserved. 6

Twin WAN Series – User Guide | v1
Physical Details
Twin WAN Gateway – Front Panel
Operation of the Front Panel LEDs is as follows:
System
Power- OFF - No Power
ON - Normal Operation
Status- OFF - Normal Operation
ON - Firmware not loaded or hardware error
Blinking - Data in/out
WAN
Link/ACT- OFF - 10BaseT connection or no connection on WAN port ½.
ON - Physical connection to the Broadband modem on WAN
port ½ established.
10/100M- OFF - 10 BaseT connection or no connection on WAN port ½.
ON - Physical connection using 100 BaseT on WAN port ½
established.
LAN
Link/ACT- OFF - No physical connection.
ON - Physical connection or data in/out.
10/100M- OFF - 10 BaseT connection on the corresponding LAN port or
no connection.
ON - Physical connection using 100 BaseT on WAN port ½
established.
Copyright © 2005 WINS International, LLC dba XiNCOM | All rights reserved. 7

Twin WAN Series – User Guide | v1
Front Panel Status & Error Conditions
LED Action Condition
WAN1 LINK/ACT & 10M/100M LEDs flash alternatively. Firmware Download in progress.
WAN1 LINK/ACT & 10M/100M LEDs flash concurrently. MAC address not assigned.
WAN1 LINK/ACT & 10M/100M LEDs solid On SDRAM error
WAN2 LINK/ACT & 10M/100M LEDs solid On Timer/Interrupt error
LAN1 LINK/ACT & 10M/100M LEDs solid On LAN/WAN error
Twin WAN Gateway – Rear Panel
WAN Ports - Connect the primary Broadband Modem to WAN 1 and the second
Broadband Modem on WAN 2.
LAN Port - Connect the PCs to these ports. Both 10BaseT and 100BaseT
connections can be used simultaneously.
Note: Any port will automatically operate as an “Uplink” port if
required. Use a standard RJ-45 Ethernet cable to connect to any port
to another hub or switch.
Reset Button - Press the Reset button once for a warm reboot. To reset the Twin
WAN Gateway to default settings, press and hold the reset button for
30 seconds.
Default Settings:
When the Twin WAN Gateway has finished booting, all configuration settings will be set
to the factory defaults, including:
•The IP Address is set to its default value of 192.168.1.1 with a Network Mask of
255.255.255.0
•DHCP Server is enabled
•User Name: admin
•Password cleared (no password)
Copyright © 2005 WINS International, LLC dba XiNCOM | All rights reserved. 8

Twin WAN Series – User Guide | v1
Chapter 1 – Basic Setup
Section 1: Overview
Basic setup of you Twin WAN Gateway will involve the following steps:
1. Connect the Twin WAN Gateway to one (1) PC and configure it to your existing
LAN.
2. Connecting one or two Broadband Modems to your Twin WAN Gateway.
3. Configuring the Twin WAN Gateway for Internet Access.
4. Configuring all PCs on your LAN to use the Twin WAN Gateway.
Requirements:
•One or two Broadband modems (T1, xDSL, Cable, and/or Satellite) with an active
account from your ISP(s).
•Two standard 10/100BaseT network (UTP) cables with RJ-45 connectors.
•TCP/IP network protocol must be installed on all PCs.
CAT-5 Ethernet Cables
Broadband Modems
TCP/IP Enabled PCs
Copyright © 2005 WINS International, LLC dba XiNCOM | All rights reserved. 9

Twin WAN Series – User Guide | v1
Section 2: Configuring your LAN
Procedure
1. Use a standard LAN cable to connect your PC to any LAN port on the Twin WAN
Gateway.
2. Connect the power adapter and power up the Twin WAN Gateway. Only use the
power adapter provided with the product; using a different one may cause hardware
damage.
3. Start your PC or restart your PC if it is already running. Once restarted, the PC will
then obtain an IP address from the Twin WAN Gateway.
4. Start your Web browser.
5. In the Address or Location box enter: HTTP://192.168.1.1
6. You will be prompted for the User Name and password, as shown in Figure 1.
Figure 1
Copyright © 2005 WINS International, LLC dba XiNCOM | All rights reserved. 10

Twin WAN Series – User Guide | v1
7. Enter admin for the User Name and leave the Password blank.
No Response?
If your computer is using a fixed IP address, you must configure your PC to use an IP
address within the range 192.168.1.2 to 192.168.1.254, with a Network Mask of
255.255.255.0. See Appendix B – Windows TCP/IP Setup for details.
Be sure to check for the following:
•The Twin WAN Gateway is properly installed
•The Ethernet cable to the Twin WAN Gateway is properly attached
•The Twin WAN Gateway is powered ON
8. After the login, you will then see the Admin Password screen, as shown in Figure 2.
Assign a password in both the Password and Verify Password fields and press the
Submit button.
Figure 2.
9. From the setup menu, select Basic Setup and then LAN & DHCP from the submenu.
You will see a screen like the example in Figure 3.
Figure 3.
Copyright © 2005 WINS International, LLC dba XiNCOM | All rights reserved. 11

Twin WAN Series – User Guide | v1
LAN & DHCP - Settings and Descriptions
IP Address
This is the IP address for the Twin WAN Gateway when seen from the local LAN. Use
the default value unless the address is already in use or your LAN is using a different IP
address range. In the latter case, enter an unused IP address from within the range used by
your LAN
Subnet Mask
The default value 255.255.255.0 is standard for small (class “C”) networks. For other
networks, use the Subnet Mask for the LAN segment to which the Twin WAN Gateway
is attached (the same value as the PCs on the LAN segment).
DHCP Server Configuration
•DHCP Server Setup
When Enabled, the Twin WAN Gateway will allocate IP Addresses to PCs
(DHCP clients) on your LAN on startup. The default and recommended value is
Enable. (Windows systems by default act as DHCP clients. This setting is called
Obtain an IP address automatically)
If you are already using an existing DHCP Server on the network, this setting
must be Disabled and the primary DHCP Server must be set to provide the IP
Address of the Twin WAN Gateway as the Default Gateway.
•Client Lease Time
A set duration before client’s IP Address is released and renewed again.
•Client Default DNS
The default DNS which are used by clients.
DHCP IP Address Range
The Offered Range fields allow you to set the values used by the DHCP server when
allocating IP Addresses to DHCP clients. This range also determines the number of
DHCP clients supported.
Free Entries indicates how many DHCP entries are not currently allocated and are still
available.
Copyright © 2005 WINS International, LLC dba XiNCOM | All rights reserved. 12

Twin WAN Series – User Guide | v1
ARP Proxy
Enable this option ONLY if the LAN port has an IP Address in the same address range as
the WAN port(s). This means that all PCs using this Gateway must have valid fixed
external (internal) IP addresses. When Enabled, enter the IP address ranged used on your
LAN.
LAN Any IP
LAN Any IP provides Internet access through the router to any PC or device with an IP
address. This provides true Plug and Play when adding new PCs or networking devices to
your network.
DHCP Client List
This table shows the IP addresses which have been allocated by the DHCP Server
function. For each address which has been allocated, the following information is shown:
•Name - The hostname of the PC. In some cases, this may note be available.
•MAC Address - The physical address (network adapter address) of the PC.
•IP Address - The IP address allocated to the PC.
•Type - Indicates IP address to be dynamic or static.
•Status - Displays the current status of the DHCP client; shown either leased or
reserved.
•Time Left - This displays the time left of the leased IP Address.
Copyright © 2005 WINS International, LLC dba XiNCOM | All rights reserved. 13

Twin WAN Series – User Guide | v1
Section 3: Connecting two broadband modems
Procedure
1. Ensure the Twin WAN Gateway and the DSL/Cable modem are powered OFF.
Leave the modem or modems connected to their data line.
2. Connect the Broadband modem(s) to the Twin WAN Gateway. If using only one (1)
Broadband modem, connect it to the WAN 1 port.
3. Use standard LAN cables to connect PCs to the LAN ports on the Twin WAN
Gateway.
•Both 10BaseT and 100BaseT connections can be used simultaneously.
•Use a standard CAT-5 Ethernet cable to connect any port on the Twin WAN
Gateway to a standard port on another hub. Any LAN port on the will
automatically act as an Uplink port when required.
4. Power Up:
•Power on the Cable or DSL modem(s) and allow the device(s) to boot up.
•Connect the supplied power adapter to the Twin WAN device.
5. Check the LEDs of your Twin WAN Gateway:
•The Power LED should be ON.
•The WAN – Link LED should be ON when the corresponding WAN port is
connected toa broadband modem.
•For each PC connected to the LAN ports, the corresponding LAN LED (either
10 or 100) should be ON.
Figure 4.
Copyright © 2005 WINS International, LLC dba XiNCOM | All rights reserved. 14

Twin WAN Series – User Guide | v1
Section 4: Configuring for Internet Access
Procedure- Select Primary Setup from the menu
1. Configure WAN 1 and/or WAN 2 as required. See below for details on the Primary
Setup screen.
2. For any of the following situations, refer to Chapter 3: Advanced Setup for any
further configuration which may be required such as:
•Using both ports
•Multiple IP addresses on either port
•Multiple PPPoE sessions
•PPTP connection method
3. Setup of the Twin WAN Gateway is now complete. PCs on your LAN must now be
configured. See the following section for details.
Figure 5.
Copyright © 2005 WINS International, LLC dba XiNCOM | All rights reserved. 15

Twin WAN Series – User Guide | v1
Primary Setup - Settings & Descriptions
Connection Mode
•Enable - Select this if you have connected a broadband modem to this port.
•Disable - Select this if there is no broadband modem connected to this port.
•Backup - When selecting a connection for Backup mode, the status of that
connection will stay disconnected until the primary connection fails.
Connection Type
Check the requirements supplied by your ISP, and select the appropriate option.
•Static IP - Select this if your ISP has provided a Fixed or Static IP address. Then
enter the data into the Address Info fields.
•Dynamic IP - Select this if your ISP provides an IP address automatically, when
you connect. You can ignore the Address Info fields.
•PPPoE - Select this if your ISP uses this method (PPPoE software that is usually
provided by your ISP is not required to be used when selecting this method). If
this method is selected, you must complete the PPPoE dialup fields.
Address Info
This is for Static IP users only. Enter the address information provided by your ISP. If
your ISP provided multiple IP address, you can use the Multi-DMZ screen to assign the
additional IP addresses.
PPPoE / PPTP Dialup
This is for PPPoE and PPTP users only.
1. Enter the Username and Password provided by your ISP.
2. If using PPTP, enable the PPTP Connection checkbox and enter the IP address of
the PPTP server.
3. Host name (Optional For PPPoE) - This field is used by a Host to uniquely
associate an access concentrator to a particular Host request.
Note: If using the PPTP connection method, select Static IP or Dynamic IP to correspond
to the IP address method used by your ISP.
Copyright © 2005 WINS International, LLC dba XiNCOM | All rights reserved. 16

Twin WAN Series – User Guide | v1
DNS
If you are using a Fixed IP address you must enter at least one DNS address. When you
use the Dynamic IP or PPPoE, inputting the DNS information is optional.
Optional
•Host Name - This is required by some ISPs. If your ISP provided a Host Name,
enter it here. Otherwise, you can use the default value.
•Domain Name - This is required by some ISPs. If your ISP provided a Domain
Name, enter it here. Otherwise, you can use the default value.
•MAC Address - Some ISP’s record your MAC address (also called Physical
Address or Network Adapter Address).
Copyright © 2005 WINS International, LLC dba XiNCOM | All rights reserved. 17

Twin WAN Series – User Guide | v1
Section 5: Configuring PCs on your LAN
Overview
For each PC, the following may need to be configured:
•TCP/IP network settings
•Internet Access configuration
TCP/IP Settings
When using Windows 95/98/ME/2000/XP and the Twin WAN Gateway’s TCP/IP default
settings, no changes need to be made. Just start or reboot your PC.
•By default, the Twin WAN Gateway will act as a DHCP Server, automatically
providing a suitable IP Address (and related information) to each PC when the PC
boots up.
•For all non-Server versions of Windows, the default TCP/IP setting is to act as a
DHCP client. In Windows, this is called Obtain an IP address automatically. Just
start (or restart) your PC, and it will obtain an IP address from the Twin WAN
Gateway.
•If using fixed IP addresses on your LAN, or you wish to check your TCP/IP
settings, refer to Appendix B – Windows TCP/IP Setup.
Internet Access
To configure your PCs to use the Twin WAN Gateway for Internet access, follow this
procedure:
For Windows 9x/2000
1. Select Start Menu > Settings > Control Panel > Internet Options
2. Select the Connection tab, and click the Setup button.
3. Select I want to set up my Internet connection manually or I want to connect
through a local area network (LAN) and click Next.
4. If I connect through a local area network (LAN) is selected, ensure all of the
boxes on the following Local area network Internet Configuration screen are
unchecked.
5. Check the No option when prompted to setup an Internet Mail account.
6. Click Finish to close the Internet Connection Wizard. Setup is now completed.
Copyright © 2005 WINS International, LLC dba XiNCOM | All rights reserved. 18

Twin WAN Series – User Guide | v1
For Windows XP
1. Select Start Menu > Control Panel > Network and Internet Connections.
2. Select Set up or change your Internet Connection.
3. Select the Connection tab, and click the Setup button.
4. Cancel the pop-up Location Information screen.
5. Click Next on the New Connection Wizard screen.
6. Select Connect to the Internet and click Next.
7. Select Set up my connection manually and click Next.
8. Check Connect using a broadband connection that is always on and click Next.
9. Click Finish to close the New Connection Wizard. Setup is now complete.
Accessing AOL
To access AOL (America Online) through the Twin WAN Gateway, the AOL for
Windows software must be configured to use TCP/IP network access, rather than a dial-
up connection. The configuration process is as follows:
1. Start the AOL for Windows communication software. Ensure that it is Version
2.5, 3.0 or later. This procedure will not work with earlier versions.
2. Click the Setup button.
3. Select Create Location, and change the location name from New Locality to Twin
WAN Gateway.
4. Click Edit Location. Select TCP/IP for the Network field. (Leave the Phone
Number blank.)
5. Click Save, then OK. Configuration is now complete.
6. Before clicking Sign On, always ensure that you are using the Twin WAN
Gateway location.
For Apple Clients
1. Open the TCP/IP Control Panel.
2. Select Ethernet from the Connect via pop-up menu.
3. Select Using DHCP Server from the Configure pop-up menu. The DHCP Client
ID field can be left blank.
4. Close the TCP/IP panel, saving your settings.
Note: If using manually assigned IP addresses instead of DHCP, the required
changes are:
•Set the Router Address field to the Twin WAN Gateway’s IP Address.
•Ensure your DNS settings are correct.
Copyright © 2005 WINS International, LLC dba XiNCOM | All rights reserved. 19
Other manuals for Twin WAN XC-DPG502
2
This manual suits for next models
4
Table of contents
Other XiNCOM Network Router manuals