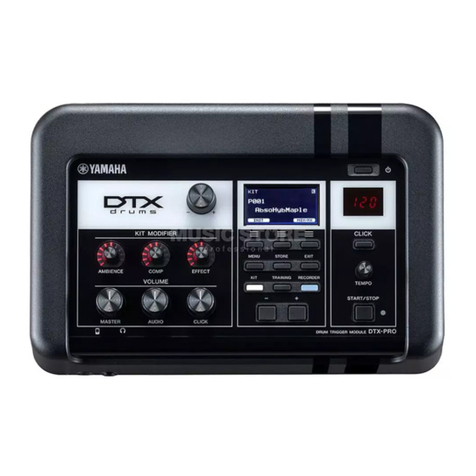
Yamaha DTX-PROX User manual

S-1 DTX-PROX Owner’s Manual
This product utilizes batteries or an external power supply (adapter).
DO NOT connect this product to any power supply or adapter other
than one described in the manual, on the name plate, or specifically
recommended by Yamaha.
WARNING: Do not place this product in a position where anyone
could walk on, trip over, or roll anything over power or connecting
cords of any kind. The use of an extension cord is not recommended!
If you must use an extension cord, the minimum wire size for a 25’
cord (or less ) is 18 AWG. NOTE: The smaller the AWG number, the
larger the current handling capacity. For longer extension cords, con-
sult a local electrician.
This product should be used only with the components supplied or; a
cart, rack, or stand that is recommended by Yamaha. If a cart, etc., is
used, please observe all safety markings and instructions that accom-
pany the accessory product.
SPECIFICATIONS SUBJECT TO CHANGE:
The information contained in this manual is believed to be correct at
the time of printing. However, Yamaha reserves the right to change or
modify any of the specifications without notice or obligation to update
existing units.
This product, either alone or in combination with an amplifier and
headphones or speaker/s, may be capable of producing sound levels
that could cause permanent hearing loss. DO NOT operate for long
periods of time at a high volume level or at a level that is uncomfort-
able. If you experience any hearing loss or ringing in the ears, you
should consult an audiologist.
IMPORTANT: The louder the sound, the shorter the time period before
damage occurs.
NOTICE:
Service charges incurred due to a lack of knowledge relating to how a
function or effect works (when the unit is operating as designed) are
not covered by the manufacturer’s warranty, and are therefore the
owners responsibility. Please study this manual carefully and consult
your dealer before requesting service.
ENVIRONMENTAL ISSUES:
Yamaha strives to produce products that are both user safe and envi-
ronmentally friendly. We sincerely believe that our products and the
production methods used to produce them, meet these goals. In keep-
ing with both the letter and the spirit of the law, we want you to be
aware of the following:
Battery Notice:
This product MAY contain a small non-rechargeable battery which (if
applicable) is soldered in place. The average life span of this type of
battery is approximately five years. When replacement becomes nec-
essary, contact a qualified service representative to perform the
replacement.
This product may also use “household” type batteries. Some of these
may be rechargeable. Make sure that the battery being charged is a
rechargeable type and that the charger is intended for the battery
being charged.
When installing batteries, never mix old batteries with new ones, and
never mix different types of batteries. Batteries MUST be installed cor-
rectly. Mismatches or incorrect installation may result in overheating
and battery case rupture.
Warning:
Do not attempt to disassemble, or incinerate any battery. Keep all bat-
teries away from children. Dispose of used batteries promptly and as
regulated by the laws in your area. Note: Check with any retailer of
household type batteries in your area for battery disposal information.
Disposal Notice:
Should this product become damaged beyond repair, or for some rea-
son its useful life is considered to be at an end, please observe all
local, state, and federal regulations that relate to the disposal of prod-
ucts that contain lead, batteries, plastics, etc. If your dealer is unable
to assist you, please contact Yamaha directly.
NAME PLATE LOCATION:
The name plate is located on the bottom of the product. The model
number, serial number, power requirements, etc., are located on this
plate.You should record the model number, serial number, and the
date of purchase in the spaces provided below and retain this manual
as a permanent record of your purchase.
Model
Serial No.
Purchase Date
PLEASE KEEP THIS MANUAL
SPECIAL MESSAGE SECTION
92-BP (bottom)
COMPLIANCE INFORMATION STATEMENT (Supplier’s declaration of conformity procedure)
Responsible Party : Yamaha Corporation of America
Address : 6600 Orangethorpe Ave., Buena Park, Calif. 90620
Telephone : 714-522-9011
Type of Equipment : Drum Trigger Module
Model Name : DTX-PROX
This device complies with Part 15 of the FCC Rules.
Operation is subject to the following two conditions:
1) this device may not cause harmful interference, and
2) this device must accept any interference received including interference that may cause undesired operation.
* This applies only to products distributed by Yamaha Corporation of America. (FCC SDoC)
(can_b_02)
CAN ICES-3 (B)/NMB-3(B)

S-2
DTX-PROX Owner’s Manual
1. IMPORTANT NOTICE: DO NOT MODIFY THIS UNIT!
This product, when installed as indicated in the instructions con-
tained in this manual, meets FCC requirements. Modifications not
expressly approved by Yamaha may void your authority, granted by
the FCC, to use the product.
2. IMPORTANT: When connecting this product to accessories and/
or another product use only high quality shielded cables. Cable/s
supplied with this product MUST be used. Follow all installation
instructions. Failure to follow instructions could void your FCC
authorization to use this product in the USA.
3. NOTE: This product has been tested and found to comply with the
requirements listed in FCC Regulations, Part 15 for Class “B” digital
devices. Compliance with these requirements provides a reason-
able level of assurance that your use of this product in a residential
environment will not result in harmful interference with other elec-
tronic devices. This equipment generates/uses radio frequencies
and, if not installed and used according to the instructions found in
the users manual, may cause interference harmful to the operation
of other electronic devices. Compliance with FCC regulations does
not guarantee that interference will not occur in all installations. If
this product is found to be the source of interference, which can be
determined by turning the unit “OFF” and “ON”, please try to elimi-
nate the problem by using one of the following measures:
Relocate either this product or the device that is being affected by
the interference.
Utilize power outlets that are on different branch (circuit breaker or
fuse) circuits or install AC line filter/s.
In the case of radio or TV interference, relocate/reorient the
antenna. If the antenna lead-in is 300 ohm ribbon lead, change the
lead-in to co-axial type cable.
If these corrective measures do not produce satisfactory results,
please contact the local retailer authorized to distribute this type of
product. If you can not locate the appropriate retailer, please contact
Yamaha Corporation of America, Electronic Service Division, 6600
Orangethorpe Ave, Buena Park, CA90620
The above statements apply ONLY to those products distributed by
Yamaha Corporation of America or its subsidiaries.
* This applies only to products distributed by Yamaha Corporation of America. (class B)
FCC INFORMATION (U.S.A.)

S-3 DTX-PROX Owner’s Manual
For AC adaptor
The above warning is located on the bottom of the unit.
Explanation of Graphical Symbols
The lightning flash with arrowhead symbol within
an equilateral triangle is intended to alert the user
to the presence of uninsulated “dangerous voltage”
within the product’s enclosure that may be of suffi-
cient magnitude to constitute a risk of electric
shock to persons.
The exclamation point within an equilateral trian-
gle is intended to alert the user to the presence of
important operating and maintenance (servicing)
instructions in the literature accompanying the
product.
IMPORTANT SAFETY INSTRUCTIONS
1 Read these instructions.
2 Keep these instructions.
3 Heed all warnings.
4 Follow all instructions.
5 Do not use this apparatus near water.
6 Clean only with dry cloth.
7 Do not block any ventilation openings. Install in accor-
dance with the manufacturer’s instructions.
8 Do not install near any heat sources such as radiators, heat
registers, stoves, or other apparatus (including amplifiers)
that produce heat.
9 Do not defeat the safety purpose of the polarized or
grounding-type plug. A polarized plug has two blades with
one wider than the other. A grounding type plug has two
blades and a third grounding prong.The wide blade or the
third prong are provided for your safety. If the provided
plug does not fit into your outlet, consult an electrician for
replacement of the obsolete outlet.
10 Protect the power cord from being walked on or pinched
particularly at plugs, convenience receptacles, and the
point where they exit from the apparatus.
11 Only use attachments/accessories specified by the manu-
facturer.
12 Use only with the cart, stand, tri-
pod, bracket, or table specified by
the manufacturer, or sold with the
apparatus. When a cart is used,
use caution when moving the cart/
apparatus combination to avoid
injury from tip-over.
13 Unplug this apparatus during light-
ning storms or when unused for long periods of time.
14 Refer all servicing to qualified service personnel. Servicing
is required when the apparatus has been damaged in any
way, such as power-supply cord or plug is damaged, liquid
has been spilled or objects have fallen into the apparatus,
the apparatus has been exposed to rain or moisture, does
not operate normally, or has been dropped
(UL60065_03)
CAUTION: TO REDUCE THE RISK OF
ELECTRIC SHOCK, DO NOT REMOVE
COVER (OR BACK). NO USER-SERVICEABLE
PARTS INSIDE. REFER SERVICING TO
QUALIFIED SERVICE PERSONNEL.
CAUTION
RISK OF ELECTRIC SHOCK
DO NOT OPEN
WARNING
TO REDUCE THE RISK OF FIRE OR ELECTRIC SHOCK, DO NOT EXPOSE THIS APPARATUS TO RAIN OR MOISTURE.

S-4
DTX-PROX Owner’s Manual
(bottom_en_01)
(weee_eu_en_02)
The model number, serial number, power requirements, etc., may be found on or near the
name plate, which is at the bottom of the unit.
You should note this serial number in the space provided below and retain this manual as a
permanent record of your purchase to aid identification in the event of theft.
Model No.
Serial No.
Information for users on collection and disposal of old equipment:
This symbol on the products, packaging, and/or accompanying documents means that used electrical and
electronic products should not be mixed with general household waste.
For proper treatment, recovery and recycling of old products, please take them to applicable collection
points, in accordance with your national legislation.
By disposing of these products correctly, you will help to save valuable resources and prevent any potential
negative effects on human health and the environment which could otherwise arise from inappropriate
waste handling.
For more information about collection and recycling of old products, please contact your local municipality,
your waste disposal service or the point of sale where you purchased the items.
For business users in the European Union:
If you wish to discard electrical and electronic equipment, please contact your dealer or supplier for further
information.
Information on Disposal in other Countries outside the European Union:
This symbol is only valid in the European Union. If you wish to discard these items, please contact your
local authorities or dealer and ask for the correct method of disposal.

2DTX-PROX Owner’s Manual
PRECAUTIONS
PLEASE READ CAREFULLY BEFORE PROCEEDING
Please keep this manual in a safe and handy place for future reference.
WARNING
• This AC adaptor is designed for use with only Yamaha electronic instruments.
Do not use for any other purpose.
• Indoor use only. Do not use in any wet environments.
CAUTION
• When setting up, make sure that the AC outlet is easily accessible. If some
trouble or malfunction occurs, immediately turn off the power switch of the
instrument and disconnect the AC adaptor from the outlet. When the AC
adaptor is connected to the AC outlet, keep in mind that electricity is flowing at
the minimum level, even if the power switch is turned off. When you are not
using the instrument for a long time, make sure to unplug the power cord from
the wall AC outlet.
WARNING
Always follow the basic precautions listed below to avoid the possibility of serious injury or even death from electrical shock, short-circuiting,
damages, fire or other hazards. These precautions include, but are not limited to, the following:
• Do not place the power cord near heat sources such as heaters or radiators.
Also, do not excessively bend or otherwise damage the cord, or place heavy
objects on it.
• Only use the voltage specified as correct for the instrument. The required
voltage is printed on the name plate of the instrument.
• Use the specified adaptor (page 60) only. Using the wrong adaptor can result
in damage to the instrument or overheating.
• Check the electric plug periodically and remove any dirt or dust which may
have accumulated on it.
• This instrument contains no user-serviceable parts. Do not open the
instrument or attempt to disassemble or modify the internal components in
any way. If it should appear to be malfunctioning, discontinue use immediately
and have it inspected by qualified Yamaha service personnel.
• Do not expose the instrument to rain, use it near water or in damp or wet
conditions, or place on it any containers (such as vases, bottles or glasses)
containing liquids which might spill into any openings. If any liquid such as
water seeps into the instrument, turn off the power immediately and unplug the
power cord from the AC outlet. Then have the instrument inspected by
qualified Yamaha service personnel.
• Never insert or remove an electric plug with wet hands.
• Do not put burning items, such as candles, on the unit. A burning item may fall
over and cause a fire.
• Radio waves or magnetism may affect electro-medical devices.
- Do not use this product near medical devices or inside areas in which the
use of radio waves is restricted.
- Do not use this product within 15cm (6 in.) of persons with a heart
pacemaker or defibrillator implant.
• When one of the following problems occur, immediately turn off the power
switch and disconnect the electric plug from the outlet. Then have the device
inspected by Yamaha service personnel.
- The power cord or plug becomes frayed or damaged.
- It emits unusual smells or smoke.
- Some object has been dropped into the instrument.
- There is a sudden loss of sound during use of the instrument.
- If any cracks or breakages exist on the instrument.
For the AC adaptor
For DTX-PROX
Power supply/AC adaptor
Do not open
Water warning
Fire warning
Influences on electro-medical devices
If you notice any abnormality
DMI-7 1/2

3
DTX-PROX Owner’s Manual
CAUTION
Always follow the basic precautions listed below to avoid the possibility of physical injury to you or others, or damage to the instrument or other
property. These precautions include, but are not limited to, the following:
• Do not connect the instrument to an electrical outlet using a multiple-
connector. Doing so can result in lower sound quality, or possibly cause
overheating in the outlet.
• When removing the electric plug from the instrument or an outlet, always hold
the plug itself and not the cord. Pulling by the cord can damage it.
• Remove the electric plug from the outlet when the instrument is not to be used
for extended periods of time, or during electrical storms.
• Assemble the instrument in the proper sequence by following the assembly
instructions in this manual. Also, make sure to tighten the bolts regularly.
Failure to do so might result in damage to the instrument or even injury.
• Do not place the instrument in an unstable position where it might accidentally
fall over.
• Before moving the instrument, remove all connected cables, to prevent
damage to the cables or injury to anyone who might trip over them.
• When setting up the product, make sure that the AC outlet you are using is
easily accessible. If some trouble or malfunction occurs, immediately turn off
the power switch and disconnect the plug from the outlet. Even when the
power switch is turned off, electricity is still flowing to the product at the
minimum level. When you are not using the product for a long time, make sure
to unplug the power cord from the wall AC outlet.
• Use the included module holder if you are installing the DTX-PROX on the
drum hardware. Also, make sure you use the wing bolts included with the
module holder. Failure to do so could cause damage to the internal
components or result in the instrument falling over.
• Take care when setting up cables. If anyone were to trip on a cable, the
instrument could topple over and cause injury.
• Before connecting the instrument to other electronic components, turn off the
power for all components. Before turning the power on or off for all
components, set all volume levels to minimum.
• Be sure to set the volumes of all components at their minimum levels and
gradually raise the volume controls while playing the instrument to set the
desired listening level.
• Do not insert a finger or hand in any gaps on the instrument.
• Never insert or drop paper, metallic, or other objects into the gaps on the
panel. This could cause physical injury to you or others, damage to the
instrument or other property, or operational failure.
• Do not rest your weight on, or place heavy objects on the instrument, and do
not use excessive force on the buttons, switches or connectors.
• Keep small parts out of the reach of infants. Your children may accidentally
swallow them.
• Do not use the instrument/device or headphones for a long period of time at a
high or uncomfortable volume level, since this can cause permanent hearing
loss. If you experience any hearing loss or ringing in the ears, consult a
physician.
Always turn the power off when the instrument is not in use.
Even when the [ ] (Standby/On) switch is in standby status (display is off), electricity is still flowing to the instrument at the minimum level.
When you are not using the instrument for a long time, make sure you unplug the power cord from the wall AC outlet.
Power supply/AC adaptor
Assembly
Location
Connections
Handling caution
Yamaha cannot be held responsible for damage caused by improper use or modifications to the instrument, or data that is lost or destroyed.
DMI-7 2/2

4DTX-PROX Owner’s Manual
NOTICE
To avoid the possibility of malfunction/ damage to the product, damage
to data, or damage to other property, follow the notices below.
Handling
• Do not use the instrument in the vicinity of a TV, radio, stereo equip-
ment, mobile phone, or other electric devices. Otherwise, the
instrument, TV, or radio may generate noise.
When you use the instrument along with an application on your
smart device such as a smartphone or tablet, we recommend that
you set Wi-Fi or Bluetooth to on after setting “Airplane Mode” to on
on that device in order to avoid noise caused by communication.
• Do not expose the instrument to excessive dust or vibrations, or
extreme cold or heat (such as in direct sunlight, near a heater, or in
a car during the day) to prevent the possibility of panel disfiguration,
damage to the internal components or unstable operation.
• Do not place vinyl, plastic or rubber objects on the instrument,
since this might discolor the panel.
Maintenance
• When cleaning the instrument, use a soft and dry/slightly damp
cloth. Do not use paint thinners, solvents, alcohol, cleaning fluids,
or chemical-impregnated wiping cloths.
Saving data
• System settings (Reference Manual (PDF)) are retained when the
power is turned off. However, the saved data may be lost due to
some failure, an operation mistake, etc. Save your important data
onto USB flash drive/an external device such as a computer (Refer-
ence Manual (PDF)). Before using a USB flash drive, make sure to
refer to page 21.
• Edited Kit/Click, etc. are lost when you turn off the power to the
instrument. This also occurs when the power is turned off by the
Auto Power Off function (page 19). Save the data to the instrument,
or to USB flash drive/an external device such as a computer (Refer-
ence Manual (PDF)). However, the data saved to the instrument
may be lost due to some failure, an operation mistake, etc. Save
your important data onto USB flash drive/an external device such
as a computer (Reference Manual (PDF)). Before using a USB
flash drive, make sure to refer to page 21.
• To protect against data loss through USB flash drive damage, we
recommend that you save your important data onto spare USB
flash drive or an external device such as a computer as backup
data.
About Bluetooth
Bluetooth is a technology for wireless communication between devices
within an area of about 10 meters (33 ft.) employing the 2.4 GHz fre-
quency band.
Handling Bluetooth communications
• The 2.4 GHz band used by Bluetooth compatible devices is a radio
band shared by many types of equipment. While Bluetooth compat-
ible devices use a technology minimizing the influence of other
components using the same radio band, such influence may
reduce the speed or distance of communications and in some
cases interrupt communications.
• The speed of signal transfer and the distance at which communica-
tion is possible differs according to the distance between the com-
municating devices, the presence of obstacles, radio wave
conditions and the type of equipment.
• Yamaha does not guarantee all wireless connections between this
unit and devices compatible with Bluetooth function.
Information
About copyrights
• Copying of the commercially available musical data including but
not limited to MIDI data and/or audio data is strictly prohibited
except for your personal use.
• This product incorporates and bundles contents in which Yamaha
owns copyrights or with respect to which Yamaha has license to use
others’ copyrights. Due to copyright laws and other relevant laws,
you are NOT allowed to distribute media in which these contents
are saved or recorded and remain virtually the same or very similar
to those in the product.
* The contents described above include a computer program, Accompani-
ment Style data, MIDI data, WAVE data, voice recording data, a score,
score data, etc.
* You are allowed to distribute medium in which your performance or music
production using these contents is recorded, and the permission of Yamaha
Corporation is not required in such cases.
About this manual
• The illustrations and LCD screens as shown in this manual are for
instructional purposes only, and may appear somewhat different
from those on your instrument.
• Windows is a registered trademark of Microsoft® Corporation in the
United States and other countries.
• Apple, Mac, Macintosh, iPhone, iPad, iPod touch are trademarks of
Apple Inc., registered in the U.S. and other countries.
• Android is a trademark of Google LLC.
• The Bluetooth® word mark and logos are registered trademarks
owned by Bluetooth SIG, Inc. and any use of such marks by
Yamaha Corporation is under license.
• The company names and product names in this manual are the
trademarks or registered trademarks of their respective companies.
• The names of buttons, terminals, and the like from the DTX-PROX’s
front, rear and top panels are enclosed in [ ] (square brackets).
Latest Firmware Version
From time to time, Yamaha may update product firmware without
prior notice.
We recommend, therefore, that you check our web site (below) for
the latest version and keep your DTX-PROX firmware up to date.
https://download.yamaha.com/
The content of this Owner’s Manual applies to the newest version of
the firmware as of printing. Details regarding any functions added to
later versions will also be made available via the above web site.
About the Electronic Drum Pads (Pads)
Within this Owner’s Manual, the optional external pads that may be
connected to the DTX-PROX are referred to by model name. Please
note that these model names were up-to-date as of printing of this
manual.
Details regarding any subsequently released models will be made
available via the following web site.
https://download.yamaha.com/
* Yamaha Corporation reserves the right to modify this URL at any
time without prior notice.

5
DTX-PROX Owner’s Manual
Importer: Yamaha Music Europe GmbH
Siemensstrasse 22-34, 25462 Rellingen, Germany
This transmitter must not be co-located or operated in conjunction with any other
antenna or transmitter.
This equipment complies with FCC radiation exposure limits set forth for an
uncontrolled environment and meets the FCC radio frequency (RF) Exposure
Guidelines. This equipment has very low levels of RF energy that is deemed to
comply without testing of specific absorption rate (SAR).
This equipment complies with IC radiation exposure limits set forth for an uncon-
trolled environment and meets RSS-102 of the IC radio frequency (RF) Expo-
sure rules. This equipment has very low levels of RF energy that is deemed to
comply without testing of specific absorption rate (SAR).
This device complies with Industry Canada’s licence-exempt RSSs. Operation is
subject to the following two conditions:
(1) This device may not cause interference; and
(2) This device must accept any interference, including interference that may
cause undesired operation of the device.
EN SIMPLIFIED EU DECLARATION OF CONFORMITY
Hereby, Yamaha Music Europe GmbH declares that the radio equipment type
[DTX-PROX] is in compliance with Directive 2014/53/EU. The full text of the
EU declaration of conformity is available at the following internet address:
https://europe.yamaha.com/en/support/compliance/doc.html
FR DECLARATION UE DE CONFORMITE SIMPLIFIEE
Le soussigné, Yamaha Music Europe GmbH, déclare que l'équipement
radioélectrique du type [DTX-PROX] est conforme à la directive 2014/53/
UE. Le texte complet de la déclaration UE de conformité est disponible à
l'adresse internet suivante:
https://europe.yamaha.com/en/support/compliance/doc.html
DE VEREINFACHTE EU-KONFORMITÄTSERKLÄRUNG
Hiermit erklärt Yamaha Music Europe GmbH, dass der Funkanlagentyp
[DTX-PROX] der Richtlinie 2014/53/EU entspricht. Der vollständige Text der
EU-Konformitätserklärung ist unter der folgenden Internetadresse verfügbar:
https://europe.yamaha.com/en/support/compliance/doc.html
SV FÖRENKLAD EU-FÖRSÄKRAN OM ÖVERENSSTÄMMELSE
Härmed försäkrar Yamaha Music Europe GmbH att denna typ av radiout-
rustning [DTX-PROX] överensstämmer med direktiv 2014/53/EU. Den full-
ständiga texten till EU-försäkran om överensstämmelse finns på följande
webbadress:
https://europe.yamaha.com/en/support/compliance/doc.html
IT DICHIARAZIONE DI CONFORMITÀ UE SEMPLIFICATA
Il fabbricante, Yamaha Music Europe GmbH, dichiara che il tipo di appare-
cchiatura radio [DTX-PROX] è conforme alla direttiva 2014/53/UE. Il testo
completo della dichiarazione di conformità UE è disponibile al seguente
indirizzo Internet:
https://europe.yamaha.com/en/support/compliance/doc.html
ES DECLARACIÓN UE DE CONFORMIDAD SIMPLIFICADA
Por la presente, Yamaha Music Europe GmbH declara que el tipo de
equipo radioeléctrico [DTX-PROX] es conforme con la Directiva 2014/53/
UE. El texto completo de la declaración UE de conformidad está disponible
en la dirección Internet siguiente:
https://europe.yamaha.com/en/support/compliance/doc.html
PT DECLARAÇÃO UE DE CONFORMIDADE SIMPLIFICADA
O(a) abaixo assinado(a) Yamaha Music Europe GmbH declara que o pre-
sente tipo de equipamento de rádio [DTX-PROX] está em conformidade
com a Diretiva 2014/53/UE. O texto integral da declaração de conformi-
dade está disponível no seguinte endereço de Internet:
https://europe.yamaha.com/en/support/compliance/doc.html
NL VEREENVOUDIGDE EU-CONFORMITEITSVERKLARING
Hierbij verklaar ik, Yamaha Music Europe GmbH, dat het type radioappa-
ratuur [DTX-PROX] conform is met Richtlijn 2014/53/EU. De volledige tekst
van de EU-conformiteitsverklaring kan worden geraadpleegd op het vol-
gende internetadres:
https://europe.yamaha.com/en/support/compliance/doc.html
BG ОПРОСТЕНА ЕС ДЕКЛАРАЦИЯ ЗА СЪОТВЕТСТВИЕ
Снастоящото Yamaha Music Europe GmbH декларира, че този тип
радиосъоръжение [DTX-PROX] евсъответствие сДиректива 2014/53/
ЕС. Цялостният текст на ЕС декларацията за съответствие може да се
намери на следния интернет адрес:
https://europe.yamaha.com/en/support/compliance/doc.html
CS ZJEDNODUŠENÉ EU PROHLÁŠENÍ O SHODĚ
Tímto Yamaha Music Europe GmbH prohlašuje, že typ rádiového zařízení
[DTX-PROX] je v souladu se směrnicí 2014/53/EU. Úplné znění EU
prohlášení o shoděje k dispozici na této internetové adrese:
https://europe.yamaha.com/en/support/compliance/doc.html
DA FORENKLET EU-OVERENSSTEMMELSESERKLÆRING
Hermed erklærer Yamaha Music Europe GmbH, at radioudstyrstypen [DTX-
PROX] er i overensstemmelse med direktiv 2014/53/EU. EU-overensstem-
melseserklæringens fulde tekst kan findes på følgende internetadresse:
https://europe.yamaha.com/en/support/compliance/doc.html
ET LIHTSUSTATUD ELI VASTAVUSDEKLARATSIOON
Käesolevaga deklareerib Yamaha Music Europe GmbH, et käesolev raadio-
seadme tüüp [DTX-PROX] vastab direktiivi 2014/53/EL nõuetele. ELi vas-
tavusdeklaratsiooni täielik tekst on kättesaadav järgmisel internetiaadressil:
https://europe.yamaha.com/en/support/compliance/doc.html
EL ΑΠΛΟΥΣΤΕΥΜΕΝΗ ΔΗΛΩΣΗ ΣΥΜΜΟΡΦΩΣΗΣ ΕΕ
Με την παρούσα ο/ηYamaha Music Europe GmbH, δηλώνει ότι ο
ραδιοεξοπλισμός [DTX-PROX] πληροί την οδηγία 2014/53/ΕΕ. Το πλήρες
κείμενο της δήλωσης συμμόρφωσης ΕΕ διατίθεται στην ακόλουθη
ιστοσελίδα στο διαδίκτυο:
https://europe.yamaha.com/en/support/compliance/doc.html
HR POJEDNOSTAVLJENA EU IZJAVA O SUKLADNOSTI
Yamaha Music Europe GmbH ovime izjavljuje da je radijska oprema tipa
[DTX-PROX] u skladu s Direktivom 2014/53/EU. Cjeloviti tekst EU izjave o
sukladnosti dostupan je na sljedećoj internetskoj adresi:
https://europe.yamaha.com/en/support/compliance/doc.html
LV VIENKĀRŠOTA ES ATBILSTĪBAS DEKLARĀCIJA
Ar šo Yamaha Music Europe GmbH deklarē, ka radioiekārta [DTX-PROX]
atbilst Direktīvai 2014/53/ES. Pilns ES atbilstības deklarācijas teksts ir
pieejams šādāinterneta vietnē:
https://europe.yamaha.com/en/support/compliance/doc.html
LT SUPAPRASTINTA ES ATITIKTIES DEKLARACIJA
Aš, Yamaha Music Europe GmbH, patvirtinu, kad radijo įrenginiųtipas
[DTX-PROX] atitinka Direktyvą2014/53/ES. Visas ES atitikties deklaracijos
tekstas prieinamas šiuo interneto adresu:
https://europe.yamaha.com/en/support/compliance/doc.html
HU EGYSZERŰSÍTETT EU-MEGFELELŐSÉGI NYILATKOZAT
Yamaha Music Europe GmbH igazolja, hogy a [DTX-PROX] típusú rádió-
berendezés megfelel a 2014/53/EU irányelvnek. Az EU-megfelelőségi
nyilatkozat teljes szövege elérhetőa következőinternetes címen:
https://europe.yamaha.com/en/support/compliance/doc.html
PL UPROSZCZONA DEKLARACJA ZGODNOŚCI UE
Yamaha Music Europe GmbH niniejszym oświadcza, że typ urządzenia
radiowego [DTX-PROX] jest zgodny z dyrektywą2014/53/UE. Pełny tekst
deklaracji zgodności UE jest dostępny pod następującym adresem interne-
towym:
https://europe.yamaha.com/en/support/compliance/doc.html
RO DECLARAȚIA UE DE CONFORMITATE SIMPLIFICATĂ
Prin prezenta, Yamaha Music Europe GmbH declarăcătipul de echipa-
mente radio [DTX-PROX] este în conformitate cu Directiva 2014/53/UE.
Textul integral al declarației UE de conformitate este disponibil la
următoarea adresăinternet:
https://europe.yamaha.com/en/support/compliance/doc.html
SK ZJEDNODUŠENÉ EÚ VYHLÁSENIE O ZHODE
Yamaha Music Europe GmbH týmto vyhlasuje, že rádiové zariadenie typu
[DTX-PROX] je v súlade so smernicou 2014/53/EÚ. Úplné EÚ vyhlásenie o
zhode je k dispozícii na tejto internetovej adrese:
https://europe.yamaha.com/en/support/compliance/doc.html
SL POENOSTAVLJENA IZJAVA EU O SKLADNOSTI
Yamaha Music Europe GmbH potrjuje, da je tip radijske opreme [DTX-
PROX] skladen z Direktivo 2014/53/EU. Celotno besedilo izjave EU o
skladnosti je na voljo na naslednjem spletnem naslovu:
https://europe.yamaha.com/en/support/compliance/doc.html
FI
YKSINKERTAISTETTU EU-VAATIMUSTENMUKAISUUSVAKUUTUS
Yamaha Music Europe GmbH vakuuttaa, että radiolaitetyyppi [DTX-PROX]
on direktiivin 2014/53/EU mukainen. EU-vaatimustenmukaisuusvakuutuk-
sen täysimittainen teksti on saatavilla seuraavassa internetosoitteessa:
https://europe.yamaha.com/en/support/compliance/doc.html
TR BASİTLEŞTİRİLMİŞ AVRUPA BİRLİĞİ UYGUNLUK BİLDİRİMİ
İşbu belge ile, Yamaha Music Europe GmbH, radyo cihaz tipinin [DTX-
PROX], Direktif 2014/53/ AB'ye uygunluğunu beyan eder. AB uyumu bey-
anının tam metni aşağıdaki internet adresinden edinilebilir:
https://europe.yamaha.com/en/support/compliance/doc.html
6DTX-PROX Owner’s Manual
Welcome
Thank you for purchasing this Yamaha DTX-PROX.
The DTX-PROX is a drum trigger module that you can use for playing electronic drum
kits and drum pads at homes, studios or live venues.
To get the most out of your DTX-PROX, be sure to read this Owner’s Manual carefully.
And after reading through this manual, be sure to store it in a safe place so that you can
refer back to it again as needed.
Included Accessories
Owner’s Manual (this book)
AC adaptor
Module holder
Module holder wing bolts (× 4)
Cubase AI Download Information
How to Attach the Module Holder
Exploded view
DTX-PROX
Module holder
wing bolts
Holder clamp
Module Holder
NOTE
The module holder is compatible with standard
drum hardware (22.2-mm or 7/8-inch diameter).

7
DTX-PROX Owner’s Manual
About the Manuals
The following manuals are provided for using the DTX-PROX. These manuals are intended for
users of the DTX-PROX.
Owner’s Manual (this book)
Setup Guide
Explains how to attach and setup the DTX-PROX for producing sound.
Basic Guide
Describes the fundamentals needed to operate the DTX-PROX.
Application Guide
Describes parameter settings and other more advanced uses.
Reference
Describes troubleshooting techniques and contains other reference materials.
Reference Manual
The Reference Manual provides a description of all the functions that can be accessed by pressing the [MENU] button as
well as other advanced settings that can be used with the DTX-PROX.
Data List
This provides lists of Kit and Effect names in the DTX-PROX, and MIDI related information.
iPhone/iPad Connection Manual
Smart Device Connection Manual for Android™
Describes how to connect smartphones and tablets.
Printed Manual
Digital Manual (PDF)
The digital format manuals listed above can be obtained from the Yamaha Downloads web page.
To do so, go to the web page using the following URL, enter “DTX-PROX” in the “Model Name”
field, and then click “Search.”
Yamaha Downloads: https://download.yamaha.com/

8DTX-PROX Owner’s Manual
Features of the DTX-PROX
Intuitive operation for playing your ideal drum sounds
Includes natural drum sounds with real ambience, played by top studio drummers
and recorded in renowned studios, including Real World Studios.
Includes unique KIT MODIFIERS giving you intuitive control of Ambience, Comp,
and Effects—the core elements of the drum sound creation (page 33).
Equipped with a high-quality headphone amplifier that delivers high fidelity
reproduction of all drum sounds.
High-quality tone generator that enables natural expressive control like that of
acoustic drums—with high-definition dynamics, high-performance effects pro-
cessing, position sensing (*1) on snare and ride cymbal pads, low latency and 256
polyphony.
The instrument features LED rotary faders that allow easy access to parameters for
drum sound creation and intuitive control of external devices during live perfor-
mances
Useful for live performance
The Live Set feature lets you prepare a custom sequence of kit, tempo, audio file,
and other parameters in, for example, the order of a performance set list and
switch among settings with a single step operation as you play live.
Routing flexibility enables each of the instrument sounds, such as snare and kick,
to be sent separately to the mixer using 8 lines from the INDIVIDUAL OUTPUT jacks.
Both stereo phone and stereo mini jacks are available for PHONES and AUX IN. No
adaptor or mixer is needed when connecting external devices.
Boost your drumming skills through effective practice
A sophisticated programmable metronome allows you to adjust the volume of
each click beat, change the tone of the click sound, and much more (page 42).
You can record or playback your songs using the build-in recorder or a USB flash
drive (page 46).
Enables you to create music, make a video of your performance, and
share your video over the Internet.
The instrument is compatible with iOS or Android apps such as Rec’n’Share. By dig-
itally connecting to smart devices via a USB cable, you can record and playback
high quality sound. You can also play the drums along with your favorite music or
make a video of your performance for uploading to social networking sites (*2)
(page 23).
Audio playback available via Bluetooth Audio connection (*3)
Includes Steinberg Cubase AI for comprehensive music production tools (page 54).
*1 For more information on the list of compatible drum pads, refer to the Pad Module Compatibility
Table.
*2 The DTX-PROX is a class compliant USB device. A separate cable is required for connecting to a com-
puter or to a smartphone.
*3 For details, see “Panel Controls and Functions” on page 10.

9
DTX-PROX Owner’s Manual
PRECAUTIONS 2
Welcome 6
Included Accessories 6
About the Manuals 7
Printed Manual.............................................................................. 7
Digital Manual (PDF) .................................................................... 7
Features of the DTX-PROX 8
Panel Controls and Functions 10
Top Panel ................................................................................... 10
Front Panel ................................................................................. 12
Rear Panel.................................................................................. 13
Setup Guide 14
Preparations ............................................................................... 14
Installing the DTX-PROX ............................................................ 14
Turning On or Off........................................................................ 17
Changing the Overall Settings .................................................... 19
Using a USB Flash Drive ............................................................ 21
Using Smart Devices .................................................................. 23
Listening to Audio Data from a Smart Device through
the DTX-PROX (Bluetooth Audio Function) ............................... 24
Basic Guide 26
Structure of the Kit ...................................................................... 26
Playing the Pads......................................................................... 27
Basic Operation of the DTX-PROX............................................. 32
Changing the Drum Set Sound (Building Your Own Drum Set) . 34
Using the Click (Metronome) ...................................................... 42
Creating Your Own Click (Metronome) Settings......................... 43
Changing the Trigger Settings .................................................... 45
Recording Your Performance ..................................................... 46
Connecting a PA System............................................................ 49
Using Live Sets........................................................................... 50
Application Guide 51
Connecting Separately Sold Add-ons and External Devices...... 51
Reference 55
Message List............................................................................... 55
Troubleshooting .......................................................................... 57
Specifications.............................................................................. 60
Index ........................................................................................... 61
Contents

10 DTX-PROX Owner’s Manual
Panel Controls and Functions
Top Panel
Mode Select knob
Changes the mode (Kit, Click, Trigger, Recorder and Live set). Shows the screen
for each mode.
KIT MODIFIER knobs
Adjust the amount of Ambience (the background sounds of the location), Comp
(the punchiness or loudness of the sound), Effect (other effects assigned to the
Kit)
Structure of the Kit (page 26)
Adjusting (Modifying) the Sound Effects (page 33)
Fader Select knob
Selects the function for assigning to the LED Rotary Faders. (page 34)
KIT
CLICK
TRIGGER
RECORDER
LIVE SET
[AMBIENCE] knob [COMP] knob [EFFECT] knob
MIXER
INST
TUNING
MUFFL (Muffling)
FX (Effects)
CUSTM (Custom)
Display
Function Buttons 1–3 ([F1], [F2], [F3])
Selects the functions that appear at the bottom of
each screen.
NOTICE
About the “ ” mark:
The mark appears in the upper right of the
screen when the Kit, Click, and other settings have
been changed. This is to remind you that the set-
tings have changed but have not yet been saved
(Store). The mark disappears when you store the
settings (page 40). When you change the Kit or
Click without first storing the settings, the changes
will be lost.
F1 F2 F3
Cross stick setting (page 28)
May not be shown depending on the pad
EFFECT screen
(page 33)
How to read
the KIT screen
LED Rotary Faders
Changes the settings of the function selected
with the Fader Select knob. Changes in val-
ues are shown in the indicators.

120
11
DTX-PROX Owner’s Manual
Panel Controls and Functions
Increases or decrease the value(s).
The knob is useful for changing multiple values, while the buttons are useful for
changing the value in steps. In this manual, the [–][+] knob, the [–] button and the
[+] button are collectively called the “[–][+] controllers” for situations where you
can use either the knob or the buttons.
[PAD SELECT] button
Shows the Trigger Input screens or the Trigger Input Source screen.
For more information, refer to the Reference Manual (PDF).
NOTE
Press this button to select a pad while changing settings with the LED
rotary faders.
[–][+] knob [–] button [+] button
[ ] (Standby/On) switch (page 17)
Switches the power between standby (off) and on.
Click Tempo Display
[TEMPO] knob (page 42)
Adjusts the tempo.
[CLICK] button (page 42)
Starts or stops the click (metronome). The
indicator flashes in sync with the click
tempo.
[AUDITION] button
Use this button to check the sound of the cur-
rently selected trigger input source (Reference
Manual (PDF)). As a default setting, the voice
assigned to the head of the snare pad connected
to the [qSNARE] jack is played.
Buttons for showing screens
[MENU] button
Accesses the advanced settings screen. For
more detailed information, refer to the Reference
Manual (PDF).
[STORE] button
STORE screen (page 40)
Stores Kit, Click, Trigger, or, Live set settings that
you have created.
[EXIT] button
Cancels the action or returns to the screen one
level higher.
NOTE
This button can also be used as a Panic Button to
stop the KIT sounds (on top screen for each
mode).
Bluetooth figure mark (page 24)
Bluetooth capability
Depending on the country in which you pur-
chased the product, the instrument may not
have Bluetooth capability. If the Bluetooth logo
is shown or printed on the control panel, this
means that the product is equipped with Blue-
tooth functionality.
Sliders
These change the corresponding volume levels.
[AUX IN] (auxiliary inputs from the [AUX IN] jacks on front and
rear panels)
[AUDIO] (audio including USB audio, Bluetooth audio, Song,
and recorder playback)
[CLICK] (click)
[OUTPUT] (outputs from the OUTPUT [R]/[L/MONO] jacks)
[PHONES] (headphones)

12 DTX-PROX Owner’s Manual
Panel Controls and Functions
Front Panel
Stereo mini phone plug
(3.5 mm)
Stereo mini plug
(3.5 mm)
[PHONES] (Headphone)
jack (page 16)
For connecting headphones. The
one on the left is a standard ste-
reo phone type (6.3 mm) output
jack, and the one on the right is a
stereo mini phone type (3.5 mm)
output jack.
CAUTION
Do not use headphones for a
long period of time at high vol-
ume. Doing so can cause loss of
hearing.
[AUX IN] (auxiliary input) jack
Connect to the headphone jack on a smart phone
or portable music player.
Standard stereo phone plug
(6.3 mm)

13
DTX-PROX Owner’s Manual
Panel Controls and Functions
Rear Panel
Trigger Input jacks
[!4] jack to [qSNARE] jack
Connects the DTX series pads.
To connect the pads included in
your Drum Kit, refer to the Assem-
bly Manual.
These trigger input jacks also
accept separately sold add-ons.
For more information, see “About
the Trigger Input Jacks” (page 51).
XP125SD-X
PCY175
[MIDI OUT] connector
[MIDI IN] connector
Connects MIDI devices for
sending and receiving MIDI
messages with the DTX-PROX.
Standard stereo phone plug (6.3 mm)
Standard phone plug
(6.3mm)
MIDI cable
[USB TO DEVICE]
terminal (page 21)
Connects a USB flash
drive. Cannot be used with
other USB devices.
“Using a USB Flash
Drive” (page 21)
DC IN jack
(page 14)
Use the AC adap-
tor that came with
the DTX-PROX.
[USB TO HOST] terminal (page 54)
Connect a computer or smart device such as a smart
phone or a tablet to send and receive digital signals
(audio and MIDI).
Computers “Connecting a Computer” (page 54)
Reference Manual (PDF)
Smart devices “Using Smart Devices” (page 23)
Cord hook
Wrap the AC adaptor cord around this hook to prevent accidental unplug-
ging during use.
CAUTION
Excessive bending can damage the AC
adaptor cord and create a fire hazard. For
this reason, make sure that the power
cord is not bent at an extreme angle when
wrapped around the hook.
AC adaptor
cord Cord hook
OUTPUT [R]/[L/MONO]
jacks (UNBALANCED)
(page 14)
Connect to powered speakers
or other such PA system.
These jacks are standard phone
type output jacks.
If mono output is required, use
only the [L/MONO] jack.
USB cable
[AUX IN] (auxiliary input) jack
Stereo standard phone jack for con-
necting an electronic instrument or
for inputting audio from a PA sys-
tem. The audio signals from the
[AUX IN] jack on the front panel and
the [AUX IN] on the rear panel are
mixed. For more information, refer
to the Reference Manual (PDF).
Standard stereo phone plug
(6.3 mm)
[INDIVIDUAL OUTPUT]
jacks (UNBALANCED)
(page 49)
Output the sound of each
instrument, such as snare and
kick.
Standard stereo phone plug (6.3 mm)

14 DTX-PROX Owner’s Manual
Setup Guide
This provides information on setup and initial settings in preparation for playing.
This completes set up.
First, install the DTX-PROX.
There are three different ways of installation as shown below.
Attach the DTX-PROX onto the rack of your drum kit. (For more information, refer to the Assembly Manual.)
Use the included module holder (page 6) to attach the standard drum hardware. (See “Integrating Electronic &
Acoustic Drums” on page 53.)
Place on a flat surface
After installing the DTX-PROX, connect cables to the Pads. For more information on the connections, refer to the specific
Assembly Manual of your drum kit.
Preparations
Workflow
Installing the DTX-PROX
Connecting the AC adaptor
Connecting Headphones
Turning On
Initial Setup (Trigger Setup Wizard)
Installing the DTX-PROX

15
DTX-PROX Owner’s Manual
Installing the DTX-PROX
Setup Guide
Connecting the AC adaptor
1. Make sure that the power is turned off (all
panel lights and the screen backlight are
off).
2. For removable plug type AC adaptors only:
Make sure that the plug is not disconnected.
3. Connect the AC adaptor.
WARNING
Only use the specified AC adaptor (page 60). Using a different AC adaptor can cause malfunction, overheating, fire, and
other problems. This may void the warranty so please take careful note.
CAUTION
Locate the DTX-PROX close to an AC outlet. If you notice any abnormalities during operation, turn the power off immedi-
ately and unplug the AC adaptor.
WARNING
• For AC adaptors with a removable plug, only use the
AC adaptor with the plug attached, and keep the
plug. Plugging only the plug into the power outlet
can cause electric shock or fire.
• If the removable plug comes off from the AC adaptor,
avoid touching the metal parts on the plug and slide
the AC adaptor onto the plug until you hear it lock on
to the adaptor with a click. Also, make sure you keep
any foreign objects out of the plug. This can cause
electrical shock, short circuit, or failure.
WARNING
Make sure to use the specified AC adaptor.
No screen backlight
Slide in the direction
indicated with the arrow.
Plug
DC IN jack
(page 60)

16 DTX-PROX Owner’s Manual
Installing the DTX-PROX
Setup Guide
4. Hook the AC adaptor’s cord around the cord
hook to secure it in place.
5. Plug the AC adaptor’s AC plug into a domes-
tic power outlet.
Connecting Headphones
Connect the headphones to the [PHONES] (headphone) jack.
To adjust the headphone volume, use the [PHONES] slider.
To adjust the headphone EQ, set the Fader Select knob to
“CUSTM,” and use the LED rotary faders.
One standard stereo phone jack and one stereo mini phone
jack are available. Select the proper jack that matches the con-
nector size of the cable. The output volume may be lower than
expected if both phone jacks are used at the same time.
CAUTION
Excessive bending can damage the AC adaptor cord
and create a fire hazard. Ensure, therefore, that the
power cord is not bent at an extreme angle when
wrapped around the hook.
CAUTION
Even when the [ ] (Standby/On) switch is in standby
status (display is off), electricity is still flowing to the
instrument at the minimum level.
When you are not using the DTX-PROX for a long
period of time, make sure that you unplug the AC
adaptor from the wall AC outlet.
NOTE
When disconnecting the AC adaptor, turn the instrument and then carry out this procedure in reverse order.
CAUTION
Do not use headphones at high volume for an extended
period of time. Doing so can cause loss of hearing.
Cord hookAC adaptor cord
Power outlet
AC adaptor
Front panel side
Table of contents
Other Yamaha Control Unit manuals

Yamaha
Yamaha ACD1 User manual

Yamaha
Yamaha disklavier DKC-850 User manual

Yamaha
Yamaha REV-1 User manual

Yamaha
Yamaha ACU16-C User manual

Yamaha
Yamaha RCX series User manual

Yamaha
Yamaha disklavier DKC-850 User manual

Yamaha
Yamaha ACD1 User manual

Yamaha
Yamaha Disklavier DKC55RCD XG Mark III User manual

Yamaha
Yamaha Disklavier ENSPIRE DKC-900 User manual

Yamaha
Yamaha disklavier DKC-850 Instruction Manual