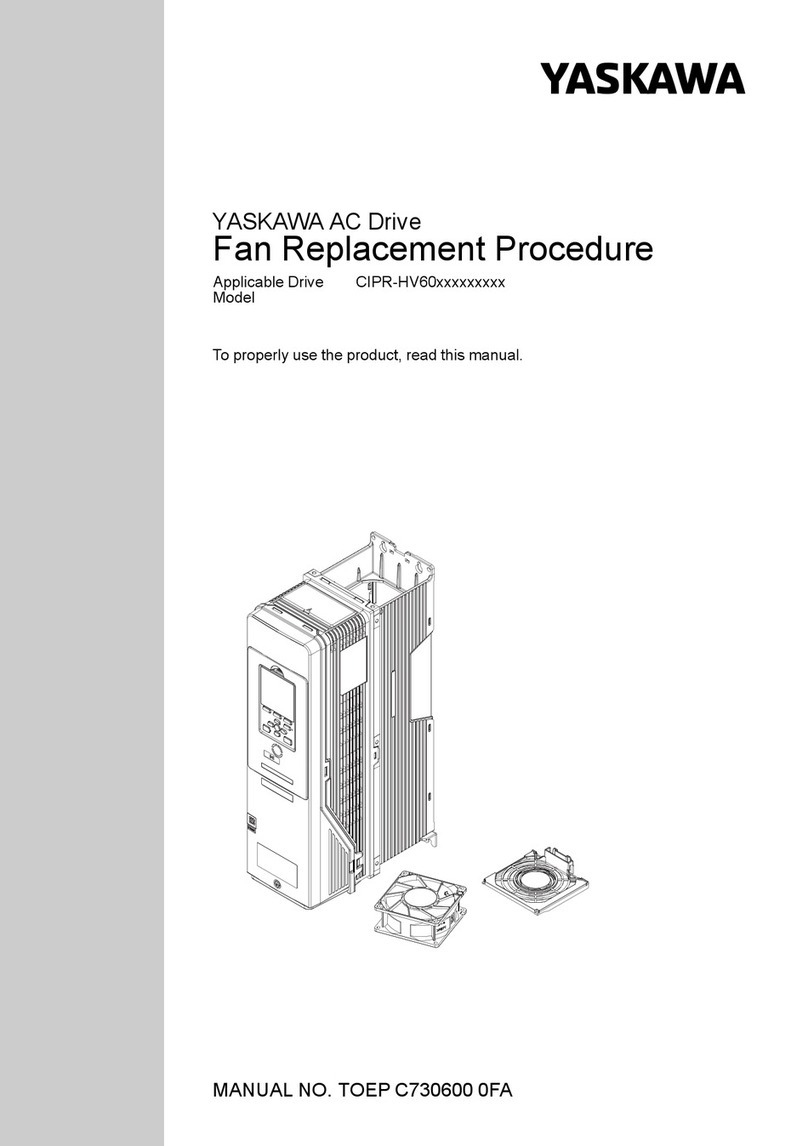
YASKAWA CIPR-FP6 Series User manual

MANUAL NO. TOEP C730600 0FC
YASKAWA AC Drive
Fan Replacement Procedure
Applicable Drive
Model
CIPR-HV6xxxxxxxxxx
CIPR-FP6xxxxxxxxxx
To properly use the product, read this manual.

This Page Intentionally Blank
2YASKAWA TOEP C730600 0FC Fan Replacement Procedure

YASKAWA TOEP C730600 0FC Fan Replacement Procedure 3
Table of Contents
1. Overview. . . . . . . . . . . . . . . . . . . . . . . . . . . . . . . . . . . . . . . . . . . . . . . . . . . . . . . . . 5
2. Explanation of Signal Words . . . . . . . . . . . . . . . . . . . . . . . . . . . . . . . . . . . . . . . . . 5
3. Section Safety . . . . . . . . . . . . . . . . . . . . . . . . . . . . . . . . . . . . . . . . . . . . . . . . . . . . 5
4. Cooling Fans and Circulation Fans by Drive Model. . . . . . . . . . . . . . . . . . . . . . . 6
HV600 . . . . . . . . . . . . . . . . . . . . . . . . . . . . . . . . . . . . . . . . . . . . . . . . . . . . . . . . . . . . . . . . . . . 6
FP605 . . . . . . . . . . . . . . . . . . . . . . . . . . . . . . . . . . . . . . . . . . . . . . . . . . . . . . . . . . . . . . . . . . . 7
5. Replace Cooling Fans and Circulation Fans . . . . . . . . . . . . . . . . . . . . . . . . . . . . 8
Fan Replacement (Procedure A). . . . . . . . . . . . . . . . . . . . . . . . . . . . . . . . . . . . . . . . . . . . . . 8
Fan Removal. . . . . . . . . . . . . . . . . . . . . . . . . . . . . . . . . . . . . . . . . . . . . . . . . . . . . . . . . . 9
Fan Installation . . . . . . . . . . . . . . . . . . . . . . . . . . . . . . . . . . . . . . . . . . . . . . . . . . . . . . . . 9
Circulation Fan Removal . . . . . . . . . . . . . . . . . . . . . . . . . . . . . . . . . . . . . . . . . . . . . . . 12
Circulation Fan Installation. . . . . . . . . . . . . . . . . . . . . . . . . . . . . . . . . . . . . . . . . . . . . . 14
Fan Replacement (Procedure B). . . . . . . . . . . . . . . . . . . . . . . . . . . . . . . . . . . . . . . . . . . . . 16
Fan Removal. . . . . . . . . . . . . . . . . . . . . . . . . . . . . . . . . . . . . . . . . . . . . . . . . . . . . . . . . 17
Fan Installation . . . . . . . . . . . . . . . . . . . . . . . . . . . . . . . . . . . . . . . . . . . . . . . . . . . . . . . 17
Circulation Fan Removal . . . . . . . . . . . . . . . . . . . . . . . . . . . . . . . . . . . . . . . . . . . . . . . 19
Circulation Fan Installation. . . . . . . . . . . . . . . . . . . . . . . . . . . . . . . . . . . . . . . . . . . . . . 21
Fan Replacement (Procedure C). . . . . . . . . . . . . . . . . . . . . . . . . . . . . . . . . . . . . . . . . . . . . 24
Fan Removal. . . . . . . . . . . . . . . . . . . . . . . . . . . . . . . . . . . . . . . . . . . . . . . . . . . . . . . . . 24
Fan Installation . . . . . . . . . . . . . . . . . . . . . . . . . . . . . . . . . . . . . . . . . . . . . . . . . . . . . . . 24
Circulation Fan Removal . . . . . . . . . . . . . . . . . . . . . . . . . . . . . . . . . . . . . . . . . . . . . . . 26
Circulation Fan Installation. . . . . . . . . . . . . . . . . . . . . . . . . . . . . . . . . . . . . . . . . . . . . . 28
Fan Replacement (Procedure D). . . . . . . . . . . . . . . . . . . . . . . . . . . . . . . . . . . . . . . . . . . . . 30
Fan Removal. . . . . . . . . . . . . . . . . . . . . . . . . . . . . . . . . . . . . . . . . . . . . . . . . . . . . . . . . 31
Fan Installation . . . . . . . . . . . . . . . . . . . . . . . . . . . . . . . . . . . . . . . . . . . . . . . . . . . . . . . 31
Fan Replacement (Procedure E). . . . . . . . . . . . . . . . . . . . . . . . . . . . . . . . . . . . . . . . . . . . . 34
Fan Removal. . . . . . . . . . . . . . . . . . . . . . . . . . . . . . . . . . . . . . . . . . . . . . . . . . . . . . . . . 34
Fan Installation . . . . . . . . . . . . . . . . . . . . . . . . . . . . . . . . . . . . . . . . . . . . . . . . . . . . . . . 35
Circulation Fan Removal . . . . . . . . . . . . . . . . . . . . . . . . . . . . . . . . . . . . . . . . . . . . . . . 37
Circulation Fan Installation. . . . . . . . . . . . . . . . . . . . . . . . . . . . . . . . . . . . . . . . . . . . . . 39
Fan Replacement (Procedure F) . . . . . . . . . . . . . . . . . . . . . . . . . . . . . . . . . . . . . . . . . . . . . 42
Fan Removal. . . . . . . . . . . . . . . . . . . . . . . . . . . . . . . . . . . . . . . . . . . . . . . . . . . . . . . . . 42
Fan Installation . . . . . . . . . . . . . . . . . . . . . . . . . . . . . . . . . . . . . . . . . . . . . . . . . . . . . . . 42
Fan Replacement (Procedure G). . . . . . . . . . . . . . . . . . . . . . . . . . . . . . . . . . . . . . . . . . . . . 45
Fan Removal. . . . . . . . . . . . . . . . . . . . . . . . . . . . . . . . . . . . . . . . . . . . . . . . . . . . . . . . . 45

4YASKAWA TOEP C730600 0FC Fan Replacement Procedure
Fan Installation . . . . . . . . . . . . . . . . . . . . . . . . . . . . . . . . . . . . . . . . . . . . . . . . . . . . . . . . 46
Circulation Fan Removal . . . . . . . . . . . . . . . . . . . . . . . . . . . . . . . . . . . . . . . . . . . . . . . . 48
Circulation Fan Installation. . . . . . . . . . . . . . . . . . . . . . . . . . . . . . . . . . . . . . . . . . . . . . . 50
Fan Replacement (Procedure H). . . . . . . . . . . . . . . . . . . . . . . . . . . . . . . . . . . . . . . . . . . . . . 53
Fan Removal. . . . . . . . . . . . . . . . . . . . . . . . . . . . . . . . . . . . . . . . . . . . . . . . . . . . . . . . . . 53
Fan Installation . . . . . . . . . . . . . . . . . . . . . . . . . . . . . . . . . . . . . . . . . . . . . . . . . . . . . . . . 56
Circuit Board Cooling Fan Removal . . . . . . . . . . . . . . . . . . . . . . . . . . . . . . . . . . . . . . . 61
Circuit Board Cooling Fan Installation . . . . . . . . . . . . . . . . . . . . . . . . . . . . . . . . . . . . . . 63
Fan Replacement (Procedure I) . . . . . . . . . . . . . . . . . . . . . . . . . . . . . . . . . . . . . . . . . . . . . . 65
Fan Removal. . . . . . . . . . . . . . . . . . . . . . . . . . . . . . . . . . . . . . . . . . . . . . . . . . . . . . . . . . 65
Fan Installation . . . . . . . . . . . . . . . . . . . . . . . . . . . . . . . . . . . . . . . . . . . . . . . . . . . . . . . . 67
Circuit Board Cooling Fan Removal . . . . . . . . . . . . . . . . . . . . . . . . . . . . . . . . . . . . . . . 71
Circuit Board Cooling Fan Installation . . . . . . . . . . . . . . . . . . . . . . . . . . . . . . . . . . . . . . 73
Revision History . . . . . . . . . . . . . . . . . . . . . . . . . . . . . . . . . . . . . . . . . . . . . . . . . . . . . . . 75

1 Overview
YASKAWA TOEP C730600 0FC Fan Replacement Procedure 5
1 Overview
This manual shows you how to replace the cooling fans, circuit board cooling fans, and
circulation fans on Yaskawa drives.
2 Explanation of Signal Words
WARNING Read and understand this manual before you install, operate, or do maintenance on the
drive. Install the drive as specified by this manual and local codes. The symbols in this section identify safety
messages in this manual. If you do not obey these safety messages, the hazards can cause serious injury, death,
or damage to the products and related equipment and systems.
These identifier words categorize and emphasize important safety precautions in these
instructions.
DANGER This signal word identifies a hazard that will cause serious injury or death if you do not
prevent it.
WARNING This signal word identifies a hazard that can cause death or serious injuries if you do not
prevent it.
CAUTION Identifies a hazardous situation, which, if not avoided, can cause minor or moderate injury.
NOTICE This signal word identifies a property damage message that is not related to personal
injury.
3 Section Safety
DANGER Electrical Shock Hazard. Do not examine, connect, or disconnect wiring on an energized
drive. Before servicing, disconnect all power to the equipment and wait for the time specified on the warning label
at a minimum. The internal capacitor stays charged after the drive is de-energized. The charge indicator LED
extinguishes when the DC bus voltage decreases below 50 Vdc. When all indicators are OFF, remove the covers
before measuring for dangerous voltages to make sure that the drive is safe. If you do work on the drive when it is
energized, it will cause serious injury or death from electrical shock.
DANGER Electrical Shock Hazard. Disconnect all power to the drive and wait for the time specified
on the warning label before you remove covers. Check the drive for dangerous voltages before servicing or repair
work. If you do work on the drive when it is energized and there is no cover over the electronic circuits, it will
cause serious injury or death from electrical shock. The drive has internal capacitors that stay charged after you
de-energize the drive.
WARNING Electrical Shock Hazard. The motor will run after you de-energize the drive. PM motors
can generate induced voltage to the terminal of the motor after you de-energize the drive. If you touch a motor
that is moving or energized, it can cause serious injury or death.
WARNING Electrical Shock Hazard. Do not wear loose clothing or jewelry when you do work on the
drive. Tighten loose clothing and remove all metal objects, for example watches or rings. Loose clothing can
catch on the drive and jewelry can conduct electricity and cause serious injury or death.
CAUTION Burn Hazard. Do not touch a hot drive heatsink. De-energize the drive, wait for a minimum
of 15 minutes, then make sure that the heatsink is cool before you replace the cooling fans. If you touch a hot
drive heatsink, it can burn you.
NOTICE Damage to Equipment. When you touch the drive and circuit boards, make sure that you
observe correct electrostatic discharge (ESD) procedures. If you do not follow procedures, it can cause ESD
damage to the drive circuitry.
NOTICE Use the instructions in this manual to replace the cooling fans. When you do maintenance
on the fans, replace all the fans to increase product life. If you install the fans incorrectly, it can cause damage to
the drive.

4 Cooling Fans and Circulation Fans by Drive Model
6YASKAWA TOEP C730600 0FC Fan Replacement Procedure
4 Cooling Fans and Circulation Fans by Drive Model
◆HV600
Table 4.1 Cooling Fans and Circulation Fans for IP20/UL Open Type and IP20/UL Type 1
Drives
Model Cooling Fan Circulation Fan Replacement
Procedure Reference
4005 - 4008 - - - -
2011 - 2031
4011 - 4034 1 - Procedure A 8
2046, 2059
4040 - 4052 1 -
Procedure B 16
4065 1 1
2075 - 2114
4077 - 4124 2 - Procedure C 24
2143 - 2273
4156 - 4240 2 - Procedure D 30
4302 2 1 Procedure E 34
Table 4.2 Cooling Fans and Circulation Fans for IP55/UL Type 12 Drives
Model Cooling Fan Circulation Fan Replacement
Procedure Reference
4005 - - - -
2011, 2017
4006 - 4014 1 -
Procedure A 8
2024, 2031
4021 - 4034 1 1
2046, 2059
4040 - 4065 1 1 Procedure B 16
2075 - 2114
4077 - 4124 2 1 Procedure C 24

4 Cooling Fans and Circulation Fans by Drive Model
YASKAWA TOEP C730600 0FC Fan Replacement Procedure 7
Table 4.3 Cooling Fans and Circulation Fans for IP55/UL Type 12 Drives with Main Switch
Model Cooling Fan Circulation Fan Replacement
Procedure Reference
4005 - - - -
2011, 2017
4008 - 4014 1 -
Procedure A 8
2024, 2031
4021 - 4034 1 1
2046, 2059
4040 - 4065 1 1 Procedure B 16
2075 - 2114
4077 - 4096 2 1 Procedure C 24
◆FP605
Table 4.4 Cooling Fans and Circulation Fans for IP20/UL Open Type and IP20/UL Type 1
Drives
Model Cooling Fan Circulation Fan Circuit Board
Cooling Fan
Replacement
Procedure Reference
4005, 4008 - - - - -
2011 - 2031
4011 - 4034 1 - - Procedure A 8
2046, 2059
4040 - 4052 1 - -
Procedure B 16
4065 1 1 -
2075 - 2114
4077 - 4124 2 - - Procedure C 24
2143, 2169
4156 2 - - Procedure D 30
2211, 2273
4180 - 4302 2 - - Procedure F 42
4361 2 1 -
Procedure G 45
2343, 2396
4414 3 1 -
4477 - 4590 2 1 2 Procedure H 53
4720 3 1 2 Procedure I 65
Table 4.5 Cooling Fans and Circulation Fans for IP55/UL Type 12 Drives
Model Cooling Fan Circulation Fan Replacement
Procedure Reference
4005 - - - -
2011, 2017 1 - Procedure A 8

5 Replace Cooling Fans and Circulation Fans
8YASKAWA TOEP C730600 0FC Fan Replacement Procedure
Model Cooling Fan Circulation Fan Replacement
Procedure Reference
4008 - 4014
2024, 2031
4021 - 4034 1 1
2046, 2059
4040 - 4065 1 1 Procedure B 16
2075 - 2114
4077 - 4124 2 1 Procedure C 24
Table 4.6 Cooling Fans and Circulation Fans for IP55/UL Type 12 Drives with Main Switch
Model Cooling Fan Circulation Fan Replacement
Procedure Reference
4005 - - - -
2011, 2017
4008 - 4014 1 -
Procedure A 8
2024, 2031
4021 - 4034 1 1
2046, 2059
4040 - 4065 1 1 Procedure B 16
2075 - 2114
4077 - 4096 2 1 Procedure C 24
5 Replace Cooling Fans and Circulation Fans
CAUTION Injury to Personnel. Some fan units are not easily accessible from a standing position.
Make sure that you can safely and comfortably remove and replace the fan. If you try to remove a fan that you
cannot easily access, the fan unit can fall and cause minor to moderate injury.
NOTICE Use the instructions in this manual to replace the cooling fans. When you do maintenance
on the fans, replace all the fans to increase product life. If you install the fans incorrectly, it can cause damage to
the drive.
◆Fan Replacement (Procedure A)
DANGER Electrical Shock Hazard. Do not examine, connect, or disconnect wiring on an energized
drive. Before servicing, disconnect all power to the equipment and wait for the time specified on the warning label
at a minimum. The internal capacitor stays charged after the drive is de-energized. The charge indicator LED
extinguishes when the DC bus voltage decreases below 50 Vdc. When all indicators are OFF, remove the covers
before measuring for dangerous voltages to make sure that the drive is safe. If you do work on the drive when it is
energized, it will cause serious injury or death from electrical shock.
CAUTION Burn Hazard. Do not touch a hot drive heatsink. De-energize the drive, wait for a minimum
of 15 minutes, then make sure that the heatsink is cool before you replace the cooling fans. If you touch a hot
drive heatsink, it can burn you.
NOTICE Use the instructions in this manual to replace the cooling fans. When you do maintenance
on the fans, replace all the fans to increase product life. If you install the fans incorrectly, it can cause damage to
the drive.

5 Replace Cooling Fans and Circulation Fans
YASKAWA TOEP C730600 0FC Fan Replacement Procedure 9
■Fan Removal
1. Push the tab on the back side of the fan finger guard and pull up to remove the fan finger
guard from the drive.
A - Fan finger guard
Figure 5.1 Remove the Fan Finger Guard
2. Pull the cooling fan straight up from the drive. Remove the protective tube on the relay
connector and disconnect the connector to remove the fan from the drive.
A - Cooling fan B - Protective tube
Figure 5.2 Remove the Cooling Fan
■Fan Installation
Reverse the removal procedure for fan installation.

5 Replace Cooling Fans and Circulation Fans
10 YASKAWA TOEP C730600 0FC Fan Replacement Procedure
1. Connect the relay connector between the drive and cooling fan, and attach the
protective tube.
A - Protective tube
Figure 5.3 Connect the Relay Connector
2. Align the notches on the fan with the pin on the drive and install the cooling fan in the
drive.
Note:
The positions of notch on the fan and alignment pin on the drive are different for different drive models. Use
these figures to make sure that you use correct positions for your drive.
A - Notch on fan
B - Alignment pin on drive
C - Front of drive
Figure 5.4 Install the Cooling Fan (Drive Models: 2011, 2017, 4006xV, 4008xV/T, 4011, 4014)

5 Replace Cooling Fans and Circulation Fans
YASKAWA TOEP C730600 0FC Fan Replacement Procedure 11
A - Notch on fan
B - Alignment pin on drive
C - Front of drive
Figure 5.5 Install the Cooling Fan (Drive Models: 2024, 2031, 4021 to 4034)
3. Put the cable and connector in the recess of the drive.
A - Front of drive B - Recess for cable and connector *1
Figure 5.6 Put the Cable and Connector in the Drive Recess
*1 Make sure that the cable and connector are in the correct space.

5 Replace Cooling Fans and Circulation Fans
12 YASKAWA TOEP C730600 0FC Fan Replacement Procedure
4. Hold the fan finger guard at an angle and put the connector tabs on the fan finger guard
into the holes on the drive.
A - Front of drive
B - Drive holes
C - Connector tabs
Figure 5.7 Install the Fan Finger Guard
5. Push the tab on the back side of the fan finger guard and click it into place on the drive.
Figure 5.8 Install the Fan Finger Guard
6. Energize the drive and set o4-03 = 0 [Fan Operation Time Setting = 0 h] to reset the fan
operation time.
■Circulation Fan Removal
Note:
Use this procedure only when you use one of these drive models:
•2024xV, 2031xV
•4021xV to 4034xV
•2024xT, 2031xT
•4021xT to 4034xT
Remove the drive cover before you start this procedure.

5 Replace Cooling Fans and Circulation Fans
YASKAWA TOEP C730600 0FC Fan Replacement Procedure 13
CAUTION Crush Hazard. Loosen the cover screws. Do not fully remove them. If you fully remove the
cover screws, the terminal cover can fall and cause moderate injury.
1. Disconnect the connector and remove the fan cable from the hook.
A - Circulation fan
B - Hook
C - Fan cable
Figure 5.9 Disconnect the Connector and Remove the Fan Cable

5 Replace Cooling Fans and Circulation Fans
14 YASKAWA TOEP C730600 0FC Fan Replacement Procedure
2. Pull the bottom of the fan forward to remove it from the drive.
A - Circulation fan
Figure 5.10 Remove the Circulation Fan
■Circulation Fan Installation
Note:
Use this procedure only when you use one of these drive models:
•2024xV, 2031xV
•4021xV to 4034xV
•2024xT, 2031xT
•4021xT to 4034xT
Reverse the removal procedure for circulation fan installation.

5 Replace Cooling Fans and Circulation Fans
16 YASKAWA TOEP C730600 0FC Fan Replacement Procedure
2. Put the cable back into its initial position and connect the connector.
A - Fan cable B - Hook
Figure 5.12 Put the Cable Back into the Drive and Connect the Connector
◆Fan Replacement (Procedure B)
DANGER Electrical Shock Hazard. Do not examine, connect, or disconnect wiring on an energized
drive. Before servicing, disconnect all power to the equipment and wait for the time specified on the warning label
at a minimum. The internal capacitor stays charged after the drive is de-energized. The charge indicator LED
extinguishes when the DC bus voltage decreases below 50 Vdc. When all indicators are OFF, remove the covers
before measuring for dangerous voltages to make sure that the drive is safe. If you do work on the drive when it is
energized, it will cause serious injury or death from electrical shock.
CAUTION Burn Hazard. Do not touch a hot drive heatsink. De-energize the drive, wait for a minimum
of 15 minutes, then make sure that the heatsink is cool before you replace the cooling fans. If you touch a hot
drive heatsink, it can burn you.
NOTICE Use the instructions in this manual to replace the cooling fans. When you do maintenance
on the fans, replace all the fans to increase product life. If you install the fans incorrectly, it can cause damage to
the drive.

5 Replace Cooling Fans and Circulation Fans
YASKAWA TOEP C730600 0FC Fan Replacement Procedure 17
■Fan Removal
1. Push the tab on the back side of the fan finger guard and pull up to remove the fan finger
guard from the drive.
A - Fan finger guard
Figure 5.13 Remove the Fan Finger Guard
2. Pull the cooling fan straight up from the drive. Remove the protective tube on the relay
connector and disconnect the connector to remove the fan from the drive.
A - Cooling fan B - Protective tube
Figure 5.14 Remove the Cooling Fan
■Fan Installation
Reverse the removal procedure for fan installation.

5 Replace Cooling Fans and Circulation Fans
18 YASKAWA TOEP C730600 0FC Fan Replacement Procedure
1. Connect the relay connector between the drive and cooling fan, and attach the
protective tube.
A - Protective tube
Figure 5.15 Connect the Relay Connector
2. Align the notch on the fan with the pin on the drive and install the cooling fan in the drive.
A - Notch on fan
B - Alignment pin on drive
C - Front of drive
Figure 5.16 Install the Cooling Fan
3. Put the cable and connector in the recess of the drive.
A - Front of drive B - Recess for cable and connector *1
Figure 5.17 Put the Cable in the Drive Recess
*1 Make sure that the cable and connector are in the correct space.

5 Replace Cooling Fans and Circulation Fans
YASKAWA TOEP C730600 0FC Fan Replacement Procedure 19
4. Hold the fan finger guard at an angle and put the connector tabs on the fan finger guard
into the holes on the drive.
A - Front of drive
B - Drive holes
C - Connector tabs
Figure 5.18 Install the Fan Finger Guard
5. Push the tab on the back side of the fan finger guard and click it into place on the drive.
Figure 5.19 Install the Fan Finger Guard
6. Energize the drive and set o4-03 = 0 [Fan Operation Time Setting = 0 h] to reset the fan
operation time.
■Circulation Fan Removal
Note:
Use this procedure only when you use one of these drive models:
•4065xF
•2046xV, 2059xV
•4040xV to 4065xV
•2046xT, 2059xT
•4040xT to 4065xT
Remove the drive cover before you start this procedure.

5 Replace Cooling Fans and Circulation Fans
20 YASKAWA TOEP C730600 0FC Fan Replacement Procedure
CAUTION Crush Hazard. Loosen the cover screws. Do not fully remove them. If you fully remove the
cover screws, the terminal cover can fall and cause moderate injury.
1. Remove the fan cable from the hooks.
A - Circulation fan
B - Hooks
C - Fan cable
Figure 5.20 Remove the Fan Cable
2. Disconnect the relay connector.
Figure 5.21 Disconnect the Relay Connector
This manual suits for next models
1
Table of contents
Other YASKAWA Fan manuals
Popular Fan manuals by other brands

Turn of the century
Turn of the century 20501 owner's manual

Honeywell
Honeywell QUIETSET HS1655 Series owner's manual

Ortech
Ortech Universal Series instruction manual

Bestron
Bestron DFS45S instruction manual

Global Industrial
Global Industrial 293030 Assembly instructions

DeLonghi
DeLonghi FAN HEATER Owner's instruction

Mercury
Mercury 450.007UK user manual

Williams-Sonoma
Williams-Sonoma A3294 Assembly instructions

Hinkley
Hinkley ATTICUS 56" instruction manual

Envirovent
Envirovent FILTERLESS EXTRACT FAN SELV Series Installation guide for engineer / installer

urban ambiance
urban ambiance Mendocino UHP9010 installation manual

Awenta
Awenta Basic WB100 instruction manual