Yukon Advanced Optics Ranger RT 6.5x42 User manual


Digital Night Vision RANGER RT 6.5x42 / 6.5x42S....................................................................1-22
Monoculaire de vision nocturne digital RANGER RT 6.5x42 / 6.5x42S......................................23-46
Monocolo digitale di visibilita' notturna RANGER RT 6.5x42 / 6.5x42S......................................95-118
Цифровой монокуляр ночного видения RANGER RT 6.5x42 / 6.5x42S.................................119-142
ITALIANO
Digitales Nachtsichtgerät RANGER RT 6.5x42 / 6.5x42S...........................................................47-70
Monocular digital de visión nocturna RANGER RT 6.5x42 / 6.5x42S.........................................71-94

2
SPECIFICATIONS
ENGLISH
RANGER RT 6.5X42 / 28047
6.5x / 13x
2x
1:1.2
350
4.6 / 8
5
±5
14
LCD / 640x480
CMOS / 1/3”
640x480
6- 9 (6xAA)
5V power bank / USB( )
10 / 4
¼”
-15 °C…+50 °C / 5 F... 122 F ° °
170x116x76 / 6.7x3.3x3
0.65 / 22.9
320x240; 640х480
320х240; 640х480; 1280х960
avi / jpg
8Gb (7.4Gb available)
1Gb / approx. 40min*
940 / 940
2.4GHz
802.11 b/g/n
15
MODEL / SKU#
Optical characteristics
Magnification
Digital zoom
Objective lens
Max. observation range of an animal 1.7 m long (built-in IR on), m
Field of view (at 6.5x), degrees/m at 100 m
Close-up range, m
Eyepiece dioptre adjustment, D
Eye relief, mm
Electronic characteristics
Display type / Resolution, pixel
Sensor type / Size
Camera resolution, pixel
Sensitivity of the device, max, mW
- wavelength 780 nm, resolution 25 lines/mm
- wavelength 915 nm, resolution 25 lines/mm
Operational characteristics
Operating voltage, V / Battery
External power supply
Max. operating time on a set of batteries (at t=22°C)
(unit only on / IR on + Wi-Fi), hours
Tripod mount thread
Operating temperature
Dimensions (LxWxH), mm / inch
Weight (w/o batteries), kg / oz
Video recorder
Video resolution, pixels
Photo resolution, pixels
Video / Photo format
Built-in memory
Memory capacity
Built-in IR LED Illuminator (long-range / short-range)
Wavelength, nm
Wi-Fi channel
Frequency
Standard
Line-of-sight reception range, m
* Actual capacity may differ.
PACKAGE CONTENTS
FEATURES
Ranger RT 6.5x42 / 6.5x42S
Digital Night Vision Monocular
Carrying case
Neck strap
Extra battery container
Micro USB cable
User manual
Lens cloth
The design of this product is subject to change for development purposes.
Warranty card
The device's software is subject to change without prior notice.
Please visit to download the latest version of the user manual. www.yukonopticsglobal.com
Enhanced night sensitivity
High magnification 6.5х / 13х
2x digital zoom
Viewing range up to 450 m
Long range invisible IR Illuminator (#28047)
Wi-Fi remote review and operation using
smartphone
Youtube. Recording and live YouTube streaming
Onboard video/sound recording
Charging with Power Bank
Updatable software
Stream Vision compatible
Self-contained operating time up to 10 hours
Resistant to bright light
Tripod mount for installation of accessories
2
1
6.5x10⁻⁵
2 8x10⁻⁴
RANGER RT 6.5X42S / 28048
6.5x / 13x
2x
1:1.2
450
4.6 / 8
5
±5
14
LCD / 640x480
CMOS / 1/3”
640x480
6- 9 (6xAA)
5V power bank / USB( )
10 / 4
¼”
-15 °C…+50 °C / 5 F... 122 F ° °
170x116x76 / 6.7x3.3x3
0.65 / 22.9
320x240; 640х480
320х240; 640х480; 1280х960
avi / jpg
8Gb (7.4Gb available)
1Gb / approx. 40min*
850 / 940
2.4GHz
802.11 b/g/n
15
6.5x10⁻⁵
2 8x10⁻⁴

DESCRIPTION OF CONTROLS
INSTALLATION OF BATTERIES
Slide and remove the battery cover (2).
Pull out the battery container (1) using the attached strap.
Slide batteries (or rechargeable batteries) into the battery container. Pay attention to «+» (positive) and «-»
(negative) symbols marked on the walls of the container.
Insert the battery container back into the battery compartment. Make sure the battery container is re-inserted
properly, particularly watching for the orientation of the battery container contacts.
Slide back the battery cover to its original position.
Attention! Do not use batteries of different types or batteries with various charge level because this may
significantly decrease operating time.
EXTERNAL POWER SUPPLY
The unit can operate on an external battery such as Power Bank (5V) or a computer (laptop).
Button
ON
ZOOM
REC
Operating mode
The unit is off
The unit is in modeVideo / Photo
Video
Photo
st
1 short press
Turns the unit on
Turns the Wi-Fi on
nd
2 short press
Turns the Wi-Fi on
Turns the Wi-Fi off
Long press
Turns the display on/off
(hold longer than 1 sec)
Turns the unit off
(hold longer than 3 sec)
Digital zoom activation
Switch between files – leftwards navigation
Return to the beginning of file under review
Switch to Photo Mode
The unit is in Review mode File deletion prompt See description of Review Mode
Review
Enter the menu
—
Video
Photo
Review
Start video recording Stop video recording
Image capture Switch to Review Mode
Recorded video review Pause video review
Switch to Video Mode
IR Turns the IR Illuminator off
Video
Photo
Review
Switch between IR Illuminator modes
Switch between files - rightwards navigation
—
3
Connect the plug of the USB cable (5) to the unit’s USB port (4).
Connect the other plug of the USB cable to a Power bank or a computer.
Upon connection of an external power supply the unit stops operating on batteries.
Operation on external power supply is shown with an icon
More about powering from Power Bank and computer in section 14.
EXTERNAL VIEW AND CONTROLS
5
5
6
7
8
1
2
3
4
Battery container
Battery container cover
Short range IR Illuminator
Micro USB port
Micro USB cable
Eyepiece diopter adjustment ring
Display brightness adjustment wheel
Objective lens
9
10
11
12
13
14
15
16
Radiator
Long range IR Illuminator
Objective lens and IR covers
Button REC
Button IR
Button ZOOM
Button ON
LED Indicator
6
4
3
Image capture

7
BASIC MENU ICONS
IR Illuminator power level
Battery charge indicator
Operation on external power supply
Display brightness level
Full magnification (optical+digital)
15
13x
Built-in microphone
Operating modes: video recording / Image capture
/
Video review / Image review
/
OPERATION
8
Remove the lens cap from the objective lens (8).
Turn the unit on by briefly pressing the button - the green will light up. The display shows theON (15) LED (16)
battery icon The short range IR Illuminator switches on automatically. charge .
To turn the display off during operation, press and hold down the button for more than one second. ON
The display will show a message. DISPLAY OFF
To turn the display on, press iefly the button. br ON
To turn the unit off, press and hold down the button for more than three second. The display shows message ON
“Switch off” 1, countdown will start from 3 to seconds, and the unit turns off.
Achieve a crisp image of the icons on the display by rotating the eyepiece diopter adjustment ring . (6)
Locate an object within 20 to 30 metres.
Achive a crisp image of the object by rotating the objective lens .(8)
Adjust the image brightness by turning the adjustment wheel . The brightness level and brightness icon(7)
are shown in the right corner of the display. The adjustment range is 0 to 20.top
When changing the viewing distance, obtain a sharp and high-quality image by rotating the objective lens
(8) (7) and the wheel . There is no need to rotate the eyepiece - you have already made the necessary
individual adjustment.
To increase the range of detection and identification in low light conditions or in complete darkness, you
may switch on the built-in LED IR Illuminator : remove the cap and press the button. The IR (10) IR (13)
illuminator allows you to increase the observation distance and recognise the object.
Press the button successively to change power level (from 1 to 3). The corresponding icon will IR
appear in the upper part of the display.
To turn the IR Illuminator off, press and hold down the button for two seconds. The IR icon will IR
disappear.
You can find a detailed description of IR Illuminator operation in section 12 “BUILT-IN IR
ILLUMINATOR”.
To activate the digital zoom, briefly press the button. ZOOM (14)
To start video recording, press briefly the REC (12) button. The LED indicator (16) blinks while recording
is on.
6
5
Wi-Fi

OPERATING MODES
9
Video (video recording)
Photo (image capture)
eviewR (video and image review)
The operating modes are as follows:
When first switched on, the unit is in Video mode. Switch between operating modes by a long press of the REC
(12) button. This enables you to cycle between modes (Video->Photo->Review->Video…)
VIDEO MODE
Video recording mode is the default mode.
Video recording mode is shown by the icon on the display.
Sound recording is shown by the icon on the display.
Full magnification is shown with by special icon (i.e. 13x) on the display.
To start or stop video recording, briefly press the REC (12) button.
The LED indicator (16) blinks while recording is on.
Video clips are saved in the internal Flash memory when video recording is stopped or the unit is turned off.
13x
04:23pm
VIDEO mode SOUNDZOOM
Current time
01:42
IR Illuminator and brightness. In VIDEO mode the display shows the following information:
IR Illuminator power level – shown by the corresponding icon -
. If the IR Illuminator is off, the icon is not displayed.
Brightness level.
Brightness level (from 0 to 20) is displayed only during brightness
adjustment.
Wi-Fi
Wi-Fi connection is shown in the top right corner of the display.
13x
04:23pm
Brightness
adjustment
Current time
15
VIDEO
mode 01:42
Note: maximum duration of a recorded file is seven minutes. After this
time expires a video is recorded into a new file. The number of recorded
files is limited by the capacity of unit’s internal memory.
Video recording indication on the display:
The REC (12) icon appears in place of the “VIDEO” icon.
Display icons are not recorded.
You can enter and navigate the menu during video recording.
Note! You can stop recording video only after exiting the menu.
13x
00:02
Elapsed
recording
time
Record timer SOUNDZOOM
Video
recording REC 00:42
Available
recording time
8
7

PHOTO MODE
Photo Mode is shown by icon on the display.
13x
VIDEO mode SOUNDZOOM
999
Photos are saved into the internal Flash memory.
The following functions are displayed in PHOTO Mode:
IR Illuminator
Brightness
Full magnification
Wi-Fi
04:23pm
Note: sound is not recorded in Photo Mode.
Current time
* The counter of available photos is displayed when the number of photos is 999 or less.
REVIEW MODE is designed to review photo and video files (saved in the internal Flash memory) on the display.
File display order. Upon activation of Review Mode, the display always shows the last recorded file.
Mode indication on the display. Along with the image itself the display shows the following information:
File type icon: photo or video .
Video clip length – shown as mm:ss. File counter – shown as x/y
(common for photo and video files) –
x – number of running file.
y – total number of files.
Page navigation (left-right).
Resolution of current (displayed) file.
“PLAY” and “PAUSE” indicators for video clip
File deletion indicator
Date and time of file recording
REVIEW Mode – Photo
REVIEW Mode – Video
960p
Delete current file
Photo resolution
File navigation
arrow (left)
Mode
REVIEW-PHOTO
Prompt for button press
480p
Play current
file
Delete current
file
File navigation
arrow (left)
00:05
Video duration
Video review mode
Photo resolution Х
9
2/123
Time and date
of photo file
File counter
File navigation
arrow (right)
22:18
2016.08.05
2/123
File navigation
arrow (right)
Time and date
of video file
File counter
22:18
2016.08.05
10

Briefly press the REC (12) button to start reviewing a video.
Video review indication:
The video length countdown timer starts.
The PAUSE indicator appears in place of PLAY.
To pause the video – briefly press the REC (12) button.
Video pause indication:
The video length countdown timer stops.
The PLAY indicator appears in place of PAUSE.
With another short press of the REC button you can resume
reviewing a file from the place where the video review was
stopped.
Return to start of current file – briefly press the ZOOM (14)
button.
Review next file – briefly press the IR (13) button.
File deletion with confirmation. A brief press of the ON (15)
button shows the file deletion prompt on the display.
To select “YES” briefly press the ZOOM button.
To select “NO” briefly press the ON button.
5/123
480p
Pause the
current file
00:05
Video countdown timer
5/123
Confirm
file deletion
00:05
Cancel
file deletion
File
counter
Video
review
mode
Video
resolution
Delete
current file
Time and
date of video
file
File
navigation
arrow (left)
File
navigation
arrow (right)
Х22:18
2016.08.05
File navigation:
Leftwards - brief press of the ZOOM (14) button.
Rightwards - brief press of the IR (13) button.
Delete current file
480p
YES NO
Х22:18
2016.08.05
Enter menu
ZOOM control
IR Illuminator control
If the IR Illuminator was on, it turns off when entering the REVIEW mode. The IR Illuminator power level is
saved. On exiting REVIEW mode, the IR Illuminator will be switched on with the previously saved power
level.
Unavailable functions. During file review some control functions are not available:
MENU
10
Menu navigation:
ZOOM (14) button:
Long press – enter the main menu;
Brief press – enter the submenu;
Brief press – confirmation of selection in submenu, with simultaneous exit to the main menu;
Long press – exit submenu without confirmation of selection (in some cases with confirmation, specified
separately in the description of menu sub-items);
Long press – exit main menu.
IR button – menu navigation – downwards or leftwards;
REC button – menu navigation – upwards or rightwards;
Automatic exit – after 10 seconds of inactivity in the menu (or submenu) exit to the main screen takes
place automatically. In some submenus automatic exit is not possible.
Menu contents
Wi-Fi setup
Recording resolution
Date and time setup
Sound record activation
About device i12
11

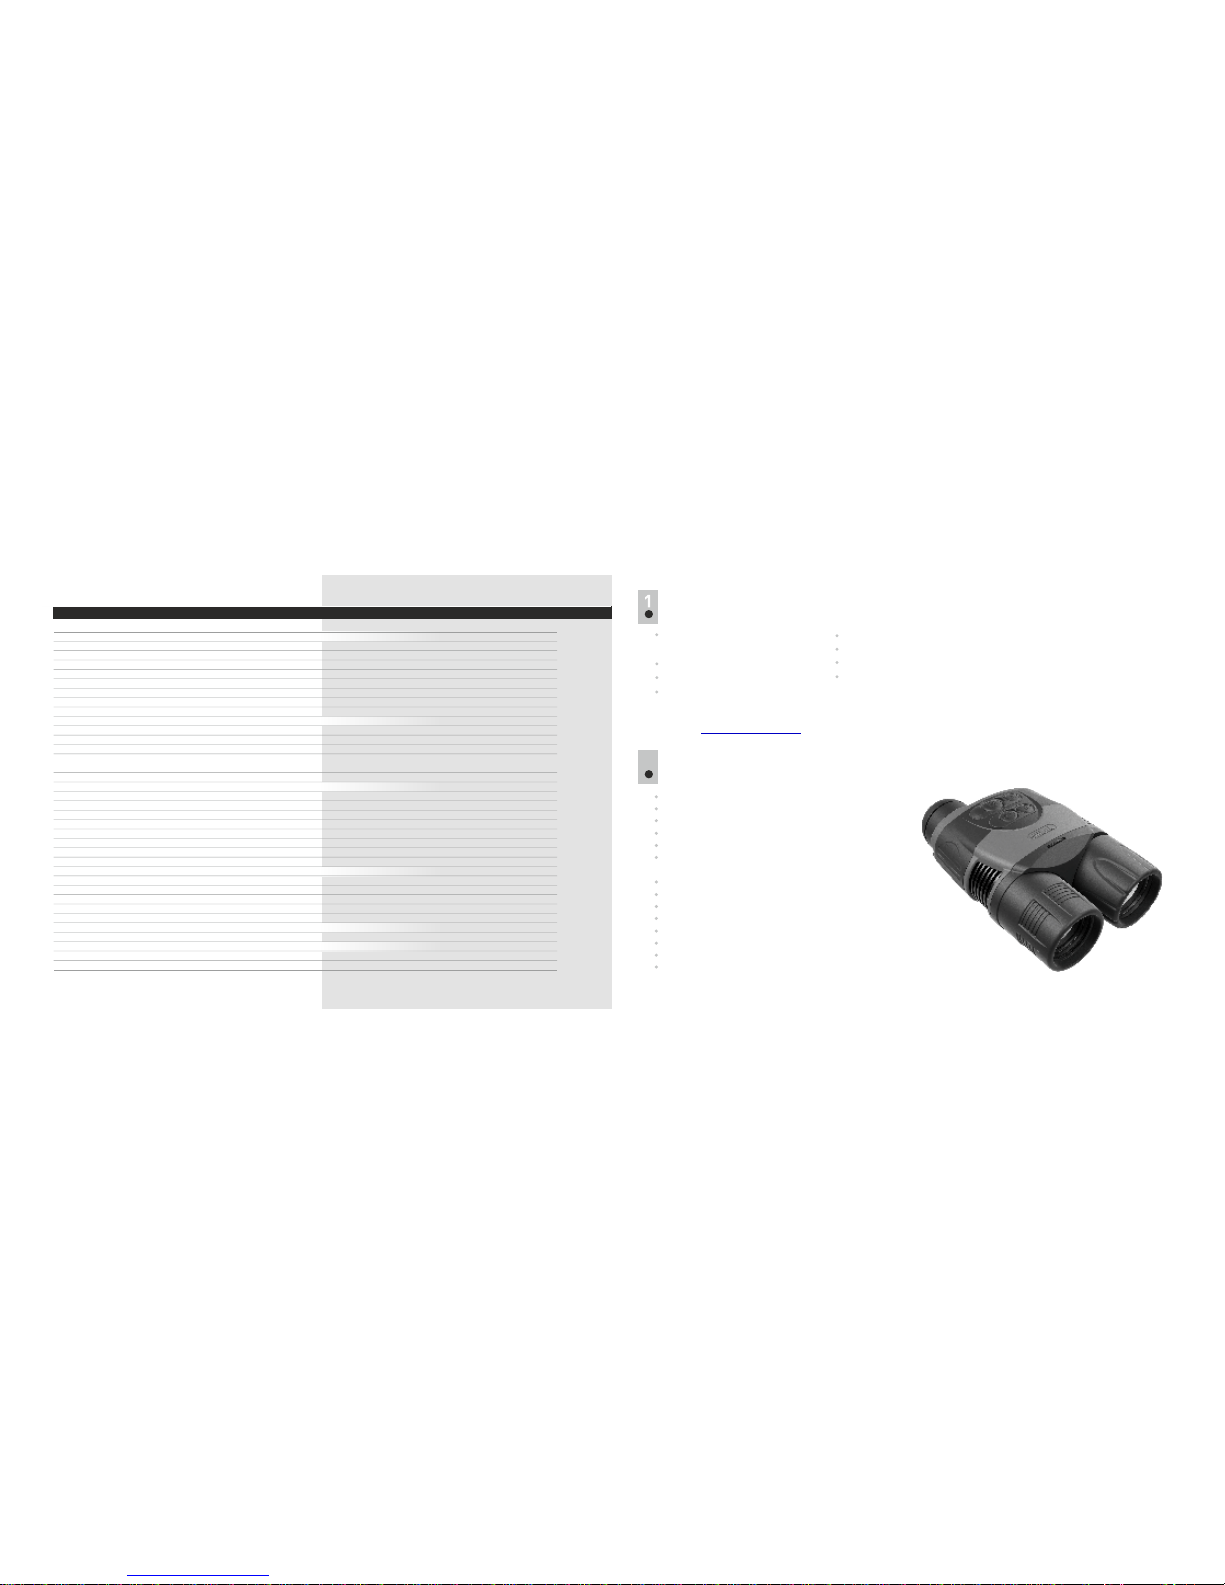
Wi-Fi operation is shown by an icon on the display:
Wi-Fi icon glows – Wi-Fi is on;
Wi-Fi icon blinks – connection is established.
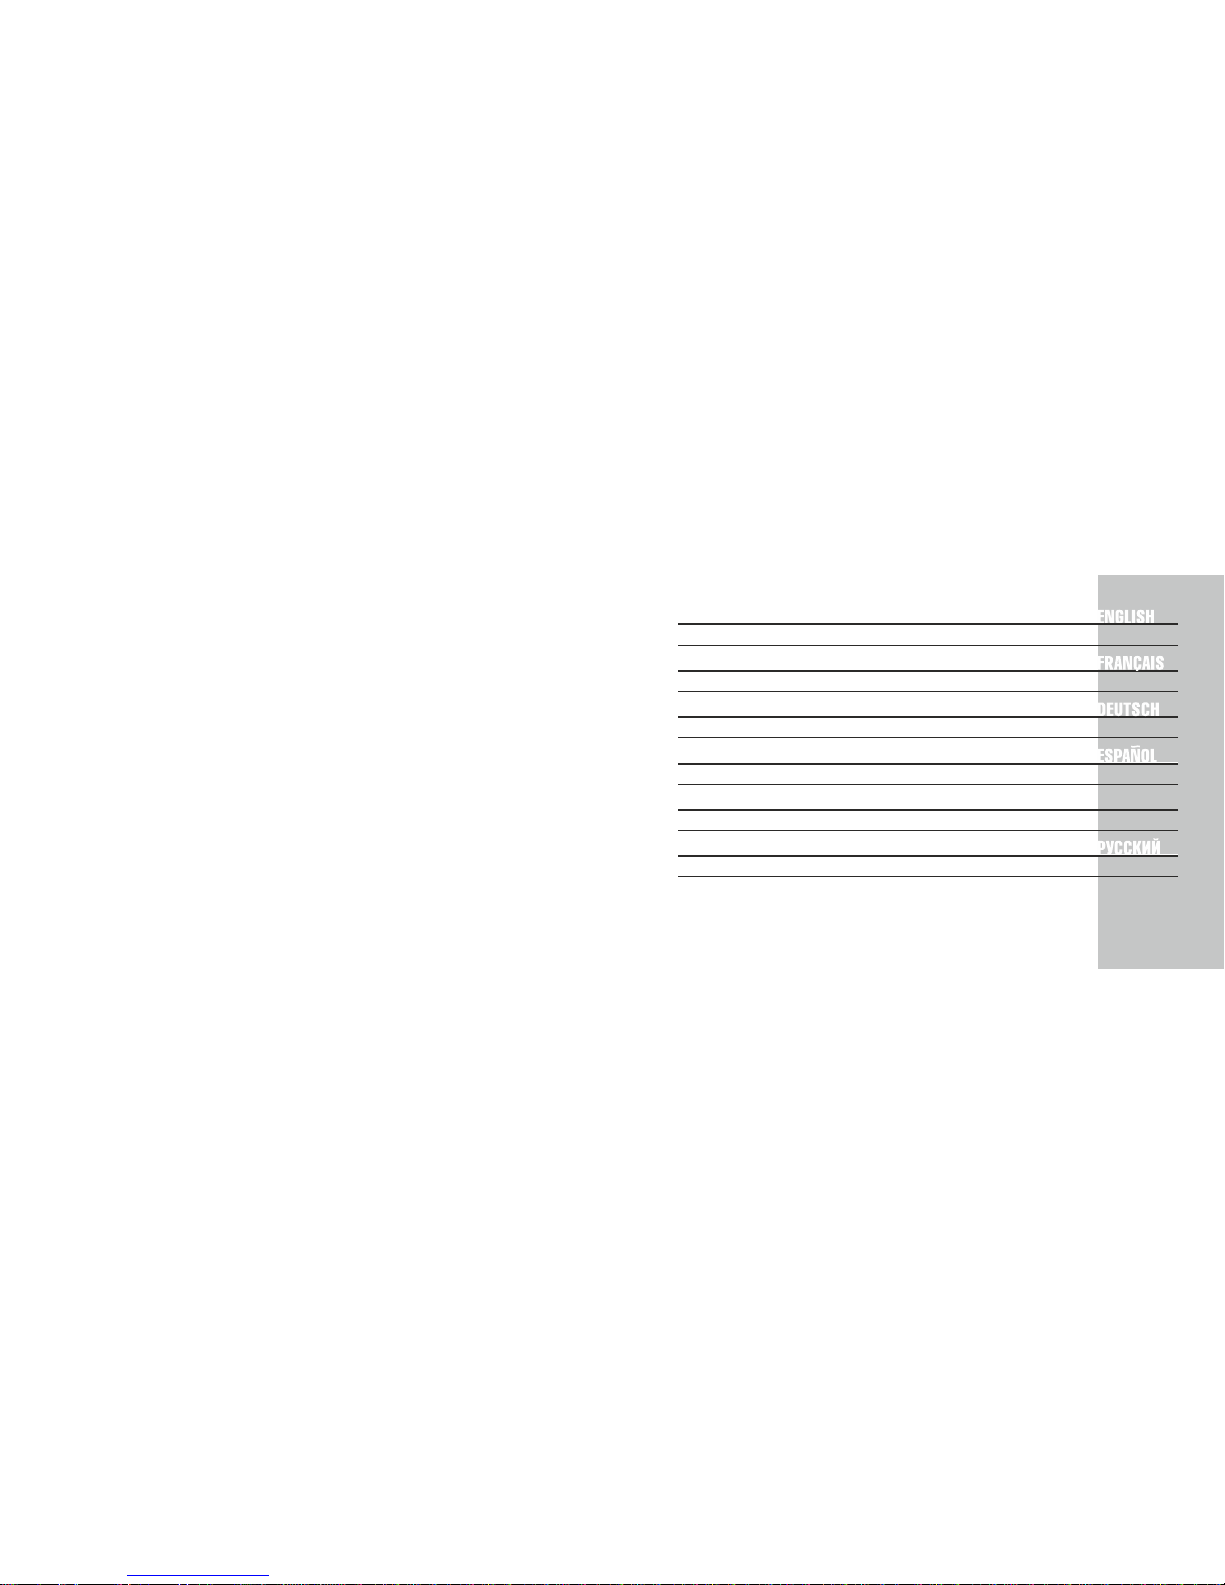
Stream Vision Technology
With the help of Stream Vision technology you can stream images from the display of your
Ranger 6.5x42 RT unit via Wi-Fi to a smartphone or PC tablet. You can find further guidelines on
Stream Vision in an individual booklet or on our web site www.yukonopticsglobal.com
Selection of recording resolution
This menu item allows you to select the resolution of a video recording or photo shot, depending on the
active mode.
Video Mode. Available resolution options for video recording (pixels):
320x240
640x480
Photo Mode. Available resolution options for photo capture (pixels):
320x240
640x480
1280x960
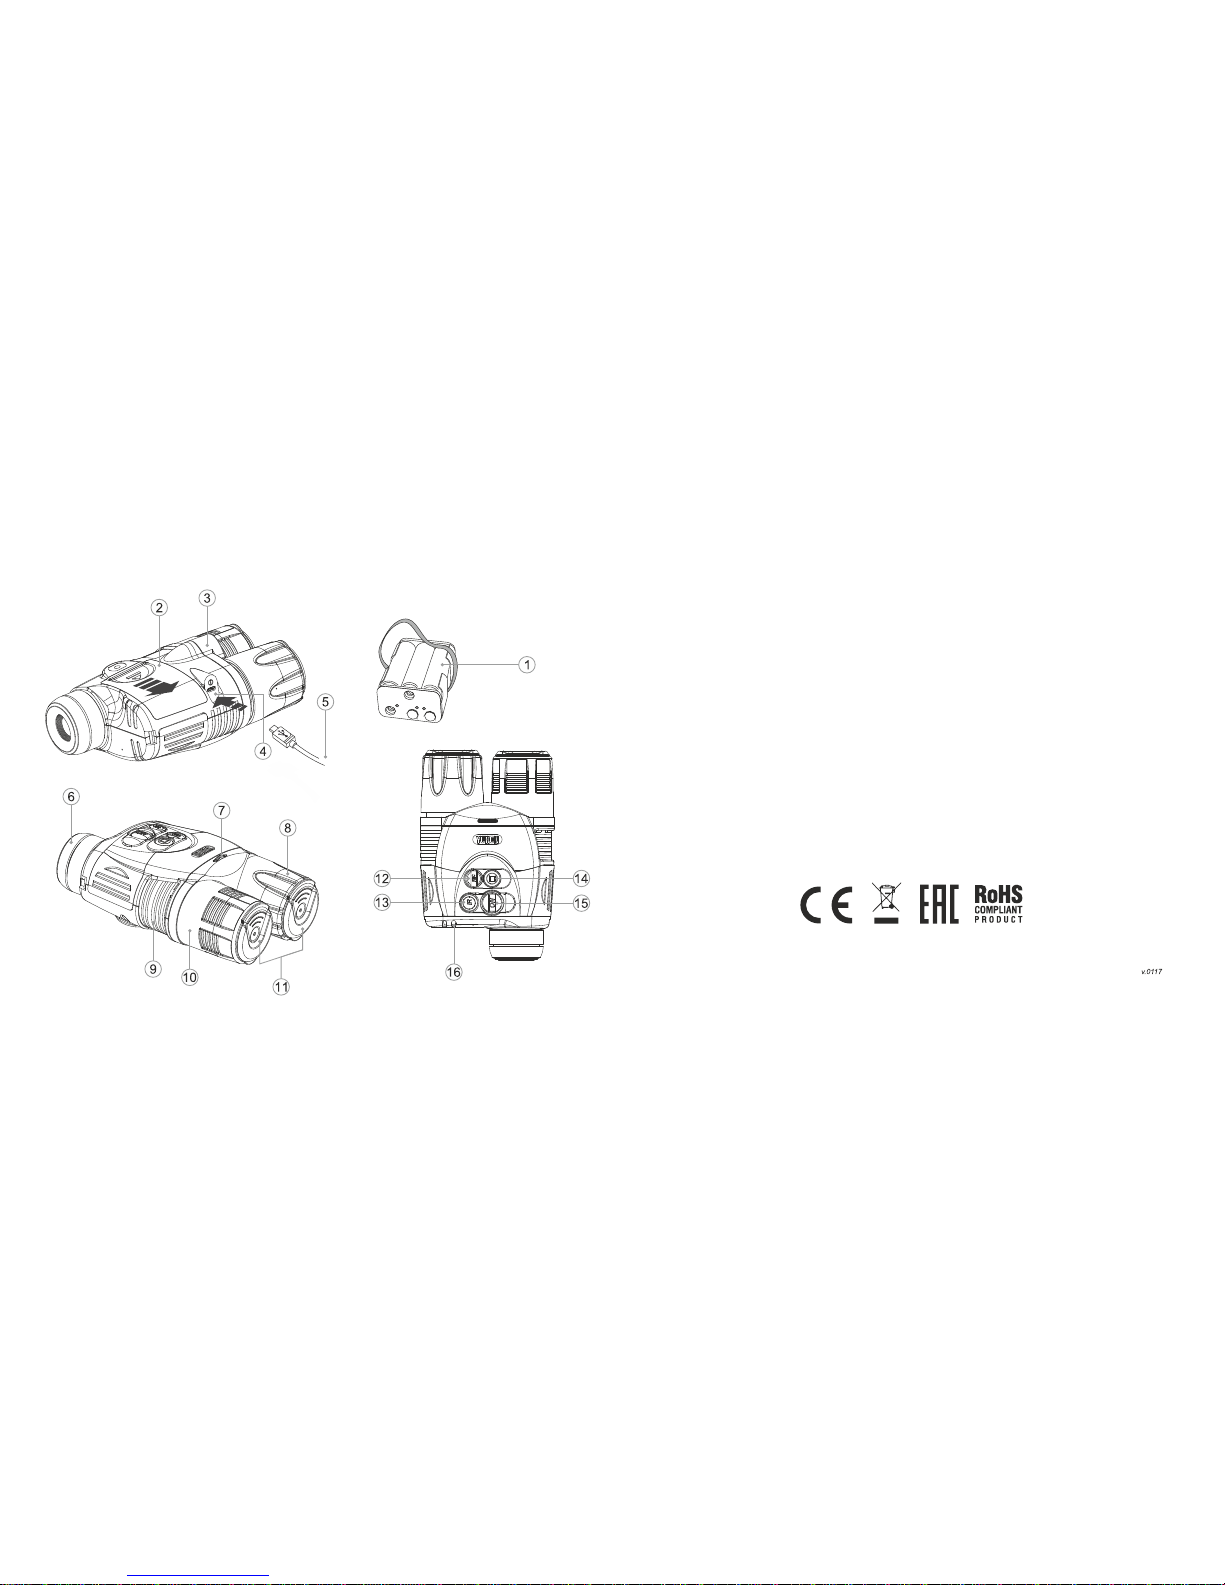
To enter the submenu, press briefly the ZOOM (14) button.
To select resolution, use the IR (13) and REC (12) navigation buttons.
Confirm your choice with a brief press of the ZOOM (14) button.
Setting Wi-Fi access levels
This option allows you to set required access level of the Stream Vision application to your
device.
Access level Owner . Stream Vision user has the complete access to all device’s functions.
Access level Guest . Stream Vision user has the access only to the video stream from the
device.
Wi-Fi Setup
This menu item allows you to set a password for the access point. This password is used to connect
an external device (such as a smartphone, for example) to your unit.
Enter the submenu with a short press of the ZOOM (14) button.
A password appears on the display – by default “12345”.
Use the navigation buttons to set your desired password
(REC (12) button to increase the value; IR (13) button to decrease the value). To switch between
digits, briefly press the ZOOM (14) button.
To save the password and exit the submenu hold down the ZOOM (14) button for longer than one
second.
The selected resolution is shown on the display as follows:
240p (for 320x240); 480p (for 640x480); 960p (for 1280x960)
Resolution is displayed only in the REVIEW mode.
The selected value is saved.
When the unit is next switched on, the display will show the last saved value.
Date and time setup
This menu option allows you to set the current date and time, and time format.
Date setup
Enter the submenu with a brief press of the ZOOM (14) button.
Date format is displayed as: yyyy/mm/dd (2016/07/12)
Use the navigation buttons to select desired value (REC (12) button to increase value; IR (13) button to
decrease value). To move from one digit to another briefly press the ZOOM (14) button.
To save the date and go to time setup, press and hold down the ZOOM button for more than one second.
14
13

Time setup
Enter the submenu with a brief press of the ZOOM (14) button.
Time format is displayed as: “format mm/hh” (24 06:51)
Use the navigation buttons IR (13) / REC (12) to select the required time format - 24/AM/PM. To set
the hour value, briefly press the ZOOM button.
Use the navigation buttons to select the hour value (REC button to increase the value; IR button to
decrease the value).
To set the minute value, briefly press the ZOOM button.
Use the navigation buttons to select the minute value (REC button to increase the value; IR button
to decrease the value).
To save the time settings and to exit the submenu, press and hold down the ZOOM button for more
than one second.
Current time in the format selected is shown on the display.
The set value is saved.
When the unit is next switched on, the display shows the last saved value.
Sound recording
This menu option allows you to activate/deactivate sound recording only during video recording.
Enter the submenu with a short press of the ZOOM (14) button.
Use the navigation buttons to select one of the options:
Yes – to activate sound recording.
No – to deactivate sound recording.
Name: Ranger 6.5x42 RT (name of the unit)
SKU: 28047 (model number)
Serial: 70119307 (serial number)
FW: 12.34.567 (software version)
HW: MNV001 (hardware version)
Confirm your selection with a short press of the ZOOM button.
When activating sound recording, the icon appears on the display. Icon is shown when
sound is deactivated.
The sound record icon is shown on the display in the VIDEO and PHOTO modes.
The set value is saved.
When the unit is next switched on, the display shows the last saved value.
About device
This menu option shows the following service information about your device:
DIGITAL ZOOM FUNCTION
11
This function allows you to control the unit's ZOOM mode. The display shows the full magnification value
which is the sum of the optical and digital magnification.
You can use the ZOOM function only in VIDEO and PHOTO modes.
To activate the zoom, briefly press the ZOOM (14) button.
Cycle through the available full magnification options by briefly pressing the ZOOM button:
6.5x>13x>6.5x.
Setting retention. The digital zoom value is retained only during the current session.
When the unit is next switched on, the full magnification value reverts to 6.5x.
BUILT-IN IR ILLUMINATOR
12
The unit is equipped with two IR Illuminators: the short-range IR Illuminator turns on automatically upon
start of the unit. The long range IR Illuminator (10) is activated manually, and the short-range IR Illuminator
turns off. In model #28047 both Illuminators operate at a wavelength of 940nm which ensures covert
observation; the long-range IR Illuminator in model #28048 operates at a wavelength of 850nm.
You can control the IR Illuminator in the VIDEO and PHOTO modes.
To activate the Illuminator, briefly press the IR (13) button.
IR Illuminator power level indication. When the IR Illuminator is set to position IR1; IR2; IR3 the display
shows the corresponding icons
16
15

To switch between IR power levels, successively press the IR button to cycle through the available
options: IR1->IR2->IR3 ->IR1…
To switch off the IR Illuminator, hold down the IR button. The icon is not displayed.
The IR Illuminator power level is not saved.
You cannot control the IR Illuminator when operating the unit in REVIEW mode.
Upon activation of REVIEW mode, the IR Illuminator switches off, the power level is saved, and the
icon is not shown on the display.
Upon exiting REVIEW mode, the IR Illuminator reverts to the power level selected before
deactivation, with the corresponding icon shown on the display.
DISPLAY OFF FUNCTION
13
This function deactivates the display, which allows you to eliminate light exposure caused by the
glowing display.
You can operate the DISPLAY OFF function in two modes: VIDEO and PHOTO.
To turn the display off, press and hold down the ON (15) button for more than a second.
The message DISPLAY OFF appears on the black display.
To activate the display, press and hold down the ON button for more than a second.
When the DISPLAY OFF function is activated:
All controls are inactive (except for the ON button).
Video recording continues (if video was recording before activating the DISPLAY OFF function).
The Wi-Fi function keeps running.
The DISPLAY OFF function deactivates when:
The ON (15) button is briefly pressed.
The unit is connected to a PC via the USB port or to an external portable power supply (in this case the
display should activate and the unit switches to operating mode).
USB CONNECTION
14
The unit can be connected to a PC via the USB port (4). The PC will detect the unit automatically, no driver
installation is necessary.
Connection options.
When the activated unit is connected to a PC via the USB port, one of the following connection options is
selected:
USB Mass storage device
If this option is selected, the unit is detected by the PC as a flash card. The unit switches to USB power.
This option is designed for use when working with files saved in the unit's memory. In this mode the unit's
functions are not available and the unit is "off".
Power
When this option is selected, the PC is used by the unit as an external
power supply. The external power icon appears on the display in
place of the battery charge icon .
The unit continues to operate, all functions are available.
Press the navigation buttons to cycle between connection options
(USB-> Power-> USB…).
To confirm the selection, briefly press the ZOOM (14) button. 960p 04:23pm
Active connection
option Inactive connection
option
18
17

Power Video/
Photo/Review
The unit continues to function.
Connection in various operating modes
Connection
option
Operating mode Status of the unit
USB Video/Photo
Review
The unit is "off".
If video recording is on when the connection is made,
the recording is stopped and saved automatically.
The unit is "off".
If a video is being reviewed when the connection is
made, the review stops.
USB disconnection.
In USB Mass storage device connection mode.
On disconnection the unit remains "off". The unit must be switched on to continue operation.
In Power connection mode
Once disconnected from PC, the unit switches off. Once the unit is disconnected from a power
bank or AC power adapter, the unit will automatically switch to internal batteries, provided the
batteries are fitted and have sufficient charge.
If the unit is switched off on connection to a PC, the display does not show anything. The unit will
not be detected by the PC until it is switched on (brief press of the ON button).
TRIPOD MOUNT
15
The standard ¼” tripod mount in the lower part of the monocular is designed to install the unit on a
tripod.
OPERATING HINTS
The unit can be used during the daytime; this is a standard feature and will not harm your unit.
When the unit is brought into a warm place after use in cold conditions, leave it in the carry case for 2-3
hours - this will help prevent condensation on the optics.
Do not leave the unit in direct sunlight.
Avoid exposing the unit to severe impact, thermal shock, aggressive liquids or other effects that are liable
to cause damage.
The unit is not water-resistant.
16
MAINTENANCE AND STORAGE
The optics should only be cleaned when it is necessary to do so. Use a soft cotton cloth and special multi-
coated lens cleaners.
Wipe plastic and metal surfaces with a soft cloth moistened with a synthetic cleaning agent.
Store the unit in its carrying case in a dry well-ventilated area. Remove the batteries when storing the unit
for an extended period.
17
20
19

TROUBLESHOOTING
18
The table below lists some potential problems that may occur when using the scope. If the problem
experienced with the scope is not listed, or if the suggested action does not resolve the problem,
the unit should be returned for repair.
The unit will not turn on. Check that the batteries are correctly
fitted in the battery compartment.
Check battery operation.
Oxidized contacts in the battery
compartment due to “leaky” batteries
or contacts have been exposed to
a chemically active liquid.
Replace the batteries or fit the batteries
correctly.
The unit does not
operate on external
power supply.
Make sure your power supply Is
providing output voltage.
Charge the external power supply
(if required).
Check that the USB cable is intact.
No Wi-Fi signal or erratic
signal.
The unit is beyond reliable Wi-Fi range.
There are obstacles between the unit
and the signal receiver (concrete walls
for example).
Place the unit in line-of-sight of the Wi-Fi signal.
Check Corrective action
Problem
Poor image quality. Check that the eyepiece and
lens are adjusted in accordance with
the user manual.
Make sure the lenses are not misted or
soiled.
Adjust the unit according in
accordance with the user manual.
Clean the lenses with a cloth moistened
with alcohol.
Clean the battery compartment,
clean the contacts.
The unit is not operating
properly due to software
update.
Please restore the original software
version.
1) Hold down simultaneously the REC and ZOOM
buttons.
2) Hold down the ON button (while holding REC
and ZOOM).
3) The green LED will blink twice, then will start
blink constantly:
the original software is being installed.
4) Release REC and ZOOM.
5) Once software installation is over, the LED is
blinking with a 1 sec interval.
6) Disconnect the unit from the power supply
(remove the batteries or disconnect an external
power supply).
Check Corrective action
Problem
22
21

CARACTERISTIQUES TECHNIQUES
RANGER 6.5X42 RT / 28047 RANGER RT 6.5X42S / 28048
6,5x / 13x
2x
350
4,6 / 8
5
±5
14
LCD / 640x480
CMOS / 1/3”
640x480
6-9 (6xAA)
5V (power bank / USB)
10 / 4
¼”
-15 °C…+50 °C
170x116x76
0,65
320x240; 640х480
320х240; 640х480; 1280х960
avi / jpg
8Go (7,4Go disponible)
1Go / env. 40 min*
940 / 940
2.4GHz
802.11 b/g/n
15
MODELE / SKU#
Caractéristiques optiques
Grossissement
Zoom numérique
Objectif
Distance d'observation maxi d'un animal d'une taille de 1,7m (IR inc. ON), m
Champs angulaire de l'objectif (à 6,5x), degré / m à 100m
Distance de focalisation minimale, m
Ajustage dioptrique de l'oculaire, dioptre
Dégagement oculaire, mm
Caractérisriques électroniques
Type / Résolution de l'afficheur, pixel
Type / Taille de la matrice
Résolution de la matrice, pixel
Sensibilité de dispositif, non supérieure, mV
- longueur d'onde de 780nm, résolution de 25 lignes/mm
- longueur d'onde de 915nm, résolution de 25 lignes/mm
Caractéristiques de service
Tension de service, V / Piles
Alimentation externe
Durée de fonctionnement maxi. avec un jeu de piles (à la temp. ambiante
de 22°C): (seul le dispositif est en marche / IR en marche +Wi-Fi), h
Dimension de la fixation au pied
Température de fonctionnement
Dimensions (LxWxH), mm
Poids (sans piles), kg
Enregistreur video
Définition vidéo, pixel
Définition photo, pixel
Format de vidéo / photo
Taille de mémoire incorporée
Capacité de mémoire
Illuminateur LED incorporé (longue portée / courte portée)
Longuer d'onde, nm
Wi-Fi
Fréquence
Standard
Portée de réception dans la zone de visibilité directe, m
* La capacité réelle peuvent différer.
2
LOT DE LIVRAISON
Monoculaire numérique
Ranger RT 6.5x42 / 6.5x42S
Etui
Bretelle pour le cou
Compartiment à piles supplémentaire
Serviette pour le nettoyage des lentilles
Guide de l'utilisateur
Carte de garantie
Câble micro USB
Des modifications éventuelles peuvent être apportées dans le concept du dispositif, afin d'améliorer ses performances.
Le logiciel peut être modifié éventuellement sans préavis. Pour la dernière version du guide de l'utilisateur, veuillez visiter le site
www.yukonopticsglobal.com
SPECIFICITES
Sensibilité nocturne améliorée
Grossissement 6,5x / 13x
Zoom numérique 2x
Portée de vue jusqu'à 450 m
Illuminateur IR incorporé invisible (#28047)
Visualisation et operation à distance à travers de Wi-Fi en
utilisant smartphone
Enregistrement et streaming a direct a YouTube
Enregistreur video et audio incorporé
Charge avec le PowerBank en option
Mise à jour du logiciel disponible
Compatible avec Stream Vision (le transfert de l'image vers les
dispositifs externes par Wi-Fi en temps réel)
Autonomie des piles jusqu'à 10 heures
Enregistrement audio
Resistant aux sources de lumière vives (convient à une utilisation de jour)
Montage trépied ¼" pour accessoires
24
23
6,5x10⁻⁵
2,8x10⁻⁴
1:1,2
6,5x / 13x
2x
450
4,6 / 8
5
±5
14
LCD / 640x480
CMOS / 1/3”
640x480
6-9 (6xAA)
5V (power bank / USB)
10 / 4
¼”
-15 °C…+50 °C
170x116x76
0,65
320x240; 640х480
320х240; 640х480; 1280х960
avi / jpg
8Go (7,4Go disponible)
1Go / env. 40 min*
850 / 940
2.4GHz
802.11 b/g/n
15
6,5x10⁻⁵
2,8x10⁻⁴
1:1,2

3
L'observation au site naturel
La recherche et le sauvetage
La chasse et le tourisme
Les jeux sportifs et l'orientation dans les conditions de nuit
La surveillance de fonctionnement de l'équipement technologique
Les monoculaires numériques de vision nocturne Ranger RT sont conçus à être utilisés pour:
INSTALLATION DES PILES
Glissez et retirez le couvercle (2) du compartiment à piles.
Retirez le contenant à piles (1) en utilisant la languette.
Glissez les piles (ou piles rechargeables) dans le compartiment à piles. Respectez les symboles
«+» (positif) et «-» (negatif) marqués sur les parois du compartiment.
Réintroduisez le contenant à piles dans le compartiment, en veillant à ce que le contenant soit
correctement inséré, veiller à bien faire coincider les contacts avec le compartiment à piles.
Replacez le couvercle (2) en place dans sa position initiale.
Attention! Ne pas utiliser de piles de types différents ou avec différents niveaux de charge,
car cela pourrait réduire de manière significative le temps de fonctionnement.
Branchez le câble USB (5) sur le connecteur USB (4) de l'appareil.
Connectez l'autre extrémité du câble USB au Power bank ou à l'ordinateur.
Après la connexion d'une batterie externe, l'appareil cesse de fonctionner sur batterie et
commence à fonctionner sur une alimentation externe.
L'icône s'affiche, une fois le dispositif fonctionne à partir de la source d'alimentation externe.
Pour en savoir plus sur l’alimentation du Power Bank et ordinateur veuillez consulter la section 14.
ALIMENTATION EXTERNE
L'appareil est alimenté par une batterie externe de type Power Bank (5V) ou à partir de un
ordinateur.
5
5
6
7
8
1
2
3
4
Compartiment à piles
Couvercle du compartiment à piles
Illuminateur IR LED à courte portée incorporé
Port micro USB
Câble micro USB
Bague de réglage dioptrique de l’oculaire
Pignon de réglage de la brillance de l'afficheur
Objectif
9
10
11
12
13
14
15
16
Radiateur
Illuminateur IR LED à longue portée
Couvercles de l’objectif et Illuminateur IR
Bouton REC
Bouton IR
Bouton ZOOM
Bouton ON
Indicateur LED
6
ELEMENTS ET ORGANES DE COMMANDE
FONCTIONNALITE DES ORGANES DE COMMANDE
Bouton
ON
ZOOM
REC
Mode de
fonctionnement
Dispositif hors service
Dispositif mis en marche en
mode Video / Photo
Video
Photo
1re appui
instantané
Mise en marche de dispositif
Enclenchement Wi-Fi
2e appui
instantané
Enclenchement Wi-Fi
Déclenchement Wi-Fi
Un appui, en tenant
le bouton appuyé
Déclenchement/ enclenchement
de l'afficheur / (maintenir le
bouton appuyé pendant plus
d'une seconde)
Arrêt du dispositif (maintenir le
bouton appuyé pendant plus
de 3 secondes)
Activation de zoom numérique
Echange de fichiers – navigation vers la gauche.
Retour à l'origine du fichier visionné.
Passage au mode Photo
Dispositif mis en marche en
mode Review Demande de suppression d'un
fichier
Voir la description du mode de
fonctionnement Review
Review
Accès au menu
—
Video
Photo
Review
Enclenchement de
l'enregistrement vidéo Déclenchement de
l'enregistrement vidéo
Prise de vue Passage au mode Review
Enclenchement du visionnage de
l'enregistrement vidéo Pause lors du visionnage de
l'enregistrement vidéo
Passage au mode Video
26
25

IR Déclenchement de l'illuminateur IR
Video
Photo
Review
Commutation de modes de
fonctionnement de l'illumintaeur IR
Echange de fichiers – navigation vers la
droite
—
Réglage de puissance de l'illuminateur IR
Réglage de brillance de l'affichage
Le grossissement total (optique+digital)
15
13x
ICONES DE MENU
l'indicateur de piles faibles
Fonctionnement sur l'alimentation externe
Microphone intégré
Modes de fonctionnement: enregistrement vidéo / Capture d'image
/
Révision de video / Révision de l’image
/
7
8
MISE EN SERVICE
Retirez le couvercle de l'objectif (8).
Mettez le dispositf en marche moyennant un appui instantané sur le bouton ON (15) – l'idicateur
(16) en couleur verte s'allume. L'icône de charge de la batterie s'affiche. L'illuminateur IR se
met automatiquement en marche.
Afin de pouvoir déclencher l'afficheur au cours du fonctionnement de dispositif, appuyez sur le bouton
ON (15), en le maintenant appuyé pendant plus d'une seconde.
L'indication DISPLAY OFF apparaîtera sur l'afficheur déclenché.
Afin d'enclencher l'afficheur, appuyez brièvement sur le bouton .ON
Afin d'arrêter le dispositif, appuyez sur le bouton et le maintenez appuyé pendant plus de trois ON
secondes. Un message “Switch off”, le comptage de temps, de 3 secondes à 0, apparaîtera sur l'afficheur
et le dispositif s'arrêtera.
Parvenez à obtenir la netteté des icônes sur l'écran par rotation de l'oculaire (6).
Pointez le dispositif sur un objet éloigné d'une distance de 20-30 m.
Parvenez à obtenir la netteté de l'image voulue, moyennant la rotation de l'oculaire de l'objectif (8).
Réglez la brillance de l'image, en procédant à la rotation du pignon (7). L'icône de brillance et le niveau
de brillance apparaîteront sur l'afficheur, au coin inférieur à droite. La gamme de réglage est de 0 à 20.
Afin d'obtenir un image net et de bonne qualité en cas de changement de distance d'observation,
procédez à la rotation de l'objectif et du pignon (7). Il n'est pas nécessaire de procéder à la rotation de
l'oculaire, vu que vous avez déjà effectué l'opération d'ajustement du dispositif.
Dans les conditions d'éclairement insuffisant ou dans l'obscurité totale, vous pouvez enclencher
l'illuminateur IR incorporé (10): enlevez le couvercle et appuyez sur le bouton IR (13). L'utilisation de
l'illuminateur IR permet d'augmenter la distance de détection et de reconnaissance de l'objet.
Afin de changer les niveaux de puissance de l'illuminateur IR, appuyez sur le bouton IR. Le niveau de
puissance (de 1 à 3) s'affiche en haut de l'afficheur.
Afin de déclencher l'illuminateur IR, appuyez sur le bouton IR et le maintenez appuyé pendant deux
secondes. L'icône IR disparaît.
Pour plus de détails sur le fonctionnement de l'illuminatueur IR, voir la section 12 “ILLUMINATEUR IR
INCORPORE”.
28
27
Wi-Fi

MODES DE FONCTIONNEMENT
9
Video enregistrement video ( )
Photo (prise de vue)
eview révisionR ( de video et l’image)
Les modes de fonctionnement du dispositif sont les suivants:
Le dispositif, lors de sa mise en marche, est installé en mode Video. Afin de changer le mode de
fonctionnement de dispositif, appuyez sur le bouton REC (12) et le maintenez appuyé. Le
changement de modes de fonctionnement se produit de façon cyclique (Video->Photo->Review-
>Video…)
MODE VIDEO
Video – le mode d'enregistrement vidéo (mode par défaut).
L'indication de mode est visualisée sur l'afficheur moyennant
l'icône .
L'indication d'activation de la fonction «Enregistrement
sonore» est représentée sur l'afficheur avec une icône
respective.
L'indication du grossissement total est représentée sur
l'afficheur sous forme d'une icône, par exemple 13x).
Afin d'enclencher ou de déclencher l'enregistrement vidéo, faîtes un appui instantané sur le bouton
REC (12).
L'indicateur LED (16) clignote pendant l'enregistrement.
Les enregistrements vidéo sont sauvegardés dans la mémoire Flash encastrée lors du déclenchement de
l'enregistrement vidéo ou lors de l'arrêt de dispositif.
L'indication de procédure d'enregistrement vidéo sur l'afficheur:
L'icône “REC” s'affiche à la place de l'icône “VIDEO”.
L'indication de minutage d'enregistrement s'affiche à la place
de la date et de l'heure en cours.
13x
04:23pm
Mode VIDEO SONZOOM
L'heure en
cours
Un appui instantané sur le bouton ZOOM (14) permet d'activer le zoom numérique.
Pour activer l'enregistrement video, appuyez brièvement sur le bouton REC (12). Pendant
l'enregistrement la LED (16) clignote.
Lors de l'enregistrement vidéo les icônes, représentées sur
l'afficheur, ne sont pas enregistrées.
L'entrée dans le menu et les manipulations dans le menu
sont possibles au cours de l'enregistrement vidéo.
Attention! Vous ne pourrez arrêter l'enregistrement
vidéo, qu'après avoir quitté le menu.
13x
00:02
Enregistrement
VIDEO
SONZOOM
REC 00:42
Durée d'enregistrement
Temps
d'enregistrement
écoulé
Remarque: la durée maximale d'un fichier enregistré est de sept minutes. Après l'expiration de ce temps,
une vidéo est enregistrée dans un nouveau fichier. Le nombre de fichiers enregistrés est limité par la
capacité de la mémoire interne de l'appareil.
L'illuminateur IR et la brillance
Au cours du fonctionnement de dispositif en mode VIDEO des informations suivantes apparaîssent sur
l'afficheur:
Le niveau de puissance de l'illuminateur IR sous forme de l'icône respective
L'illuminateur IR décleché, l'icône disparaît.
30
29

La valeur de luminosité.
Le niveau de luminosité (de 0 à 20) est affiché
uniquement pendant le réglage de luminosité.
Wi-Fi.
Connexion Wi-Fi apparaît en haut à droite de
l’écran.
13x
Réglage de
luminosité
15
Mode
VIDEO 01:42
Disponible temps
d’enregistrement
04:23pm L'heure
en cours
* Le compteur de photos disponibles est affiché
lorsque le nombre de photos est inférieur à 999.
MODE REVIEW – le mode de visionnage sur l'afficheur de photos prises et de fichiers vidéo mémorisés
(sauvegardés dans la mémoire inhérente du dispositif).
L'ordre d'affichage de fichiers:
Lors de l'enclenchement de mode Review, le dernier fichier enregistré s'affiche toujours sur l'afficheur.
Indication de mode sur l'afficheur:
Des informations suivantes sont représentées, en plus de l'image, sur l'afficheur:
La sauvegarde de la photo s'effectue dans la mémoire interne.
L'indication des fonctions sur l'afficheur en mode PHOTO:
Illuminateur IR
Luminosité
Grossissement total
Wi-Fi
Attention: en mode PHOTO l'enregistrement sonore n'est pas possible.
L'icône du type de fichier: photo ou vidéo .
La durée de vidéo - s'affiche en format: mm:ss.
Le compteur de fichiers – s'affiche sous forme de: x/y, (le même pour
les photos et les fichiers vidéo), х – numéro du fichier en cours,
у – quantité totale de fichiers.
Les flèches de saut (vers la gauche - vers la droite).
La définition du fichier en cours (affiché).
Les indicateurs “PLAY” et “PAUSE” – pour le fichier vidéo.
L'indicateur de suppression de fichier.
La date et l'heure d'enregistrement de fichier.
04:23pm L'heure
en cours
MODE PHOTO – le mode de prise de vue.
L'indication du mode de fonctionnement s'affiche
moyennant l'icône “Photo” . Mode
PHOTO 999
Compteur d'images* SONZOOM
13x
Mode REVIEW – photo
2/123
960p
Supprimer le fichier
actuel
Compteur de fichiers
Résolution
de la photo
La flèche
de saut
vers la (
gauche)
Mode
REVIEW-
PHOTO
La flèche de saut
vers la ( droite)
22:18
2016.08.05
Invite pour appuyer le bouton
Date et heure de
photo
32
31

Mode REVIEW – fichier vidéo
Navigation sur les fichiers:
Vers la gauche – un appui instantané sur le bouton ZOOM (14).
Vers la droite – un appui instantané sur le bouton IR (13).
Un appui instantané sur le bouton REC (12) permet
d'enclencher le visionnage vidéo.
Durée de la vidéo
Mode
REVIEW-VIDEO
Reproduire le
fichier en cours
Résolution du
fichier en cours Date et heure de
l'enregistrement
La flèche de saut
vers la gauche( ) La flèche de saut
vers la ( droite)
Compteur de
fichiers
Supprimer le fichier
actuel
2/123
480p
00:05
Х22:18
2016.08.05
Pause dans le visionnage d'un vidéo en cours – un appui instantané sur le bouton REC.
Indication d'une pause dans le visionnage de vidéo:
La minuterie de comptage à rebours de la durée de vidéo s'arrête.
L'indicateur PLAY s'affiche à la place de l'indicateur PAUSE.
Reprise de visionnage vidéo après la pause. Un deuxième appui instantané sur le bouton REC (12)
permet de reprendre le visionnage de fichier à partir de l'endroit où le visionnage a été arrêté.
5/123
640p 22.18
05.08.15
00:05
Minuterie de comptage à rebours
de la durée de vidéo
Mode
REVIEW-VIDEO Compteur de
fichiers
La flèche de saut
vers la gauche( ) La flèche de saut
vers la ( droite)
Date et heure de
l'enregistrement
Résolution du
fichier en cours
Mettre en pause
le fichier en cours Supprimer le fichier
actuel
Х
Retour à l'orgine du vidéo visionné en cours – un appui instantané sur le bouton ZOOM (14).
Passage au visionnage de fichier suivant – un appui instantané sur le bouton IR (13).
Suppression de fichiers avec validation.
Lors d'un appui instantané sur le bouton ON (15), une demande de valider la suppression apparait sur
l'afficheur. Pour sélectionner la commande “Yes” - un appui instantané sur le bouton ZOOM (14) . Pour
sélectionner la commande “No” - un appui instantané sur le bouton ON (4).
5/123
Confirmer la
suppression
du fichier
00:05
Annuler la suppression
du fichier
480p
YES NO
Х22:18
2016.08.05
Supprimer le fichier actuel
La minuterie de comptage à
rebours de la durée de vidéo
démarre.
L'indication PAUSE s'affiche à la
place de l'indication PLAY.
Indication de visionnage vidéo:
Accès au menu.
Commande de ZOOM.
Commande de l'illuminateur IR.
Fonctions inaccessibles. Au cours du visionnage de fichiers certaines fonctions de dispositif sont
inaccessibles pour la commande. Ce sont:
34
33
This manual suits for next models
1
Table of contents
Languages: