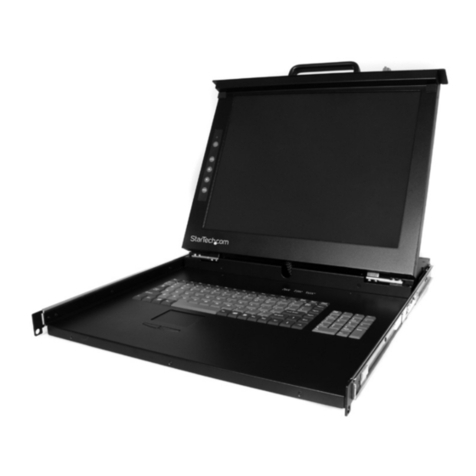
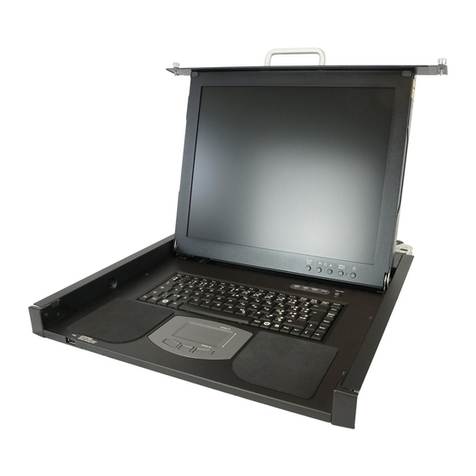
Z Microsystems 15 User manual

Doc# 27-0002UM Issued 7/99 Rev. 1.2
Z Microsystems
FIELD-READY
COMMAND
CONSOLE
15
Z Microsystems
FIELD-READY
User Manual

Doc# 27-0002UM Issued 7/99 Rev. 1.2
1. Use the power
and video
cab es supp ied
with the
Command
Conso e to he p
prevent
interference
with radio and
te evision
reception. The
use of cab es
and adapters
may cause
interference
with e ectronic
equipment in
the vicinity of
this unit.
2. This equipment
is pending
approva for a
C ass A digita device,
pursuant to certain imits
imposed by Part 15 of the
FCC ru es. These imits are
designed to provide
reasonab e protection
against harmfu interference
in a residentia insta ation.
This equipment generates,
uses and can radiate radio
frequency energy, and, if not
insta ed and used in
accordance with the
instructions, may cause
harmfu interference to radio
communications. However
there is no guarantee that
interference wi not occur in
a particu ar insta ation. If
this equipment does cause
harmfu interference, to
radio or te evision reception,
which can be determined by
turning the equipment off
and on, the user is
encouraged to try to correct
the interference by one or
more of the fo owing
measures:
Reorient or re ocate the
receiving antenna.
Increase the separation
between the equipment and
receiver.
Connect the equipment into
an out et on a circuit
different from that to which
the receiver is connected.
Consu t your dea er or an
experienced radio/TV
technician for he p.
3. If necessary, the user shou d
contact the dea er or an
experienced radio/te evision
technician for additiona
suggestions. The user may
find the fo owing book et,
prepared to be the FCC,
he pfu : How to Identify
and Reso ve Radio-TV
Interference Prob ems. This
book et is avai ab e from the
U.S. Government Printing
Office, Washington, DC,
20402, Stock No. 004-
00345-4.
FCC INFORMATION
Regulatory
COMMAND
CONSOLE
15
2

Doc# 27-0002UM Issued 7/99 Rev. 1.2
STARTING POINT 4
Shipment Contents 4
User Manua 4
System Requirements 4
Product Description 5
PREPARATION 6
INSTALL RAILS 7
INSTALL CONSOLE 9
FINAL ADJUSTMENTS 10
SETUP 11
CLOSING CONSOLE 12
OPERATION 13
CONFIGURE MONITOR 14
Setup For Windows 95 or 98 14
Auto Setup 15
Auto Setup for DOS 15
Auto Setup for Windows 3.1
95, 98 or NT 16
ADJUSTMENTS 18
User Contro Features 18
Operation 18
OSD Lock/Un ock 19
On-Screen Disp ay (OSD) 19
OSD Functions 20
MAINTENANCE 23
TROUBLESHOOTING 24
Causes and Corrective Action 24
APPENDICES 26
Disp ay Modes 26
Power Management 27
SPECIFICATIONS 28
Disp ay Specifications 28
Supported Disp ay Modes 28
Communications 28
Power Input 28
Power Consumption 28
Performance Tested 28
Environmenta Specifications 28
Regu atory 29
Re iabi ity Specifications 29
Deve opmenta Options 29
SUPPORT 30
Further He p 30
Rep acing Parts 31
Providing Feedback 31
Y2K COMPLIANCE 32
DRAWINGS 33
3
Contents

Doc# 27-0002UM Issued 7/99 Rev. 1.2
The User Manua comes in two
formats: printed hardcopy or CD-
ROM. This Manua is a so avai ab e
on the Z Microsystems website
(www.zmicro.com).
We recommend you read this manua
as fo ows:
Carefu y fo ow the instructions in the
Insta ation and Testing chapter for
hookup and initia contro settings.
Refer to the Operation chapter for a
comp ete description of a the user
contro s, and the Maintenance and
Troub eshooting chapters for care and
correcting any unforeseen prob ems
with the system. The Appendices and
References chapters are provided for
quick y finding technica information
about the Command Conso e.
SYSTEM REQUIREMENTS
The Command Conso e works with
any computer system that provides
industry standard screen formats from
640 x 480 to 1280 x 1024, with up to
75 Hz vertica sync. See the Specifica-
tions Tab e of this Manua for a
comp ete isting of a reso utions
supported.
The Command Conso e requires a
computer with a suitab e onboard
subsystems for Video Adapter Card
that can support XGA 1024 x 768,
SVGA 800 x 600, or VGA 640 x 480
at 60 Hz
The Command Conso e shipping box
contains the fo owing:
The Command Conso e Unit
Video Signa Cab e
AC/DC Power Supp y Brick with
attached DC cab e
AC Power Cab e
Setup Diskette
User Manua
Remember to save your origina
shipping container and packing
materia to transport or ship the
Command Conso e.
USER MANUALSHIPMENT CONTENTS
4

Doc# 27-0002UM Issued 7/99 Rev. 1.2
PRODUCT DESCRIPTION
The Command
Conso e provides
a iquid crysta
disp ay, a desk
work surface and
storage for any
size keyboard
and mouse in a
3.5" high (2U)
standard 19"
rack or transit
case.
Specia y de-
signed ocks on
each side of the
Command
Conso e ho d the
compact fo ded
unit secure y in
p ace during
storage.
Re ease of the
two Z-Locks on
the front sides of
the Conso e
a ow it to s ide
out and the LCD
disp ay to quick y
swing up into a
reading position
By ifting up the
desktop, the
keyboard and
mouse can be
easi y removed
and set on top.
The ightweight and durab e a umi-
num construction provides exceptiona
strength in fie d app ications.
The high qua ity LCD screen provides
fu co or and features up to 1280 x
1024 pixe reso ution.
The LCD screen has a back ight
contro that reduces power and
extends the ife of the monitor.
The side-viewing ang e is up to 160
degrees. It can be easi y adjusted to
any vertica -viewing ang e up to 100
degrees. The disp ay works effective y
with any workstation.
An e ectrostatica y-app ied and
baked-on finish is used for extreme
durabi ity for shipboard, airborne,
fie d dep oyments, and industria or
ab app ications where weight and
size are very critica .
5

Doc# 27-0002UM Issued 7/99 Rev. 1.2
TOOLS REQUIRED
PRECAUTIONS
Required Too s and Equipment
F athead screwdriver with about 10"
shaft.
Phi ips screwdriver with about 10"
shaft.
Computer Setup Diskette
In preparation to insta the Com-
mand Conso e, take the fo owing
precautionary steps:
Turn off the e ectrica power to your
computer.
Verify the Command Conso e power
switch is off. If the Conso e is off, the
ight wi not be i uminated.
DANGER: To avoid shock hazard:
Do not remove the covers around
the Command Console.
Do not connect or disconnect the
Command Console during an
electrical storm.
The power cord plug must be
connected to a properly wired
and grounded power outlet.
Any equipment to which the
Command Console will be
attached must also be connected
to properly wired and grounded
power outlets.
OTE: For the fastest and easiest
installation of the
Command Console, follow
these steps in the sequence
they are presented.
Starting Point
6

Doc# 27-0002UM Issued 7/99 Rev. 1.2
SLIDE REMOVAL
With the Conso e sitting
on a workbench with the
front facing towards
you, press down to
re ease the Z-Locks on
each side of the front of
the Conso e to s ide the
side rai s back.
The s ide rai wi reach
a stop about ha f way
back.
This is a safety stop to
prevent the Conso e
s iding out too far whi e
mounted to the rack.
Simu taneous y press in
the safety catches on
each s ide rai and s ide
the side rai s a the way
off the back of the
Conso e.
The s ides shou d now
be separated from the
Conso e.
Each s ide unit inc udes
the s ide rai , with the
front Z- ock mount and
the rear mount.
On the front of the
cabinet frame, use three
Phi ips screws on each
side to secure the right
and eft Z-Lock mounts.
DO NOT tighten these
screws to a ow for
adjustment of the
Conso e within the
cabinet frame.
On the rear of the
cabinet frame, use the
two Phi ips screws to
oose y secure the right
and eft rear s ide mount
to the cabinet frame.
DO NOT tighten these
screws fu y at this time.
On the s ide rai s, using
a s ot screwdriver,
oosen off the screw.
Repeat on each side.
INSTALL THE SLIDES IN THE CABINET FRAME
7
Install Rails

Doc# 27-0002UM Issued 7/99 Rev. 1.2
Install Rails
Go back on the rear of
the cabinet frame, and
tighten the s ide mount
to the cabinet frame.
Make sure you ho d the
s ide mounts hard
against the rack rai .
8

Doc# 27-0002UM Issued 7/99 Rev. 1.2
INSTALL THE COMMAND CONSOLE IN THE SLIDES
Pu the two Conso e
s ides out unti they ock.
Ho d the Conso e by
each side, with the front
toward you.
Feed the four cab es
coming out of the
Conso e back through
the cabinet frame.
Guide the Conso e into
the s ides and s ide the
Conso e in unti it stops.
Simu taneous y press in
the catches on each
s ide and s ide the
Conso e a the way into
the cabinet frame.
The Conso e shou d
s ide in and out easi y.
S ide the Conso e in
and out severa times.
The Conso e shou d
easi y c ose comp ete y.
To be sure the s ide and
mount assemb y are
a igned proper y, s ide
the Conso e in and out
severa times.
If the Conso e binds
during s iding, do the
fo owing:
Because of variances in
cabinet frames, there
may need to be some
adjustments of the
Conso e s ide system for
best fit and movement
of the Conso e in and
out.
TEST INSTALLATION AND MAKE ADJUSTMENTS
Install Console
9

Doc# 27-0002UM Issued 7/99 Rev. 1.2
Loosen the screws on
each of the front Z-Lock
mounts.
FINAL ADJUSTMENTS OF THE COMMAND CONSOLE
S ide the Conso e
partia y out.
Use a f athead screw
driver to s ight y move
the Z-Locks out away
from the Conso e.
Tighten a the screws on
the front Z-Lock mounts.
S ide the Conso e in and
out to see if it moves
smooth y.
Go back to the rear of
the rack and fu y
tighten the side rai
screws.
Note: A wrench may be
necessary to hold the
nut on the other side.
Install Console
10

Doc# 27-0002UM Issued 7/99 Rev. 1.2
C ose the storage tray
top, then p ace the
keyboard and mouse on
top of the tray door.
Using both hands,
gent y ift the Conso e
screen by the top bar.
Open the storage tray
top.
Remove the keyboard
and mouse.
A ign the Keyboard and
Mouse cab e to pass
through the recessed
access notch.
With both hands, press
both the Z-Locks down
and
SETTING UP MONITOR KEYBOARD AND MOUSE
S ide the Conso e a
the way out.
The storage tray door
now becomes a
workstation for the
keyboard and mouse.
There shou d be amp e
cab e to both units for
movement around the
workstation.
11
Install Console

Doc# 27-0002UM Issued 7/99 Rev. 1.2
P ace the keyboard and
mouse inside the tray
a ong with a cab es
and c ose door.
Using both hands,
gent y drop the Conso e
screen by the top bar
unti it ays f at.
Remove the keyboard
and mouse from top.
Open the storage tray
top.
Press both the Z-Locks
down and and s ide in
the conso e unti you
hear the positive c ick
from the ock.
CLOSING DOWN THE MONITOR
S ide the Conso e in
with both hands.
Closing Console
12

Doc# 27-0002UM Issued 7/99 Rev. 1.2
POWERING UP
Operation
4 cab es connect the back of the
Conso e to the computer.
Power cab e
Video cab e
Keyboard cab e
Mouse cab e
To connect the four cab es:
Turn off the computer and a
attached devices.
Connect the video cab e to the
video port on the back of the
computer.
Insert the power p ug into a proper y
grounded e ectrica out et.
WARNING: Be sure all electrical
power to the cabinet is off
before connecting any of the
cables.
WARNING: There is a key guide for
alignment on all the cables.
Be sure the cable plug and
receptacles are aligned
properly using the key
guide. Misalignment can
cause short circuiting.
INSTALLING CABLES
Switch the Conso e
monitor on by pushing
and re easing the power
switch marked.
Turn on the monitor and
then the computer.
13

Doc# 27-0002UM Issued 7/99 Rev. 1.2
Configure Monitor
The Command Conso e offers severa methods to set up the monitor, depend-
ing on the operating system used for your computer. Use the Setup Diskette
and se ect the setup that is best for your computer operating system.
When first used, you must perform Automatic Setup (AUTO SETUP). This
procedures sets up the monitor to process the video signa s from the computer
without image disco oration or smearing. After performing AUTO SETUP, the
settings are stored and used each time the monitor is turned on.
The Setup Uti ity inc uded on the Setup Diskette is for disp ay dot patterns.
They do not rep ace or modify the disp ay driver.
The Automatic Setup instructions require the monitor to be warmed up for 15
minutes. However, this is not required for norma operation.
SETUP FOR WINDOWS 95 OR WINDOWS 98
To use the P ug and P ay feature in
Windows 95 or Windows 98, fi es
shou d be oaded from the Setup
Diskette as fo ows:
1. Turn the computer off and attach
devices.
2. Ensure that the monitor is con-
nected correct y.
3. Turn on the monitor and then the
computer. A ow the computer to
boot into Windows 95 or Windows
98. The computers P ug and P ay
code may disp ay a warning that
the system hardware has changed.
This probab y means that it has
detected the new monitor for the
first time.
4. Open the DISPLAY PROPERTIES
window by c icking on START,
SETTINGS, CONTROL PANEL and
then doub e c icking on the
DISPLAY icon.
NOTE: This section must be
completed before
continuing with the
Windows 95 or Windows
98 Auto Setup for the
computer.
5. Se ect the SETTINGS tab.
6. Se ect the CHANGE DISPLAY TYPE
button.
7. Se ect the CHANGE MONITOR
TYPE button.
8. Insert the Setup Diskette into drive
A: and se ect the Have Diskette
button.
9. Se ect OK.
10. Choose IBM T55A monitor and
se ect OK. The fi es wi be copied
from the diskette to the computer
hard drive.
11. C ose a open windows and
remove the diskette.
12. Reboot the computer system. The
system wi automatica y se ect the
maximum refresh rate and corre-
sponding Co or Matching Profi es.
14

Doc# 27-0002UM Issued 7/99 Rev. 1.2
NOTE: After making changes in
the Setup, the computer
must be Rebooted to
insure proper changes to
the CO FIG.SYS and
AUTOEXEC.BAT files.
NOTE: Before proceeding with
the next section, it is very
important that The Setup
Diskette for Windows 95
or Windows 98 has been
run.
Locate the operating system insta ed
on the computer in the Tab e be ow
and fo ow the appropriate instruc-
tions. You may choose to run Auto
Setup for each operating system that
is used. This means that if sometimes
the monitor is used whi e running any
version of Windows and sometimes it
is a so used within DOS (not a DOS
window), you must run Auto Setup for
both Windows and DOS. You may run
versions of Auto Setup in any order.
NOTE: If your computer does
not run with the Setup
Diskette shipped with the
monitor, refer to Manual
Setup.
NOTE: The Auto Setup process
only applies to the
current screen mode.
When a new mode is
selected, repeat this
section to reset the
monitor.
AUTO SETUP
Before beginning Auto Setup for the
computer:
Make a backup copy of the Setup
Diskettes supp ied with the monitor.
Make sure the computers video
mode is set in the range of the
supported screen reso ution shown
in the tab e in the Reference section.
Perform Auto Setup for each screen
mode used.
15
Configure Monitor

Doc# 27-0002UM Issued 7/99 Rev. 1.2
AUTO SETUP FOR WINDOWS 3.1 95 98 OR NT
1. Turn the monitor on first, then the
computer. If the message CHECK
SIGNAL CABLE is disp ayed. If
nothing is disp ayed check:
that the video interface cab e is
connected proper y.
the correct video adapter card is
insta ed.
the correct support disp ay mode is
se ected for the computer.
2. Wait approximate y 15 minutes,
unti the monitor warms up.
3. Drag the icon bar and too bar, if
they are disp ayed, to the bottom of
the screen.
4. Insert the Setup Diskette into the
diskette drive.
5. Check the operation system
insta ed on your computer and
fo ow the instructions from the
tab e above.
6. When the test pattern appears,
press the OSD Enter button at
the bottom of the monitor to
disp ay the initia OSD menu.
NOTE: The size and diversity of
the dot pattern varies with
the screen resolution.
NOTE: Position the mouse
pointer at the bottom
center of the screen. This
allows Auto Setup to run
properly.
NOTE: If the monitor is in
standby mode (STA DBY
O ), it may automati-
cally turn off while you
are waiting for it to
warm up.
Configure Monitor
16

Doc# 27-0002UM Issued 7/99 Rev. 1.2
7. Use an Arrow button ( ) to
se ect the Image Lock icon (symbo
of Image Lock) and press OSD
Enter button to access the
function.
8. Using an Arrow button ( ),
se ect Automatic and press the
OSD Enter button . This acti-
vates the Auto Setup procedure,
which wi optimize the disp ay
settings with the provided test
pattern. The screen wi dim, b ink
on and off severa times, and you
may notice sma changes to the
test pattern. To abort the Auto
Setup function, press the Esc key.
9. When finished, the OSD main
menu returns. Press the Exit button
once to exit from the OSD.
10. Press the Esc key to return to
Windows. You have comp eted the
monitor setup for Windows.
You have co pleted the onitor
setup for Windows. If you use other
operating syste s, perfor the
appropriate AUTO SETUP for those
syste s.
17
Configure Monitor

Doc# 27-0002UM Issued 7/99 Rev. 1.2
Monitor Adjustments
Making adjustments to the Command Conso e screen is a matter of perform-
ing the fo owing easy On-Screen Disp ay steps:
NOTE: The image is already
optimized for many
display modes, however
the user controls can be
used to adjust the image
to your liking.
NOTE: The settings saved after
adjustment and when
existing the OSD and will
be effective thereafter.
NOTE: After making adjust-
ments, the Power
indicator LED will
briefly turn amber to
indicate that the new
value has been saved.
Press any of the OSD contro
buttons to disp ay the main OSD
menu.
Use the Arrow buttons to move
among the icons. Se ect an icon
and press OSD Enter to access that
function. If there is a submenu,
you can move between options
using the Arrow buttons, then press
OSD Enter to se ect that function.
Use the Arrow buttons to make
adjustments.
Press the Exit button to move
backwards through the submenus
and exit from the OSD.
Operation
User Control Features
18

Doc# 27-0002UM Issued 7/99 Rev. 1.2
OSD Loc /Unloc
This feature a ows you to secure
the current contro settings, whi e
a owing the user to adjust Bright-
ness and Contrast, so that they
cannot be inadvertent y changed,
you can un ock the OSD contro s at
any time by using the same
procedure.
Push and ho d the button 10
seconds to Lock or to Un ock.
When ocked, a LOCKED
message wi be disp ayed.
NOTE: The LCD monitor needs time
to become thermally stable
the first time you turn it on
each day. Thus, to achieve
more accurate adjustments
for parameters. Allow the
LCD monitor to warm up
(be On) for at least 15
minutes before making any
screen adjustments.
On-Screen Display (OSD) Controls
19
Monitor Adjustments

Doc# 27-0002UM Issued 7/99 Rev. 1.2
Monitor Adjustments
Initial Appearance of OSD
OSD Functions
20
Other manuals for 15
1
This manual suits for next models
1
Other Z Microsystems LCD Drawer manuals
Popular LCD Drawer manuals by other brands

Synergy Global Technology
Synergy Global Technology NOVA MIL1U17-01 user manual

IKEA
IKEA RATIONELL manual

Acnodes
Acnodes KD 9219 Specifications

Ronda
Ronda QM1 Installation, use & care guide

serverLink
serverLink LKS-08D17W user manual

Crystal Image Technologies
Crystal Image Technologies RM-118-17 user manual