manuals.online logo
Brands
  1. Home
  2. •
  3. Brands
  4. •
  5. Zanussi Electrolux
  6. •
  7. Dishwasher
  8. •
  9. Zanussi Electrolux ZDF 501 User manual

Zanussi Electrolux ZDF 501 User manual

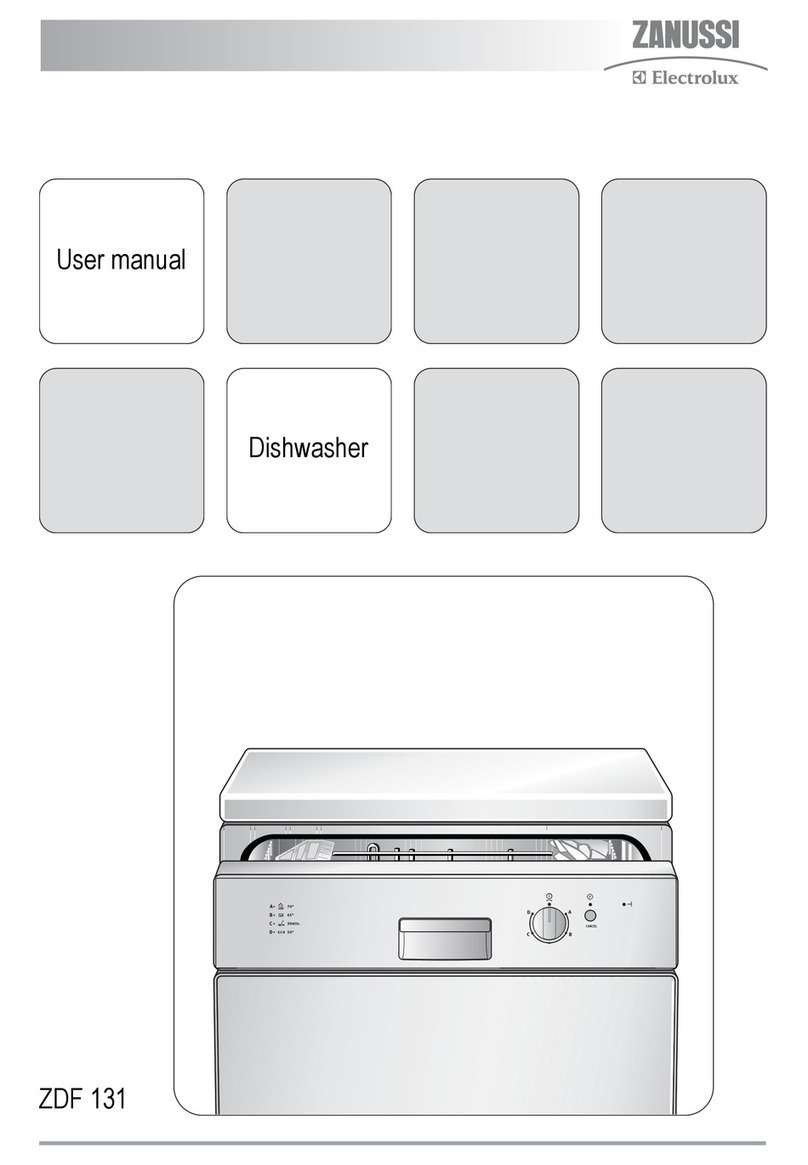
User
manual
Dishwasher
ZDF 501
156999 58/0en 17-03-2006 14:09 Pagina 1
2
Content
Safety information - - - - - - - - - - - - - - - - - -3
Control panel and functions - - - - - - - - - - -4
Programme ta le - - - - - - - - - - - - - - - - - - -7
Before the first use - - - - - - - - - - - - - - - - -8
Setting the water softener - - - - - - - - - - - - -8
Filling with dishwasher salt - - - - - - - - - - -11
Filling with rinse aid - - - - - - - - - - - - - - - -12
Adjusting the dosage of rinse aid - - - - - - -12
Loading cutlery and dishes - - - - - - - - - - -13
Filling with detergent - - - - - - - - - - - - - - -16
Unloading the dishwasher - - - - - - - - - - - -16
Cleaning and care - - - - - - - - - - - - - - - - - 17
Environmental concerns - - - - - - - - - - - - - 18
Something not working- - - - - - - - - - - - - - 19
Technical data- - - - - - - - - - - - - - - - - - - - 21
Consumption values - - - - - - - - - - - - - - - 21
Hints for test institutes - - - - - - - - - - - - - - 22
Installation - - - - - - - - - - - - - - - - - - - - - - 23
Service and spare parts - - - - - - - - - - - - - 26
Guarantee conditions- - - - - - - - - - - - - - - 27
156999 58/0en 17-03-2006 14:09 Pagina 2
3
Safety information
Correct use
●This dishwasher is only intended for washing
household utensils suita le for machine
washing.
●Do not put any solvents in the dishwasher.
This could cause an explosion.
●Knives and other items with sharp points
must e loaded in the cutlery asket with
their points down or placed in a horizontal
position in the upper asket.
●Only use products (detergent, salt and rinse
aid) suita le for dishwashers.
●Avoid opening the door whilst the appliance
is in operation, hot steam may escape.
●Do not take any dishes out of the dishwasher
efore the end of the dishwashing cycle.
●After use, isolate the appliance from the
power supply and turn off the water supply.
●This product should e serviced only y an
authorised service engineer, and only
genuine spare parts should e used.
General safety
●Dishwasher detergents can cause chemical
urns to eyes, mouth and throat. Could
endanger life! Comply with the safety
instructions of the dishwasher detergent
manufacturer.
●The water in your dishwasher is not for
drinking. Detergent residues may still e
present in your machine.
●Ensure that the door of the dishwasher is
always closed when it is not eing loaded or
unloaded. In this way you will avoid any ody
tripping over the open door and hurting
themselves.
●Do not sit or stand on the open door.
Child safety
●This appliance is designed to e operated y
adults. Don’t allow children to use the
dishwasher unsupervised.
●Keep all packaging well away from children.
There is risk of suffocation.
●Keep all detergents in a safe place out of
children’s reach.
●Keep children well away from the dishwasher
when the door is open.
Installation
●Check your dishwasher for any transport
damage. Never connect a damaged
machine. If your dishwasher is damaged
contact your supplier.
●All packaging must e removed efore use.
●Any electrical and plum ing work required to
install this appliance must e carried out y
a qualified and competent person.
●For safety reasons it is dangerous to alter
the specifications or attempt to modify this
product in any way.
In the interest of your safety and to ensure the correct use, efore installing and first using the
appliance, read this user manual carefully, including its hints and warnings. To avoid unnecessary
mistakes and accidents, it is important to ensure that all people using the appliance are thoroughly
familiar with its operation and safety features. Save these instructions and make sure that they
remain with the appliance if it is moved or sold, so that everyone using it through its life will e
properly informed on appliance use and safety.
156999 58/0en 17-03-2006 14:09 Pagina 3
4
●Never use the dishwasher if the electrical
supply ca le and water hoses are damaged;
or if the control panel, work top or plinth area
are damaged such that the inside of the
appliance is freely accessi le. Contact your
local Service Force centre, in order to avoid
hazard.
●All sides of the dishwasher must never e
drilled to prevent damage to hydraulic and
electric components.
WARNING!
For electrical and water connection carefully
follow the instructions given in specific
paragraphs.
Control panel and functions
Function and pro ramme selection uttons
Di ital display
On/Off utton
Delay start utton
Pro ramme in pro ress light
Salt and rinse aid lights
IMPORTANT!
Always remem er that when performing
operations such as:
- selecting a washing programme,
- setting the water softener,
the appliance MUST e in setting mode:
●Press On/Off utton, ALL programme
selection utton lights are illuminated =
appliance in settin mode.
●Press On/Off utton, ONLY a programme
utton light is illuminated = last performed
pro ramme still set.
In this case the programme has to e
cancelled (see instructions “Cancel a
washing programme in progress”).
156999 58/0en 17-03-2006 14:09 Pagina 4
5
Pro ramme selection
uttons
●Startin the washin pro ramme:
1. Press the On/Off utton.
2. Press the utton corresponding to the required programme, the
corresponding light remains illuminated while the other programme
lights turn off. In the digital display will appear, flashing, the running
time of the programme (in minutes).
3. The pro ramme in pro ress light illuminates.
4. After a out 3 seconds from the last pressure of a utton the
programme starts automatically. In the digital display the running time
of the programme is no longer flashing and the pro ramme in
pro ress light remains illuminated.
IMPORTANT!
Once the programme has started, if you want to change the selection made
you must cancel the washing programme in progress.
●Cancel the washin pro ramme in pro ress:
1. Press and hold simultaneously function uttons 2and 3until ALL
programme utton lights will illuminate.
2. Release function uttons 2and 3.
3. Switch off the machine y pressing the On/Off utton or select a new
washing programme (check that there is detergent in the detergent
dispenser.
Function uttons
In addition to the dishwashing programme selection, the following functions
can also e set with the help of these
uttons.
- the setting of the water softener,
- the cancelling of a programme in
progress.
IMPORTANT!
It is possi le to select a washing programme and the delay start also with the door slightly
opened. In this case the start of the programme or the countdown will occur after the closure of
the door. Until that moment it is possi le to modify the set made.
156999 58/0en 17-03-2006 14:09 Pagina 5
6
Pro ramme in
pro ress light
Illuminates when the washing programme has een set.
When the delay start has een set, this light turns off and will come on again
once the countdown has elapsed and the washing programme has started.
Salt refillin
light
Illuminates when special salt needs to e filled.
It can remain illuminated several hours after the salt has een filled.
Delay start
utton
This option allows the start of the programme to e delayed from 1 to 19
hours. Before selecting the washing programme, press the On/Off utton
and then press the delay start utton until the flashing num er of the hours
for the delay start will appear in the digital display.
Select a washing programme, in the digital display will appear for a
moment, the running time of the programme and then again appears the
selected delay start time.
As soon as the num er of hours is displayed without flashing, the
countdown for the delay start is active.
Once the countdown has elapsed the washing programme will start
automatically.
●Cancel the delay start in pro ress:
To cancel a delay start in progress you have to reset the dishwasher;
follow the same instructions given in “Cancel the washing programme in
progress”.
IMPORTANT!
Cancelling a delay start involves also the cancelling of the washing
programme set. In this case you have to select the washing programme
again.
Rinse aid
refillin light Illuminates when rinse aid needs to e filled.
156999 58/0en 17-03-2006 14:09 Pagina 6
7
Pro ramme Use Cycle description
Pro ramme table
Auto Normal / Light soil. Prewash - Main wash
65°50° Crockery and cutlery 1 or 2 intermediate rinses
Final rinse - Dry
Intensive Heavy soil. Prewash - Main wash
70° Crockery, cutlery, pots and pans 2 intermediate rinses - Final rinse
Dry
Rinse and Any. Prewash
Hold Partial load (to e completed later in the
day). This programme does not require the
use of detergent.
30 min. Light soil. Main wash - Final rinse
Crockery and cutlery
Eco Normal soil. Prewash - Main wash
50° Crockery and cutlery 1 intermediate rinse - Final rinse
Dry
"AUTO" washin pro ramme
During the "AUTO" washing programme the
amount of soil on the dishes is determined y
how cloudy the water is.
If the appliance is partially loaded and the
dishes lightly soiled, the "prewash", "main
wash", and "rinse" phases of the programme
are shorter and the water consumption level is
lower.
If the appliance is fully loaded and the dishes
heavily soiled, the "prewash", "main wash", and
"rinse" phases of the programme are longer
and the water consumption level is higher.
For this reason the programme duration, water
and energy consumption levels can vary within
the stated range for AUTO programme (see
"Washing programmes chart").
During the "AUTO" programme the
temperature of the main wash water is also
automatically adjusted etween 50°C and
65°C depending on the amount of soil on the
dishes.
156999 58/0en 17-03-2006 14:09 Pagina 7
Before the first use
When usin separate special
(dishwasher) salt, rinse aid and
deter ent:
- set the water softener
- add special (dishwasher) salt
- fill up with rinse aid
When usin tablets that inte rate
rinse aid and deter ent:
there is no need to fill up with rinse aid
- set the water softener
- add special (dishwasher) salt
When usin tablets that inte rate
rinse aid, deter ent, salt function
and other additives:
there is no need to fill up with special salt or
rinse aid.
Check whether these detergents are suita le
for your water hardness. Follow the
manufacturers instructions.
- Set the water hardness to level 1.
IMPORTANT!
If the drying results are not satisfactory we
recommend that you:
1. Fill up the rinse aid dispenser with rinse aid.
2. Set the rinse aid dosage to position 2.
If you decide in future to use separated
detergents, we advise that you:
- Fill up the salt and rinse aid container.
- Adjust the water hardness setting to the
highest level and perform 1 normal washing
programme without loading any dishes.
- Adjust the water hardness setting according
to the hardness of the water in your area.
- Adjust the rinse aid dosage
8
Settin the water softener
The dishwasher is equipped with a water
softener designed to remove minerals and salts
from the water supply, which would have a
detrimental or adverse effect on the operation
of the appliance.
The softener should e adjusted according to
the hardness of the water in your area. Your
local Water Authority can advise you on the
hardness of the water in your area.
IMPORTANT!
The water softener must e set in oth ways:
manually and electronically.
156999 58/0en 17-03-2006 14:09 Pagina 8
9
1) Clarke degree, measure of the water hardness.
2) (°TH) French degree, measure of the water hardness.
3) (mmol/l) millimol per litre, international unit for water hardness
The water softener is factory set at position 2.
Settin the water softener manually (see table)
Set switch to position 1
or 2
64 - 88 91 - 125 9,0 - 12,5 2 level 10
53 - 63 76 - 90 7,6 - 8,9 2 level 9
46 - 52 65 - 75 6,5 - 7,5 2 level 8
36 - 45 51 - 64 5,1 - 6,4 2 level 7
28 - 35 40 - 50 4,0 - 5,0 2 level 6
18 - 22 26 - 32 2,6 - 3,2 1 level 4
5 - 12 7 - 18 0,7 - 1,8 1 level 2
23 - 27 33 - 39 3,3 - 3,9 2 level 5
13 - 17 19 - 25 1,9 - 2,5 1 level 3
< 5 < 7 < 0,7 1 level 1
no salt necessary
Water hardness Level indicated on Adjustment of the
the di ital display water hardness settin
Clarke1) in °TH2) in mmol/l3) manually electronically
factory
setting
156999 58/0en 17-03-2006 14:09 Pagina 9
10
Settin the water softener electronically (see table)
The dishwasher must
e switched off.
Switch on the
dishwasher y pressing
the On/Off utton.
The digital display
indicates the current
level.
To change the level,
press function utton 1.
Each time the utton is
pressed the level
increases. (For the
selection of the new
level see the chart).
The digital display
indicates the new level
set. (Level 1 follows
level 10).
To memorise the
operation, switch off the
dishwasher y pressing
the On/Off utton.
Press and hold
simultaneously function
uttons 2and 3until the
lights of function
uttons 1, 2and 3start
flashing.
Release the uttons
and then press function
utton 1; the lights of
function uttons 2and 3
turn off while function
utton 1goes on
flashing.
The water softener is factory set at position 5.
156999 58/0en 17-03-2006 14:09 Pagina 10
11
Fillin with dishwasher salt
Unscrew the cap. Only before fillin with
salt for the first time,
fill the salt container
with water
Using the funnel
provided, pour in the
salt until the container is
filled with salt.
Remove any trace of
salt. Replace the cap tightly
turning it clockwise until
it stops with a click.
CAUTION!
Use only special salt suita le for dishwashers
IMPORTANT!
Immediately start a complete programme.
IMPORTANT!
Top up the special salt when the light on
the control panel illuminates.
IMPORTANT!
Water will overflow from the container as salt is
added.
156999 58/0en 17-03-2006 14:09 Pagina 11
Fillin with rinse aid
12
Open the lid. Fill up with rinse aid.
The maximum level for
filling is indicated y
"max".
Clean up any rinse aid
which overflows. Close
the lid and press until it
locks.
CAUTION!
Never fill the rinse aid dispenser with any other
su stances (e.g. dishwasher cleaning agent, liquid
detergent). This would damage the appliance.
Adjustin the dosa e of rinse aid
Increase the dose if there are drops of water or
lime spots on the dishes after washing. Reduce the dose if there are whitish streaks
on the dishes or a luish film on glassware or
knife lades.
Open the lid. Set the dosage level.
(The dose is factory set
in position 4).
Close the lid and press
until it locks.
IMPORTANT!
Top up the rinse aid when the light on the
control panel illuminates.
156999 58/0en 17-03-2006 14:09 Pagina 12
13
Loadin cutlery and dishes
●The following items are not suita le for use
in the dishwasher:
- Cutlery with wooden, horn, china or
mother-of-pearl handles
- Plastic items that are not heat resistant
- Older cutlery with glued parts that are not
temperature resistant
- Bonded cutlery items or dishes
- Pewter or copper items
- Lead crystal glass
- Steel items prone to rusting
- Wooden platters
- Items made from synthetic fi res
●When loading the dishwasher, make sure
that you:
- Remove all left over food and de ris.
- Soften remnants of urnt food in pans
- Load hollow items such as cups, glasses,
pans, etc. with the opening downwards so
that water cannot collect in the container
or a deep ase.
-Dishes and items of cutlery must not lie
inside one another, or cover each other.
- To avoid damage to glasses, they must
not touch.
- Lay small o jects in the cutlery asket.
●Plastic items and pans with teflon have a
tendency to retain water drops; these
items will not dry as well as porcelain and
steel items.
IMPORTANT!
Before closing the door, ensure that the spray
arms can rotate freely.
Load cutlery.
For est results we
recommend you to use
the cutlery grid provided
(if the size and
dimensions of the
cutlery allow it.
Place knives and other
items of cutlery with
sharp points or edges
with their handles facing
upwards.
Risk of injury!
156999 58/0en 17-03-2006 14:09 Pagina 13
14
Load the lower asket.
Arrange serving dishes and large lids around the
edge of the asket.
The two rows of prongs
on the lower asket can
e easily lowered to
allow you to load pots,
pans and owls.
Load upper asket.
Light items (plastic
owls etc.) must e
loaded in the upper
asket and arranged so
they do not move.
For taller items, the cup
racks can e folded
upwards.
If plates are to be loaded in the upper
basket:
load them starting from the rear positions;
tilting them slightly forwards and avoiding the
front positions near the door.
Load cutlery.
For est results we
recommend you to use
the cutlery grid provided
(if the size and
dimensions of the
cutlery allow it.
Place knives and other
items of cutlery with
sharp points or edges
with their handles facing
upwards.
Risk of injury!
156999 58/0en 17-03-2006 14:09 Pagina 14
15
IMPORTANT!
Never lift or lower the asket on one side only
IMPORTANT!
When the asket is in the higher position you
will not e a le to use the cup racks.
To move to the hi her position proceed as
follows:
1. Pull out the asket until it stops.
2. Carefully lift oth sides upwards until the
mechanism is engaged and the asket is sta le.
To lower the basket to the ori inal position
proceed as follows:
1. Pull out the asket until it stops.
2. Carefully lift oth sides upwards and then allow
the mechanism to drop ack down slowly,
keeping hold of it.
Adjustin the hei ht of the upper basket
If washing very large plates you can load them in the lower asket after moving the upper asket
to the higher position.
Maximum hei ht of the dishes in:
upper basket lower basket
With upper asket raised 20 cm 31 cm
With upper asket lowered 24 cm 27 cm
156999 58/0en 17-03-2006 14:09 Pagina 15
16
Fillin with deter ent
IMPORTANT!
Only use detergents suita le for dishwashers.
O serve the manufacturer’s dosing and storage recommendations.
Open the lid.
For programmes with
prewash add an
additional detergent
dose in compartment B.
When using detergent
ta lets:
place detergent ta lets
in compartment A.
Close the lid.
Fill in the detergent in
compartment A. O serve the dosing
levels.
Unloadin the dishwasher
●Empty the lower asket first and then the
upper one; this will avoid water dripping from
the upper asket onto the dishes in the lower
one.
●Water may appear on the sides and the door
of the dishwasher as the stainless steel will
eventually ecome cooler than the dishes.
IMPORTANT!
Open the dishwasher’s door, leave it ajar and
wait a few minutes efore removing the
dishes; hot dishes are sensitive to knocks. In
this way they will e cooler and the drying will
e improved.
156999 58/0en 17-03-2006 14:09 Pagina 16
17
Cleanin and care
IMPORTANT!
NEVER use the dishwasher without filters.
Incorrect repositioning and fitting of the filters will produce poor washing results.
Cleanin the filters
IMPORTANT!
NEVER try to remove the spray arms.
If residues of soil have clogged the holes in the
upper spray arm, remove them with a
toothpick.
Clean filters A, Band C
thoroughly under
running water.
Turn the handle a out
1/4turn anticlockwise
and remove filters B
and C.
Remove filter Afrom the
ase of the washing
compartment.
Put the flat filter Aack
in the ase of the
washing compartment
and ensure that it fits
perfectly under the two
guides D.
Replace the filters and
lock y turning the
handle clockwise to the
stop.
The dishwasher must
e switched off
156999 58/0en 17-03-2006 14:09 Pagina 17
18
Environmental concerns
External cleanin
Clean the external surfaces of the machine and
control panel with a damp soft cloth. If
necessary use only neutral detergents. Never
use a rasive products, scouring pads or
solvent (acetone, trichloroethylene etc....).
Ensure that the seals around the door, the
detergent and rinse aid dispensers are cleaned
regularly with a damp cloth.
We recommend every 3 months to run a 65°C
wash programme without dishes using
detergent.
Prolon ed periods of non-operation
If you are not using the machine for any period
of time you are advised to:
1. Unplug the appliance and then turn off the
water.
2. Leave the door ajar to prevent the formation
of any unpleasant smells.
3. Leave the inside of the machine clean.
Frost precautions
Avoid placing the machine in a location where
the temperature is elow 0°C. If this is
unavoida le, empty the machine, close the
appliance door, disconnect the water inlet pipe
and empty it.
Movin the machine
If you have to move the machine (moving
house etc....):
1. Unplug it.
2. Turn the water tap off.
3. Remove the water inlet and discharge
hoses.
4. Pull the machine out together with the
hoses.
5. Only transport the dishwasher in an upright
position, otherwise salt water may run out.
Packa in material
The packaging materials are environmentally
friendly and can e recycled. The plastic
components are identified y markings, e.g.
>PE<, >PS<, etc. Please dispose of the
packaging materials in the appropriate
container at the community waste disposal
facilities.
WARNING!
When a unit is no longer eing used:
- Pull the plug out of the socket.
- Cut off the ca le and plug and dispose of
them.
- Dispose of the door catch.
This prevents children from trapping
themselves inside and endangering their
lives.
Old appliance
The sym ol on the product or on its
packaging indicates that this product may not
e treated as household waste. Instead it shall
e handed over to the applica le collection
point for the recycling of electrical and
electronic equipment. By ensuring this product
is disposed of correctly, you will help prevent
potential negative consequences for the
environment and human health, which could
otherwise e caused y inappropriate waste
handling of this product.
For more detailed information a out recycling
of this product, please contact your local city
office, your household waste disposal service
or the shop where you purchased the product.
156999 58/0en 17-03-2006 14:09 Pagina 18
19
Fault code / malfunction Possible cause Solution
Somethin not workin
The dishwasher does not fill with
water.
- continuous flashin of the
li ht of the runnin pro ramme
- appears in the di ital
display
The dishwasher will not drain.
- continuous flashin of the
li ht of the runnin pro ramme
- appears in the di ital
display
The water tap is locked or furred Clean the water tap.
with limescale.
The water tap is turned off. Turn the water tap on.
The filter (where present) in the . Clean the filter in the.
threaded hose fitting at the water threaded hose fitting.
inlet valve is locked.
The water inlet hose has not een Check the water inlet hose
correctly laid or it is ent or connection.
squashed.
The sink spigot is locked. Clean out the sink spigot.
The water drain hose has not een Check the water drain hose
correctly laid or it is ent or connection.
squashed.
- continuous flashin of the
li ht of the runnin pro ramme
- appears in the di ital
display
Anti-flood device is activated. Close the water tap and
contact your local Service
Force Centre.
The programme does not start.
The dishwasher door has not een Close the door
properly closed.
The main plug is not plugged in. Insert the mains plug
The fuse has lown in the household Replace the fuse.
fuse ox.
Delay start has een selected If dishes are to e washed
immediately, cancel the delay
start.
IMPORTANT!
The dishwasher will not start or stops during operation.
Certain pro lems are due to the lack of simple maintenance or oversights, which can e solved
with the help of the indications descri ed in the chart, without calling out an engineer.
Open the door and carry out the following suggested corrective actions.
IMPORTANT!
When carrying out the suggested corrective
actions the appliance must e switched off.
156999 58/0en 17-03-2006 14:09 Pagina 19
20
The wash results are not satisfactory
The dishes are not clean ●The wrong washing programme has een selected.
●The dishes were arranged in such a way as to stop water reaching all parts
of the surface. The askets must not e overloaded.
●The spray arm do not rotate freely due to incorrect arrangement of the load.
●The filters in the ase of the washing compartment are dirty or incorrectly
positioned.
●Too little or no detergent has een used.
●Where there are limescale deposits on the dishes; the salt container is
empty or the incorrect level of the water softener has een set.
●The drain hose connection is not correct.
●The salt container cap is not properly closed.
The dishes are wet and
dull
●Rinse aid was not used.
●The rinse aid dispenser is empty.
Water drops have dried
onto glasses and dishes
●Increase rinse aid dosing.
●The detergent may e the cause, Contact the detergent manufacturer’s
consumer care line.
There are streaks, milky
spots or a luish coating
on glasses and dishes
●Decrease rinse aid dosing.
If after all these checks, the pro lem persists,
contact your local Service Force Centre,
quoting the model (Mod.), product num er
(PNC) and serial num er (S.N.).
This information can e found on the rating
plate located on the side of the dishwasher
door (see picture).
So that you always have these num ers at
hand, we recommend you to make a note of
them here:
Mod. : . . . . . . . . . . . . . . . . . . . . . . . . . . . . . .
PNC : . . . . . . . . . . . . . . . . . . . . . . . . . . . . . .
S.N. :. . . . . . . . . . . . . . . . . . . . . . . . . . . . . . .
156999 58/0en 17-03-2006 14:09 Pagina 20

Other manuals for ZDF 501

1

Other Zanussi Electrolux Dishwasher manuals

Zanussi Electrolux ZDF 601 User manual

Zanussi Electrolux

Zanussi Electrolux ZDF 601 User manual

Zanussi Electrolux DE 6554 User manual

Zanussi Electrolux

Zanussi Electrolux DE 6554 User manual

Zanussi Electrolux ZSF 6128 User manual

Zanussi Electrolux

Zanussi Electrolux ZSF 6128 User manual

Zanussi Electrolux ZSF 6161 S User manual

Zanussi Electrolux

Zanussi Electrolux ZSF 6161 S User manual

Zanussi Electrolux ZSF 6150 User manual

Zanussi Electrolux

Zanussi Electrolux ZSF 6150 User manual

Zanussi Electrolux DE6344 User manual

Zanussi Electrolux

Zanussi Electrolux DE6344 User manual

Zanussi Electrolux DE 6754 User manual

Zanussi Electrolux

Zanussi Electrolux DE 6754 User manual

Zanussi Electrolux ZDF 121 User manual

Zanussi Electrolux

Zanussi Electrolux ZDF 121 User manual

Zanussi Electrolux ZSF 4111 User manual

Zanussi Electrolux

Zanussi Electrolux ZSF 4111 User manual

Zanussi Electrolux DCS 12 W User manual

Zanussi Electrolux

Zanussi Electrolux DCS 12 W User manual

Zanussi Electrolux ZDF 411 User manual

Zanussi Electrolux

Zanussi Electrolux ZDF 411 User manual

Zanussi Electrolux DA4442 User manual

Zanussi Electrolux

Zanussi Electrolux DA4442 User manual

Zanussi Electrolux DX 6452 User manual

Zanussi Electrolux

Zanussi Electrolux DX 6452 User manual

Zanussi Electrolux ZSF 6152 User manual

Zanussi Electrolux

Zanussi Electrolux ZSF 6152 User manual

Zanussi Electrolux DX 6453 User manual

Zanussi Electrolux

Zanussi Electrolux DX 6453 User manual

Zanussi Electrolux ZDS 231 User manual

Zanussi Electrolux

Zanussi Electrolux ZDS 231 User manual

Zanussi Electrolux DE 4855 User manual

Zanussi Electrolux

Zanussi Electrolux DE 4855 User manual

Zanussi Electrolux ZDF 601 User manual

Zanussi Electrolux

Zanussi Electrolux ZDF 601 User manual

Zanussi Electrolux ZSF 4123 S User manual

Zanussi Electrolux

Zanussi Electrolux ZSF 4123 S User manual

Zanussi Electrolux DE 6955 User manual

Zanussi Electrolux

Zanussi Electrolux DE 6955 User manual

Zanussi Electrolux DA4143 User manual

Zanussi Electrolux

Zanussi Electrolux DA4143 User manual

Zanussi Electrolux DE 6954 User manual

Zanussi Electrolux

Zanussi Electrolux DE 6954 User manual

Zanussi Electrolux ZSF 4126 User manual

Zanussi Electrolux

Zanussi Electrolux ZSF 4126 User manual

Zanussi Electrolux ZSF 4112 User manual

Zanussi Electrolux

Zanussi Electrolux ZSF 4112 User manual

Popular Dishwasher manuals by other brands

Asko DBI653IB operating instructions

Asko

Asko DBI653IB operating instructions

Sears Kenmore 14371 owner's manual

Sears

Sears Kenmore 14371 owner's manual

Asko D5883 operating instructions

Asko

Asko D5883 operating instructions

Wolkenstein WGSP15-8FI instruction manual

Wolkenstein

Wolkenstein WGSP15-8FI instruction manual

Fagor LFA-45X operating instructions

Fagor

Fagor LFA-45X operating instructions

Heartland HCDWIS User and installation instructions

Heartland

Heartland HCDWIS User and installation instructions

Electrolux GA60LVCN user manual

Electrolux

Electrolux GA60LVCN user manual

Washtech UL Operator's manual

Washtech

Washtech UL Operator's manual

Fisher & Paykel DishDrawer DD603 PREFINISHED user guide

Fisher & Paykel

Fisher & Paykel DishDrawer DD603 PREFINISHED user guide

Galanz GLDW09TS2A5A user manual

Galanz

Galanz GLDW09TS2A5A user manual

Tricity Bendix DH041 Instruction booklet

Tricity Bendix

Tricity Bendix DH041 Instruction booklet

Bosch SMS4ETW02E INFORMATION FOR USE

Bosch

Bosch SMS4ETW02E INFORMATION FOR USE

Inoksan BYM052 S user manual

Inoksan

Inoksan BYM052 S user manual

Zanussi ZDV14002FA user manual

Zanussi

Zanussi ZDV14002FA user manual

Haier DW45BI user manual

Haier

Haier DW45BI user manual

Hanseatic WQP12-T7735E user manual

Hanseatic

Hanseatic WQP12-T7735E user manual

AEG FSK62607P user manual

AEG

AEG FSK62607P user manual

Frigidaire FGID2479SF4A use & care

Frigidaire

Frigidaire FGID2479SF4A use & care

manuals.online logo
manuals.online logoBrands
  • About & Mission
  • Contact us
  • Privacy Policy
  • Terms and Conditions

Copyright 2025 Manuals.Online. All Rights Reserved.