MISC
Stacked Poles
Not all of the TRRS connectors have tabs. Some of the connectors have
stacked "poles" to solder to. Many of the steps for attaching them are
the same, but the process is a bit dierent. 1
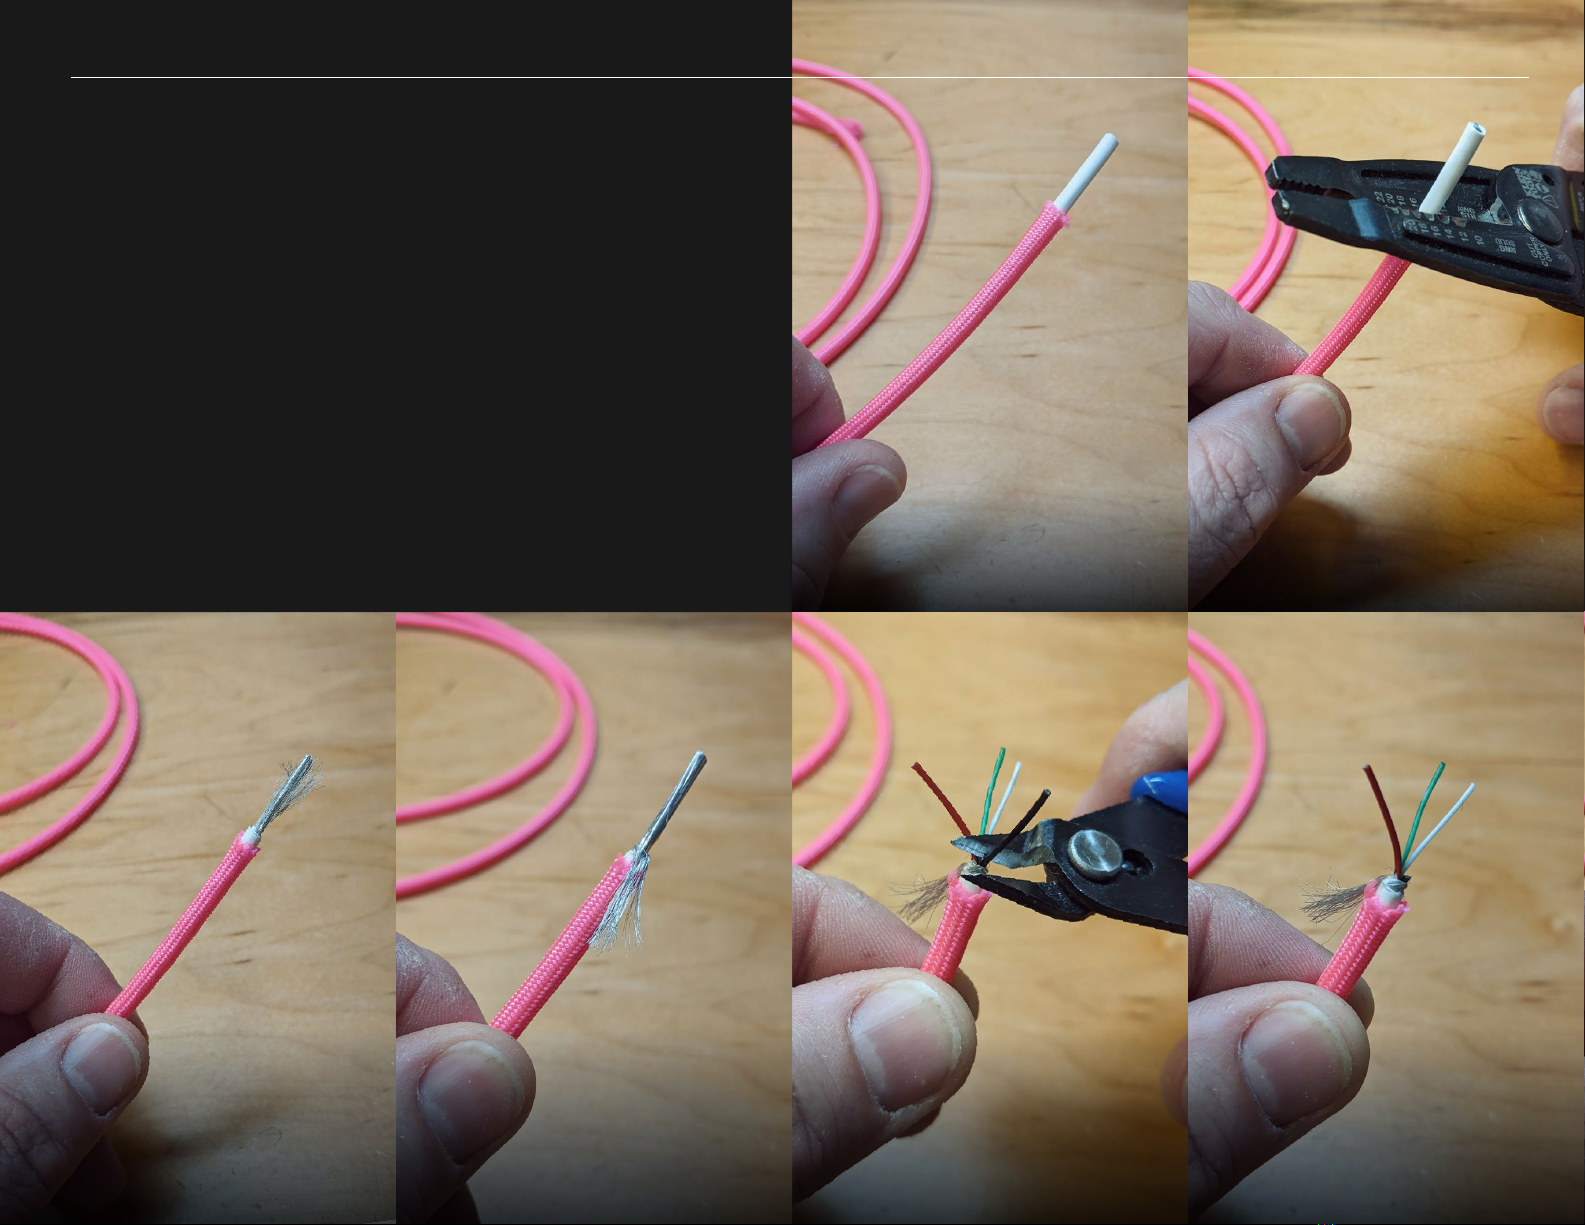
Prep the cable as covered previously.
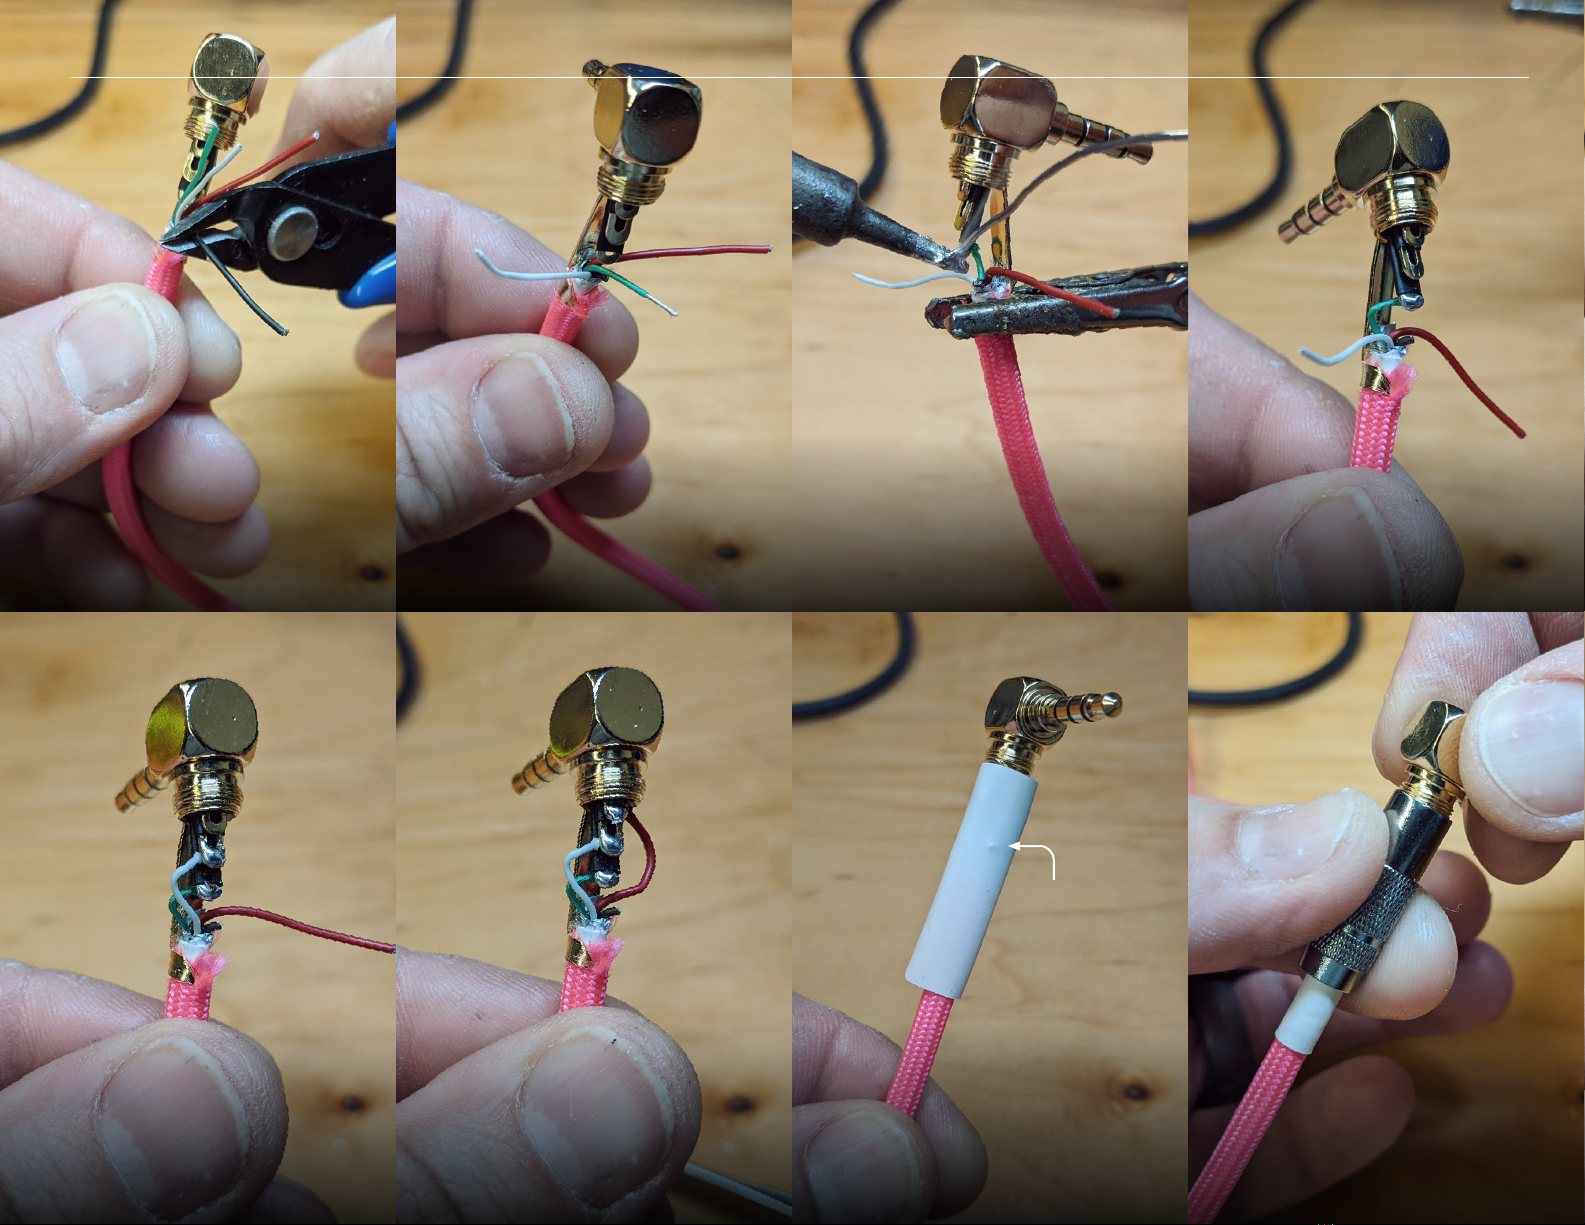
After you slide the barrel and heatshrink
on to the cable (don't forget!), Place
the connector onto the cable with the
clamps making solid contact with the
gathered shielding. The shielding needs
to make physical contact with the clamp
tab for proper shielding/grounding.
3
After you get them all tinned, inspect
your work. Make sure the plastic isn't
covering up the tinned soldering poles.
Cut away any loose "hairs" of melted
plastic.
5
Using tweezers, hold the conductor in
place and solder to pole. Keep in mind
you can heat this bottom pole from the
underside as well.
4
Strip, twist, tin, and trim the first
conductor. Start with the bottom-most
soldering pole. You will likely want to cut
this one relatively short to keep things
tidy. (Longer than shown here is fine.)
6
Inspect your work. This conductor was
worked a bit too much and lost some of
its insulation, but should still function
just fine. Watch out for exposed wire
like this making contact with other
exposed wires.
2
Tin each section of the pole. You will
likely melt some of the black insulation
plastic, but don't worry. Depending
on your soldering iron, the pole-style
connectors may require a higher heat
setting.
The poles are a mirror
image of the plug. The
bottom-most pole
connects to the tip.
Zap Cables Instructional Series DIY TRRS Cable Kit Guide