Zenoah G3800 User manual

G3800
G3800
OWNER’S MANUAL
CHAIN SAW
G
B
115 57 92-38 (302)
Original Language

G3800
EXPLANATION OF SYMBOLS AND SAFETY WARNINGS
Contents
1. For Safe Operation ................................................................... 3
2. Explanation of Symbols on the Machine .................................. 5
3. Installing Guide Bar and Saw Chain ......................................... 6
4. Fuel and Chain Oil .................................................................... 7
5. Operating the Engine ............................................................... 8
6. Sawing .................................................................................... 10
7. Maintenance ........................................................................... 11
8. Maintenance of Saw Chain and Guide Bar ............................ 12
9. Troubleshooting Guide ........................................................... 13
10. Disposal .................................................................................. 13
11. Specifications ......................................................................... 14
Read operator's instruction
book before operating this
machine.
Wear head, eye and ear
protection.
Use the chain saw
with two hands.
Warning! Danger of
kickback.
Read, understand and
follow all warnings. Never touch hot surface.
GB-2

G3800
1. For safe operation
WARNING
This chainsaw has been especially designed for tree
maintenance and should therefore only be used by
trained operators when working on trees.
1. Never operate a chain saw when you
are fatigued, ill, or upset, or under the
influence of medication that may
make you drowsy, or if you are under
the influence of alcohol or drugs.
2. Use safety footwear, snug fitting
clothing and eye, hearing and head
protection devices.
Use the vibration-proof glove.
3. Keep the saw chain sharp and the
saw, including the AV system, well
maintained. A dull chain will increase
cutting time, and pressing a dull
chain through wood will increase the
vibrations transmitted to your hands.
A saw with loose components or with
damaged or worn AV buffers will also
tend to have higher vibration levels.
4. Always use caution when handling
fuel. Wipe up all spills and then move
the chain saw at least 3 m from the
fueling point before starting the en-
gine.
5. Eliminate all sources of sparks or
flame (i.e. smoking, open flames, or
work that can cause sparks) in the
areas where fuel is mixed, poured,
or stored.
6. Do not smoke while handling fuel or
while operating the chain saw.
7. Do not allow other persons to be near
the chain saw when starting or cut-
ting. Keep bystanders and animals
out of the work area. Children, pets
and bystanders should be a minimum
of 10 m away when you start or oper-
ate the chain saw.
8. Never start cutting until you have a
clear work area, secure footing, and
a planned retreat path from the fall-
ing tree.
9. Always hold the chain saw firmly with
both hands when the engine is run-
ning. Use a firm grip with thumb and
fingers encircling the chain saw
handles.
10. Keep all parts of your body away from
the saw chain when the engine is run-
ning.
11. Before you start the engine, make
sure the saw chain is not contacting
anything.
12. Always carry the chain saw with the
engine stopped, the guide bar and
saw chain to the rear, and the muffler
away from your body.
13. Always inspect the chain saw before
each use for worn, Ioose, or dam-
aged parts. Never operate a chain
saw that is damaged, improperly ad-
justed, or is not completely and se-
curely assembled. Be sure that the
saw chain stops moving when the
throttle control trigger is released.
14. All chain saw service, other than the
items listed in the Owner’s Manual,
should be performed by competent
chain saw service personnel. (E.g.,
if improper tools are used to remove
the flywheel, or if an improper tool is
used to hold the flywheel in order to
remove the clutch, structural damage
to the flywheel could occur which
could subsequently cause the fly-
wheel to disintegrate.)
15. Always shut off the engine before
setting it down.
16. Use extreme caution when cutting
small size brush and saplings be-
cause slender material may catch the
saw chain and be whipped toward
you or pull you off balance.
17. When cutting a limb that is under ten-
sion, be alert for spring- back so that
you will not be struck when the ten-
sion in the wood fibers is released.
18. Never cut in high wind, bad weather,
when visibility is poor or in very high
or low temperatures. Always check
the tree for dead branches which
could fall during the felling operation.
19. Keep the handles dry, clean and free
of oil or fuel mixture.
GB-3
G
B

G3800
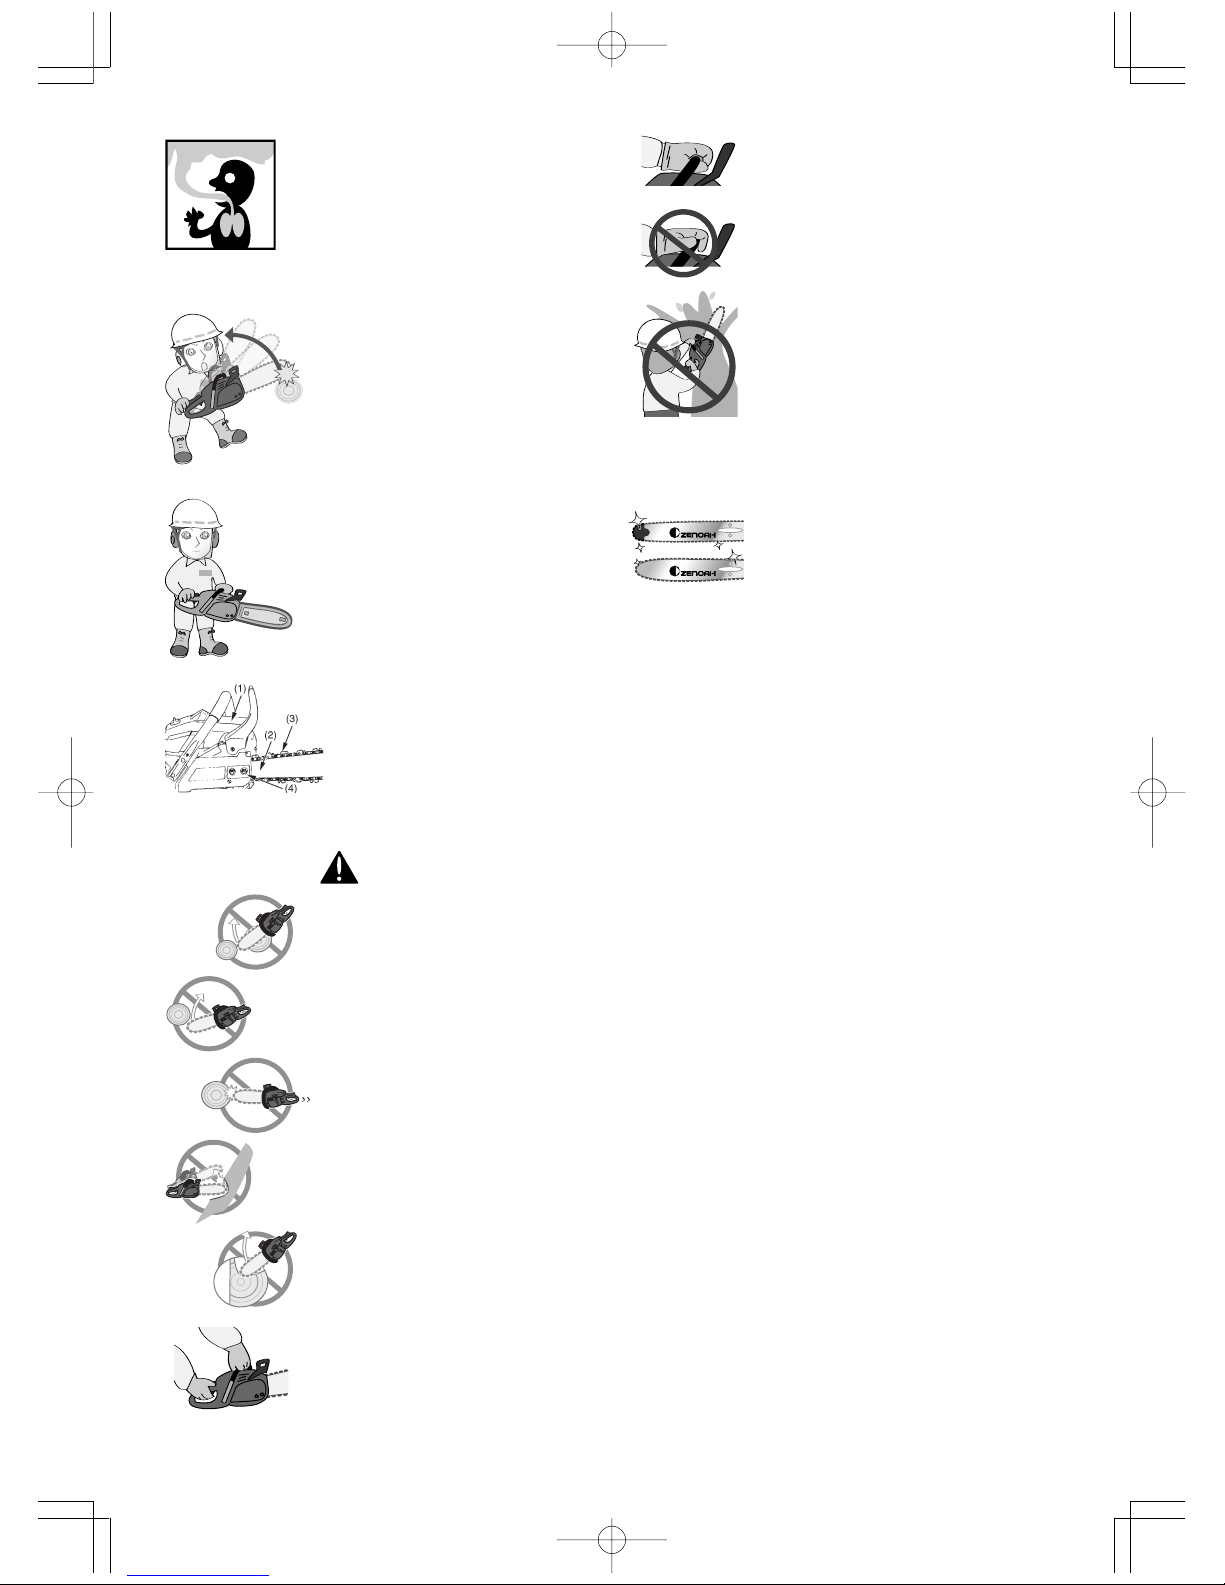
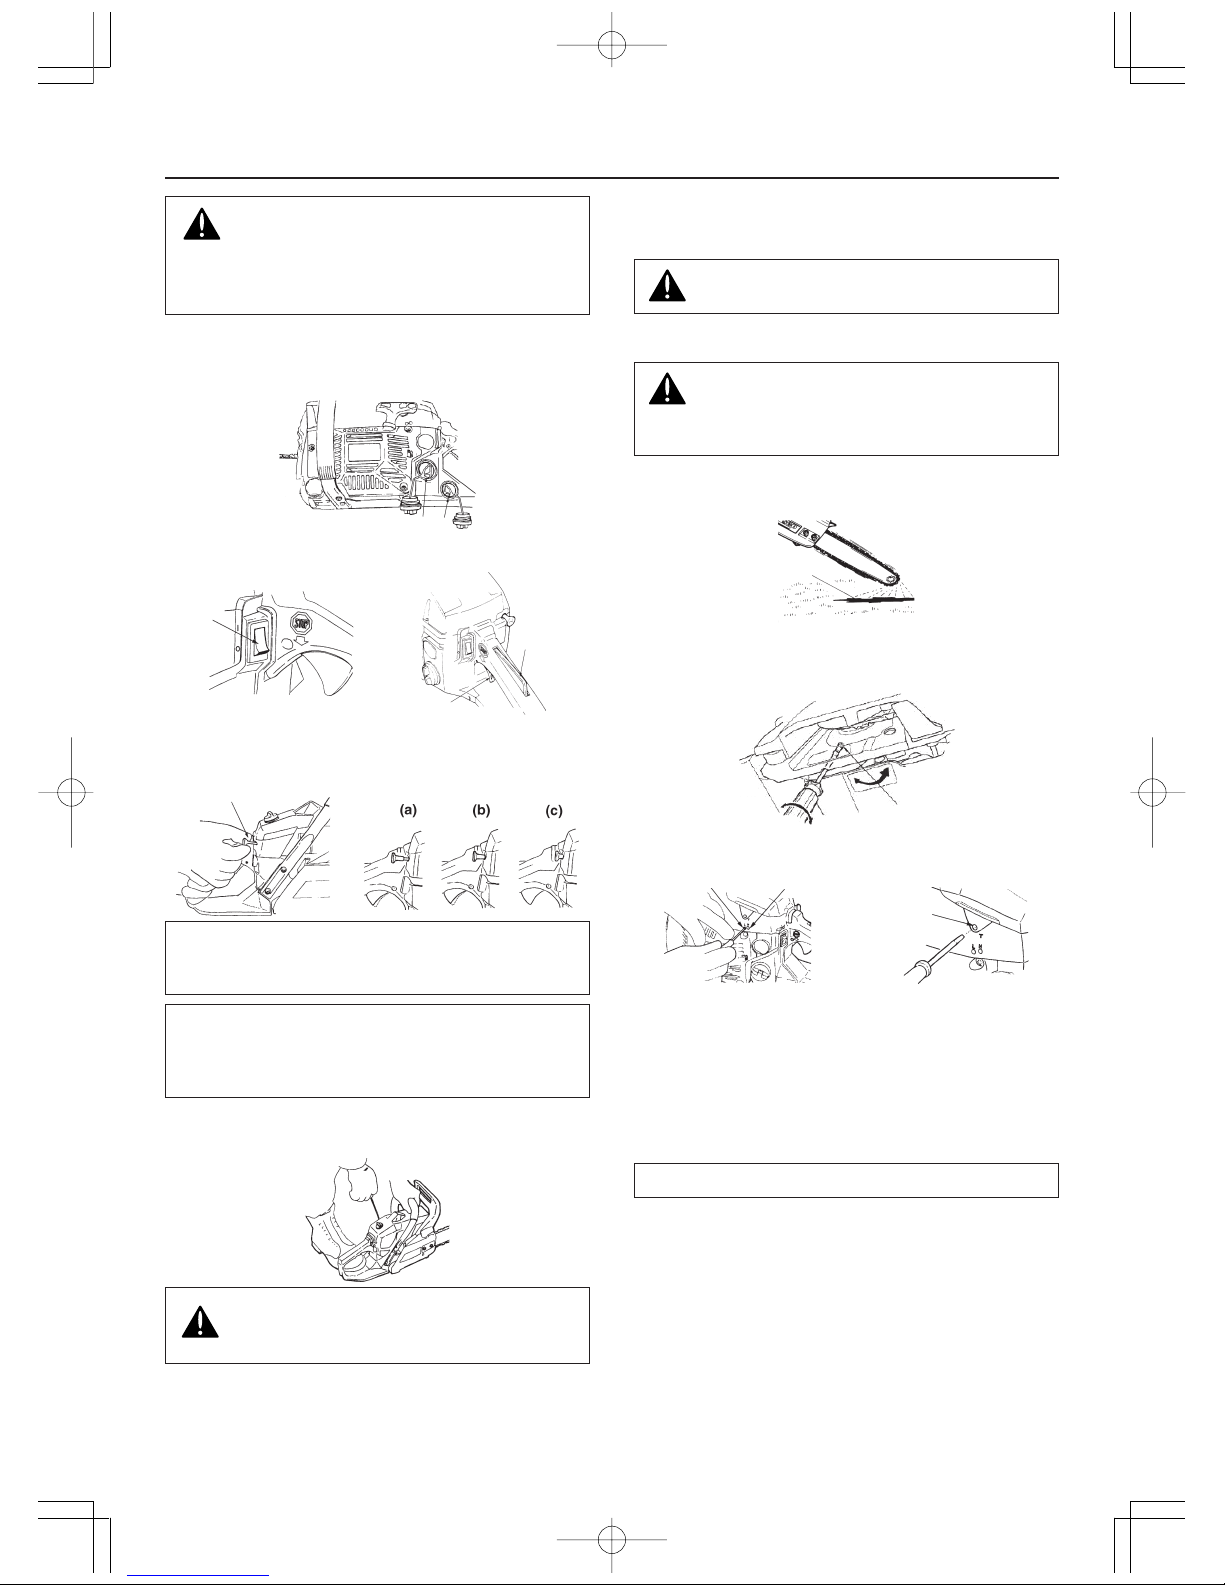
(1) cover (2) guide bar
(3) saw chain (4) nut
20. Operate the chain saw only in well
ventilated areas. Never start or run
the engine inside a closed room or
building and potentially explosive at-
mosphere. Exhaust fumes contain
dangerous carbon monoxide.
21. Do not operate the chain saw in a tree
unless specially trained to do so.
22. Guard against kickback. Kickback is
the upward motion of the guide bar
which occurs when the saw chain at
the nose of the guide bar contacts
an object. Kickback can lead to dan-
gerous loss of control of the chain
saw.
23. When transporting your chain saw,
make sure the appropriate guide bar
scabbard is in place.
24. Never touch the cover, guide bar, saw
chain or nut with bare hands while
the engine is in operation or immedi-
ately after shutting down the engine.
Doing so could result in serious burns
because of high temperature.
KICKBACK SAFETY PRECAUTIONS
FOR CHAIN SAW USERS
WARNING
•Kickback may occur when the nose
or tip of the guide bar touches an
object, or when the wood closes in
and pinches the saw chain in the cut.
Tip contact in some cases may cause
a lightning fast reverse
reaction,kicking the guide bar up and
back towards the operator. Pinching
the saw chain along the top of the
guide bar may push the guide bar
rapidly back towards the operator.
Either of these reactions may cause
you to Iose control of the saw, which
could result in serious personal injury.
•Do not rely exclusively on the safety
devices built into your saw. As a chain
saw user you should take several
steps to keep cutting jobs free from
accident or injury.
(1) With a basic understanding of kick-
back you can reduce or eliminate the
element of surprise. Sudden surprise
contributes to accidents.
(2) Keep a good grip on the saw with
both hands, the right hand on the rear
handle, and the left hand on the front
handle, when the engine is running.
Use a firm grip with thumbs and fin-
gers encircling the chain saw
handles. A firm grip will help you re-
duce kickback and maintain control
of the saw.
(3) Make certain that the area in which
you are cutting is free from obstruc-
tions. Do not let the nose of the guide
bar contact a log, branch, or any
other obstruction which could be hit
while you are operating the saw.
(4) Cut at high engine speeds.
(5) Do not overreach or cut above shoul-
der height.
(6) Follow the manufacturer’s sharpening
and maintenance instructions for the
saw chain.
(7) Only use replacement bars and
chains specified by the manufacturer
or the equivalent.
WORSE EFFECTS OF VIBRATION
If you continue to use high-vibration tools these
symptoms will probably get worse, for example:
•the numbness in your hands could become perma-
nent and you won’t be able to feel things at all;
•you will have difficulty picking up small objects such
as screws or nails;
•the vibration white finger could happen more fre-
quently and affect more of your fingers.
FOR PROTECTING YOUR BODY FROM VIBRATION
Please observe the following matter, in order to pro-
tect the health of your body.
1. Always use the right tool for each job (to do the job
more quickly and expose you to less hand-arm vi-
bration).
2. Check tools before using them to make sure they
have been properly maintained and repaired to avoid
increased vibration caused by faults or general wear.
3. Make sure cutting tools are kept sharp so that they
remain efficient.
4. Reduce the amount of time you use a tool in one go,
by doing other jobs in between.
5. Avoid gripping or forcing a tool or workpiece more
than you have to.
6. Store tools so that they do not have very cold handles
when next used.
7. Encourage good blood circulation by:
•keeping warm and dry (when necessary, wear
gloves, a hat, waterproofs and use heating pads if
available);
•giving up or cutting down on smoking because
smoking reduces blood flow; and massaging and
exercising your fingers
DISPOSAL
•When you dispose of the machine, do not disas-
semble the machine.
•When you dispose of the machine, fuel, chain oil,
be sure to follow your local regulations.
GB-4

G3800
2. Explanation of Symbols on the Machine
The port to refuel “MIX GASOLINE”
Position: Fuel cap
The port to top up chain oil
Position: Oil cap
Setting the switch to the “O” position, the engine stops immediately.
Position: Rear-left of the unit
Starting the engine. If you pull out the choke knob (at the back-right of
the rear handle) to the point of the arrow, you can set the starting mode
as follows:
•
First-stage position – starting mode when the engine is warm.
•
Second-stage position – starting mode when the engine is cold.
Position: Upper-right of the aircleaner cover
The screw under the “H” stamp is The High-speed adjustment screw.
The screw under the “L” stamp is The Slow-speed adjustment screw.
The screw at the left of the “T” stamp is the Idle adjustment screw.
Position: Left side of the rear handle
Shows the directions that the chain brake is released (white arrow) and
activated (black arrow).
Position: Front of the chain cover
If you turn the rod by screwdriver follow the arrow to the "MAX" position,
the chain oil flow more, and if you turn to the "MIN" position, less.
Position: Bottom of the power unit
For safe operation and maintenance, symbols are carved in relief on the
machine.
According to these indications, please be careful not to make any mistake.
GB-5
G
B

G3800
3. Installing Guide Bar and Saw Chain
A standard saw unit package contains the items as illustrated.
Open the box and install the guide bar and the saw
chain on the power unit as follows:
The saw chain has very sharp edges. Use
thick protective gloves for safety.
1. Pull the guard towards the front handle to check that
the chain brake is not engaged.
2. Loosen the nuts and remove the chain cover.
3. Gear the chain to the sprocket and, while fitting the
saw chain around the guide bar, mount the guide
bar to the power unit. Adjust the position of the chain
tensioner.
Note: Pay attention to the correct direction of the saw chain.
Tensioner nut
Chain cover
Moving direction
4. Fit the chain cover to the power unit and fasten the
nuts to finger tightness.
5. While holding up the tip of the bar, adjust the chain
tension by turning the tensioner screw until the tie
straps just touch the bottom side of the bar rail.
6. Tighten the nuts securely with the bar tip held up
(12 ~ 15 N·m). Then check the chain for smooth ro-
tation and proper tension while moving it by hand. If
necessary, readjust with the chain cover loose.
7. Tighten the tensioner screw.
Note: A new chain will expand its length in the beginning of use.
Check and readjust the tension frequently as a loose chain can
easily derail or cause rapid wear of itseif and the guide bar.
Power unit
Bar protector
Guide bar
Saw chain
Plug wrench
(Hexagon socket (S13/S19) +
Slotted driver)
Screwdriver for carburetor adjustment
(Slotted driver)
Tighten
Tensioner screw
Loosen
GB-6

G3800
G
B
GB-7
4. Fuel and Chain Oil

G3800
6. Allow the engine to warm up with the throttle lever
pulled slightly.
Keep clear of the saw chain as it will start
rotatIng upon starting of engine.
■ CHECKING THE OIL SUPPLY
Make sure to set up the bar and the chain
when checking the oil supply.
If not, the rotating parts may be exposed. It is
very dangerous.
After starting the engine, run the chain at medium speed
and see if chain oil is scattered off as shown in the figure.
The chain oil flow can be changed by inserting a screw-
driver in the hole on bottom of the clutch side. Adjust
according to your work conditions.
■ ADJUSTING THE CARBURETOR
The carburetor on your unit has been factory adjusted,
but may require fine tuning due to a change in operat-
ing conditions.
Before adjusting the carburetor, make sure that the pro-
vided air/fuel filters are clean and fresh and the fuel prop-
erly mixed.
When adjusting, take the following steps:
Note: Be sure to adjust the carburetor with the bar chain attached.
1. H and L needles are restricted within the number of
turn as shown below.
H needle : -1/4
L needle : -1/4
2. Start the engine and allow it to warm up in low speed
for a few minutes.
3. Turn the idle adjusting screw (T) counterclockwise
so that the saw chain does not turn. If the idling
speed is too slow, turn the screw clockwise.
4. Make a test cut and adjust the H needle for best
cutting power, not for maximum speed.
Note: When restarting immediately after stopping the engine, set
the Choke knob in the first-stage position (choke open and throttle
lever in the starting position).
Note: Once the choke knob has been pulled out, it will not return
to the operating position even if you press down on it with your
finger. When you wish to return the choke knob to the operating
position, pull out the throttle lever instead.
4. While holding the saw unit securely on the ground,
pull the starter rope vigorously.
Do not start the engine while the chain saw
hangs in one hand. The saw chain may touch
your body. This is very dangerous.
5. When engine has ignited, first push in the choke knob
to the first-stage position and then pull the starter
again to start the engine.
It is very dangerous to run a chainsaw that
mounts broken parts or lacks any parts.
Before starting engine, make sure that all the
parts including bar and chain are installed
properly.
■ STARTING THE ENGINE
1. Fill fuel and chain oil tanks respectively, and tighten
the caps securely.
2. Set the switch to “I” position.
3. Pull out the choke knob to the second-stage posi-
tion. The choke will close and the throttle lever will
then be set in the starting position.
5. Operating the Engine
Chain oil
Fuel
Switch
Throttle lever
Throttle
interlock
Choke knob
Chain oil
L needle H needle
Idle adjusting
screw
Rich Chain oil flow
adjusting
Lean
GB-8

G3800
■ CHAIN BRAKE
This machine is equipped with an automatic brake to
stop saw chain rotation upon occurrence of kickback
during saw cutting. The brake is automatically operated
by inertial force, which acts on the weight fitted inside
the front guard.
This brake can also be operated manually with the front
guard turned down to the guide bar.
To release the brake, pull up the front guard toward the
front handle till a “click” sound is heard.
[Caution]
Be sure to confirm brake operation during daily inspec-
tion.
How to confirm:
1) Turn off the engine.
2) Holding the chain saw horizontally, release your hand
from the front handle, hit the tip of the guide bar to a
stump or a piece of wood, and confirm brake op-
eration. Operating level varies by bar size.
In case the brake is not effective, ask our dealer for
inspection and repairs.
If the engine keeps rotating at high speed with the brake
engaged, the clutch will overheat causing trouble.
When the brake engages during operation, immediately
release the throttle lever to stop the engine.
■ STOPPING THE ENGINE
1. Release the throttle lever to allow the engine to idle
for a few minutes.
2. Set the switch to the “O” (STOP) position.
Carburetor anti-freeze mechanism
Operating chain saws in temperatures of 0 – 5°C at times of
high humidity may result in ice forming within the carburetor,
and this in turn may cause the output power of the engine to
be reduced or for the engine to fail to operate smoothly.
This product has accordingly been designed with a ven-
tilation hatch on the right side of the surface of the cyl-
inder cover to allow warm air to be supplied to the en-
gine and to thereby prevent icing from occurring.
Under normal circumstances the product should be
used in the normal operating mode, i.e., in the mode to
which it is set at the time of shipment. However when
the possibility exists that icing may occur, the unit should
be set to operate in the anti-freeze mode before use.
Please switch between modes in the repair specialty
store.
Continuing to use the product in the anti-freeze
mode even when temperatures have risen and
returned to normal, may result in the engine
failing to start properly or in the engine failing
to operate at its normal speed, and for this
reason you should always be sure to return
the unit to the normal operating mode if there
is no danger of icing occurring.
Normal operating mode Anti-freeze mode
Cylinder cover
“Sunshine” mark “Snow” mark
switch
GB-9
G
B

G3800
6. Sawing
•Before proceeding to your job,
read the section “For Safe
Operation”. It is recommended
to first practice sawing easy
logs. This also helps you get
accustomed to your unit.
•Always follow the safety regu-
lations. The chain saw must
only be used for cutting wood.
It is forbidden to cut other
types of material. Vibrations
and kickback vary with differ-
ent materials and the require-
ments of the safety regulations
would not be respected. Do
not use the chain saw as a le-
ver for lifting, moving or split-
ting objects. Do not lock it over
fixed stands. It is forbidden to
hitch tools or applications to
the PTO other than those
specified by the manufacturer.
•It is not necessary to force the saw into the
cut. Apply only light pressure while running the
engine at full throttle.
•When the saw chain is caught in the cut, do
not attempt to pull it out by force, but use a
wedge or a lever to open the way.
•If the guide bar and saw chain becomes
caught in wood while operating it, stop the
engine.
Do not pry the handle with excessive force.
Use a wedge to remove the chain instead.
■ GUARD AGAINST KICKBACK
•This saw is equipped with a chain
brake that will stop the chain in the
event of kickback if operating prop-
erly. You must check the chain brake
operation before each usage by run-
ning the saw at full the throttle for I -
2 seconds and pushing the front
hand guard forward. The chain
should stop immediately with the en-
gine at full speed. If the chain is slow
to stop or does not stop, replace the
brake band and clutch drum before
use.
•It is extremely important that the
chain brake be checked for proper
operation before each use and that
the chain be sharp in order to main-
tain the kickback safety level of this
saw. Removal of the safety devices,
inadequate maintenance, or incor-
rect replacement of the bar or chain
may increase the risk ot serious per-
sonal injury due to kickback.
■ FELLING A TREE
1. Decide the felling direction considering the wind,
lean of the tree, location of heavy branches, ease of
completing the task after felling and other factors.
2. While clearing the area around the tree, arrange a
good foothold and retreat path.
3. Make a notch cut one-third of the way into the tree
on the felling side.
4. Make a felling cut from the opposite side of the notch
and at a level slightly higher than the bottom of the
notch.
When you fell a tree, be sure to warn neigh-
boring workers of the danger.
Bucking and Limbing
•Always ensure your foothold. Do not stand
on the log.
•Be alert to the rolling over of a cut log. Es-
pecially when working on a slope, stand
on the uphill side of the log.
•Follow the instructions in “For Safe Opera-
tion” to avoid kickback of the saw.
Before starting work, check the direction of bending
force inside the log to be cut. Always finish cutting from
the opposite side of the bending direction to prevent
the guide bar from being caught in the cut.
Notch cut Felling cut
Felling direction
GB-10

G3800
3. Guide bar
When the guide bar is dismounted, remove sawdust in the bar
groove and the oiling port.
Grease the nose sprocket from the feeding port on the tip of
the bar.
4. Others
Check for fuel leakage and loose fastenings and damage to
major parts, especially handle joints and guide bar mounting.
If any defects are found, make sure to have them repaired
before operating the saw again.
■ PERIODICAL SERVICE POINTS
1. Cylinder fins
Dust clogging between the cylinder fins will cause overheat-
ing of the engine. Periodically check and clean the cylinder
fins in the repair specialty store.
7. Maintenance
Oiling port
Grease port
Sprocket
Oiling port
Before cleaning, the inspecting or repairing the unit,
make sure that engine has stopped and is cool.
Disconnect the spark plug to prevent accidental
starting.
■ MAINTENANCE AFTER EACH USE
1. Air filter
Dust on the cleaner surface can be removed by tapping a
corner of the cleaner against a hard surface. To clean dirt in
the meshes, split the cleaner into halves and brush in gaso-
line. When using compressed air, blow from the inside.
To assemble the cleaner halves, press the rim until it clicks.
Note: When installing the main filter, make sure that the grooves on the
filter edge are correctly fit with the projections on the cylinder cover.
2. Oiling port
Dismount the guide bar and check the oiling port for clogging.
A log lying on the ground
Saw down halfway, then roll the log over and cut from
the opposite side.
A log hanging off the ground
In area A, saw up from the bottom one-third and finish
by sawing down from the top. In area B, saw down from
the top one-third and finish by sawing up from the bot-
tom.
Cutting the limbs of Fallen Tree
First check to which side the limb is bent. Then make
the initial cut from the bent side and finish by sawing
from the opposite side.
Be alert to the springing back of a cut limb.
Pruning of Standing Tree
Cut up from the bottom, finish down from the top.
•Do not use an unstable foothold or ladder.
•Do not overreach.
•Do not cut above shoulder height.
•Always use both your hands to hold the
saw.
GB-11
G
B

G3800
3. Spark plug
Clean the electrodes with a wire brush and reset the gap to
0.65 mm as necessary.
4. Sprocket
Check for cracks and for excessive wear interfering with the
chain drive. If the wear is considerable, replace it with new
one. Never fit a new chain on a worn sprocket, or a worn chain
on a new sprocket.
Fuel filter
8. Maintenance of Saw Chain and Guide Bar
Appropriate gauge checker
Make the shoulder round
Depth gauge standard
■ Saw Chain
It is very important for smooth and safe op-
eration to always keep the cutters sharp.
The cutters need to be sharpened when:
• Sawdust becomes powder-like.
•You need extra force to saw in.
•Thecut path does not go straight.
•Vibration increases.
•Fuel consumption increases.
Cutter setting standards:
Be sure to wear safety gloves.
Before filing:
•Make sure the saw chain is held securely.
•Make sure the engine is stopped.
• Use a round file of proper size for the chain.
Chain type: 91VG 91PX
File size: 5/32 in (4.0 mm)
0.025″(0.64 mm)
Place the file on the cutter and push straight forward.
Keep the file position as illustrated.
After each cutter has been filed, check the depth gauge
and file it to the proper level as illustrated.
0.6 ~ 0.7 mm
2. Fuel filter
(a) Using a wire hook, take out the filter from the filler port.
(b) Disassemble the filter and wash with gasoline, or replace
with a new one if needed.
Note:
•After removing the filter, use a pinch to hold the end of the suction pipe.
•When assembling the filter, take care not to allow filter fibers or dust
inside the suction pipe.
Champion
RCJ-7Y
GB-12

G3800
9. Troubleshooting Guide
Case 1. Starting failure
Make sure the icing prevention system is not
working.
Check fuel for water
or substandard mix-
ture.
Replace with proper
fuel.
Check for engine
flooding.
Check spark ignition.
Remove and dry the
spark plug.
Then pull the starter
again with no choke.
Replace with a new
plug.
Case 2. Lack of power/Poor acceleration/
Rough idling
Case 3. Oil does not come out
Check fuel for water
or substandard mix-
ture.
Check air filter and
fuel filter for clog-
ging.
Check carburetor
for inadequate ad-
justment.
If the unit seems to need further service, please consult
with an authorized service shop in your area.
Replace with proper
fuel.
Clean.
Readjust speed
needles.
Check oil for sub-
standard quality.
Check oil passage
and ports for clog-
ging.
Replace.
Clean.
a
d
d
a
a
d
d
a
a
a
d
a
a
Be sure to round off the front edge to reduce
the chance of kickback or tie-strap breakage.
Make sure every cutter has the same length and edge
angles as illustrated.
■ Guide Bar
•Reverse the bar occasionally to prevent partial wear.
•The bar rail should always be square. Check for wear
of the bar rail. Apply a ruler to the bar and the out-
Cutter length
Filing angle
Side plate angle
Top plate cutting angle
Ruler
Gap
No gap
Chain tilts
side of a cutter. If a gap is observed between them,
the rail is normal. Otherwise, the bar rail is worn.
Such a bar needs to be corrected or replaced.
WARNING:
This saw is equipped with one of the following low
kickback bar/chain combinations:
Zenoah Part Number
Bar Size
Guide Bar
Saw Chain
91VG 91PX
14
848-CB2-4G24
2931-52210 580 70 35-03
16
3608-52113 2932-52210 580 70 35-04
10. Disposal
•When you dispose of the machine, do not disas-
semble the machine.
•When you dispose of the machine, fuel, chain oil,
be sure to follow your local reguations.
91VG 60°
91PX 55°
GB-13
G
B

G3800
11. Specifications
Power unit:
Displacement (cm3): ............................................. 37.2
Fuel: ................ Mixture (Gasoline 50 : Two-cycle oil 1)
(when using ZENOAH genuine oil)
Fuel tank capacity (cm3): ....................................... 310
Chain oil: ................................. Motor oil SAE# 10W-30
Oil tank capacity (cm3): .......................................... 210
Carburetor: ......................................... Diaphragm type
lgnition system: .............................................. Pointless
Spark plug:......................................Champion RCJ-7Y
Oil feeding system: ............................ Automatic pump
Power ........................................ 1.71/10,000 (kw/min-1)
Max speed ............................................. 12,500 (min-1)
Idle speed ................................................ 2,900 (min-1)
Sprocket (Teeth x Pitch): ................................ 6T x 3/8″
Dimensions (L x W x H) (mm): ............ 370 x 235 x 270
Limited warranty
Should any failure occur on the product under normal
operating conditions within the applicable warranty pe-
riod, the failed part will be replaced or repaired free of
charge by a ZENOAH authorized dealer.
WARRANTY PERIOD: 1 year (6 months if used profes-
sionally, and 30 days if used for rental purpose) from
the date of initial purchase.
THE PURCHASER SHALL BEAR COSTS OF TRANS-
PORTING THE UNIT TO AND FROM THE ZENOAH
DEALER.
THE PURCHASER SHALL NOT BE CHARGED FOR DI-
AGNOSTIC LABOR WHICH LEADS TO THE DETERMI-
NATION THAT A WARRANTED PART IS DEFECTIVE, IF
THE DIAGNOSTIC WORK IS PERFORMED AT THE
ZENOAH DEALER.
THE PURCHASER OR OWNER IS RESPONSIBLE FOR
THE PERFORMANCE OF THE REQUIRED MAINTE-
NANCE AS DEFINED BY THE MANUFACTURER IN THE
OWNER/OPERATOR MANUAL.
ANY WARRANTED PART WHICH IS NOT SCHEDULED
FOR REPLACEMENT AS REQUIRED MAINTENANCE,
OR WHICH IS SCHEDULED ONLY FOR REGULAR IN-
SPECTION TO THE EFFECT OF REPAIR OR “REPLACE
AS NECESSARY” SHALL BE WARRANTED FOR THE
WARRANTY PERIOD. ANY WARRANTED PART WHICH
IS SCHEDULED FOR REPLACEMENT AS REQUIRED
MAINTENANCE SHALL BE WARRANTED FOR THE
PERIOD OF TIME UP TO THE FIRST SCHEDULED
REPLACEMENT POINT FOR THE PART.
ANY REPLACEMENT PART THAT IS EQUIVALENT IN
PERFORMANCE AND DULABILITY MAY BE USED IN
NON-WARRANTY MAINTENANCE OR REPAIRS, AND
SHALL NOT REDUCE THE WARRANTY OBLIGATION
OF THE COMPANY.
THE COMPANY IS LIABLE FOR DAMAGES TO OTHER
ENGINE COMPONENTS CAUSED BY THE FAILURE OF
A WARRANTED PART STILL UNDER WARRANTY.
THE WARRANTY DOES NOT APPLY TO THOSE UNITS
WHICH HAVE BEEN DAMAGED BY NEGLIGENCE OF
INSTRUCTION LISTED IN THE OWNER/OPERATOR
MANUAL FOR PROPER USE AND MAINTENANCE OF
THE UNITS ACCIDENT MISHANDLING, ALTERATION,
ABUSE, IMPROPER LUBRICATION, USE OF ANY
PARTS OR ACCESSORIES OTHER THAN THOSE
SPECIFIED BY THE COMPANY, OR OTHER CAUSES
BEYOND THE COMPANY'S CONTROL.
THIS WARRANTY DOES NOT COVER THOSE PARTS
REPLACED BY NORMAL WEAR OR HARMLESS
CHANGES IN THEIR APPEARANCE.
THERE ARE NO OTHER EXPRESS WARRANTIES.
IMPLIED WARRANTIES INCLUDING THOSE OF MER-
CHANTABILITY AND FITNESS FOR A PARTICULAR
PURPOSE ARE LIMITED TO TWO (2) YEARS OF HOME
USE [ONE (1) YEAR FOR ANY OTHER USE] FROM THE
ORIGINAL DELIVERY DATE.
LIABILITIES FOR INCIDENTAL OR CONSEQUENTIAL
DAMAGE UNDER ANY AND ALL WARRANTIES ARE
EXCLUDED.
IF YOU NEED TO OBTAIN MORE INFORMATION,
PLEASE CALL YOUR NEAREST SERVICE CENTER, OR
CHECK PLEASE ZENOAH WEB SITE http://
www.zenoah.net
Dry weight
Power unit only (kg): ............................................... 4.2
Cutting head:
Guide bar
Type: ................................................ Sprocket nose
Size (in. (mm)): ............................ 14 (350), 16 (400)
Saw chain
Type: ....................................... Oregon 91VG. 91PX
Pitch (in. (mm)):........................................ 3/8 (9.53)
Gauge (in. (mm)):................................... 0.05 (1.27)
Specifications are subject to change wihout notice.
GB-14
Other manuals for G3800
4
Table of contents
Other Zenoah Chainsaw manuals

Zenoah
Zenoah G3200 Owner's manual

Zenoah
Zenoah G415AVS User manual

Zenoah
Zenoah G320AV Guide

Zenoah
Zenoah G3800 User manual

Zenoah
Zenoah G500AVS User manual

Zenoah
Zenoah G4500 User manual

Zenoah
Zenoah GZ3500T User manual

Zenoah
Zenoah G4501 User manual

Zenoah
Zenoah G2501 User manual

Zenoah
Zenoah GZ400 User manual

Zenoah
Zenoah GZ3700EZ User manual

Zenoah
Zenoah G3400 User manual

Zenoah
Zenoah G3700 User manual

Zenoah
Zenoah G4100 User manual

Zenoah
Zenoah GZ4350 User manual

Zenoah
Zenoah GZ4350 Instruction manual

Zenoah
Zenoah GZ4000 Manual

Zenoah
Zenoah G3200 Manual

Zenoah
Zenoah G3800/G3800EZ User manual

Zenoah
Zenoah G4101 User manual