Zenza Bronica GS-1 User manual

Congratulations on your choice of the Zenza Bronica GS-1, a lens shutter type single reflex camera in the 6
x 7 format.
The GS-1 provides the professional user with a lightweight and compact 6 x 7 format single lens reflex of
extremely useful versatility and multi-functional performance, which is based on the history and experience
gained in the development of the Zenza Bronica ETRS and SQ-A single lens reflexes, as well as the latest
technological advances in the electronic field.
The GS-1 has been developed as a full-scale system camera, with a wide range of versatile accessories and
especially with complete film back interchangeability which gives it multi-format capability for use in a
wide field of applications, including commercial photography, news photography, scientific photography,
etc., as well as giving this 6 x 7 format single reflex versatility equal to the 35mm single reflex camera.
Although instructions following are based on the GS-1 camera main body, the Zenzanon-PG 100mm lens
and the Film Back GS 120, the choice of the finder is left to the discretion of the photographer who should
also read the instructions for the finder chosen. The choice of lens, film back and finder should be based on
the type of assignment contemplated by the user.
To obtain best results from the Zenza Bronica GS-1, may we suggest that you read this instruction manual
through carefully, before you even touch the camera, as your pleasure in using the camera will be even
greater if you thoroughly familiarize yourself with its working parts before loading your first roll of film.
1
GS-1

Specifications of the Zenza Bronica GS-1
Parts of the Zenza Bronica GS-1
1. Loading the Battery
2. Main Switch
3. Finder Display and Battery Checking
4. Attachment and Removal of Film Backs
5. Construction of Film Back
6. Film Loading
7. Film Speed Dial
8. Exposure Counter
9. Film Type Indicator Frame
10. Exposure Counter
11. Film Winding/Shutter Cocking
12. Film Unloading
13. Setting the Shutter Speed Dial
14. Shutter Release Button
15. Time (T) Exposure
16. Exchanging Lenses
17. Interchanging Finders
18. Setting the Aperture Ring
19. Focusing Adjustments
20. Distance Scale and Depth of Field Scale
21. Infrared Photography
22. Flash Photography
23. Multiple Exposures
24. Mirror Lock-Up
25. Remote Control Operations
26. Interchanging Focusing Screens
27. Removal and Attachment of the Film Winding Crank Assembly
28. Attachment of Neck Strap
29. Facts about the Battery
30. Pointers on Shooting
31. Care of the Zenza Bronica GS-1
32. Depth of Field Tables
33. Specifications of Zenzanon-PG Lenses
Contents Page
3, 4
5
6
6, 7
7, 8
8, 9
10, 11
11
11
12
12
12
13
13, 14
14
15
15
16
16, 17
17
17
18
18
19
19, 20
20
21
22
22
2

Type 6 x 7cm format lens, shutter single lens reflex
camera with interchangeable lens, film back,
finder and focusing screen systems.
Frame Size 55.6 x 69.0mm (4:5 ratio matching the size of
the photographic paper.)
Film 120 roll film; 220 roll film; 135 roll film in film
cartridges; and Polaroid Land Pack films (with
exclusive film backs required for each film
type.)
Standard Lens Zenzanon-PG 100mm F3.5; interchangeable
type; six elements in four groups; multi-layer
anti-reflection coated; 48 degree angle of
view; F22 minimum aperture; and minimum
0.75m focusing distance.
Filter Size 72mm diameter on 100mm F3.5 standard
lens.
Lens Mount Bronica GS mount (exclusive four-claw bayo-
net.)
Focusing Adjustment Helical focusing system built into each lens.
Lens Diaphragm Fully automatic instant reopening lens
diaphragm; ½ stop increments; equal-distant
aperture scale graduations.
Shutter Electronic control SEIKO #0 between-lens leaf
shutter; shutter speeds from 16 sec. to 1/500
sec., without intermediate settings, plus T
(time exposure), B (bulb) and A (automatic
exposure.)
Shutter Release Electro-magnetic shutter release system; also
has electro-magnetic cable release system.
Film Winding Film winding crank, with one full forward rev-
olution or ratcheted winding action.
Multiple Exposure Multiple exposures possible with multiple
exposure lever on camera body.
Mirror Lock-up Continuous mirror lock-up possible with mir-
ror lock-up lever on camera body.
3
Specifications of the ZENZA BRONICA GS-1

Film Back Daylight loading interchangeable type; exclu-
sive film backs for 120 and 220 roll films (6 x
7, 6 x 6 and 6 x 4.5 formats) and Polaroid
Land Pack film; with ASA/ISO film speed dial
and exposure compensation dial (coupling to
finders with built-in exposure meter.
Finder Interchangeable type; shows 94% of the
actual field of view (which does not change
upon exchanging finders.)
Focusing Screen Interchangeable type; standard type, sup-
plied with camera, has full-area matte screen.
Finder Indications Shutter speed, etc., is shown at the top of the
finder area, outside the screen area; 5 digits, 7
segments and dot indication, depending on
the finder attached.
Flash Synchronization X-setting (for all speeds up to 1/500 sec.)
Battery Checking Steady illumination or flickering of shutter
speed display in finder, with half-stroke of the
shutter release button.
Battery Single 6 volt silver oxide or alkaline-man-
ganese battery.
Dimensions 106.5 (wide) x 99 (high) x 80 (long) mm- GS-1
main bodies only.
106.5 (wide) x 116 (high) x 196.5 (long) mm-
GS-1, with standard 100mm lens, Film Back
GS 120 and Waist-level Finder G.
Weight 630 grams (GS-1 main body only, without
battery.)
1,830 grams (GS-1, with standard 100mm
lens, Film Back GS 120 and Waist-level Finder
G, but without battery.)
*The above specifications are subject to change without prior notice.
4
Specifications of the ZENZA BRONICA GS-1 (con’t)

5
Parts of the ZENZA BRONICA GS-1
Film Winding Crank
Finder release button
Shutter speed dial lock button
Depth of field preview lever
Main switch
Lens release button
Neck strap eyelet
Electro-magnetic cable
release socket
Film back release
button
Dark slide slit
Film plane mark
Multiple exposure lever
Neck strap eyelet
Back cover release button (bottom)
Back cover release button (top)
Focusing ring
Flash synch socket
Shutter speed scale
window
Shutter speed dial
AE finder contacts
Mirror lock-up lever
Screen removal lever
(left)
Shutter release button
Spool holder
Film winding crank
assembly release lever
Screen removal lever
(right)
ASA/ISO film speed
contacts
Manual film winder
LED display plate
Time exposure
lever release
Aperture ring
Depth of field scale
Lens alignment dot
Distance scales
Film winding
coupler
Accessory contacts
Accessory guide sockets
Exposure compensation dial
Exposure counter window
Film type indicator frame
ASA/ISO film
speed dial lock
button
ASA/ISO film
speed scale
Battery chamber
button
Battery chamber
cover
Tripod socket
Time exposure lever
Exposure compensation dial lock button
Film widing crank assembly

The electronically controlled shutter and, of course, the electro-magnetic shutter release system will not
work without loading the battery. Use one 6 volt silver oxide battery or alkaline-manganese battery.
* The battery may be obtained at any photographic equipment or electrical appliance shop.
A. Depress the battery chamber button with your finger and, at the
same time, move the battery chamber cover in the arrow-indicated
direction. The cover will come off quite easily.
6
1. Loading the Battery
B. Coincide the plus (+) and minus (-) marks on the battery with simi-
lar polarity indications in the battery chamber. Then, push in the bat-
tery. Insert the battery chamber cover into the BATTERY end first and
then move the cover in the other direction until it locks.
* The shutter will not operate when the battery is loaded with polari-
ty marks reserved.
The main switch is located on the upper left side of the main body.
There will be no operation unless the main switch is pushed down
(i.e., switched ON).
* There is no power consumption, even with the main switch ON.
However, the battery life will be shortened when the shutter release
is stroked half-way and the shutter speed display lights up steadily or
flickers. Therefore, switch OFF (push up) the main switch when you
are not planning to use the camera for some time.
2. Main Switch
A. A LED display located over the top center of the focusing
screen shows the shutter speed, which is viewed laterally
reversed with the waist-level finder. Since the LED display dif-
fers with the finder in use, please read the instructions sup-
plied with the finder for correct usage and reading.
3. Finder Display and Battery Checking

B. Turn ON the main switch and then stroke the shutter release but-
ton halfway. If the LED display in the finder lights up steadily or flick-
ers, as the case may be, the battery is loaded properly and there is
sufficient power for operation.
* If the LED display does not light up steadily or does not flicker, (1)
the battery is not loaded properly or (2) the battery is completely
drained and should be exchanged.
7
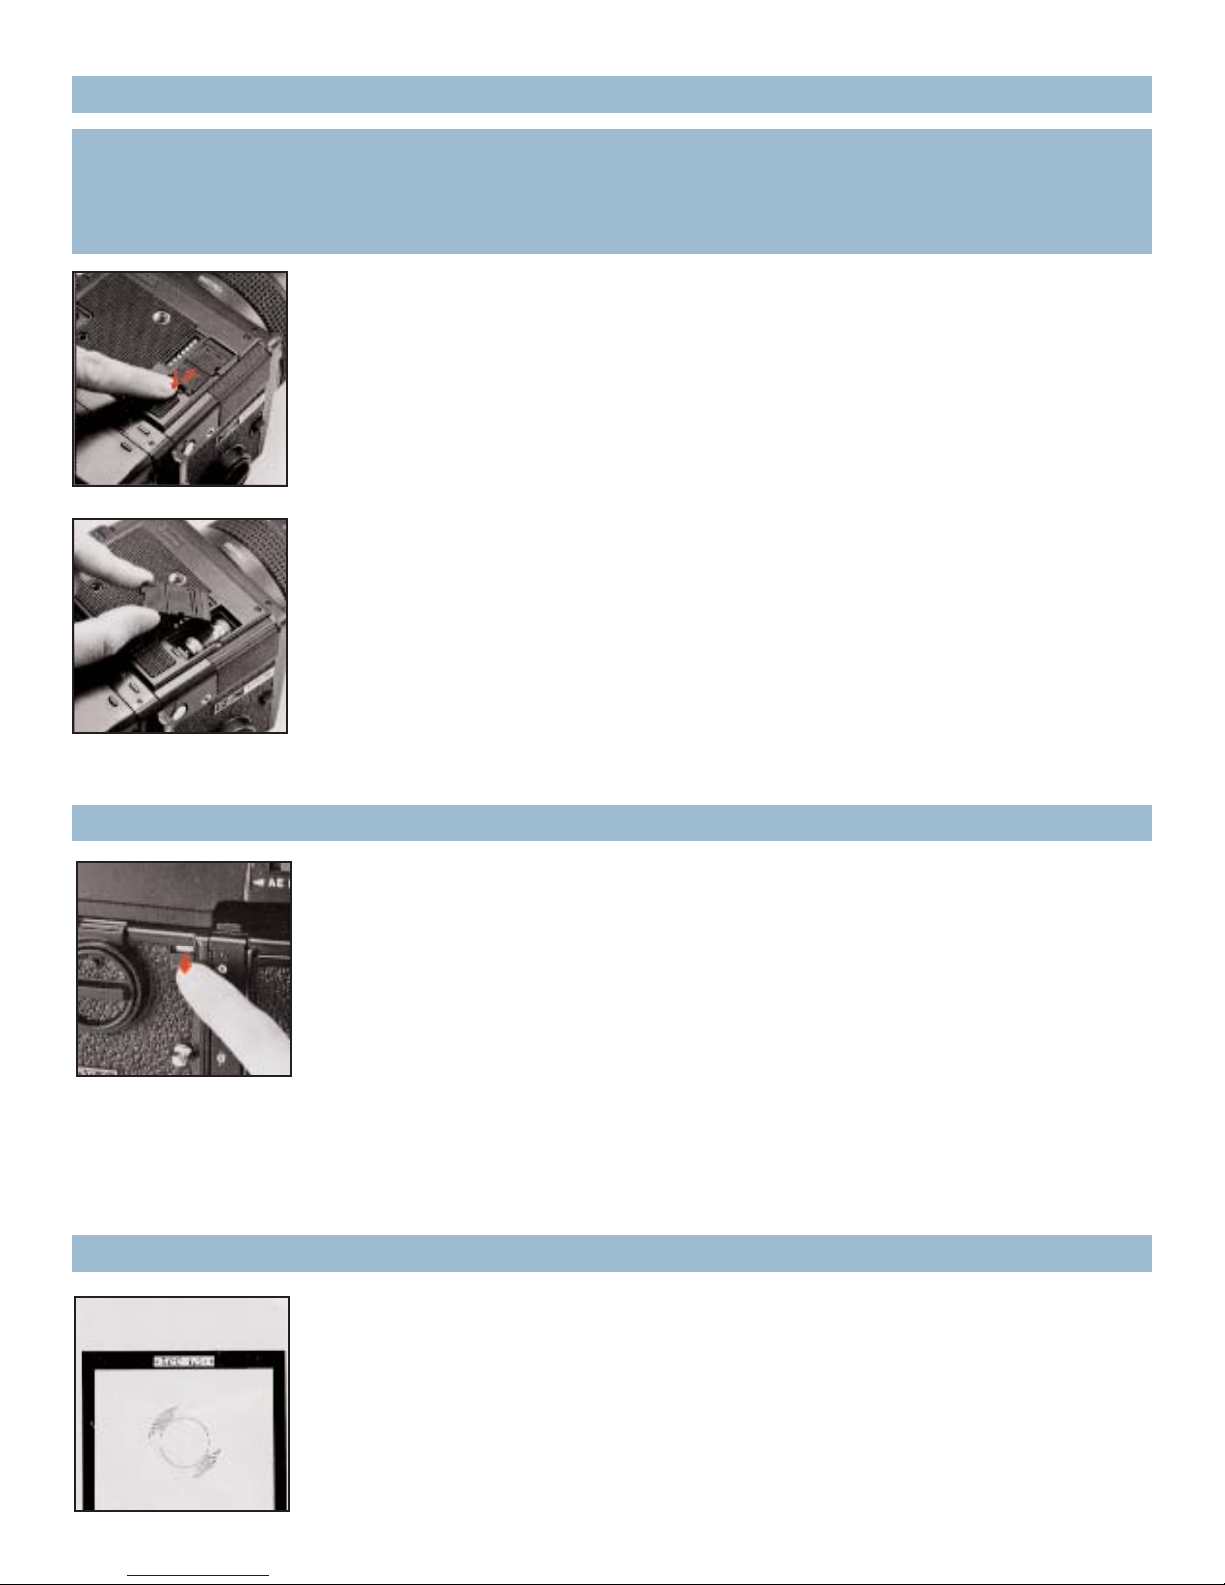
3. Finder Display and Battery Checking (con’t)
The film back is a film chamber that can be attached or detached freely from the main body,
thus permitting free exchange of film types, at all times. Since the main body and film back
are always fully coupled, upon connection, always turn the film winding crank completely
one time, upon attaching the film back. If winding is not possible, however, rotating the film
winding crank until it stops automatically takes care of the incomplete action, whether the
shutter is not cocked or film not advanced. This means, of course, that it's possible to
choose the film type most suited for the shot, even midway in a roll.
An ASA/ISO film speed dial and an exposure compensation dial are available on the film
backs. When used for setting the film speed of the film loaded in the film back, there is
automatic coupling when finders with built-in exposure meters are attached on the main
body. This will, of course, be very convenient when using films of different sensitivities in
the film backs.
* Make full use of film back interchangeability, in the following manner: -
1. Take full advantage of the multi-format superiority of the GS-1 and use film backs
in many different formats, which will not only give you different effects but will econ-
omize on film.
2. Take your pictures in color and black-and-white, and in different film speeds, as
required.
3. Keep sufficient quantity of pre-loaded film backs on hand and speedy, continuous
shooting will be possible.
4. Don't waste unsuitable film used in a previous session but simply load up a new
film back with the required film type.
5. The Polaroid Film Back can be used for instant color or black-and-white pictures,
when in a rush, or used for checking composition or lighting effect, before taking the
actual picture.
* Film backs are available optionally and the type meeting the requirements of the photog-
rapher should be chosen.
4. Attachment and Removal of Film Backs

8
4. Attachment and Removal of Film Backs (con’t)
A. To attach the film back to the main body, simply insert the latches
at the upper end of the film back into the attachment openings at
the upper end of the main body. Then, press the lower end of the
film back against the main body until it locks securely.
* The dark slide must be withdrawn from its slit, upon attachment of
the film back to the main body, as otherwise the shutter cannot be
released.
B. The dark slide must be inserted into the dark slide slit in order to
remove the film back from the main body. Insert, with the mark at
the top, as illustrated, and then push in all the way.
* There is danger of the film back becoming detached from the main
body, if the dark slide is left in its slit while the camera is being car-
ried. Therefore, make it a rule to withdraw the dark slide whenever
the film back is attached to the main body.
C. Depress the film back release button and the lower end of the film
back can be removed, as illustrated. Simply shift the film back up
slightly and pull it away.
* The dark slide cannot be withdrawn from the film back when the
film back is detached from the main body.
5. Construction of Film Back
A. The film back consists of a film holder and film back frame, with
exclusive film backs available for 120 and 220 roll films. The film hold-
er is not only detachable from the film back but also has a built-in
film winding mechanism.
* Read instructions supplied with the Film Back GS 135 for loading
135 roll film.

9
B. The film back frame has a base with dark slide slit and a back cover
with an ASA/ISO film speed dial, and exposure compensation dial and
a film type indicator frame. The film back frame completely encloses
the film holder and shields it from outside light, as well as connecting
it to the main body and also coupling with finders with built-in expo-
sure meters.
A. To open the back cover, squeeze the top and bottom back cover
release buttons, in the arrow-indicated directions, at the same time
and the back cover will open.
5. Construction of Film Back (con’t)
6. Film Loading
B. It will be possible to take out the film holder, upon opening the
back cover.
C. The film holder has two spool holders, with the right one for the
fresh film spool while the left one is for the empty take-up spool. The
top spool holder is opened, as illustrated, by sliding the film (spool) in
the arrow-indicated "A" direction. The new film spool should be coin-
cided on the right-side bottom shaft, which is fixed, after which the
top spool holder should be closed to engage the spool.
* The spool holders on the top will be locked securely, when the back
cover is closed.
D. After loading the fresh film spool properly, draw out the leading
end of the film and turn it across the film pressure plate (as illustrat-
ed). Run it across and turn it over to the take-up spool. Insert the
leading end into the slit of the take-up spool and wind slightly until
securely engaged.
* The inside black surface of the leader must face out when running
across the pressure plate, in this case.

10
6. Film Loading (con’t)
E. Rotate the manual film winder on top of the film holder in the
arrow-indicated direction and wind up the film leader. When the
starting point, or arrow-mark appears, align it with the triangular
start-mark on the right-top side of the film holder. Then, stop rota-
tion.
F. The starting point can also be aligned with the start-mark, with the
film holder loaded in the film back. In this case, simply rotate the film
winding crank of the main body to align the start-mark. This method
is preferable since there will be coupling with the camera body
mechanism from the beginning.
* If the film is not advanced when the film winding crank is rotated,
however, the film holder is not loaded properly in the film back
and/or the camera main body may be set for multiple exposures. In
the latter case, return the multiple exposure lever to an upright or
vertical position. (See 23. Multiple Exposures.)
G. Close the back cover by pressing it firmly against the right side of
the film back base, as illustrated. The back cover will automatically
lock and close. The same operation will close the back cover when
the film back is detached from the main body.
H. Upon loading the film, rotate the film winding crank until it stops
to place the first frame into place for taking the picture. The exposure
counter will also change from "S" to "1", with the film advanced and
the shutter cocked.

11
* When loading 220 roll film in the Film Back GS 220, do not mistake
the dotted line before the arrow-mark for the start-mark.
* For the use of film backs other than the 6 x 7 format, read the
instructions supplied with the film back.
I. The manual film winder is used to place the first frame into posi-
tion, when the film back is detached from the main body.The manual
film winder will not stop rotating, even when the film is in place for
the first frame, but should be rotated 2 or 3 times more, in order to
take up slack in the loaded film.
6. Film Loading (con’t)
7. Film Speed Dial
Set the film sensitivity of the film loaded in the film back, when using
finders with a built-in exposure meter. To set the film speed, depress
the ASA/ISO film speed dial lock button and, at the same time, rotate
the ASA/ISO film speed dial and set the required film speed to the
index. The dial has click-stops at 1/3rd increments.
Exposure compensation up to ±3 stops is possible at 1/3rd incre-
ments. To set the required compensation, slide the exposure com-
pensation dial lock button in the arrow-indicated direction, then
rotate the exposure compensation dial, as required.
When compensation is not needed, simply set to "0" where it is
locked.
* There will be no effect on the exposure, no matter where the
ASA/ISO film speed dial and exposure compensation dial are set,
when a finder with a built-in exposure meter is not used.
8. Exposure Compensation Dial

12
The exposure counter is an additive type which shows the number of frames exposed.
Starting from "S", the counter on the Film Back GS 120 (6 x 7) shows numbers from 1 to 10,
while Film Back GS 220 (6 x 7) shows numbers from 1 to 20. "S", "10" and "20" are orange-
colored, in the above case, and all other numbers are white.
Upon loading the film, tear off the end flap from the empty film pack-
age and insert it in the film type indicator frame.This will help you
keep track of the film loaded in the film back, even when two or more
film backs are used with different types of films.
9. Film Type Indicator Frame
10. Exposure Counter
The film winding crank automatically stops, when rotated completely
one time in the forward direction, with film advanced one frame and
shutter cocked, at the same time.
Or, short, rapid strokes, up to an accumulated full rotation, will also do
the job because of a ratcheted mechanism.
* The mirror lock-up lever must be vertical at all times, except when
shooting with the mirror locked up. (See 24. Mirror Lock-up.)
11. Film Winding / Shutter Cocking

13
A. After the 10th exposure of the 120 roll film (20th exposure of the
220 roll film), continue rotating the film-winding crank and the film
will only be advanced until the remaining film and leader paper are
wound up on the take-up spool. Open the back cover when there is
no resistance in the winding action.
B. Remove the film holder and while preventing the loose film from
unwinding, take out the take-up spool. Seal the exposed film and
return it to its original box until development.
* Load and unload film away from direct sunlight and/or strong illu-
mination.
12. Film Unloading
A. The shutter speed scale is viewed in its window over the shutter
speed dial. The numbers on the scale are shutter speed settings, with
numbers 1 to 16S full numbers and numbers 2 to 500 fractions of a
second. For example, "16S" is 16 seconds, "2" is ½ sec. and "500" is
1/500 sec. "A" is the setting for aperture priority AE (automatic expo-
sure) when a finder with a built-in exposure meter is attached. B
(bulb) is the setting used to keep the shutter opened, as long as the
shutter button is depressed. However, since power is consumed dur-
ing this time, the use of T (time) exposure is recommended for expo-
sures longer than one minute.
B. The numbers on the scale are color-coded in red and white. Red-
colored numbers are full number settings of 1 second and longer
while white-colored numbers are settings from ½ to 1/500 second, as
well as the letters "A" and "B". The shutter speed can be set before or
after film winding.
13. Setting the Shutter Speed Dial

14
C. The shutter speed dial is set to A, for aperture-priority AE photog-
raphy when a finder with a built-in exposure meter is attached. To set
A, press the shutter speed dial lock button and rotate the shutter
speed dial at the same time. To change from A to another setting, for
manual photography, press the lock button and rotate the shutter
speed dial to the required setting. However, the shutter speed dial
cannot be moved directly from A to B, in this case, or from B to A.
* The shutter speed, when the shutter speed dial is set to A, is 16 sec-
onds, when a finder with a built-in meter is not attached.
13. Setting the Shutter Speed Dial (con’t)
14. Shutter Release Button
An electro-magnetic shutter release button is incorporated in the
Zenza Bronica GS-1. Stroking the release button halfway illuminates
the shutter speed, as digits and dots, etc., in the display panel in the
top center of the finder, outside the screen area.
The display will go out when the release button is stroked all the way
and a shutter release warning LED will light up momentarily, when
the exposure is completed and the shutter blades are closed, which
should be checked when using a slow shutter speed.
In the following cases, the shutter will not be released and the shutter
release warning LED will light up, except in the first instance: -
1. Main switch is OFF.
2. Dark slide is inserted.
3. Film is not advanced. (Same when exposure counter is
between "S" and "1".)
4. Shutter is not cocked.
5. Lens is not attached properly. (Same with automatic exten
sion tubes)
6. Lens release button is depressed.
7. All frames (i.e., 10 frames for 120 roll film and 20 for 220 roll
film) have been exposed.
* There will be under-exposure if the film-winding crank is accidental-
ly rotated before conclusion of the exposure, on a slow shutter speed
setting. Furthermore, the shutter will not be released on the follow-
ing shot until the remaining time for the previous exposure has
elapsed.

15
Time exposures are made with the time exposure lever on the lens, regardless of the setting
on the shutter speed scale.
15. Time (T) Exposures
A. First, cock the shutter with the film-winding crank and then pull up
the time exposure lever release.
B. Slide the time exposure lever and release the shutter, when a red-
colored "T" is exposed on the lens barrel. The shutter will stay open
until the time exposure lever is moved in the opposite direction,
exposing the letter "A", which will close the shutter.
* Except for time exposures, always shift the time exposure lever so
that the letter "A" is visible on the lens barrel and keep the time expo-
sure lever release pushed in all the way.
16. Exchanging Lenses
The lens cannot be attached or detached unless the shutter is cocked.
Therefore, first, rotate the film-winding crank and cock the lens shutter.
A. To attach the lens, align the white dot on the main body and the
red dot on the lens, and then insert the lens fully into its mount.
Rotate counter-clockwise (in the arrow-indicated direction) until it
stops, with an audible click, which will indicate that it is securely
locked.
B. To detach the lens, press the lens release button down and, at the
same time, rotate the lens clockwise (as arrow indicated) until it
makes a full stop, at which point it will be possible to detach the lens.

16
17. Interchanging Finders
A. Various types of optional finders can be interchanged to match
shooting conditions to photographic conditions. To attach the finder,
align the front end of the finder with the front end of the finder
frame on top of the main body, as shown. Then, gently lower the
finder and, when well seated, slide forward until it locks.
B. To detach the finder, simply depress the finder release button and,
at the same time, slide the finder backwards where it can be
detached.
* Read instructions supplied with the optional finders on their use.
A. The aperture ring is rotated, in either direction, to set the required
F/number opposite the white index dot. The aperture ring click-stops
at the numbered settings, as well as intermediate ½ stop settings.
The aperture ring may also be set midway between the ½ click-stops
also.
* The intermediate ¼ stop settings cannot be used when finders with
a built-in exposure meter are used. Click-stop settings only can be
used in this case.
B. The Zenzanon-PG Series interchangeable lenses have a fully auto-
matic lens diaphragm, which means that the focusing screen is
always viewed at the full aperture, with the brightest possible image.
Depressing the depth of field preview lever stops the lens diaphragm
down to a pre-selected lens opening and permits checking of the
depth of field effect on the focusing screen.
* The aperture ring must not be adjusted while the depth of field pre-
view lever is being depressed.
18. Setting the Aperture Ring

17
* When using finders with a built-in exposure meter, exposure meas-
urements should not be taken with the depth of field preview lever
depressed, as the shutter speed indicated will cause over-exposure.
This is because proper exposures are obtained with exposure meas-
urements made at the full aperture.
18. Setting the Aperture Ring (con’t)
19. Focusing Adjustments
The lens is focused on the subject, by rotating the focusing ring in
either direction, while checking the effect on the central matte sur-
face area of the focusing screen (standard type).
20. Distance Scale and Depth of Field Scale
A. To adjust the lens to the required distance, without use of the find-
er, simply rotate the focusing ring and set the distance opposite the
orange-colored index. When the lens is focused, there is an apparent
zone of sharpness, both in front and back of the focused plane, which
is known as the depth of field.
* See the depth of field table for the Zenzanon-PG 100mm (32. Depth
of Field Tables.)
B. The depth of field scale, next to the distance scales, shows the zone
of apparent sharpness at any lens opening or distance and is made
up of identical pairs of apertures on both sides of the distance index.
These identical pairs of apertures indicate the distance that will be in
focus at these apertures. For example, if the 100mm lens is focused at
a distance of 3 meters, it can be seen from the depth of field scale
that the zone will extend from 2.2 to 4.8 meters, when a lens opening
of F22 is used.

18
In infrared photography, some adjustment is required in the focus in
order to retain sharpness on the film, because the invisible infrared
rays are longer in wave length than the visible rays used for focusing.
For infrared photography: -
1. Use an R filter or equivalent with an infrared (black-and-white) film.
2. The red-colored line, next to the orange-colored distance index, is
the infrared index.
3. After focusing in the normal manner, re-set the distance indicated
by the orange-colored index to the infrared index, by shifting the dis-
tance ring.
21. Infrared Photography
For example, if the distance indicated by the orange-colored index is
3m, when the lens is focused on the subject, re-set 3m to the red-col-
ored infrared index, by shifting the distance ring, which will focus the
lens properly at 3 meters for the infrared film loaded in the camera.
* Follow instructions enclosed with the film and filter and, to be on
the safe side, make several bracketing shots. In general, it seems safer
to give more exposure than less, in this case.
A. Always use flash cords with a standard PC type plug, which should
be connected to the flash synch socket on the front of the main body.
* When detaching the flash cord, grip the plug firmly and pull it out
straight, instead of using a twisting action.
B. The Zenzanon-PG lenses have a between-lens leaf shutter with X-
setting for flash synchronization. This means that electronic flash
units can be used and will synchronize at all shutter speed settings,
up to 1/500 second. Flash fill-in for daylight shots are also made very
easy.
22. Flash Photography

19
A. To make multiple exposures, rotate the film-winding crank to
advance the film and cock the shutter. Then, turn the multiple expo-
sure lever in the arrow-indicated direction. When the shutter release
button is depressed, in this condition, the shutter will be released any
number of times without advancing the film.
23. Multiple Exposures
B. Upon taking the multiple exposed picture, be sure to return the
multiple exposure lever back to its vertical position. Otherwise, there
will be additional multiple exposures on the same frame.
When the mirror lock-up lever is reversed, upon suspension of shooting with the mirror
locked up, the shutter will be released. Therefore, shooting should be continued, in this
case, by the following methods.
A. For shooting with the mirror locked up, first, rotate the film-wind-
ing crank and advance the film and cock the shutter. Then, turn the
mirror lock-up lever in the arrow-indicated direction, which will close
the lens shutter down completely and swing up the reflex mirror and
film safety plate.
* Read instructions supplied with the finder with built-in exposure
meter for AE (automatic exposure) photography with the mirror
locked up.
B. The shutter will be released when the shutter release button or
Electro-Magnet Cable Release is pressed.
* When suspending further shooting with the mirror locked up,
reverse the mirror lock-up lever before rotating the film-winding
crank. The shutter will be released any number of times, with mirror
locked up and advancing the film (leader paper), when the film-wind-
ing crank is rotated after taking the final exposure. Therefore, reverse
the mirror lock-up lever before rotating the film-winding crank.
24. Mirror Lock-Up

20
C. Reverse the mirror lock-up lever. One frame will be exposed and,
therefore, wasted.
24. Mirror Lock-Up (con’t)
E. Utilize film back interchangeability and detach the film back before
reversing the mirror lock-up lever. Then, attach the film back and con-
tinue shooting in the normal manner. (See 4. Attachment and
Removal of Film Backs.)
D. Cover the lens with its lens cap and then reverse the mirror lock-
up lever. Then, take the next exposure with the multiple exposure
lever turned. Reverse the multiple exposure lever, upon taking the
picture. (See 23. Multiple Exposures.)
The Zenza Bronica GS-1 has an electro-magnetic shutter release sys-
tem which means that the usual cable release cannot be used.
A Zenza Bronica Electro-Magnet Cable Release is available for this
purpose, although it is also possible to use any cable release with a
2.5mm mini-plug, such as those available in photographic equipment
stores.
* Always check operations before actually using such cable releases.
25. Remote Control Operations
Table of contents
Other Zenza Bronica Digital Camera manuals