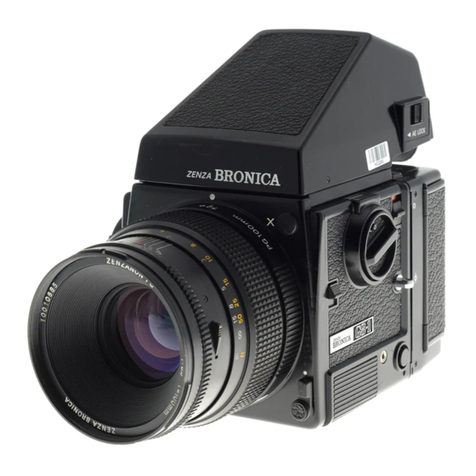
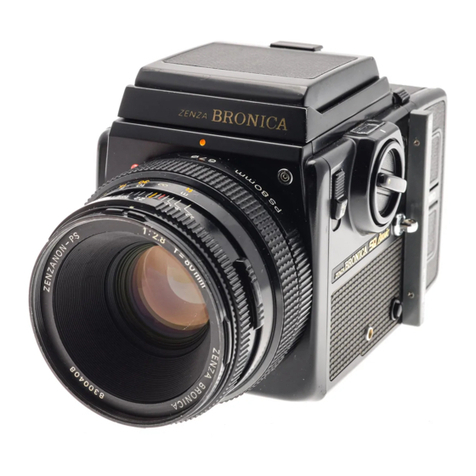
Zenza Bronica S User manual

~e.ZA
-
INSTRUCTIONS
FIR@NICA-S
' .
+

FEATURES
OF
THE
In
s
tant
Return Automatic Mirror ..... .. ......
......
.
......
.
...
....
.. 4
ZENZA BRONICA-S Instant Re
open
Automatic Diaphragm
.............
..
.....
..
........
5
Depth-af-fleld Pr
ev
iew Button
....
..
........
..
....
.. .. .. .. ......
..
...
5
Interchangeable
Filminder Back
....
....
............
..
....
.....
.....
6
New Exclusive
Film
Tension System..
....
......
....
..
........
..
.....
7
Nikkor Lenses
............
..
..............
.
....
.
..
......
.
....
..
......
... .. 7
HOW
TO
USE
YOUR
Removing
the
' F
il
mi
nder
' Back
........
........
............
.......
9
ZENZA
BRO~ICA
-
S
Loading
the
'Filmi
nder'
Back ..
....
..........
....
..
....
..
......
..
...
10-
11
Removing
the
Exposed
Film
.. .. ..
..
....
.
....
....
......
....
......
..
...
11
( 1 ) Winding the Shutter
and
Advancing the Fi
lm
.. .. .. 12
( 2 ) Presetti
ng
the Diaphragm
and
Focusing the Lens...
12
-13
(
3)
Using the Depth-of-
fl
eld Pre
vi
ew Button ...
........
. 13
(
4)
Selecti
ng
the Shutter
Speed
..
......
..
.................
14
(5)
Mirror Lock-
Do
wn Button ......
...
..
....
..
....
....
......
..
15
(6)
Making the Exposure ..
..............
....
....
.....
..
.....
15
(
7)
Making Double
or
Multiple Ex
po
su
res
..
..........
....
16
(
8)
Interchanging Lenses ....
..
......
..
..
..
......
..
........
... .
16
(9)
Using Flash
....
..
....
......
..
....
..
....
..
....
..
....
.. .. .. .. 17
Close-up Photograph
....
..
..................
..
......
....
17
Using the Broni
ca
Ne
ck Strap
........
..
....
...
..
........
..
..........
18
Lens
Spec
iflcations
.........
....
.
..
....
........
.
..
..
.....
.. .... ...
....
18
Filters ..
.............
....... ..
....
...
......
......
..
..
..
....
.....
.
........
..
19
Speciflcations ..
......
.
..
.. .
.....
...
...
.....
.....
.. .
....
........
..........
20

·-
-.
..

@------

Your
ZENZA
BRONICA
S
is
0 precIsion instrument which
has
been designed with the utmost
of
humon ingenuity ond skill.
It
is
unique in its field. possessing conveniences and
automatic
features
not
found in any
other
instrument
of
its type. The
ZENZA
BRONICA
S was designed
to
extend
th~
scope
of
photographic
expression
beyond
the limitations imposed
by
conventional
equipment. It was designed
to
serve
you
-
to
help
you
create
the fine picture results
you
have
often
conceived
yet
found
to
be
beyond
the
ken
of
ordinary
camera equipment. The
ZENZA
BRONICA
S
is
an
integrated
tool
in which
automatic
·
operation
and
quality
of
performance
combine
to
equip and assist
you
in
achieving
notably
superior
pictures.
It
is
best that
you
become familiar
with
your
new
ZENZA
BRONICA
S
at
the
very
beginning.
Devote
the
extra
minutes
it
will
toke
to
know
your
ZENZA
BRONICA
S.
Read the instructions carefully. Your efforts
will
be
reworded
by
the
pride
you
will
have in the ·pictures
it
will
give
you.
INSTANT
RETURN
AUTOMATIC MIRROR
The reflex
mirror
of
the
BRONICA
S
is
on exclusive
original.
It
does
not
fiip up
for
the exposure
as
in
other
single
lens
reflex
cameros. but
it
moves
forward
and
down
with
greater
clearance
provided
for
deep
seated lenses
per-
mitting
shorter
focal
length
to
be used
without
mirror
interference.
(Fig.
21
Using this exclusive method.
th
e
BRONICA
S
con be equipped with a normal
75mm
lens
or
with
a
50mm
super
wide
angle.
After
on
exposure. the
mirror
in
st
ant-
ly
automaticall
y retu"ns
to
viewing
position.
(Fig.
11
Fie
. I


INSTANT REOPEN AUTOMATIC DIAPHRAGM
Lenses
for
the
BRONICA
S
have
fully
automatic
diaphragms. Simply focus and
view
with
the lenses
wide
open.
(Fig.
31
When
an
exposure
is
made, the
diap
hragm
automa
iical
ly closes
dawn
to
the
pr
ese
lec
ted
aperture
for the
correct
exposure.
(Fig.
41
Immediately
after
the
exposure
. the
diaphragm
autom
atically
reopens
to
full
aperture
(
Fig
.
51
to
pro
v
ide
a
bright
clear
image
on
the
fo
cus
ing
screen-read
y
for
the n
ext
pic
ture
wit
h
no
readju
stmen
t.
DEPTH·OF·FIELD PREVIEW BUTTON
The lens on the
BRONICA
S is al
ways
wide
open
for
f
oc
using and
view
ing. This p
rovi
de
s
ma
xi
mum
image-screen
brightness
for
greater
ease and
acc
uracy. H
owev
er
it
is
often
desirable
to
see the
depth
.
of-field
at
'taking'
ap
er ture. This
is
done
by
pre
ss
ing the
Depth-of-
F
ield
Pre
view
Button. The
diap
hra
gm
aut
omatic
all
y
st
o
ps
down.
(Fig. 41 Relea
se
the
button
and the
diaphragm
instantly
returns
to
full
aperture.
IFig.
51.
(
Fig.
3
Fig.
4
Fig.
5

INTERCHANGEABLE .FILMINDER'
BACK
This
convenient
feature
offers mony
advantages.
It
is
possible
to
change
foIm
in
the
middle
of
a
roll
(b
lack-and-white
to
co
l
or,
co
l
or
to
black-and-white,
indoor
to
daylight,
etc.I
without
the loss
of
a single
exposure.
It permits
you
to
preload
several
backs (Fig.
61
and
shoot
continuously
without
stopping
for
reloads
.
The filminder back
is
fully
automatic
and
foolproof.
It
is
equipped
with
a metal
dark
slide
to
prevent
the film
from
being
exposed
while
the back
is
off
the camera. The
back
cannot
be
removed
until
th
e
dark
sl
ide
is
inserted
and
while
the
back
is
off
the
camera,
the
dark
slide
cannot
be
withdrawn.
(Fig.
71
When
a filminder
back
is
attached
to
the
camera,
no
attention
need be
paid
as
to
whether
the film
or
the shutt
er
has been
previously
wound.
The film
advance
crank, which
normally
winds the shut
ter
and
the film simultaneously,
automat
ic
ally
pe
rforms
only
the r
equired
function.
For example,
if
the shutter
is
wound
and
if
the film
in
position
has
been
exposed,
turning the crank
will
only
advance
the film
to
a fresh
unexposed section. Also, when the
back
is
on the camera, the
dark
slide must
be
completely
withdrawn
before
an
exposure
can
··
be made.
F
il.
"7

NEW
EXCLUSIVE FILM TENSION SYSTEM*
The
BRONICA
nlm tension system makes the nlm s
urface
perfectly
nat
at
the
focal
plane.
All
tension
on
the nlm
is
removed
during
the
winding
process. IFig.
81
The instant the nlm
is
in
place,
tension
is
automatically
applied.
IFig.
91
The system
not
only
adds much
greater
tension
on
the
mm
during
exposure
to
assure
perfect
nlm natness
but
also
eliminates
dangerous
nlm scratches
which
occur
if
the
mm
is
advanced
while
under
tension
.
Patent
applied
for
Fig
. 9
NIKKOR
LENSES
Nikkor
lenses
are
standard
for
the
BRONICA
S.
IFig.
101
Today,
no
nner
optics
are
available.
Nikkor
lenses
are
the most
com-
patible
for
the superb
performance
of
the
BRONICA
S.
They
have
proved
to
be
the nnest
.in
the 35mm
photography
neld
in
which
optical
qual
ity
means almost
everything.
The
availab
le
focal
lengths
range
from
50mm super
wide
an-
gie
to
200mm
telephoto.
The
50,
75,
135, and 200mm lens·
es
are
equipped
with
instant
reopen
automatic
diaphragms
and
are
designated
as
Auto-Nikkors.


HOW
TO
USE
YOUR
ZENZA
BRONICA·S
REMOVING
THE
'FILMINDER'
BACK
Insert the dark slide
into
the filminder back.
Ifig
. 11)
Hold
the camera
in
the
left
hand.
With
the right hand,
hold
th~
filminder back with the thumb on the
protruding
edge
of
the
dark
slide.
Pre
ss
the
dark
slide
inward
with
th
e thumb. This
will
release the filminder bock from the camera. Remove the back
by
tilt
i
ng
and
lifting
it
off
the open hinge
at
the
bottom
.
Ifig
.
121
Note
, The dark slide
is
only necessary
for
removing the filminder back from the comera and should be
withdrawn
when the bock
is
attached
to
the cemera.
Fig. I

LOADING
THE
0
FILMINDER
0
BACK
The
BRONICA
5
uses
120 roll
nlm
and may be
loaded
with the nlminder back
either
on
or
off
the camera.
a.
Open
th
e film type
indicator
window
and slide the lock
in
the
direction
of
the"
0
".
IFig.
131
The back
cover
will
pop
open.
b.
Remove the film
holder
from the nlminder back.
c.
The nlm
holder
consi
sts
of
two
assemblies.
(F
i
g.
141
The
lower
spindle assembly, which is marked
with
red
arrows,
holds the
roll
of
unexposed film and the
other
assembly hol
ds
the take-up spool.
Note
that one end
of
both spindles
is
spring-loaded
and can be pulled
or
pushed
out
for
inserting the nlm rolls.
d. The unexposed roll
of
film should be
loaded
onto
the spindle marked with the red
arrows.
Push
one
end
of
the film
onto
the
spring-loaded
side
of
the spindle. (Fig. 1
41
The film roll
will
then slip
into
place.
Make
sure that the
ins
ide
of
the
leader
paper
faces
outward.
e.
Draw
the
leader
paper
across t,
he
film pressure
plate
and
over
the rollers. Insert the end
of
the
leader
paper
into
the
wide
slot
of
the take-up spool and secure
it
by manually turning the take-up spool until the film start mark
is
in line with the red
arrows.
(Fig.
151
f.
Place the
fi
lm
hoider
into
the
open
filminder back
so
that the
gear
on the ho
lder
and the
gear
in
the back
mesh
together.
To engage the
two
gears
correctly,
it
may be necessary
to
turn the manual film
winder
and
push
down
on the
nlm
holder
.

g.
Close
and lock the back
cover
by
sliding the lock in the
direction"
C ".
If
the back
cover
does
not
lock
fully, check and make
certain
that the fil'l'
holder
is
properly
set in the filminder back.
h.
Place
an
end
of
the film
carton
,
bo
x in the film type
indicator
window
and snap closed, IFig. 16)
Th
is exclusive film type
indicator
window
is
designed so that
you
can
indentify
the name, the type and the speed
of
the film in each filminder bock.
i. To
coordinate
the
loaded
filminder bock
with
the camero
body,
pull
out
the winding cronk and
wind
the cronk until
it
stops.
IFig.
171
The first exposure number
11)
will
appear
in the exposure
counter
window.
If the filminder bock
is
not
attached
to
the camero
body,
film can be
wound
by
turning the monuol film
winder
on the bock.
IFig. 18)
Caution
: Handle the filminder bock
carefully
.
Do
not
exert
pressure in
use
and
avoid
hard shocks.
REMOVING
THE
EXPOSED
FILM
After
the 12 exposures
are
made, the winding crank
will
wind
only
the film.
Wind
until there
is
no
resistance. Then
open
the back and
remove the exposed film
from
the film
holder
.
Fig
,
18

TAKING PHOTOGRAPHS
(1)
WINDING
THE
SHUTTER
AND ADVANCING
THE
FILM
Pull
out
the
winding
crank
in the
focusing
knob.
Turn the
crank
in a
forward
direction
to
wind
the shutter and
advance
the
film.
(Fig.
171
If
the film has been
pre
viously
wound,
only
the shutter
will
be
wound
or
vice
verso.
After
the shutter and film
have
been
fully
wound,
the
crank
can be
folded
back
into
the
focusing
knob. Be sure
to
keep
turning
the
crank
until
it
stops
to
insure
that
the
shutter and film
are
fully
wound.
(2)
PRESETTING
THE
DIAPHRAGM AND FOCUSING
THE
LENS
a. Set the
diaphragm
fo
r t
he
selected
exposure
or
'taking'
aperture
by
rotating
th
e
diaphragm
preselector
ring on the lens until
th
e
desired
aperture
opening
number is in line
with
the
white
do
t.
(Fig.
191
The
preselector
ring may also be set
for
intermediate
aperture
openings
(between
numbersl.
b. Slide
hood
lock
in the di
rection
of
the
arrOw.
IFig.
201
Hood
will
unfold
and
open.
c. L
ook
at
the
image
on
the focusing screen.
No
te
how
uniformly
bright
it
is
from
corne
r to
corner
and h
ow
readily
you can see
the image in
'infocus'
or
'out-of-focus'.
The focusing scale
is
calibrated
on the focusing knob. (Fig.
211
If the
75mm
lens
is
used,
read the
green
calibrations;
the red is
for
the 50mm lens a
nd
the whi
te
scale
is
f
or
the 135mm len
s.
To
set the scale
fo
r the
le
ns
you
are
using, rack the focusing
tube
back
to
infinit
y.
Us
ing the raised pin
in
the focusing scale
collar,
set the
correct
color
scale in
position.
The
'infinity'
setting
on
the scale
you
are
using must line
up
with the ind
icator
mark
on
the side
of
the
camera
body
.

d.
If
a magn
ified
· image is d
es
ired
,
push
back on the hood
co
ver
. IFig.
221
This will release the magni
fier
into
position. Keep the
ey
e
clo
se to
th
e magnifier
for
a
clear
vision
of
the
entire
field
of
the focusing Screen.
e. To replace the magnifier, pre
ss
down
on the metal frame
of
the magnifier until
it
locks against the under-side
of
the
hood
cover.
f.
To
clo
se the
hood
,
fold
in the sides, then the back and finally bring the
front
cover
down
until
it
locks.
g. To remove
th
e
fo
cusing ho
od
for
cleaning the screen o r interchanging wi
th
sports
or
other
finde
rs
,
lift
the
hood
retaining lock
ab
ove
th
e
cam
e
~
nam
e
plat
e. I
Fig
.
231
The
hood
will spring
fr
ee.
h. To replace
th
e h
oo
d, slide
it
on so that the
two
me
lal
tab
s on
th
e camera fit
into
the slots on the re
ar
of
the
hood
frame.
Pr
ess
h
oo
d d
ow
n
to
lo
ck.
(3) USING
THE
DEPTH-OF-FIELD
PREVIEW
BUTTON
In · the BRONI
CA
S,
the lens
is
always
wide
ope
n for
viewing
and focusing reg
ar
dl
ess
of the
aper
tu
re
you
have
se
lected
for
the
exposure. H
owever,
after
h
aving
foc
used,
yo
u may
wa
nt
to
see the
depth·
of-
fi
el
d
at
' taki
ng'
ape rture. W hile l
oo
king
at
the
foc
using
sc
reen, press t
he
red bu
tto
n with
th
e
fo
refinger of your left hand. IFig. 241
Th
is
wi
ll in
st
a
nt
ly close
th
e di
aphra
gm d
ow
n
to
your
preselected
'tak
i
ng'
aper
ture
ope
ning a
nd
th
e im
age
on t
he
sc
reen
will
show
th
e
exac
t depth
-o
f-
fi
eld
at
that
apertur
e.
Re
lease the red
butto
n and
th
e diaphragm w·ill instantly spring ba
ck
to full a
per
ture.

(4) SELECTING
THE
SHUTTER
SPEED
A
sh
utte r
speed
ma
y
be
selected
eith
er
before
or
after
the
shutter
is
wound.
Rotate
the
speed
selector
dial until
the
desired
. s
hutter
speed
'cli
cks'
into
p~sition
und
er
the
red
dot
indicat
or.
IFig.
251
The
selecto
r
ma
y
also
be
set
for
interm
ed
iate shutte r
speeds
Ib
et
wee
n markings!. IFig.
261
The numerals
represent
shutt
er
speeds
of
1
second,
1/ 2, 1/ 4, 1/8, 1/ 15, 1/
30,
1/
60,
1/ 125, 1
/250,
1/
500
and
1/
1000th
.
"X"
repres
ents 1/50th
of
a
second
and
is
the
fastest
shutter
speed
with w
hi
ch
el
ect
r
onic
flash units may be used. Isee Using Flash)
"B"
is
for
bulb.
The
shutter
release
button (Fig.
27)
.
is
equipped
with a
safety
lock.
Turn the tip
of
the
release
buttam'
clockwise.
When
the
red
dot
on the button
is
in
the
side
position,
the
shutter
is
locked.
Wh
e n 'time'
exposure
is
desired,
set
the di
al
at
'B' .
Depress
the
shutter
release
button
and
turn
the tip
of
the
button
counter-
clockwise
. This will lock the
shutter
open
. To close
the
shutter,
turn
the tip
of
the
button
clc;>ckw
ise .

(5)
MIRROR
LOCK-DOWN BUTTON
The
mirror
can be
locked
down
in
one
action
and the shutter
tripped
in a separate
action
.
After
the shutter
is
wound,
push
back on the
mirror
lock·down
button.
(Fig.
281
The
mirrar
will
move
down
and lock. The'n depress the
body
release
button
to
trip
the shutter. This method
will
give you a steady and
quiet
exposure.
(6)
MAKING
THE
EXPOSURE
After
winding
the film and shutter, selecting the
aperture
apening
and shutter speed and focusing
th
e lens,
you
are
now
ready
to
make an exposure.
a.
If the dark metal slide
has
not
been previously
withdrawn,
do
so
at
this time. The
BRONICA
cannot be .
fired'
with
the dark slide in the bock.
It
must be complet.ely removed.
Simply
pvll
the
wire
handle until the slide
is
withdrawn
. The
dark
slide need
not
be reinserted
after
the exposure unless
you
intend
to
remove the filminder bock.
b.' To make the exposure, squeeze the
body
release
button
with
the right
or
left
forefinger
. (Fig. 29) You
will
notice
that
the image returns
to
the
viewing
screen immediately
after
the exposure-
bright
and
clear
as
before
. This
is
the
result
of
two
automatic
BRONICA
features;
the instant return
automatic
mirror
and the instant reopen
automatic
diaphragm.
It
is desirable
to
use
a
cable
release when
slow
shutter
speeds
are
used.
Cable
release sockets
are
located
in the
body
release
button
IFig.
311
and
below
the
depth.of·field
preview
button. (Fig. 30)
When
shootin.g
at
speeds
slower
than 1
/3
0th
of
a second,
it
is
recommended
that
the
BRONICA
be mounted
on
a
stable
tripod
Or
rested on a firm support.

(7)
MAKING
DOUBLE
OR
MULTIPLE
EXPOSURES
As
explained
earlier,
your
BRONICA
S has a
built-in
protection
against
inadvertent
double
exposures.
However
there
ar
e times
when
deliberate
double
exposures
ma
y be desired.
a.
After
mak
ing
one
exposure, insert the
dark
slide and
remove
the filmind
er
back. (Fig.
321
b. Turn the
winding
crank until the shutter
is
wound
.
Rep
lace
the
fi
l
mi
nder back
on
the
camera
body
and
withd
r
aw
the dark slide
You can
now
make a
double
exposure
.
(8) INTERCHANGING
LENSES
Lenses
are
quickly
and easily
int
erchangeable
on
the
BRONICA
S.
The
standard
75mm, the 50mm supel
wide
angle,
the 135mm
and
200mm
telephoto
lenses
are
equipped
with
quick-change
1/6th turn
bayonet
moun
ts.
a.
To
remove
a
bayonet-mounted
rens,
hold
the l
ens
front
in the.
right
hand
with
the thumb on the
milled
ridges of the lens
bayonet
lock
. (Fig.
331
b. P
ress
th
e
bayonet
lock
with
the thumb and simultaneously t urn the lens
to
the
left
!co
unter-clockwisel
1/6th turn. Remove
th
e
lens. {Fig.
341
c.
To mount the lens, insert the lens
into
the focusing tube lining up the red
dots
on
the l
ens
ring
and
the focusing tube. Turn the
lens
to
the
right
!clockwisel
until the
bayonet
lock
snaps closed.
d . Lang tel
ep
hoto
lenses,
with
a focu
si
ng
ring
, should
not
be
mounted
an
the focu
si
ng
tube
because
of
weight.
Turn the focu
si
ng
tube
back
to
infinity
and
mount the lens an the
outside
bayonet
an the
camera
body
.
Note,
The inside
of
the
BRONICA
focusing tube
is
thre
aded
157mm
dia
. X l
mm
pitchl
to
accept
threaded
lenses
you
now
have. The dist
ance
from
the
foremost
front
edge
of
the focusing tube
to
the film emulsi
on
is
102.0mm.

(91
USING
FLASH
Your
BRONICA
S
is
in automatic s
wit
ch
-ove
r
syn
c
hronizati
on which
is
coupled with the shutter spe ed.
The
BRONICA
flash terminal
acc
epts a standard connecting
cord
(German Type
).
(Fig. 35)
~hu
t
~
r
F lash
Bl~ed
F Bulb
M Bulb
E le
ct
ro
nic
Fla
sh
FP Bulb
S
hutt
er
Dial
(col
or)
B 1 2 4 8
15
30
60
125
2
50
5
00
1000
X
red
__
green
~
~whlt
e
_____
yell
ow
(10) CLOSE-UP PHOTOGRAPHIY
With
th
e
75mm
standard lens
you
can
shoot
as
close
as
50cm from
the subject
without
using
an
attachment.
If you
want
to
photograph
the subje
ct
in
clo
ser than 50cm, USe the
BRONICA
Extension Tube Set. IFig.
361
On
e set consists
of
a
"A"
ring, a
"B"
ring and
two
"C"
rings.
No. of
Tube
\
Magnification
Role
E)t
posure
Multip
le R
ol
e
75mm
F
2.8
50mm
F3.5 1
35mm
f
3.5
75mm
F
2.8
50mm
F
3.5
135m
m f 3
.5
"A"
0.22-0.45 0.35- 0.69 0.15-0.26
1.4-2.0
1.82-2.85 1
.32-
1.56
"A"+"S"
0.45- 0.67
0.69
- 1.
03
0.26-0.38 2.0- 2.77
2.85-
4.12
1.56-
1.
90
"A"+
'S"+"C"
0.
67-0.88
1.03-1.47
0.38-0.57 2.77- 3.53 4.12- 6.10 1.90 - 2
.46
"A
"+
'
8"
+
"C"+"C"
0.88-1.10 1
.4
7- 1.70 0.57- 0,
63
3.53-4.41
6.10
-7.29 2.46- 2
.65
Fig
.
36

USING
THE
BRONICA NECK
STRAP
Th
e shoulder strap supplied with
your
BRONI
CA5
serves
two
purposes.
One
,
it
prov
ides a safe and convenient
mea
ns
for
c
arr
ying the camera and
two,
it
helps
ste
ady
the camera
during
the exposure, especially when u
si
ng
l
ong
foc
us lenses. (Fig.
371
a. The shoulder strap
is
equipped with a
co
upling
conn
ector
at
each end. Place these coupling
con-
nectors
ove
r the ' camera s
trap
studs on each side
of
th
e camera and pr
ess.
b.
To
remove the
st
rap, li
ft
or raise the metal wings
on each camera strap stud and
simu
ltaneously l
ift
off
th
e
coupling
connectors.
c. As
an
aid
to
steadying the camera during exposure,
first adju
st
the length
of
the strap so that
th
e camera
is
at a
comfortable
distance
for
viewing
and focusing.
Du
ring
th
e exposure,
draw
downward
on the c
am
era
so that the strap
is
strain
ed
and taut. This
will
greatly
minimize the
effect
of
hand
vibrations.
Type
Super
Wide
Angle
Standard
Telephoto
Telephoto
Focal
Ape
rt
ure
length Ratio
50mm 3.5
75mm 2.8
135mm 3.5
200mm
.4
LENS
SPECICATIONS
Angle
of
Mognifi-
Closest
Ap
erture Fi
lter
D
ia-
Focu
sing
View
cation Distan
ce
phragm
Size
cm
in.
Auto
82m
m
dia
. Focusing
77
° 0.
67X
29 12 Pre-set
Screw
Tube
Bo
ck-
Forth
55
° 1 X
50
20
S
eries
/I
VIII
/I
m
ft.
33
° 1.8 X
1.3-
.4
/I
/I /I
32
° 2
.5
X 2.8 10
/I /I
/I

FILTERS
Se
ries VIII Filters attbch to
th
e
75mm
, 13
5mm
, and 200mm
lens
es
wi
th
t
he
BR
ONICA
Fi
lt
er
Retai ning
Rin
g.
(Fi
g. ·38)
Fil
te
rs wi
th
82
mm
diameter thr-
ead fit
the
50m
m lens.
L·IA
light Daylight type
or
Violet Tungsten
O·85A
Orange
+12 Tungsten type
B-80A Dark
Blue
-12
2.5 Daylight type
B·82C Slue
-4.0
1.5
Daylight type
0·8
1B
Amber
+4.0
1.5 Daylight type
•
(+J
Reduct
ion
of
c
olor
temperatur
e.
(-)
I
nc
rease
of
color temperature
Absorbs ultro-violet roys
10
prevent
bluish
appearanc
e 00 ba
ck
ground.
Adjusts natural
color
balance. Used
for
lens protection.
Conversion /'iller for tungsten type
color
film
in
daylight.
Conversion filler for daylight type
color
film
under ortilkiol
lig
ht.
when photographs ore
token
before 9 A.M. or ofter
Absorbs bluish color when photographs
'"
token
;0
cloudy or shadowy
COr'lditions•
Other manuals for S
1
Table of contents
Other Zenza Bronica Digital Camera manuals

Zenza Bronica
Zenza Bronica ETRC User manual

Zenza Bronica
Zenza Bronica Model-C User manual

Zenza Bronica
Zenza Bronica CS-1 User manual

Zenza Bronica
Zenza Bronica GS-1 User manual

Zenza Bronica
Zenza Bronica S User manual

Zenza Bronica
Zenza Bronica SQ-Am User manual

Zenza Bronica
Zenza Bronica SQ-B User manual