ZEPCAM T2+ User manual

1
T2+ BODYCAM
INSTRUCTION MANUAL

More information and FAQ on: www.zepcam.com - [T2+ IM-EN-1.0] 2
Thank you for buying the ZEPCAM T2+ Bodycam. We hope you will enjoy our product as much as we
enjoyed creating it.
Before starting please check:
●If the product or the packaging is not visibly damaged.
●Make sure all the packaging content is complete (camera, clip, cradle, usb cable, charger, Pin
code sticker)
●Do not attempt to use the device with missing or damaged parts.
●Use Zepcam certified accessories only
[Note] The information contained in the document are subject to change without notice. For any
question, please check www.zepcam.com

More information and FAQ on: www.zepcam.com - [T2+ IM-EN-1.0] 5
PRODUCT DESCRIPTION
HOW TO USE AND CHARACTERISTICS
The Zepcam T2+ is a bodycam for professional use to record video, audio and GPS. The T2+ camera is
easy to use, ruggedized and has a large battery to record up to 8.5 hours continuously. The Zepcam T2+
can be used with an integrated Zepcam back end solution to store and manage recorded footage.
COMPONENTS OF ZEPCAM T2+
1. Wide angle lens
2. Light sensor
3. Infrared light source
4. Main button for power on/off
and record
5. Tag button
6. Reset button
7. Included Clip mount (several
mounts available)
8. Charge indicator
9. Recording indicator
10. Contacts for charge and data transfer
11. Universal mounting thread, suitable for
many fixtures on clothing, vehicles or
stationary use is available. The
standard ¼-20 UNC thread will
interface with most mounting
solutions.
12. Microphone
CHARACTERISTICS OF ZEPCAM T2+

More information and FAQ on: www.zepcam.com - [T2+ IM-EN-1.0] 6
Functionalities
Video & optics
Video resolution
1920x1080 @ 30 FPS
1280x720 @ 30FPS
1280x720 @ 60 FPS
840x480 @ 30 FPS
Sensor video
4MP CMOS
Video Format
MP4, H.264
Lens
140 degrees wide angle lens, low
distortion
Photo format
21 MP, JPEG
Night visions
Low light image sensor
Photo capture
Capture photo while video
recording or standalone
Infrared lights
(Auto) IR mode for dark
environments
IR threshold at < 10 lux
IR reach up to 10m
Face recognition up to 5m
Pre-event recording
Up to 90 seconds
Notifications
Location
GPS during recording
LED
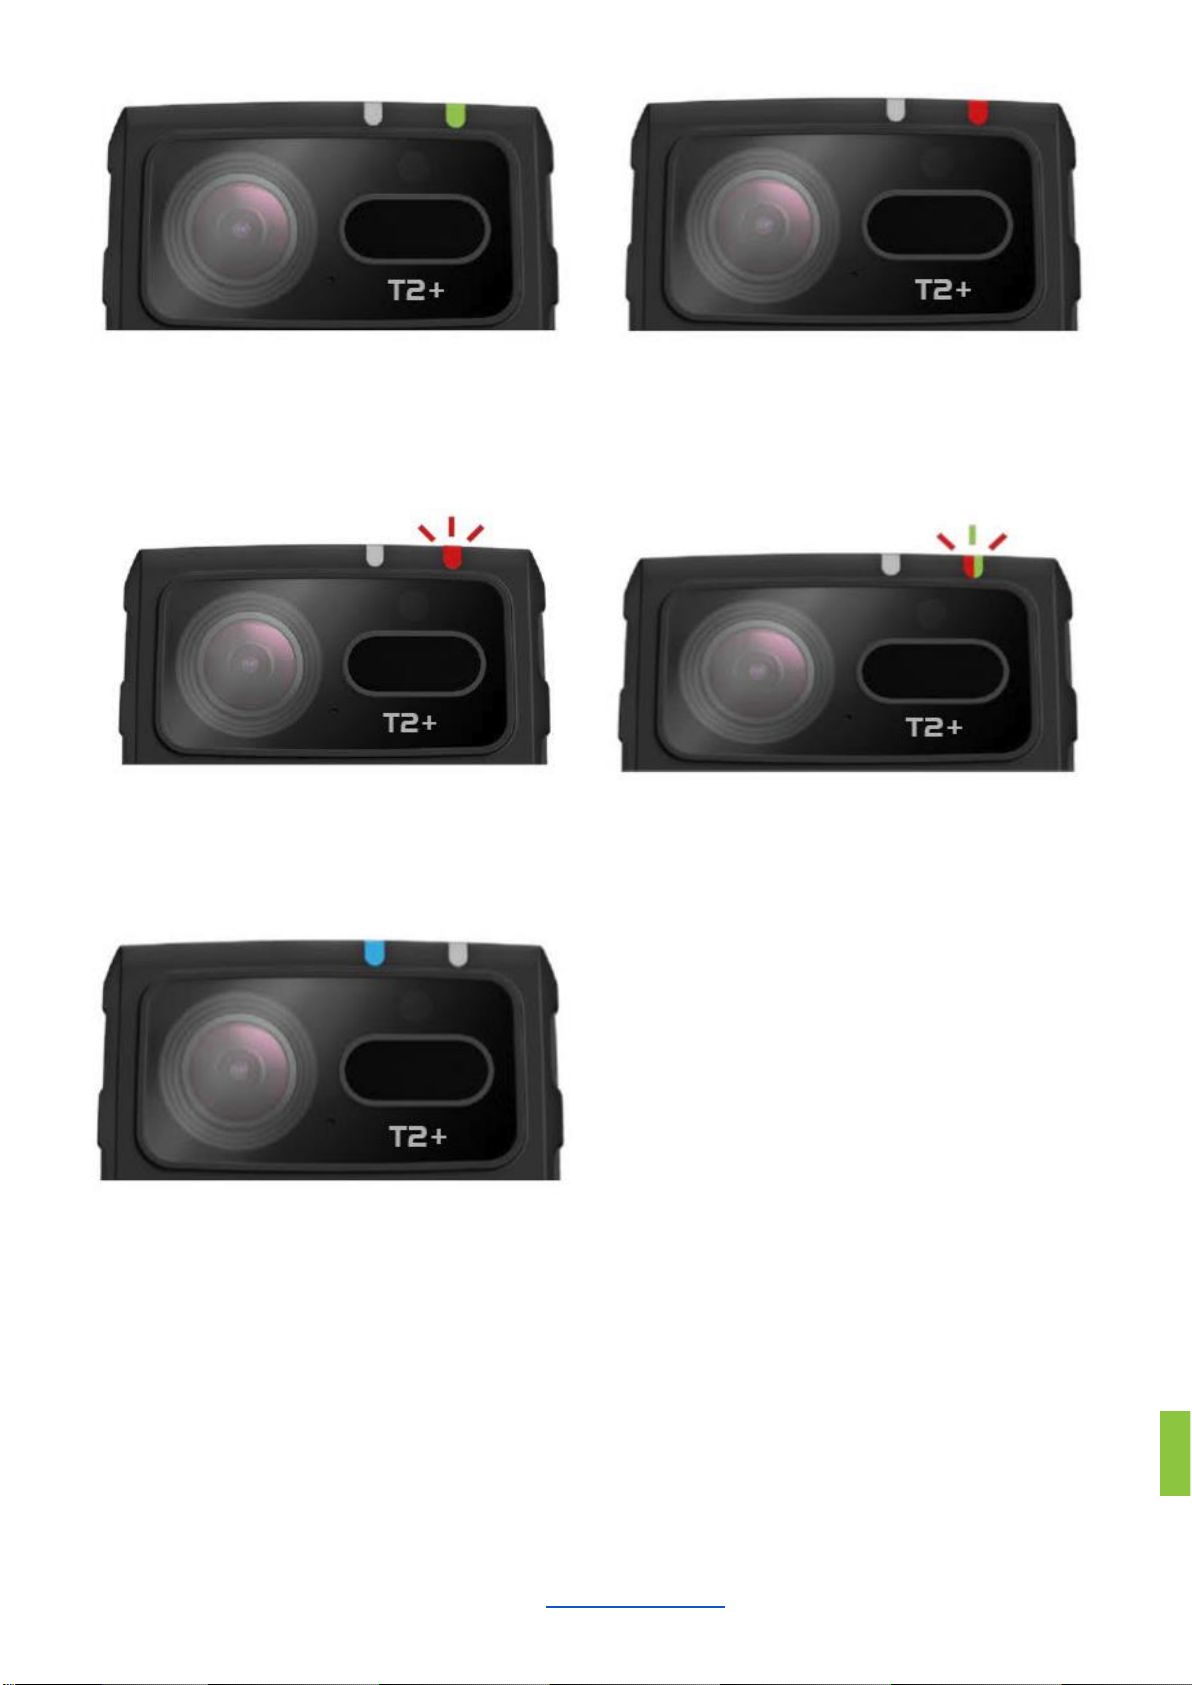
2 LEDS for indication of standby,
recording, charging, disc full
Scene tagging
Yes, including photo shot
Audio / Vibration
Audio and vibration notification for
start/stop recording, disc full, low
battery level
Audio
AAC(LC) 128 kb/s, 2 channel
(mono) 48khz
Other
Storage
4 GB (T2+-BC2)
IP class
IP65 (rain and dust proof)
Battery
Certification
CE
type
Built-in 3200mAh Lithium Ion
Battery
Working temperature range
-20C to +50C
charging time
3.5 hours from empty to 80%
(Fast Charge)
Storage temperature range
-20 to +55C
recording time
Up to 9 hours
standby time
Up to 10 hours
Security
Only accessible for authorized
users.
charging
Zepcam docking station (sold
separately)
Single dock with USB charger
Data offload
Via Single Dock or Zepcam
Docking Station
Size
User management
Use Zepcam Server Software or
Zepcam Cloud to manage users,
user rights, access control and
more
dimensions
72x56x24mm
Mounts
Clip mount (360 degrees
rotatable), Peter Jones mount
support
weight
115 grams (without mount)
Software
Zepcam Core Software
Zepcam Manager (web based)
Zepcam Connect (Pc software)
In the box
T2+ bodycam
Single dock for PC connection
USB wall plug charger + cable
Clip mount
Integration
3rd party integration possible with
Video Management Systems
Based on ONVIF

More information and FAQ on: www.zepcam.com - [T2+ IM-EN-1.0] 7
HOW TO USE
WHAT CAN YOU DO WITH YOUR ZEPCAM T2+
POWER ON
●Push button 4, keep pressed for 2 seconds (single beep, indicator 9 is green to
indicate standby).
(Note! After switching on, the camera needs 5 seconds before accepting
record commands!)
RECORD
●Push button 4. (2 beeps, indicator 9 is red)
STOP RECORDING
●Push button 4, keep pressed for 2 seconds. (2 beeps, indicator 9 is green
TAKE A PICTURE
●Push button 5. (1 beep, indicator 9 flashes red 1 time)
TAKE A PICTURE WHILE
RECORDING
●Push button 4 or 5. (1 beep)
PRE-RECORDING ENABLED
●In pre-recording mode video is buffered prior to actual recording and will be
part of the entire recording. This can be activated using Zepcam software.
RESET
●Press once for reset
●No data and settings will be lost if the device is in standby mode
●If the device is currently recording, you will lose data while pressing the reset
button.
POWER OFF
●(When the indicator 9 is green) Push button 4, and keep pressed for 3 seconds
(single long beep, indication lights turns off)
COLOUR SIGNAL

More information and FAQ on: www.zepcam.com - [T2+ IM-EN-1.0] 8
Green light
Device powered ON
standby mode
Not recording
Red light
Recording video
Red light
One flash - a picture is taken
Pre-recording activated
After powering on: solid green for 5 sec. and then 2
times red flash
Blue light
Charging. Turns off when fully charged
CHARGING ZEPCAM T2+
HOW TO USE AND CHARACTERISTICS

More information and FAQ on: www.zepcam.com - [T2+ IM-EN-1.0] 9
The T2+ can be charged using the single docking station or the multi docking station (available as 4 Dock
and 8 Dock). Please note:
●When the T2+ is powered on, it will not charge
●When connected to a power source, the T2+ will be powered off after a time that can be set when
there is no data exchange with computer or docking station. The default set time is 10 minutes.
SINGLE DOCKING STATION
The T2+ is provided with a single docking station. The single docking station is used to charge from the wall
plug. For fast charging power off the T2+. Do not use a PC or laptop to recharge your T2+.
1. Place Zepcam T2+ into the single docking station
2. Connect the zepcam single dock to the USB charger
3. Continuous blue LED during charging on the T2+ camera
4. When the T2+ is fully charged the blue LED will turn off

More information and FAQ on: www.zepcam.com - [T2+ IM-EN-1.0] 10
DOCKING STATION 4 OR 8 DOCKS
Your T2+ camera can also be charged using the Zepcam Docking Station (4 or 8 docks). With the Zepcam
Docking Station, you can fast charge your T2+ camera and simultaneously offload recorded data.
1. Connect the Zepcam 4 or 8 Docks to a wall socket
2. Place the Zepcam T2+ in the Zepcam Docking station for normal charging and fast charging

More information and FAQ on: www.zepcam.com - [T2+ IM-EN-1.0] 11
MANAGING DATA OF ZEPCAM T2+
HOW TO USE AND CHARACTERISTICS
MANAGE MY T2+
There are several ways, to view, download and manage your video. An overview is given below. For more
information go to: https://zepcam.com
Zepcam Connect
Zepcam Connect is PC software available for Windows 7, 8.1 and 10. This
software is meant for single T2+ bodycam that is connected to a PC using
the single dock.
With this software you can:
●Download the videos onto your computer
●Modify the settings of a connected T2+ camera
●Offload your video to Zepcam Manager (online and on premise)
Zepcam Manager
Zepcam Manager is web-based software for evidence management and is
available as cloud and on-premise software.
With this software you can:
●Manage and view videos, users and cameras
●Store and archive your videos
●View tags, place comments, create cases
●View GPS position synchronized with the video
●View loggings
Zepcam T2+ Docking
Station (4 Bay, 8 Bay)
The Zepcam Docking Station makes recharging and data offloading of
multiple T2+ cameras possible. The docking station offloads its data to a
server and is managed by Zepcam Manager software. With the Zepcam
Docking Station you can:
●Manage a batch of cameras simultaneously
●Offload video to Zepcam Manager
●Remotely manage T2+ camera settings
●Assign different users to bodycams
[Note]: Zepcam Connect software has been provided to you by email. If you don’t have Zepcam Connect
installed on your PC/laptop, please download from Zepcam.com.
[Note]: If you would like to have a Zepcam Manager account or an on premise software installation

More information and FAQ on: www.zepcam.com - [T2+ IM-EN-1.0] 12
TROUBLESHOOTING
HOW TO SOLVE PROBLEMS
If the Zepcam T2+ behaves oddly or does not respond to button presses:
●Reset the T2+ by pressing the reset button (button 6) on the back of the T2+.
On the docking station, when the LED in front of the camera is flashing green and red, an error occurred.
Try the following:
1. Remove the T2+ from the docking station.
2. Reset the T2+ by pressing the reset button (button 6) on the back of the T2+.
3. Make sure the Zepcam T2+ is not recording when docked.
4. Put the T2+ back in the docking station at a different position.
If that didn’t work, you can try to reset the T2+ docking station. Please only do this as a last resort since it
will reset all your docking station settings to the factory reset. It will also remove all recordings that are
stored on the docking station. You can reset the T2+ docking station by using a blunt pointed object (e.g.
pencil, paperclip) to push the reset button on the docking station (the small hole on the right side of the
docking station).
Other manuals for T2+
1
Table of contents
Other ZEPCAM Digital Camera manuals
Popular Digital Camera manuals by other brands

Canon
Canon POWERSHOT A1300 Getting started

Olympus
Olympus Camedia C-300 ZOOM Basic Manual

Pentax
Pentax IQZoom 90WR Operation manual

Automation Technology
Automation Technology C3 Series Hardware reference manual

Pentax
Pentax 555 - Optio 555 5MP Digital Camera operating manual

Olympus
Olympus Stylus 1050SW instruction manual