ZICAR BS14 User manual

Instruction Instruction Instruction InstructionManual Manual Manual Manualto to to to
BS14ModelWoodCuttingBandSaw
Please Please Please Pleaseread read read readthe the the themanual manual manual manualbefore before before beforeusing using using usingit it it it

IT IT IT IT’ ’’’S SSSIMPORTANT IMPORTANT IMPORTANT IMPORTANTTHAT THAT THAT THATYOU YOU YOU YOUREAD READ READ READTHE THE THE THERETIRE RETIRE RETIRE RETIREMANUAL MANUAL MANUAL MANUALTO TO TO TOBECOME BECOME BECOME BECOME
FAMILIAR FAMILIAR FAMILIAR FAMILIARWITH WITH WITH WITHTHE THE THE THEUNIT UNIT UNIT UNITBEFORE BEFORE BEFORE BEFOREYOU YOU YOU YOUBEGIN BEGIN BEGIN BEGINASSEMBLY . ASSEMBLY . ASSEMBLY. ASSEMBLY .
1. 1. 1. 1.TECHNICAL TECHNICAL TECHNICAL TECHNICALSPECIFICATIONS SPECIFICATIONS SPECIFICATIONS SPECIFICATIONS
NOITEMSUNIT
TYPE
1Sawwheeldiametermm350
2Tablepivotcapacityº0-45º
3
Processing
Scope
Maxheightmm160
Maxwidthmm335
4
Lengthofsawblademm2400
Widthofsawblademm6-15
5Linespeedofsawbladem/s12;10
6
Necessary
Motor
PowerHP/Kw1;0.75
VoltageV230;110
FrequencyHz50;60
RotationalspeedRPM1400;1700
2. 2. 2. 2.PACKAGING PACKAGING PACKAGING PACKAGING
Accessories
1)mitregauge(accordingtothecustomers
’
requirement)
2)manual
3)sawmouthboard
3. 3. 3. 3.IMPORTANT IMPORTANT IMPORTANT IMPORTANTSAFETY SAFETY SAFETY SAFETYINSTRU INSTRU INSTRU INSTRUC CCCTIONS! TIONS! TIONS! TIONS!
READ READ READ READALL ALL ALL ALLINSTRUCTIONS INSTRUCTIONS INSTRUCTIONS INSTRUCTIONSBEFORE BEFORE BEFORE BEFOREUSING USING USING USINGTHIS THIS THIS THISPRODUCT PRODUCT PRODUCT PRODUCT! !!!
3.1WORKAREA
To
Avoidofpersonalinjury,equipmentdamage,fireandshock,makesureyourworkareais:
―Freeofdamp,wetorrainyconditions
―Freeofflammablegassesorliquids
―Childproof-usepadlocksandmasterswitcheswhennotinuse.
―Well-lit
―Cleananduncluttered
―Well–ventilated
3.2THEOPERATOR
COMMONSENSEANDCAUTIONAREFACTORSWHICHCANNOTBEBUILTINTO
ANYPRODUCT.THESEFACTORSMUSTBESUPPLIEDBYTHEOPERATOR.PLEASE
REMAMBER:
―Preventbodycontactwithgroundedsurfacessuchaspipesorradiators.
―Stayalert.Neveroperateequipmentifyouaretired.
―Donotoperatetheproductisundertheinfluenceofalcoholordrugs.Readwarninglabelson
prescriptionstodetermineifyourjudgmentreflexesmightbeimpaired.
―Donotwearlooseclothingorjewelryastheycanbecaughtinmovingparts.
BS14

―Not-skidfootwearisrecommended.
―Wearrestrictivehaircoveringtocontainlonghair.
―Useeyeandearprotection.Alwayswear:
ANSIapproveddustmaskorrespiratorwhenworkingaroundmetalwood,andchemicaldustsand
mists.
A
fullfaceshieldifyouareproducingmetalorwoodfilings.
Earprotectors
―Maintainproperfootingandbalanceatalltimes.
―Donotreachoveroracrossrunningmachines.
3.3BEFOREOPERATING
―Knowthemachine.Learnitsapplicationsandlimitationsaswellasthespecificpotentialhazards.
―Checkfordamage.Ifpartofthemachineisdamaged.Itshouldbecarefullyinspectedtoensure
thatitcanperformitsintendedfunctioncorrectly.Ifindoublethepartshouldbereplaced.
―BesuretheswitchisOFFbeforepluggingin.
―Makesuretoolhasbeencleanedandproperlylubricated.
―Checkfordamagedpartsbeforeusinganytool,anypartthatappearsdamagedshouldbe
carefullycheckedtodeterminethatitwilloperateproperlyandperformitsintendedfunction.
―Checkforalignmentandbindingofallmovingpartsbrokenpartsormountingfixturesandany
otherconditionthatmayaffectproperoperation.Anypartthatiddamagedshouldbeproperly
repairedreplacedbyaqualifiedtechnician.
―Donotusethetoolifanyswitchdoesnotturnoffandonproperly.
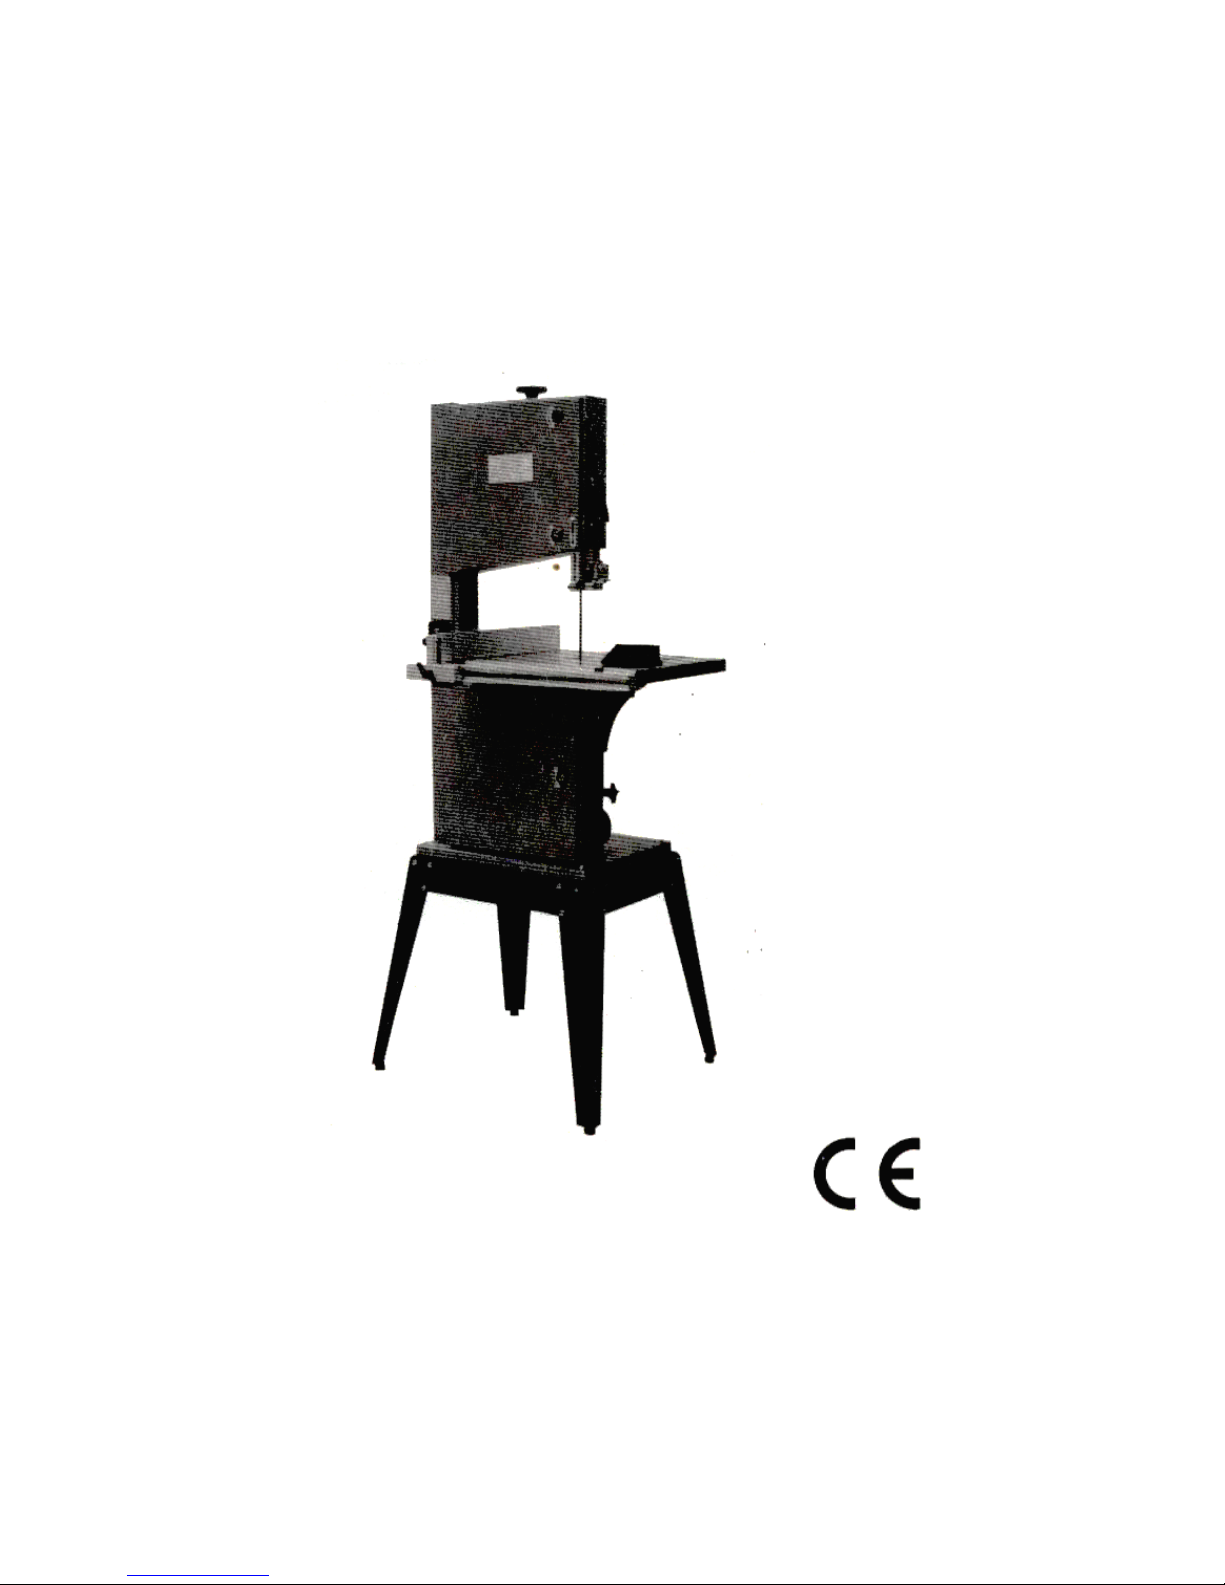
3.4SPECIALSAFETYRULESFORBANDSAWS
―Adjustingtheupperguideofsawbladetomakeithigherabout1/8"thanthecutmaterial.
―Sawafterthemachinerollingregularlyselectdifferentspeedoffillingmaterialaccordingtothe
differenthardnessandthicknessofwood.Forbidfillingmaterialtoofast.
―Checkforproperbladesizeandtypemakesurethatblade'stensionandtackingareproperly
adjustedaccordingtotheinstructiontochangesawblade.
―Theworkershouldn'tleavetheplacewhenthemachineisworking.Don'tforgettocutoffthemain
powersourcewhennotworking.
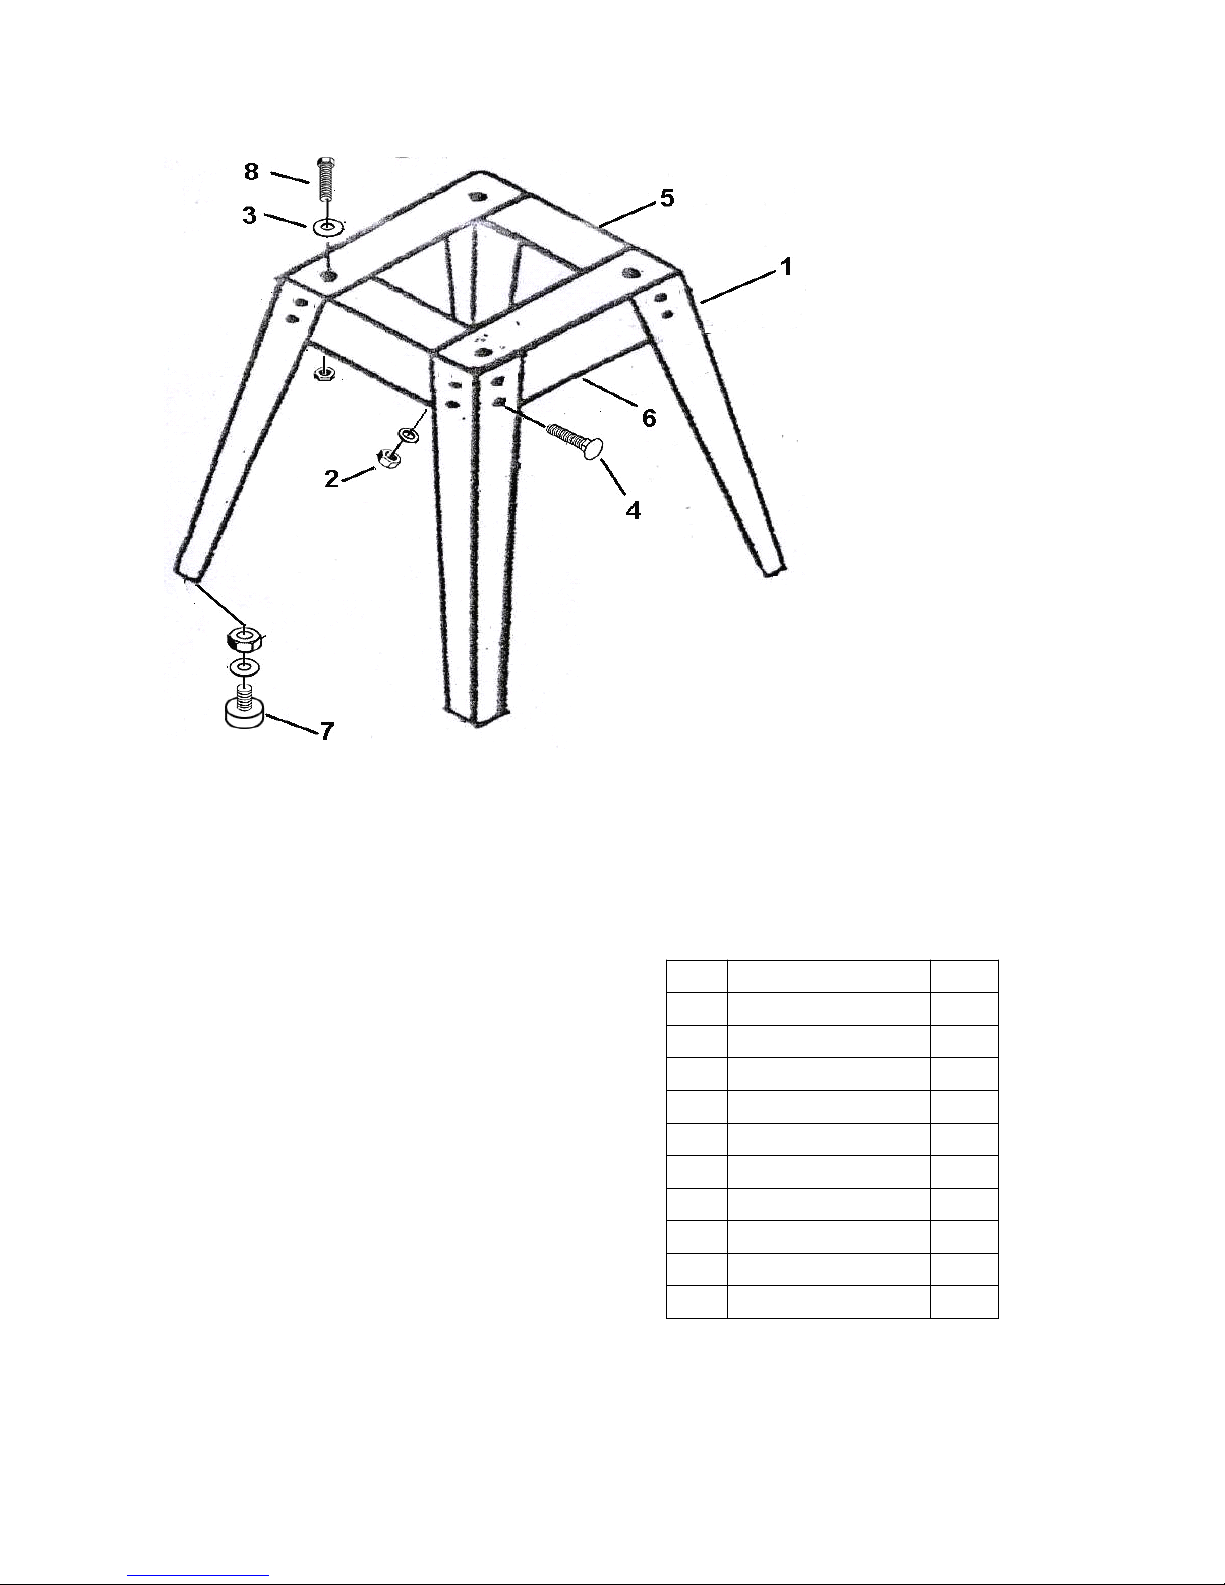
―Usefootbolttoforbidthemachinelearningtotheground.
4. 4. 4. 4.GROUNDING/VOLTAGE GROUNDING/VOLTAGE GROUNDING/VOLTAGE GROUNDING/VOLTAGE
4.1INSTRUCTIONOFGROUNDING
―Thismachineprovidedpoweroutletandcable.Andthereisgroundingwireonit.Thecontactof
outletonthesawingmachinemustconnectwiththecase
ofsawingmachine.Theotheroutletshouldbecorrectlypluginthestandardoutletshouldbe
installedcorrectlyandconnectedwiththeearth.
―Ifgroundingwirecan'tbeconnectedproperly,itmaybestruck,Changeorrepaircableoroutlet
don'tconnectthegroundinglinewrongly.
―Whenthecableisdamaged,changeorrepairitintime.
4.2CONNECTIONSOFPOWERSOURCE
Thesingleelectriccurrentshouldbeused.Theprotectorshouldbesetinordertoprotect.Assure
thatthelinevoltageshouldagreewiththemotorvoltageonit'splatebeforerunningmachine.
4.3WIREDIAGRAMS(MJ343B,MJ343C)

NOTICE:WESUPPLYYOUINTERLOCKSWITCHESONLYWHENYOUPLACEANORDER.
5. 5. 5. 5.TABLE'S TABLE'S TABLE'S TABLE'STINSTALLING TINSTALLING TINSTALLING TINSTALLINGAND AND AND ANDADJUDTING ADJUDTING ADJUDTING ADJUDTING
5.1INSTALLINGTABLEseeFig.(1)
Installworktable(#83)accordingtoFig.(1).Fixthesawmouth(#85)intothecenterofworktable.
Connecttheguideboard(#87)withthetableusefourbutterflyscrewboltsasFig.(1).Thenmake
thesquareneckbolt(#76)pluginthesideguideboardthroughstrip-shaperwasher(#75).Fixthe
upperguideboard(#79)andsideguideboardwithwasherandbutterflynut.
Puttheupperboardontherightsideofsawblade.Loosenthenuts(#77).Takeofftheupperguide
boardandloosenthebutterflynut(#76).Slipthestandofupperguideboard(#74)totherightside
ofsawblade(#36).Thenfixtheupperguideboardontheothersideofthestandofupperguide
board.
EXERCISECAUTION!Neverforcethematerialintothebandsaw.
You
willbecomefamiliarwiththe
saw'sfeaturesfrompracticeanduse.Ifpossible,practicesawingwithapieceofwood.
5.2ADJUDTINGTABLEANGLEseeFig.(2)
1)Ifworkingtableistobeusedatanangle,makesuretoinstalltheanglecoreboard.
2)Loosenbutterflynut(#32)andadjustworkingtabletothedesiredangleusingthenumbersonthe
rotatinganglerule(#88)。
3)Tightenbutterflynut(#73)securelysothattheworkingtablewillnotmoveduringoperation.

6. 6. 6. 6.MANUAL MANUAL MANUAL MANUALTO TO TO TOSAW SAW SAW SAWBLADE BLADE BLADE BLADE
6.1TOCHANGESAWBLADE
MAKESURESWITCHIN“OFF”POSITION.ANDUNPLUGTHESANDERBEFORE
PERFORMINGANYOFTHESTEPSBELOW.
1)Firstopentheupperdoorandlowerdoor(#8)&(#9),thenloosenhandwheel(#20).Fig.(3)
2)Removesideguideboard(#87)andsawblade(#36).Fig.(1)
3)Selectandinstallthenewone.
4)Installthesideguideboard(#87).
5)Rollthehandwheel(#20)totightenthesawblade.Givethesawblade3kgsidepressuretensile
deformationisabout8mm.Thetensionofsawbladeismoderate.
6)Rolltheuppersawbladewithhand,adjusttherunningtrackofsawblade(#36)intheprotective
casebyrollingtheflowerhandle(#33)ofthebackofuppersawwheelhousingasFig.(3)inorder
tomakethesawbladeruninthecenter.
a)BLADEGUIDINGseeFig.(4)
ThesawbladesguideofthisbandsawmodelMJ34ensureanexactguidingofthebladefor
cleancuts.Whenusingnarrowbladesensurethatthelowerbladeguidepositivelysupportsthe
bladefrombothsidesandtherear.
Setthebearings(#111)oftheupperbladeguideandtheguideaxles(#66)towithinapprox.
0.5mmoftheblade,andthelargethrustbearing(#109),(#62)againstthebackofthebladejust
clearofit.Donotsetthebearingtooclose,asthefrictiongeneratesheat,whichmayhavean
adverseeffectonthebearingsandthesawbladeaswell.
b)SETTINGTHECUTTINGHEIGHTseeFig.(4)
Theupperbladeguideshouldalwaysbesetascloseaspracticalagainstthewok.
To
adjust,
loosentheposition(1)ofthewingnutatthesideoftheupperwheelhousing,andsetthebladeguide
totherequiredheight.
Tightenwingnutaftersetting.

7. 7. 7. 7.BREAKDOWN BREAKDOWN BREAKDOWN BREAKDOWNAND AND AND ANDTHE THE THE THEMETHODS METHODS METHODS METHODSOF OF OF OFFIXING FIXING FIXING FIXINGBREAKDOMN BREAKDOMN BREAKDOMN BREAKDOMN
ItemsReasonFixingMethod
1.Themotorcannot
start.
1.Thepowerisn'ton.
2.Thefuseofelectriccircuithas
blown.
3.Theelectriccableisdamaged.
4.Theswitchisn’t“on”.
5.Themotorisdamaged.
1.Checkalltheelectriccircuit.
2.Changethefuse.
3.Repairorchangethecable.
4.Checktheswitch.
5.Changethemotor.
2.Thesawbladecan
notcutorthecutting
speedisslow.
1.Thesawbladeisinstalledonthe
contrary,thesawteethcutonthe
samedirection.
2.Therearesomehardthingssuch
asironorstoneetcinthesawteeth.
3.Thesawteethispassiveforlong
timeusing.
1.Turnoverthesawbladeandinstall
itagain.
2.Managetoremovethehardthings,
resharpenthesawteeth.
3.Repairandgringthesawteethto
makeitsharp.
3.Slippingsawblade.1.Thesawbladeisnotstraight.
2.Theupperwheeldoesn’tparallel
withthelowerone,
3.Theguidinginstallationofthesaw
bladehasdeflected.
1.Reinstalltheup-to–standardsaw
blade.
2.Adjusttheupperwheeltomakeit
parallelwiththelowerone.
3.Adjusttheguidinginstallationto
makeitsrunningdirectionassame
asthesawblade's
4.Thesawbladeis
broken.
1.Thedirectionoftheguidingboard
isdeflected.
2.Thedeflectionofthesawteethis
toosmallorthesawtoothispassive.
3.Whencuttingtoosmalldiameter
wood,thesawbladeissprained
badly.
4.Speedoffillingwoodistoohigh.
5.Thesawbladeistootightened.
6.Thesawbladeisoverwarrantable
period.
1.Adjusttheguidingboardcorrectly.
2.Reshapethesawroute,sharpen
thesawteeth..
3.Reinstallthenarrowsawbladeto
makethesawroutewide.
4.Slowthespeedofsending
materials.
5.Loosenthesawbladeproperly.
6.Renewthesawblade.

BS14
STANDPARTS
NO.NAMEQ’TY
1Supportparts4
2HexnutM824
3
W
asherø828
4CarriageboltM8×1616
5Connectedplate(1)2
6Connectedplate(2)2
7Rubberwasher4
8HexboltM8×404

NO. NO. NO. NO.Description Description Description DescriptionQ'TY Q'TY Q'TY Q'TYNO. NO. NO. NO.Description Description Description DescriptionQ'TY Q'TY Q'TY Q'TY
1Columncover141HexagonnutM16
1
2Sawingbody143Motorwheel
1
3Copperwasher444Washerø141
4Magneticswitch145Double-endedscrew3
5HexagonheadscrewM8×20446Bigtriangleframe1
6Motor147Rubberbeltforsawwheel2
7Dustcover148SemicircleheadscrewM5×121
8Upperdoor149Washerø101
9Lowerdoor150SemicircleheadscrewM6×125
10ThinhexagonheadscrewnutB(4)C(3)51Frameofguidepole1
11
DoorrollingaxisB(4)C(3)52Guidepole1
12SpringwasherB(4)C(3)53Spacingboard1
13CaseofdoorrollingaxisB(4)C(3)54Tappingscrew4
14ClosingdoorboardB(4)C(3)55Square-neckedscrewM8×245
15FlatheadscrewM6×8B(4)C(3)58Squarepoleendframe1
16SemicircleheadscrewM5×8659Longholecenterseat1
17Washerø5
5
60Washerø614
18Springleaf
2
61hexagonheadscrewM6×243
19HexagonnutM5
2
62Bearing800164
20Handwheel
1
63SemicircleheadscrewM4×61
21SemicircleheadscrewM6×16
1
64Smallsafetycover1
22Washerø12
4
65Stopaxispole1
23Guidescrewpole
1
66Guideaxle2
24Spring
1
67SemicircleheadscrewM6×142
25Squarenut
1
68Nutboard1
26Steeldowel
2
69Guideframe1
27Guideboardsaddle
2
70Screwdowel1
28Washerø8
18
71
29HexagonheadscrewM8×16
4
72hexagonheadscrewM6×141
30Upperwheelsaddle
1
73ThumbnutM83
31Smalltriangularframe
1
74Standofupperguideboard1
32Upperwheelaxle
1
75
Stripe-shaperwasher2
33AdjustinghandleM8
1
76
StepboltM8×502
34Bearing80203
4
77
Flowernut2
35Uppersawwheel
1
78
StepboltM6×402
36Blade179Upperguideboard1
37Axiselasticring280hexagonheadscrewM8×441
38Lowsawwheel181Rubberwasher1

NO. NO. NO. NO.Description Description Description DescriptionQ'TY Q'TY Q'TY Q'TYNO. NO. NO. NO.Description Description Description DescriptionQ'TY Q'TY Q'TY Q'TY
40Lowwheelaxle
1
82Guideboard1
83worktable
1
110
HexagonscrewM6×202
84insert
2
111
Bearingpole2
85
Boardofsawmouth1
112
Guideframestand1
86
Largewasherø64
113
Singleholepressboard2
87
Sideguideboard1
114
HexagonscrewM6×122
88
Rotatinganglerule1
115
Thumbbolt4
89
Standofworktable1
116
HexagonnutM66
90
SocketheadcapscrewM8×204
117
Protectboard1
91
Rotatingpointer2
118Springwasherø12
3
92
FlowerknobM6×181
119Springwasherø8
8
93
Graduatedisc1
120Spring
1
94
Washer4
121Key
1
95
Rollingfixedframe1
122Plasticbush
4
96
Nut4
123Fixbush
1
97
HexagonnutM85
124LocknailM6×12
1
98
Drawingbelt1
125FlatnailM5×6
1
99
Circlipsforshaft1
126
hexagonheadscrewM6×201
100
Bearing801012
127
Plasticsquarewasher1
101
Presswheel1
128
Externalteethwasherø46
102
Axleofpresswheel1
129
washerø49
103
Presswheelpole1
130
Flowerknob
104
Springpin1
131
SemicircleheadscrewM4×308
105
Handleofpresswheel1
132
Interlockswitch2
106
HexagonscrewM6×181
133
HexagonnutM44
107
FlatscrewM6×181
108
Upperpressboard1
109
Nearingpartsforspacing1

Table of contents