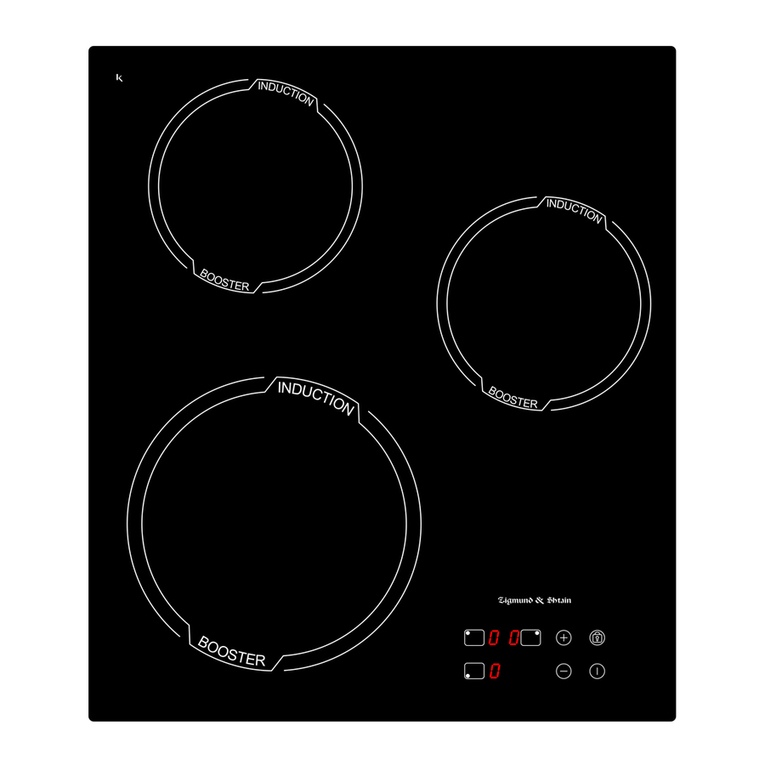
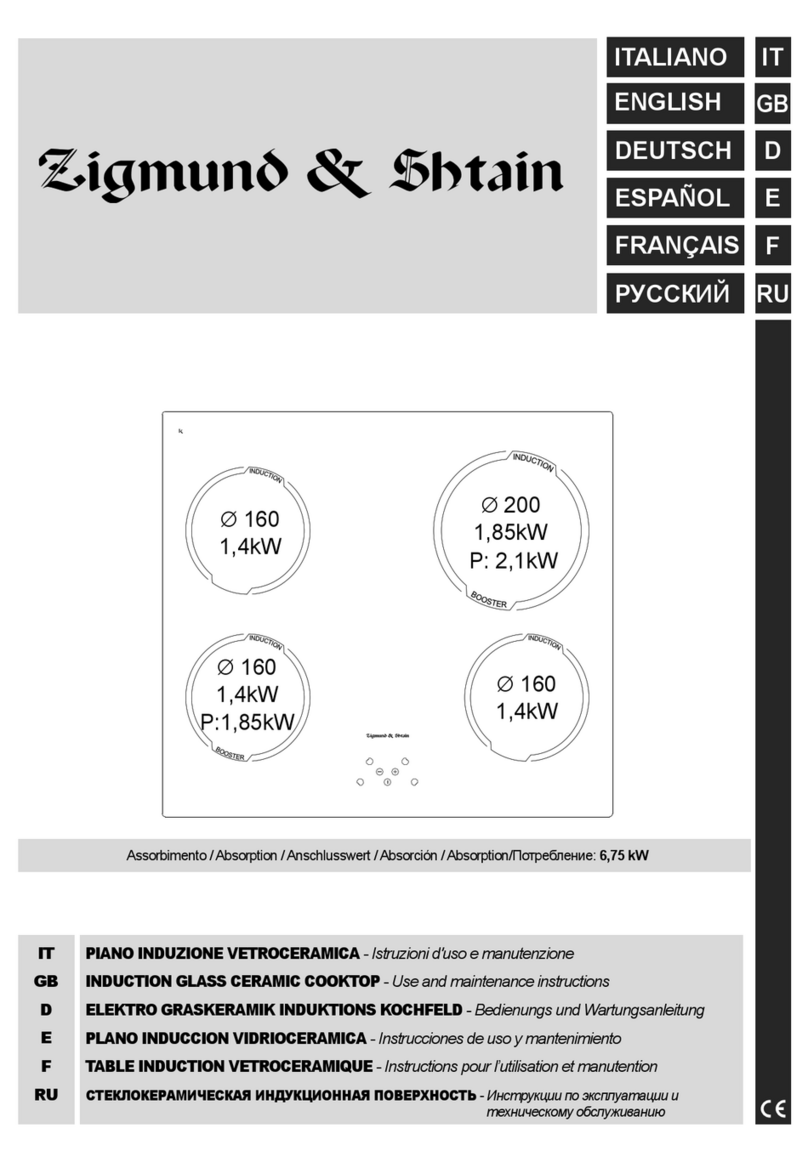
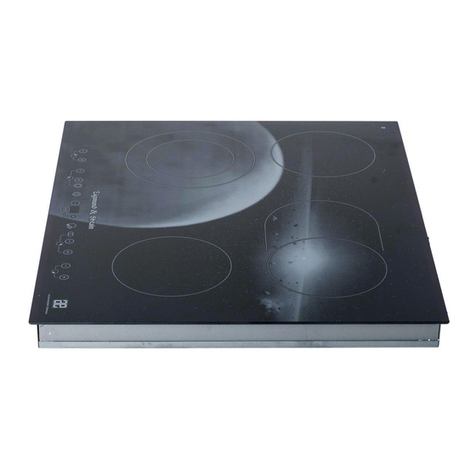
Zigmund & Shtain CNS 302.45 WX Operation instructions

ITALIANO IT
DEUTSCH DE
ENGLISH
EN
ESPAÑOL ES
FRANÇAIS FR
IT
EN
DE
ES
FR
RU
PIANO VETROCERAMICA
- Istruzioni d'uso e manutenzione
CERAMIC GLASS COOKTOP
- Use and maintenance instructions
ELEKTRO GRASKERAMIK KOCHFELD
- Bedienungs und Wartungsanleitung
PLANO VIDRIOCERAMICA
- Instrucciones de uso y mantenimiento
TABLE VETROCERAMIQUE
- Instructions pour l’utilisation et manutention
СТЕКЛОКЕРАМИЧЕСКАЯ ПАНЕЛЬ
- Инструкции по пользованию
РУССКИЙ RU

2
ABCD G
B
E
F
Fig.1
Fig.2
~ 2 mm
min. 50 mm
40
mm
20 mm
510 mm
430mm
440 mm
50
Min
490 mm
mm03
1
2
3
mm04
1
2
3
40 mm
~ 2 mm
min. 50 mm
40
mm
20 mm
510 mm
430mm
440 mm
50
Min
490 mm
mm03
1
2
3
mm04
1
2
3
40 mm

3
220-240V ~ 220-240V2 ~
2,5 mm
2
H05V2V2-F 3G
~ 2 mm
min. 50 mm
40
mm
20 mm
510 mm
430mm
440 mm
50
Min
490 mm
mm03
1
2
3
mm04
1
2
3
40 mm
Fig.3 Fig.4
Fig.7
Fig.6Fig.5

4
ITALIANO IT
GENERALITÀ
Leggere attentamente il contenuto del
presente libretto in quanto fornisce
importanti indicazioni riguardanti la
sicurezza di installazione, d’uso e di
manutenzione. Conservare il libretto
per ogni ulteriore consultazione. Tutte
le operazioni relative all’installazione
(connessioni elettriche) devono essere
effettuate da personale specializzato in
conformità delle norme vigenti.
AVVERTENZE PER LA SICUREZZA
Si consigliano recipienti a fondo piatto
dal diametro uguale o leggermente
superiore a quello dell’area riscaldata
(Fig.5).
Non utilizzare recipienti con base ruvida,
per evitare di graffiare la superficie
termica del piano. Questo apparecchio
non è adatto per l’uso da parte di
bambini o persone che necessitano di
supervisione.
IMPORTANTE
- Evitare le fuoriuscite di liquido,
pertanto per bollire o riscaldare
liquidi, ridurre l’alimentazione di
calore.
- Non lasciare gli elementi riscaldanti
accesi senza recipienti o con
recipienti vuoti.
- Una volta terminato di cucinare,
spegnere la relativa resistenza tramite
il comando indicato in seguito.
- Questo apparecchio non è
destinato all’uso da parte di persone
(inclusi i bambini) con capacità
fisiche, sensoriali o mentali ridotte,
o con mancanza di esperienza
e conoscenza, a meno che non
siano controllati o istruiti all’uso
dell’apparecchio da una persona
responsabile della loro sicurezza.
- Sorvegliare i bambini per assicurarsi
che non giochino con l’apparecchio.
- Se la superficie del piano
è incrinata, spegnere
l’apparecchio e disconnettere
dalla rete elettrica per evitare
l’eventualità di scosse elettriche.
ISTRUZIONI PER L’INSTALLAZIONE
Le presenti istruzioni sono rivolte ad un
installatore specializzato e fungono da
guida per l’installazione, la regolazione
e la manutenzione in conformità delle
leggi e delle norme vigenti.
Se un forno da incasso o qualsiasi
altra apparecchiatura che genera
calore deve essere montato
direttamente sotto il piano di cottura
in vetroceramica, È NECESSARIO
CHE TALE APPARECCHIATURA
(forno) E IL PIANO DI COTTURA
IN VETROCERAMICA SIANO
ADEGUATAMENTE ISOLATI.
Il mancato rispetto di tale precauzione
potrebbe determinare l’errato
funzionamento del sistema TOUCH
CONTROL.
• Posizionamento:
L’elettrodomestico è realizzato per
essere incassato in un piano di lavoro,
come illustrato nella figura (Fig.2).
Predisporre materiale sigillante lungo
l’intero perimetro - Fig.4 (dimensioni
del taglio Fig.2). Questa operazione è
necessaria per evitare che eventuali
liquidi penetrino all’interno del piano,
in quanto non è possibile garantire
la planarità del top e del vetro e il loro
accoppiamento.
Bloccare l’elettrodomestico sul piano di
lavoro mediante i 4 sostegni, tenendo
presente lo spessore del piano di lavoro
(Fig.2).
Se la parte inferiore dell’apparecchio,
dopo l’installazione, è accessibile dalla
parte inferiore del mobile è necessario

5
montare un pannello separatore
rispettando le distanze indicate (Fig.3).
Se si installa sotto un forno questo non
è necessario.
L’apparecchio non è destinato ad essere
gestito per mezzo di un timer esterno
o di un sistema di comando a distanza
separato.
• Connessioni elettriche (Fig.7):
Prima di effettuare le connessioni
elettriche assicurarsi che:
- le caratteristiche dell’impianto siano
tali da soddisfare le indicazioni sulla
targhetta identificativa applicata sulla
parte inferiore del piano di lavoro;
- l’impianto sia dotato di una messa a
terra efficiente conforme alle norme e
alle disposizioni di legge in vigore.
La messa a terra è obbligatoria per
legge.
Nel caso in cui l’elettrodomestico non
sia dotato di cavo e/o della relativa
spina, utilizzare materiale adatto per
l’assorbimento indicato nella targhetta
identificativa e per la temperatura di
funzionamento.
Se si desidera una connessione
diretta alla linea elettrica, è necessario
interporre un interruttore omnipolare,
con un’apertura minima di 3 mm fra i
contatti, appropriato al carico indicato
nella targhetta e conforme alle norme
vigenti (il conduttore di terra giallo/
verde non deve essere interrotto dal
commutatore).
Terminata l’installazione
dell’apparecchiatura, l’interruttore
omnipolare deve essere facilmente
raggiungibile.
USO E MANUTENZIONE
• Manutenzione (Fig.6):
Rimuovere eventuali residui di cibo e
gocce di unto dalla superficie di cottura
utilizzando lo speciale raschietto fornito
su richiesta. Pulire l’area riscaldata
nel miglior modo possibile utilizzando
prodotti idonei ed un panno-carta, quindi
sciacquare con acqua e asciugare con
un panno pulito.
Mediante lo speciale raschietto
(opzionale) rimuovere immediatamente
dall’area riscaldata di cottura frammenti
di fogli di alluminio e materiale plastico
scioltisi inavvertitamente o residui di
zucchero o di cibi ad elevato contenuto
di zucchero. In questo modo si evita ogni
possibile danno alla superficie del piano.
In nessun caso si devono utilizzare
spugnette abrasive o detergenti
chimici irritanti quali spray per forno o
smacchiatori.
• Uso:
Utilizzare il sistema touch control relativo
alla posizione corrispondente alle
esigenze di cottura, tenendo presente
che quanto maggiore è il numero, tanto
più calore viene emanato.
• Funzionamento (Fig.1):
A - Tasto On/Off
B - Tasto di selezione zona cottura
C - Tasto incremento “+”
D - Tasto decremento “-”
E - Display timer
F - Display zone di cottura
G - Indicatore della doppia zona cottura
attiva
• Accensione piano di cottura:
Premere il tasto Aper accendere il piano.
Tutti i display Frelativi alle zone di
cottura si accenderanno in posizione di
standby .
L’unità di controllo rimarrà attiva per un
tempo di 20 secondi.
Se entro questo termine non verrà
selezionata nessuna zona di
cottura il piano cottura si spegnerà
automaticamente.
• Accensione zone di cottura:
Premere il tasto Aper accendere il piano.
Selezionare la zona di cottura desiderata
premendo uno dei tasti B.

6
Premere i tasti C/D per per aumentare
o diminuire la potenza della zona di
cottura.
La potenza della singola zona di cottura
può essere regolata in 9 differenti
posizioni, e sarà visualizzata dal display
luminoso F con un numero da “ a ”.
• Funzione warming:
Una volta accesa una zona di cottura,
premere i tasti C/D, tra i livelli di potenza
e compare il simbolo che indica la
funzione per il mantenimento al caldo.
• Funzione Parboiling:
Questa funzione permette di impostare
per alcuni minuti la massima potenza
per poi tornare ad un valore impostato.
Selezionare la zona di cottura desiderata
premendo uno dei tasti B.
Premere il tasto Cper per aumentare
la potenza della zona di cottura, arritati
a , premendo nuovamente il tasto C
compare il simbolo , ora premendo il
tasto Dsi imposta il livello di potenza
desiderato. Sul display F della zona
cottura selezionata compariranno in
alternaza il valore di potenza impostato
e la . Passati alcuni minuti la funzione
si disattiva e resta visualizzato soltanto il
livello di potenza.
• Disattivazione doppia zona di
cottura:
- Per disattivare questa funzione,
selezionare la piastra con la doppia zona
di cottura B
- Premere di nuovo il tasto B(Double
zone), il led di conferma del relativo
display ( G) si spegnerà .
• Attivazione doppia zona di cottura:
- Per attivare questa funzione,
selezionare la piastra con la doppia zona
di cottura B
- Premere di nuovo il tasto B(Double
zone), il led di conferma del relativo
display ( G) si accenderà .
• Calore residuo:
Se la temperatura di una zona di cottura
è ancora elevata (superiore a 50°) dopo
essere stata spenta, il display relativo a
quella zona mostra il simbolo (calore
residuo). L’indicazione scompare solo
quando non vi è più alcun rischio di
ustioni.
• Timer:
Questa funzione permette di stabilire
il tempo (da a minuti) per lo
spegnimento automatico della zona di
cottura selezionata.
Attivare una zona cottura premendo uno
dei tasti Be regolare la potenza tramite
i tasti C o D.
Premere simultaneamente i tasti C
e D per attivare il timer (il display Esi
attiverà), regolare il tempo tramite i tasti
C o D e poi premere di nuovo il tasto B
per confermare.
Allo scadere del timer la zona cottura
si spegnerà automaticamente e verrà
emesso un segnale acustico che potrà
essere disattivato premendo un qualsiasi
tasto dell’area comandi.
Per disattivare il timer premere il tasto
Bdella zona precedentemente abilitata,
premere simultaneamente i tasti C e
D(il display Esi attiverà), portare a
il valore del timer tramite il tasto D
e poi premere di nuovo il tasto B per
confermare.
• Egg timer/promemoria:
Questa funzione permette di impostare
un promemoria acustico. La funzione
è attivabile solo con tutte le zone di
cottura spente.
Accendere il piano cottura tramite il
tasto A, attivare la zona timer premendo
i tasti C/D, regolare un qualsiasi tempo
compreso tra e minuti premendo
sui tasti C/D. Al termine spegnere il piano
cottura con il tasto A, (altrimenti attendere
5’’ per la conferma automatica).
Allo scadere del timer verrà emesso
un segnale acustico che potrà essere

7
disattivato premendo un qualsiasi tasto
dell’area comandi. Con il promemoria
attivo non è possibile accedere alla
funzione timer.
• Blocco comandi:
Accendere il piano cottura premendo il
tasto A.
É possibile bloccare i comandi per
evitare il rischio di modifiche non
intenzionali alle regolazioni (bambini,
operazioni di pulizia, ecc.), la funzione
è attivabile solo con tutte le zone di
cottura spente.
Premere, entro 10” dall’accensione del
piano cottura, il tasto D, poi insieme
premere anche il tasto Bin basso a
sinistra ,come conferma sarà visualizzato
il simbolo sui display F.
Quando il blocco dei comandi è attivo è
comunque possibile spegnere il piano di
cottura. In questo caso il blocco comandi
rimane attivo anche alla riaccesione del
piano. Per sbloccare permanentemente
il piano, premere di nuovo il tasto D,
poi insieme premere anche il tasto Bin
basso a sinistra ,come conferma sarà
visualizzato il simbolo sui display F.
• Spegnimento zone cottura:
Per spegnere una zona di cottura,
premere il tasto B relativo alla zona,
premento il tasto D portare il livello di
potenza fino allo , poi premere di nuovo
il tasto G della zona, per conferma.
• Spegnimento piano cottura:
Per spegnere completamente il piano di
cottura premere il tasto A.
• Spegnimento di sicurezza:
L’apparecchio è provvisto di un sistema di
sicurezza che spegne automaticamente
il grill trascorso il tempo limite di
accensione ad una data potenza.
POTENZA TEMPO LIMITE
ACCENSIONE (ore)
1- 2 6
3 - 4 5
5 4
6 - 7 - 8 - 9 1,5
6 - 7 - 8 - 9 1,5
DISMISSIONE DEGLI
ELETTRODOMESTICI
La direttiva Europea 2002/96/CE
sui rifiuti di apparecchiature
elettriche ed elettroniche (RAEE),
prevede che gli elettrodomestici
non debbano essere smaltiti nel normale
flusso dei rifiuti solidi urbani. Gli
apparecchi dismessi devono essere
raccolti separatamente per ottimizzare il
tasso di recupero e riciclaggio dei
materiali che li compongono ed impedire
potenziali danni per la salute e l’ambiente.
Il simbolo del cestino barrato è riportato
su tutti i prodotti per ricordare gli obblighi
di raccolta separata. Per ulteriori
informazioni, sulla corretta dismissione
degli elettrodomestici, i detentori
potranno rivolgersi al servizio pubblico
preposto o ai rivenditori.
SI DECLINA OGNI RESPONSABILITA’
PER EVENTUALI DANNI PROVOCATI
DALLA INOSSERVANZA DELLE
SUDDETTE AVVERTENZE. LA
GARANZIA NON E’ VALIDA NEL
CASO DI DANNI PROVOCATI
DALL’INOSSERVANZA DELLE
SUDDETTE AVVERTENZE.

8
GENERAL INFORMATION
Carefully read this use and maintenance
manual, where important information
about installation, use and maintenance
safety is provided.
Keep this manual for future reference.
Any installation operation (electric
connections) shall be performed by
specialized personnel, in compliance
with all standards and regulations in
force.
SAFETY WARNING
The use of flat-bottomed pots, with
a diameter equal to or slightly bigger
than the heated area, is recommended.
(Fig.5). Do not use pots that have a
rough base, in order to prevent the hob
thermal surface from being scratched.
This appliance is not intended for use
by children or infirm people without
supervision.
IMPORTANT
- Avoid the overflow of liquids by
reducing the heat supply when
boiling or warming liquids.
- Do not leave any heating element
switched on, if there are no pots, or
if the pots are empty.
- Once cooking is completed, turn the
concerned heating element off, by
using the control shown below.
- Thisapplianceisnot intendedfor use
by people (children included) with
limited physical, sensorial or mental
abilities, or lacking of experience
and knowledge, unless they are
supervised or well instructed about
the use of the appliance, by a person
who is responsible for their safety.
- Children should be supervised to
assure that they do not play with the
appliance.
- If the hob surface is cracked, turn
the appliance off and disconnect
it from the electric network , so as
to avoid the possibility of electric
shock.
INSTALLATION INSTRUCTIONS
These installation instructions are
intended for a specialized installer
and are meant as guidelines for the
hob installation, adjustment and
maintenance, in compliance with any
regulations and standards in force.
If a built-in oven or any other appliance
generating heat is to be mounted
directly under the vitro-ceramic hob,
IT IS NECESSARY THAT SUCH
AN APPLIANCE (the oven) AND
THE VITRO-CERAMIC HOB ARE
PROPERLY INSULATED.
Failure to comply with this precaution
might result in the incorrect operation of
the TOUCH CONTROL system.
• Positioning:
This household appliance has been
designed for built –in installation onto a
worktop, as shown in the figure (Fig.2).
Use sealing material along the whole
perimeter - Fig.4 (Cut dimensions-
Fig.2). This operation is necessary in
order to prevent any liquid from entering
inside the hob, being that the flatness
of the top, the glass and their coupling
cannot be assured. Fix the appliance
on the worktop by using the 4 supports,
taking the work top thickness into
account (Fig.2). If, after installation, the
lower part of the appliance is accessible
from the lower part of the cabinet, it will
be necessary to mount a spacing panel
at the distances given (Fig.3). If the
appliance is installed under an oven,
this step will not be necessary. The
appliance is not intended to be operated
by an external timer or a separate remote
control system.
ENGLISH EN

9
• Electric connections (Fig.7):
Before carrying out any electric
connections, please make sure that:
- the electrical system meets any
requirement mentioned in the rating
label found on the underside of the
work top;
- the electrical system is equipped with
an efficient grounding system and
compliant with any standards and law
directives in force.
The grounding system is required by law.
In the case the appliance is not equipped
with a power cord and/or the related
plug, please use a material suitable for
the power absorption value mentioned
in the rating label and for the operating
temperature. If a direct connection to
the electric network is required, you
need to use an omnipolar power switch
with a switch-contact gap of at least 3
mm, suitable for the value mentioned
in the label, and compliant with the
related standards in force (the yellow/
green ground connection shall not be
interrupted by the change-over switch).
Once the appliance installation is
completed, the omnipolar switch shall be
easily accessible.
USE AND MAINTENANCE
• Maintenance (Fig.6):
Remove any food residue and grease
drops from the cooking surface, by using
the special scraper provided on request.
Clean the heated area in the best way
possible, using suitable products and a
paper towel, then rinse with water and
wipe away with a clean cloth.
Through the use of the special scraper
(optional), promptly remove any pieces
of aluminum foil and plastic material,
which might have accidentally melted, or
sugar or food remains, and/or remains of
sugary foods, from the heated surface.
In this way, any possible damage to
the surface is prevented. The use of
abrasive sponges or irritating chemical
cleaners, such as sprays for ovens or
cleaning agents is not allowed under any
circumstance.
• Use:
Use the touch control system, related
to the position corresponding to your
cooking needs, taking into account that
the higher the number, the more the heat
released.
• Functioning (Fig.1):
A - On/Off key
B - Cooking zone selection key
C - Increment Key “+”
D - Decrement Key “-”
E - Timer display
F - Cooking zone display
G - Double cooking zone indicator
• Switching the cooking top on:
Press Akey to switch the top on.
All the displays Frelative to the cooking
zones switch on in the standby position
.
The control unit remains active for 20
seconds.
If no cooking zone is selected within
this time, the ccoking top switches off
automatically.
• Switching cooking zones on :
Press key Ato switch the hob on.
Select the desired cooking zone, by
pressing one of the Bkeys.
Press the Cor Dkeys to increase or
decrease the power of the cooking zone.
The power of each single cooking zone
can be set in 9 different positions and
will be shown in the Fdisplay with a
number ranging from to .
• Warming function:
The warming function sets a power level
ranging from to . Once the cooking
zone is started , press the Ckey and
select value ; then press the Dkey ;
the symbol will appear on the Fdisplay,

10
meaning that the warming function is
activated.
• Parboiling function:
This function allows you to set the
maximum power for some minutes, and
then to go back to a set power value.
Select the desired cooking zone by
pressing one of the Bkeys.
Press the Ckey to increase the cooking
zone power, up to value ; by pressing
the Ckey again, the symbol will be
displayed. .
Then, the desired power level can
be set by pressing the Dkey. The
set power value and the symbol will
appear alternately on the Fdisplay of
the cooking zone selected. After a few
minutes, the function is deactivated and
only the power level is displayed.
• Disabling the dual cooking zone:
- To disable this feature, select the zone
with the dual cooking zone B.
- Press again the B button (Double
zones), the LED on the display (G) will
go off.
• Enabling the dual cooking zone:
- To enable this feature, select the zone
with the dual cooking zone B.
- Press again the Bbutton (Double
zones), the LED on the display (G) will
illuminate.
• Residual Heat:
If the temperature of the cooking zone
is still high (over 50°) after it has been
switched off, the relative display will
indicate the symbol (residual heat).
The symbol will only switch off when the
burn risk in no longer present.
• Timer:
This function allows you to set the time
(from to minutes) for the automatic
turn off of the cooking zone selected.
Start a cooking zone by pressing one
of the Bkeys and set the power by
pressing the Cor Dkeys.
Press the Cand Dkeys simultaneously
to start the timer (the Edisplay will be
activated ), set the time by pressing the
Cor Dkeys and then press the key B
again to conrm your selection.
When the timer function elapses, the
cooking zone will automatically switch
off and an acoustic signal will be heard,
which can be deactivated by pressing
any key on the control panel.
To disable the timer function, press the
Bkey on the cooking zone previously
started, then press the Cand - keys
simultaneously (the Edisplay will be
activated), and bring the timer value
back to by using the Dkey and then
press the B key again to conrm your
selection.
• Egg timer/reminder:
This function allows you to set an
acoustic reminder. This function can
only be activated with all the cooking
zones off.
Switch on the hob by pressing key A,
activate the timer zone by pressing the C
and Dkeys simultaneously, and set the
time , ranging from and minutes,
by pressing the Cor Dkeys.
When cooking is completed, switch off
the hob by pressing key A, (or wait for
5’’ for the automatic conrmation).
When the timer function elapses, an
acoustic signal will be heard which can
be deactivated by pressing any key on
the control panel.
When the reminder function is active, the
timer function cannot be selected.
• Control lock:
Switch on the hob by pressing key A.
Controls can be locked in order to prevent
any risk of unintentional changes to the
setting (children, cleaning operations,
etc.); this function can only be
activated with all the cooking zones
off. Press the Dkey within 10” from the
hob switching on, then simultaneously

11
press the Bkey found on the left lower
side; the symbol will appear on the F
displays to conrm your selection.
When the control lock is activated you
can switch the hob off. In this case, the
control lock is still activated, even when
the hob is switched on again.
To unlock the hob permanently, press
the Dkey again, then simultaneously
press the key Bfound on the left lower
side; the symbol will appear on the F
displays to conrm your selection.
• Switching cooking zones off:
To switch a cooking zone off, press the
key Brelated to this zone, bring the
power level back to by pressing the D
key, then press the Bkey related to this
zone to conrm your selection.
• Switching the cooking top off:
To turn off the cooking top entirely hold
down the Akey.
• Safety switch:
The appliance has a safety switch that
automatically switches off the cooking
zones when they have been operating
for a certain amount of time at a given
power level.
POWER
LEVEL
OPERATING TIME LIMIT
(hours)
1- 2 6
3 - 4 5
5 4
6 - 7 - 8 - 9 1,5
6 - 7 - 8 - 9 1,5
DISPOSAL OF OLD HOUSEHOLD
APPLIANCES
The European Directive 2002/96/
EC on Waste Electrical and
Electronic Equipment (WEEE),
requires that old household
appliances shall not be disposed of in
the standard urban solid waste stream.
Old appliances shall be collected
separately in order to optimize the
recovery and recycling of the materials
they contain and reduce the impact on
human health and the environment.
The crossed-out dustbin symbol on the
product reminds you of your obligation
regarding separated waste collection.
Consumers should contact their local
public service or their local dealer for
more information on the correct disposal
of old household appliances.
THE MANUFACTURER DECLINES
ALL RESPONSIBILITY FOR
POSSIBLE DAMAGES CAUSED
BY NOT ABIDING TO THE ABOVE
MENTIONED WARNINGS.

12
DEUTSCH DE
ALLGEMEINE INFORMATIONEN
Das vorliegende Handbuch liefert
dem Kunden alle erforderlichen
Informationen für die Installation, die
Wartung und den Betrieb. Bewahren
Sie diese Gebrauchsanleitung für
weitere Benutzung auf. Die Installation
(elektrische Verbindungen) darf nur
von qualifiziertem Personal gemäß den
örtlichen Bestimmungen ausgeführt
werden.
SICHERHEITSHINWEISE
Wir empfehlen Kochgeschirr mit einem
flachen Boden, das den gleichen oder
einen etwas größeren Durchmesser
als die jeweilige Kochzone aufweist
(Abb.5). Vermeiden Sie Kochgeschirr
mit rauen Böden, damit die Glaskeramik
nicht verkratzt. Das Gerät ist nicht
zur Benutzung durch Personen
(einschließlich Kindern) vorgesehen,
die über reduzierte körperliche Eignung,
Wahrnehmung oder geistige Fähigkeiten
verfügen.
WICHTIG
- Das Verschütten von Flüssigkeiten
vermeiden, indem Sie eine niedrige
Temperatur wählen.
- Die Kochzonen nicht mit leerem
oder ohne Kochgeschirr benutzen.
- Nach jedem Gebrauch die Kochzone
immer mit dem nachstehend
angegebenen Schalter ausschalten.
- Dieses Gerät darf nicht von
Personen (einschließlich Kindern)
mit eingeschränkten physischen,
sensorischen oder geistigen
Fähigkeiten sowie von Personen
bedient werden, denen es an
Erfahrung und notwendigem
Wissen fehlt, sofern diese Personen
nicht von einer verantwortlichen
Person beaufsichtigt und nachhaltig
hinsichtlich der Bedienung des
Gerätes unterwiesen wurden.
- Kinder sollten grundsätzlich
beaufsichtigt werden, damit sie
nicht mit dem Gerät spielen.
- Sollte die Oberfläche der Kochplatte
springen, das Gerät ausschalten
und den Stecker herausziehen,
um einen elektrischen Schlag zu
vermeiden.
MONTAGEHINWEISE
Alle Arbeiten für die Installation,
Regelung und Wartung müssen von
einem qualifizierten Fachmann und nach
den geltenden Vorschriften durchgeführt
werden. Falls ein Einbauherd bzw.
ein Gerät, das Wärme erzeugt, direkt
unter dem Glaskeramik-Kochfeld
installiert wird, IST ES NOTWENDIG,
DASS DAS GERÄT (Backofen)
UND DAS GLASKERAMIK-
KOCHFELD KORREKT ISOLIERT
WERDEN. Die Nichtbeachtung dieser
Vorsichtsmaßnahme kann zu einer
Fehlfunktion der Touch-Control-
Bedienung führen.
• Einbau:
Das Gerät ist für den Einbau in einer
Arbeitsplatte erstellt worden, wie inAbb.2
dargestellt. Dichtungsmittel entlang
des gesamten Randes aufbringen –
Abb.4 (Einbaumaße Abb.2): Diese
Abdichtung verhindert, dass Flüssigkeit
in das Kochfeld eindringen kann, da
die Ebenheit der Oberseite und des
Glases nicht gewährleistet ist. Das
Gerät mit den 4 Stützen befestigen, je
nach der Dicke der Arbeitsplatte (Abb.2).
Falls die untere Seite des Geräts nach
dem Einbau von unten frei zugänglich
bleibt, muss eine Trennplatte nach
den angezeigten Massen angebracht
werden (Abb.3). Wird das Gerät direkt

13
über einen Backofen eingebaut, ist
dies nicht nötig. Das Gerät ist nicht
für eine externe Schaltuhr oder ein
Fernbedienungssystem vorgesehen.
• Elektroanschluss (Abb.7):
Vor dem Stromanschluss versichern Sie
sich, dass:
- die Spannungsangabe auf dem
Typenschild, das sich auf der unteren
Seite des Kochfelds befindet, mit der
Netzspannung übereinstimmt;
- die Elektroanlage mit einer Erdung
gemäß den geltenden Richtlinien
versehen ist.
DieErdung istgesetzlich vorgeschrieben.
Falls das Gerät nicht mit einem
Stromkabel und/oder Stecker
ausgestattet ist, geeignetes
Material für die Absorption und die
Betriebstemperatur, die am Typenschild
angegeben sind, verwenden.
FallseindirekterStromanschlussbenötigt
wird, muss ein mehrpoliger Schalter
mit mind. 3 mm Kontaktöffnungsweite
nach der am Typenschild angegebene
Belastung und gemäß den geltenden
Richtlinien verwendet werden (das gelb/
grüner Erdungskabel darf nicht vom
Schalter unterbrochen werden).
Nach dem Einbau des Geräts muss der
mehrpolige Schalter leicht erreichbar
sein.
BEDIENUNG UND WARTUNG
• Wartung (Abb.6):
Eventuelle Speisereste oder Fetttropfen
am Kochfeld mit dem Schaber (auf
Anfrage erhältlich) beseitigen. Die
erhitzte Fläche bestmöglich mit
geeigneten Produkten und Papiertuch
reinigen, danach mit Wasser
nachwischen und mit einem sauberen
Tuch trocknen. Alufolie und Plastik
müssen sofort vom erhitzen Kochfeld
mit dem speziellem Schaber (optional)
beseitigt werden, ebenso Zucker oder
Lebensmittel mit hohem Zuckergehalt.
Auf diese Weise werden eventuelle
Schäden am Kochfeld vermieden.
Keinesfalls kratzende Schwämme
oder Scheuermittel verwenden wie
Backofenspray oder Fleckentferner.
• Bedienung:
Benutzen Sie die Touch-Control-
Bedienung für die entsprechende
Kochzone und nach Bedarf; je höher
die Kochstufe, desto mehr wird die
Kochzone erwärmt.
• Betriebsweise (Abb.1):
A - Ein/Aus-Taste
B - Kochzonen-Wahltaste
C - Leistungsstufe erhöhen “+”
D - Leistungsstufe verringern “
-
”
E - Timer-Display
F - Kochzonen-Display
G - Doppelte Kochen Zonen-Indikator
• Einschalten des kochfeldes:
Drücken Sie die Taste A, um auf
dem Boden ab. Alle Anzeigen Fund
verwandten Bereichen des Kochens in
den Standby schalten .
Die Steuerung bleibt für eine Zeit von 20
Sekunden aktiv. Wenn innerhalb dieser
Frist nicht auswählen, wird jeder Bereich
der Herd schaltet sich automatisch ab.
• Kochzone einschalten:
Zum Einschalten die Taste A drücken.
Die Taste Bder gewünschten Kochzone
drücken.
Mit den Tasten Coder Ddie gewünschte
Leistungsstufe einstellen.
Jede Kochzone hat 9verschiedene
Leistungsstufen und der eingestellte
Wert wird auf dem Display F(von bis
) angezeigt.
• Warmhaltefunktion:
Mit dieser Funktion wird die Kochzone
auf eine Leistungsstufe zwischen und
eingestellt. Nach dem Einschalten der

14
Kochzone, die Taste C bis Leistungsstufe
und dann die Taste D drücken; das
Symbol auf dem Display zeigt die
Einstellung der Warmhaltefunktion an.
• Ankochautomatik:
Mit dieser Funktion wird die Kochzone
für eine begrenzte Zeit auf die höchste
Leistungsstufe eingestellt; nach Ablauf
dieser Zeit schaltet sich die Kochzone
automatisch auf die zuvor eingestellte
Leistungsstufe zurück.
Die Taste Bder gewünschten Kochzone
drücken. Die Taste Cbis Leistungsstufe
drücken; danach die Taste C
nochmals drücken: das Display zeigt
das Symbol an. Mit der Taste - die
gewünschte Leistungsstufe wählen. Das
Display Fder gewünschten Kochzone
zeigt abwechseln die eingestellte
Leistungsstufe und das Symbol an.
Nach wenigen Minuten schaltet sich
die Funktion automatisch aus und auf
dem Display wird nur die eingestellte
Leistungsstufe angezeigt.
• Abstellen der Doppel-Zone:
- Um diese Funktion abzustellen, wählen
Sie Doppelkochzone B
- Drücken Sie di Taste B(Doppel Zone),
sobald das LED erlischt auf dem Display
(G) hat sie abgestellt.
• Aktivieren der Doppel Zone:
- Um diese Funktion zu aktivieren,
wählen sie die Doppelkochzone B
- Drücken Sie die Taste B(Doppel
Zone), sobald sie angestellt ist leuchtet
auf dem Display das LED.
• Restwärmeanzeige:
Wenn eine Kochzone auf OFF gestellt
wird und die Temperatur auf dem Glas
des Kochfeldes 50°C überschreitet,
erscheint der Buchstabe auf der
Anzeige, die der noch warmen Kochzone
entspricht. Diese Anzeige erlischt erst,
wenn keine Verbrennungsgefahr mehr
besteht.
• Timer:
Mit dieser Funktion kann auf der
gewünschten Kochzone eine Garzeit
von bis Minuten eingestellt
werden.
Die Taste Bder gewünschten Kochzone
drücken und die Leistungsstufe mit den
Tasten Cund Deingeben.
Gleichzeitig die Tasten Cund D
drücken, um den Timer einzuschalten
(das Display E leuchtet auf); die Garzeit
mit den Tasten Cund Deingeben und
die Taste Bzur Bestätigung drücken.
Am Ende der eingestellten Garzeit
schaltetsichdieKochmuldeautomatisch
aus und es ertönt ein akustisches
Signal; das Signal durch das Betätigen
irgendeiner Taste ausschalten.
Um den Timer zu deaktivieren, die
Taste Bder gewünschten Kochzone
drücken, danach gleichzeitig die Tasten
Cund - drücken (das Display Eleuchtet
auf), mit der Taste Ddie Anzeige auf
einstellen und die Taste Bzur
Bestätigung drücken.
• Kurzzeitwecker:
Der Kurzzeitwecker hat die Funktion
am Ende der eingestellten Zeit ein
akustisches Signal zu geben. Diese
Funktion kann nur aktiviert werden,
wenn alle Kochzonen auf Aus sind.
Die Kochmulde durch die Betätigung
der Taste A einschalten; gleichzeitig
die Tasten Cund Ddrücken, um den
Timer einzuschalten, dann durch die
Betätigung der Tasten Cund Deine Zeit
zwischen und Minuten eingeben.
Am Ende die Kochmulde durch die
Betätigung der Taste Aausschalten
(oder 5 Sekunden die automatische
Bestätigung abwarten).
Nach Ablauf der Zeit ertönt ein
akustisches Signal; das Signal durch
das Betätigen irgendeiner Taste
ausschalten.
Ist der Kurzzeitwecker aktiviert, kann
die Timer-Funktion nicht eingestellt
werden.

15
• Verriegelung:
Die Kochmulde durch die Betätigung der
Taste Aeinschalten.
Das Bedienfeld kann durch diese
Funktion verriegelt werden, um eine
Veränderung der Kochzoneneinstellung
zu vermeiden (z.B. von Kindern, bei
der Reinigung, usw.). Diese Funktion
kann nur aktiviert werden, wenn alle
Kochzonen auf Aus sind.
Gleichzeitig die Tasten Dund B(unten
links) innerhalb von 10 Sekunden nach
Einschalten des Gerätes drücken; das
Display Fzeigt zur Bestätigung das
Symbol an.
Ist die Verriegelung aktiviert, können
jedenfalls die Kochzonen ausgeschaltet
werden. Die Verriegelung bleibt bei
Einschaltung der Kochfelder immerhin
aktiv. Für die Deaktivierung gleichzeitig
die Tasten D und Bdrücken (unten links);
das Display Fzeigt zur Bestätigung das
Symbol an.
• Ausschalten der Kochzone:
Um eine Kochzone auszuschalten,
die jeweilige Taste Bdrücken; durch
die Betätigung der Taste Ddie
Leistungsstufe auf einstellen und die
Taste Bzur Bestätigung drücken.
• Abschalten des kochfeldes:
Um die Kochfläche komplett
auszuschalten, die Taste Adrücken.
• Sicherheitsabschaltung:
Das Gerät ist mit einer
Sicherheitsabschaltung ausgestattet,
die automatisch das Gerät ausschaltet,
wenn an der Temperatureinstellung
des Kochfeldes keine Veränderungen
vorgenommen werden. Nach welcher
Zeit die Sicherheitsabschaltung in
Kraft tritt, hängt von der gewählten
Temperaturstufe ab.
TEMPERA-
TURSTUFE
MAX. BETRIEBSZEIT
(IN STUNDEN)
1- 2 6
3 - 4 5
5 4
6 - 7 - 8 - 9 1,5
6 - 7 - 8 - 9 1,5
ENTSORGUNG VON
ELEKTRO- UND ELEKTRONIK-ALTG
ERÄTEN
Dieses Symbol weist darauf hin,
dass das Produkt gemäß WEEE
Richtlinie (Richtlinie über Elektro-
und Elektronik-Altgeräte) (2002/96/
EC) und nationalen Gesetzen nicht über
den Hausmüll entsorgt werden darf.
Dieses Produkt muss bei einer dafür
vorgesehenen Sammelstelle abgegeben
werden. Dies kann z. B. durch Rückgabe
beim Kauf eines ähnlichen Produkts
oder durchAbgabe bei einer autorisierten
Sammelstelle für die Wiederaufbereitung
von Elektro- und Elektronik-Altgeräten
geschehen. Informationen zu
Sammelstellen für Altgeräte erhalten Sie
bei Ihrer Stadtverwaltung, dem öffentlich-
rechtlichen Entsorgungsträger, einer
autorisierten Stelle für die Entsorgung
von Elektro- und Elektronik-Altgeräten
oder Ihrer Müllabfuhr.
FÜR SCHÄDEN, DIE DURCH
NICHTBEACHTUNG DIESER
BEDIENUNGSANLEITUNG
ENTSTEHEN, ÜBERNEHMEN WIR
KEINE HAFTUNG.

16
ESPAÑOL ES
GENERALIDADES
Leer atentamente el contenido del
presente manual ya que aporta
informaciones importantes sobre la
seguridad relativa a la instalación, uso
y mantenimiento. Guardar este manual
para consultas posteriores. Todas las
operaciones relativas a la instalación
(conexiones eléctricas) deben ser
efectuadas por personal especializado
conforme con las normas vigentes.
ADVERTENCIAS PARA LA
SEGURIDAD
Se recomienda utilizar recipientes
con fondo plano de diámetro igual
o ligeramente superior al del área
calentada (Fig.5). No utilizar recipientes
con base rugosa para evitar que se
dañe la superficie térmica de la placa.
Este aparato no es apto para ser usado
por niños o personas que requieran
vigilancia.
IMPORTANTE
- Evitar derramar líquidos; por
tal motivo, cuando se hiervan o
calienten líquidos, disminuir la
alimentación de calor.
- No dejar las placas de calentamiento
encendidas sin recipientes o con
recipientes vacíos.
- Una vez terminado de
cocinar, apagar la resistencia
correspondiente mediante el
mando indicado a continuación.
- Este aparato no está destinado a
ser usado por parte de personas
(incluidos los niños) con capacidad
física, sensorial o mental reducida,
o con falta de experiencia o de
conocimientos, a menos que no
estén controlados o instruidos para
usar el aparato por una persona
responsable de su seguridad.
- Vigilar a los niños para asegurarse
de que no jueguen con el aparato.
- Si la superficie de la placa
está resquebrajada, apagar
el aparato y desconectarlo
de la red eléctrica para evitar
posibles descargas eléctricas.
INSTRUCCIONES PARA LA
INSTALACIÓN
Las presentes instrucciones están
dirigidas a instaladores especializados
y sirven como guía para la instalación,
el ajuste y el mantenimiento de
conformidad con las leyes y normas
vigentes. Si se debe montar un horno
empotrado o cualquier otro aparato que
produzca calor directamente debajo de
la placa de vitrocerámica, HABRÁ QUE
AISLAR ADECUADAMENTE DICHO
APARATO (horno) Y LA PLACA DE
VITROCERÁMICA.
El incumplimiento de dicha precaución
podría provocar un funcionamiento
incorrecto del sistema TOUCH
CONTROL.
• Colocación:
Este electrodoméstico ha sido diseñado
para encajarlo en una encimera, tal
como se muestra en la figura (Fig2).
Distribuir el material de sellado a
lo largo de todo el perímetro- Fig.4
(dimensiones del corte Fig.2).
Esta operación es necesaria para evitar
que puedan introducirse líquidos en
el interior de la encimera ya que no
es posible garantizar la planitud de la
cubierta y del vidrio y su acople.
Bloquear el electrodoméstico en la
encimera mediante los 4 soportes,
teniendo en cuenta el espesor de la
encimera (Fig.2).
Si la parte inferior del aparato, tras la
instalación, es asequible desde la parte
inferior del mueble, es necesario montar

17
un panel de separación siguiendo
las distancias indicadas (Fig.3). Si se
instala un horno debajo, lo antedicho
no es necesario. El aparato no está
diseñado para funcionar mediante un
temporizador externo o con un sistema
de control remoto separado.
• Conexiones eléctricas (Fig.7):
Antes de efectuar las conexiones
eléctricas asegurarse de que:
- las características de la instalación
cumplan con las indicaciones de la
placa de identificación situada en la
parte inferior de la encimera;
- la instalación esté equipada con una
puestaatierra eficiente deconformidad
con las normas y disposiciones de ley
en vigor.
La puesta a tierra es obligatoria por ley.
En el caso de que el electrodoméstico
no disponga de cable y/o del
correspondiente enchufe, utilizar un
material adecuado para la absorción
indicada en la placa de identificación y
para la temperatura de funcionamiento.
Si se desea una conexión directa a la
línea eléctrica, es necesario intercalar
un interruptor omnipolar, con una
apertura mínima de 3 mm entre los
contactos, adecuado para la carga
indicada en la placa y conforme con
las normas vigentes (el conductor de
tierra amarillo/verde no debe estar
interrumpido por el conmutador).
Una vez terminada la instalación del
aparato, el interruptor omnipolar debe
poderse alcanzar cómodamente.
USO Y MANTENIMIENTO
• Mantenimiento (Fig.6):
Eliminar los eventuales residuos de
comida y de grasa de la superficie
de cocción utilizando el rascador
específico suministrado a petición.
Limpiar el área calentada de la mejor
manera posible utilizando productos
adecuados y un paño de papel, tras lo
cual enjaguar con agua y secar con un
paño limpio. Con el rascador especial
(opcional) eliminar inmediatamente de
la zona caliente de cocción los trozos
de aluminio o de plástico que se hayan
derretido sin querer o los residuos de
azúcar o de comida con contenido alto
de azúcar. De tal forma se evitarán
posibles daños a la superficie de la
placa. No utilizar bajo ningún concepto
estropajos abrasivos o detergentes
químicos irritantes como espráis para
hornos o quitamanchas.
• Uso:
Utilice el sistema Touch Control en
el grado de escala de calentamiento
según necesidad de la cocción,
teniendo presente que cuanto mayor es
el grado, más calor viene emanado por
el elemento calefactor correspondiente.
• Funcionamiento (Fig.1)
A - Tecla On/Off
B -Teclas de selección zona cocción
C -Tecla aumento “+”
D -Tecla disminución “
-
”
E - Display temporizador
F - Display zonas de cocción
G - Indicador de zona de cocción doble
• Encendido de la placa de cocción:
Pulse el botón Apara encender la
placa. Todos los displays Fde las zonas
de cocción se activarán en posición de
standby .
La unidad de control permanecerá
activa durante 20 segundos.
Si en este plazo no se selecciona
ninguna zona de cocción, la placa se
apagará automáticamente.
• Encendido zonas de cocción:
Pulsar la tecla Apara encender la
encimera.
Seleccionar la zona de cocción deseada
pulsando una de las teclas B.

18
Pulsar las teclas Co Dpara aumentar
o disminuir la potencia de la zona de
cocción.
La potencia de cada zona de cocción
se puede regular en 9diferentes
posiciones y se mostrará en el display
luminoso Fcon un número de a .
• Función warming:
La función warming congura un nivel
de potencia comprendido entre y .
Una vez encendida una zona de cocción
pulsar la tecla Cy seleccionar el valor
; luego pulsar la tecla D; en el display
Faparece el símbolo que indica la
función warming para mantener en
caliente.
• Función Parboiling:
Esta función permite congurar unos
minutos a máxima potencia para luego
volver al valor congurado. Seleccionar
la zona de cocción deseada pulsando
una de las teclas B.
Pulsar la tecla Cpara aumentar la
potencia de la zona cocción hasta
llegar a ; pulsar de nuevo la tecla Cy
aparecerá el símbolo .
Ahora, pulsando la tecla Dse
congura el nivel de potencia
deseado. En el display Fde la zona
de cocción seleccionada aparecerán
alternativamente el valor de potencia
congurado y la . Transcurridos unos
minutos la función se desactiva y queda
visualizado solo el nivel de potencia.
• Doble zona de cocción de:
- Para desactivar esta función,
seleccione la placa con doble cocción
zona B.
- Pulse el botón B(zona dual), la
conrmación de led (G) se apagará.
• Activación de zona cocción doble:
- Para activar esta función, seleccione
la placa con doble cocción zona B.
- Pulse el botón B(zona dual), la
conrmación de led (G) se encenderá.
• Calor residual:
Si la temperatura de una zona de
cocción es todavía elevada (superior a
50°) después de haberla apagado, su
display mostrará el símbolo (calor
residual). Esta indicación desaparecerá
solamente cuando cese el riesgo de
quemaduras.
• Temporizador:
Esta función permite establecer el
tiempo (de a minutos) para el
apagado automático de la zona de
cocción seleccionada.
Activar una zona de cocción pulsando
una de las teclas By regular la potencia
mediante las teclas C o D.
Pulsar simultáneamente las teclas Ce D
para activar el temporizador (el display E
se activará), regular el tiempo mediante
las teclas C o D y luego pulsar de nuevo
la tecla B para conrmar.
Cuando el temporizador llegue a su
n, la zona de cocción se apagará
automáticamente y se emitirá una
señal acústica que podrá desactivarse
pulsando una tecla cualquiera de la
zona de mandos.
Para desactivar el temporizador pulsar
la tecla Bde la zona anteriormente
habilitada, pulsar simultáneamente las
teclas C y D (el display Ese activará),
colocar en el valor del temporizador
con la tecla - y luego pulsar de nuevo la
tecla B para conrmar.
• Egg timer/recordatorio:
Esta función permite congurar un
recordatorio acústico. La función se
puede activar solo con todas las
zonas de cocción apagadas.
Encender la encimera con la tecla A,
activar la zonadel temporizador pulsando
simultáneamente las teclas Cy D,
establecer un tiempo comprendido entre
y minutos pulsando las teclas Co
D. Al nalizar, apagar la encimera con la
tecla A, (de lo contrario esperar 5” para
la conrmación automática).

19
Cuando el temporizador llegue a su
n, se emitirá una señal acústica que
podrá desactivarse pulsando una tecla
cualquiera de la zona de mandos. Con
el recordatorio activo no es posible
acceder a la función temporizador.
• Bloqueo mandos:
Encender la encimera pulsando la tecla
A.
Es posible bloquear los mandos para
evitar el riesgo de modicaciones
involuntarias de los ajustes (niños,
operaciones de limpieza, etc.), la
función se puede activar solo
con todas las zonas de cocción
apagadas.
Pulsar, en el plazo de 10” a partir del
encendido de la encimera, la tecla D, y
luego pulsar al mismo tiempo la tecla B
abajo a la izquierda; para conrmar se
mostrará el símbolo en los displays F.
Cuando el bloqueo de los mandos está
activado se puede de todas formas
apagar la encimera. En este caso el
bloqueo de los mandos permanece
activado también cuando se
enciende de nuevo la encimera. Para
desbloquear de forma permanente la
encimera, pulsar de nuevo la tecla D, y
luego pulsar al mismo tiempo la tecla B
abajo a la izquierda; para conrmar se
mostrará el símbolo en los displays
F.
• Apagado zonas de cocción:
Para apagar una zona de cocción,
pulsar la tecla Bcorrespondiente a la
zona, pulsando la tecla D establecer
el nivel de potencia a , luego pulsar
de nuevo la tecla Bde la zona, para
conrmar.
• Apagado placa de cocción:
Para apagar completamente el plano
de cocción pulsar el botón A.
• Apagado de seguridad:
El aparato cuenta con un sistema
de seguridad que lo apaga
automáticamente una vez transcurrido
el tiempo límite de encendido a una
determinada potencia, como se ilustra
en la siguiente tabla.
POTENCIA TIEMPO LÍMITE DE
ENCENDIDO (horas)
1- 2 6
3 - 4 5
5 4
6 - 7 - 8 - 9 1,5
6 - 7 - 8 - 9 1,5
ELIMINACIÓN DE LOS
ELECTRODOMÉSTICOS
La directiva Europea 2002/96/CE
sobre residuos de aparatos
eléctricos y electrónicos (RAEE),
prevé que los electrodomésticos
no se eliminen en el circuito normal de
residuos sólidos urbanos. Los aparatos
eliminados deberán recogerse de forma
separada para optimizar el porcentaje
de recuperación y reciclaje de los
materiales que los componen e impedir
daños potenciales para la salud y el
ambiente. El símbolo de la papelera
tachada se encuentra en todos los
productos para recordar la obligación
de efectuar una recogida selectiva.
Para más informaciones, sobre la
correcta eliminación de los
electrodomésticos, los usuarios podrán
dirigirse al servicio público encargado
de ello o al revendedor.
SE DECLINA TODA
RESPONSABILIDAD POR
EVENTUALES DAÑOS
PROVOCADOS POR EL
INCUMPLIMIENTO DE LAS
ANTEDICHAS ADVERTENCIAS.

20
FRANÇAIS FR
GÉNÉRALITÉS
Avant d’utiliser cet appareil, lisez
attentivement la notice car elle contient
des instructions très importantes
concernant la sécurité d’installation,
d’usage et d’entretien. Conservez cette
notice pour une consultation ultérieure.
Toutes les opérations d’installation
(connexions électriques) doivent être
effectuées par du personnel qualifié
conformément aux normes sur la
sécurité électrique.
CONSIGNES DE SÉCURITÉ
Veillez à ce que le diamètre des
récipients soit égal ou légèrement
supérieur à celui de la zone de cuisson
choisie (Fig.5).
Il est préférable que vos casseroles
présentent un fond parfaitement
plat afin d’éviter de rayer la zone de
cuisson. Cet appareil n’est pas destiné
à être utilisé par des enfants ou des
personnes qui nécessitent d’une
personne responsable de leur sécurité.
IMPORTANT
- Évitez tout débordement de liquides
; faites bouillir ou réchauffer les
liquides en réduisant la chaleur.
- Ne laissez jamais les foyers radiants
allumés sans récipients ou avec
des récipients vides.
- Terminée la cuisson, éteignez
la résistance par la commande
indiquée ci-après.
- Cet appareil n’est pas destiné à
être utilisé par des personnes
(enfants y compris) ayant des
facultés physiques, sensorielles ou
mentales réduites, ou un manque
d’expérience et de connaissance,
à moins qu’elles aient eu des
explications concernant l’utilisation
de l’appareil par une personne
chargée de leur sécurité.
- Surveillez les enfants pour s’assurer
qu’ils ne jouent pas avec l’appareil.
- Si la surface de la table est
fêlée, éteindre l’appareil
et débrancher l’appareil du
réseau électrique pour éviter
tout risque de chocs.
INSTRUCTIONS POUR
L’INSTALLATION
Ces instructions sont destinées à
un installateur qualifié et servent
comme guide pour l’installation, le
réglage et l’entretient conformément
aux dispositions en vigueur. Si un
four à encastrement ou tout autre
appareil qui produit de la chaleur est
installé directement sous la table de
cuisson en vitrocéramique, IL EST
NÉCESSAIRE QUE CET APPAREIL
(four) ET LA TABLE DE CUISSON
SOIENT CORRECTEMENT ISOLÉS.
Le non-respect de cette précaution peut
entraîner un fonctionnement erroné du
système TOUCH CONTROL.
• Positionnement:
L’appareil est conçu pour être encastré
dans un plan de travail, comme illustré
dans la figure (Fig.2). Appliquer du
matériau scellant le long de tout le
périmètre - Fig.4 (dimension du trou
Fig.2). Cette opération est nécessaire
pour éviter toute infiltration de liquide
à l’intérieur de la table de cuisson,
car il n’est pas possible de garantir
la planéité de la plaque et du verre et
de leur accouplement. Fixez l’appareil
sur le plan de travail en utilisant les
4 supports, en tenant compte de
l’épaisseur du plan de travail (Fig.2).
Si le dessous de l’appareil, après
l’installation, est accessible par le
bas du meuble, il est nécessaire de
positionner un panneau de séparation
This manual suits for next models
1
Table of contents
Languages:
Other Zigmund & Shtain Cooktop manuals
Popular Cooktop manuals by other brands

Frigidaire
Frigidaire GLGC36S8K Factory parts catalog

Fisher & Paykel
Fisher & Paykel CookSurface CG363ML user guide

ROBINHOOD
ROBINHOOD HIA604TFG Installation & operating instructions

Frigidaire
Frigidaire GLGC30S8A Factory parts catalog

Everglades
Everglades EVFH820 user manual

Electrolux
Electrolux 5995447090E36GC76EPS Use and care guide