10 GB
Do not place the product on
hot surfaces, near hot surfaces
or near an open fire.
To prevent impermissible heating
do not cover the plug and the
product during use.
Do not use any corrosive or
abrasive cleaning agents.
Keep the blade oil out of reach
of children. Do not ingest the
blade oil, do not get it into your
eyes. Keep it in a safe place if it
is not being used.
No action is needed from users
to shift the product between 50
and 60Hz. The product adapts
itself for both 50 and 60Hz.
Before use
Remove all parts from the package.
Oiling the blades
It is recommended that you oil the blades before
first use and after cleaning to guarantee complete
functionality.
Apply one or two drops of blade oil 9bet-
ween the blades and distribute them evenly
(see Fig. I).
Wipe away any excess oil using a cloth.
You can also use any acid-free oil such as
sewing machine oil.
Operation
Changing the attachments
(Fig. C‒E)
Remove the blade guard 7from the cutting
head 1.
Place the required trimming guide 6with the
prongs facing upwards on the cutting head
1and thereby press the flap of the trimming
guide 6down firmly onto the lower metal
edge of the cutting head 1(see Fig. C and D).
Ensure that the trimming guide 6has properly
engaged with “click“ sound before starting to c
ut/
trim the fur (see Fig. E).
CAUTION!
It is normal that the product will become hot
during use.
Occasionally turn off the product while using
and check to see if product has possibly got-
ten too hot for your pet. If so, let the product
cool off; otherwise the hot shaving head may
hurt your pet.
As a rough guide, you should start dipping
behind the shoulders and slowly work your
way backwards and downwards. Work very
carefully when clipping/trimming your pet‘s
sensitive body parts such as face, stomach,
legs or hindquarters.
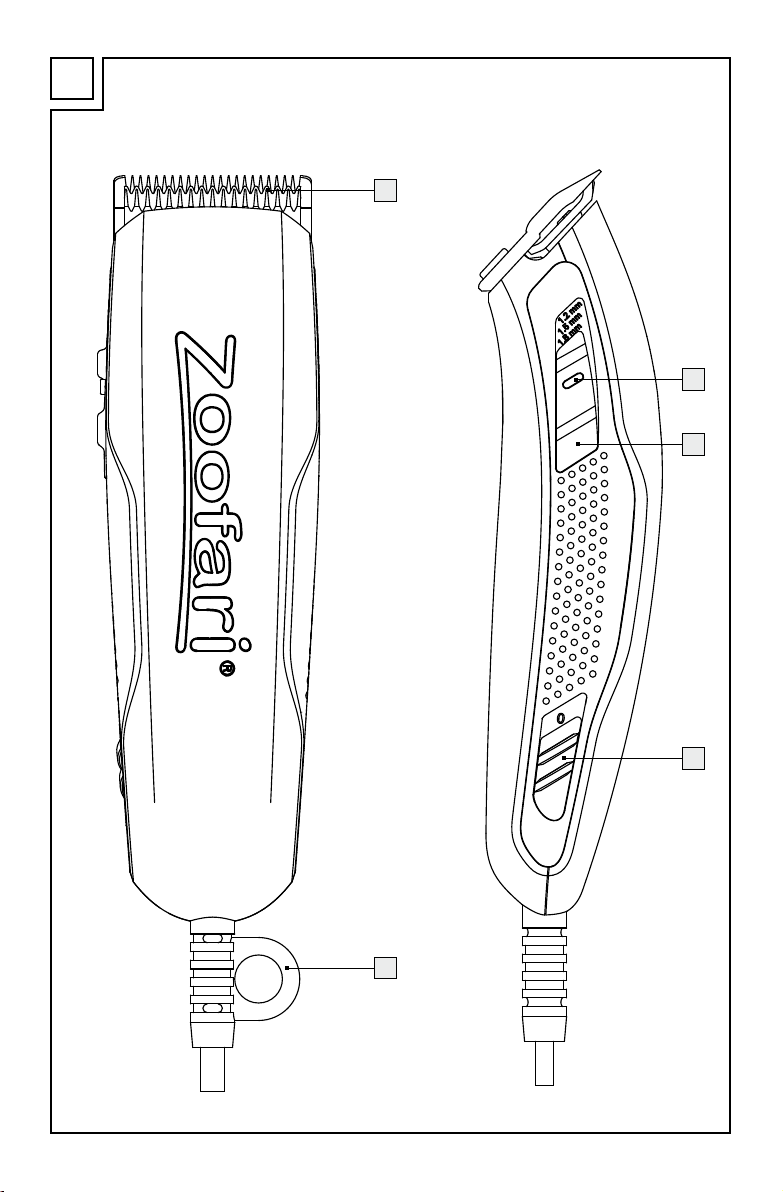
Setting the trim length
To set different trim lengths, hold the main body
of the product slide the adjustment switch 4
into the desired position (0.9‒1.8mm). The set
trim length will be displayed on adjustment
switch 4.
1. Select a shorter trim length: Press and hold
the safety lock 3and slide the adjustment
switch 4upwards. The shortest trim length
is 0.9mm (see Fig. A).
2. Select a longer trim length: Press and hold
the safety lock 3and slide the adjustment
switch 4downwards. The longest trim
length is 1.8mm (see Fig. A).