SPECIFICATIONS
9
GENERAL SPECIFICATIONS / ESPECIFICAIONES GENERALES
Nominal Diameter (speakers) / Diámetro nominal (altavoces) ................................................ 15" / 381mm
Number of Ways (speakers) / Número de vías (altavoces) .....................................................2-Way / 2 Vías
Total Watts (Peak) / Total de vatios (pico) ........................................................................................... 1000W
RMS Power (Internal Amp) / Potencia RMS (amplificador interno) ....................................................... 250W
MAX Power (Internal Amp) / Potencia MAX (Amplificador Interno) ....................................................... 500W
Frequency Response / Respuesta de Frecuencia ......................................................................42HZ-20KHZ
SPL Output / Salida SPL .............................................................................................................................97dB
Max SPL Output / Salida SPL Máxima .................................................................................................... 127dB
Coverage Pattern / Patrón de Cobertura.......................................................................................... 90° x 60°
BODY - FEATURES / CUERPO - CARACTERÍSTICAS
Enclosure Material / Material de la Caja .......................... Polypropylene Molded / Polipropileno Moldeado
Waterproof Grade / Grado Impermeable ....................................... NOT waterproof / NO Resistente al Agua
Grill Type / Tipo de parrilla......... Perforated Steel with Acoustically Transparent Black Cloth Backing /
Acero Perforado con Respaldo de Tela Negra Acústicamente Transparente
Color / Color ................................................................................................................................ Black / Negro
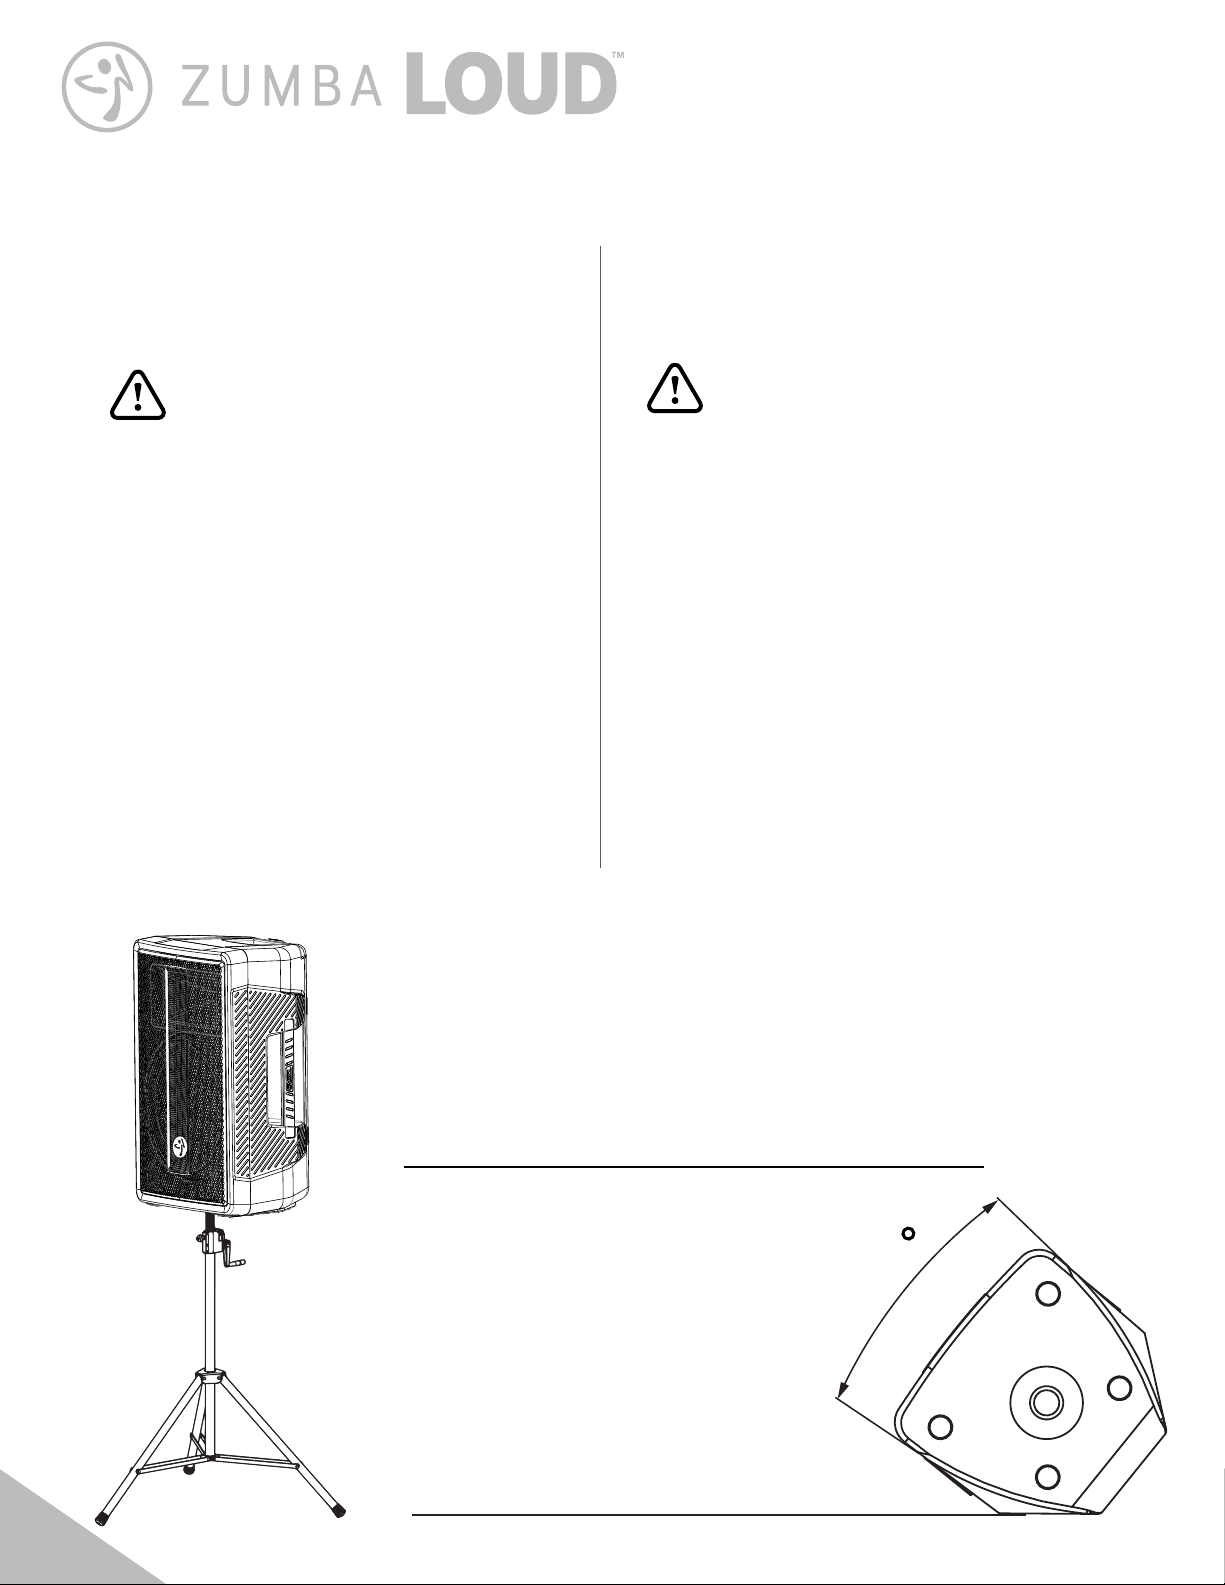
Monitor Angle / Ángulo del Monitor ............................................................Yes, Both Sides / Sí, ambos lados
Mounting / Montaje ...............................................................35mm Pole Socket / Toma de poste de 35 mm
Handles / Manijas..............................................................................................................................................3
Transporting / Transporte ........... Retractil Ttop Handle and Wheels / Manija Superior Retráctil y Ruedas
WOOFER SPECIFICATIONS / ESPECIFICACIONES DE WOOFER
Voice Coil Diameter / Diámetro de la Bobina de Voz.............................................................2.57" / 65.5mm
Voice Coil Former Material / Material interior de la Bobina de Voz...................................................... Kapton
Cone Material / Material del Cono ............................................................................................... Paper / Papel
Surround Material / Material de la Suspensión...............................................................................Cloth / Tela
Basket Material / Material de la Canasta ..................................................................................... Steel / Acero
Magnet Material / Material del Imán........................................................................................Ferrite / Ferrita
Magnet Weight / Peso del Imán............................................................................................................49.6 Oz
TWEETER SPECIFICATIONS / ESPECIFICACIONES DEL TWEETER
Voice Coil Diameter / Diámetro de la Bobina de Voz..............................................................1.75" / 44.4mm
Type / Tipo ......................................................................... Compression Driver / Controlador de Compresión
Diaphragm Material / Material del Diafragma .....................................................................Titanium / Titanio
Magnet Material / Material del Imán........................................................................................Ferrite / Ferrita
Magnet Weight / Peso del Imán........................................................................................................... 22.2 OZ
GENERAL SPECIFICATIONS / ESPECIFICAIONES GENERALES
Nominal Diameter (speakers) / Diámetro nominal (altavoces) ................................................ 15" / 381mm
Number of Ways (speakers) / Número de vías (altavoces) .....................................................2-Way / 2 Vías
Total Watts (Peak) / Total de vatios (pico) ........................................................................................... 1000W
RMS Power (Internal Amp) / Potencia RMS (amplificador interno) ....................................................... 250W
MAX Power (Internal Amp) / Potencia MAX (Amplificador Interno) ....................................................... 500W
Frequency Response / Respuesta de Frecuencia ......................................................................42HZ-20KHZ
SPL Output / Salida SPL .............................................................................................................................97dB
Max SPL Output / Salida SPL Máxima .................................................................................................... 127dB
Coverage Pattern / Patrón de Cobertura.......................................................................................... 90° x 60°
BODY - FEATURES / CUERPO - CARACTERÍSTICAS
Enclosure Material / Material de la Caja .......................... Polypropylene Molded / Polipropileno Moldeado
Waterproof Grade / Grado Impermeable ....................................... NOT waterproof / NO Resistente al Agua
Grill Type / Tipo de parrilla......... Perforated Steel with Acoustically Transparent Black Cloth Backing /
Acero Perforado con Respaldo de Tela Negra Acústicamente Transparente
Color / Color ................................................................................................................................ Black / Negro
Monitor Angle / Ángulo del Monitor ............................................................Yes, Both Sides / Sí, ambos lados
Mounting / Montaje ...............................................................35mm Pole Socket / Toma de poste de 35 mm
Handles / Manijas..............................................................................................................................................3
Transporting / Transporte ........... Retractil Ttop Handle and Wheels / Manija Superior Retráctil y Ruedas
WOOFER SPECIFICATIONS / ESPECIFICACIONES DE WOOFER
Voice Coil Diameter / Diámetro de la Bobina de Voz.............................................................2.57" / 65.5mm
Voice Coil Former Material / Material interior de la Bobina de Voz...................................................... Kapton
Cone Material / Material del Cono ............................................................................................... Paper / Papel
Surround Material / Material de la Suspensión...............................................................................Cloth / Tela
Basket Material / Material de la Canasta ..................................................................................... Steel / Acero
Magnet Material / Material del Imán........................................................................................Ferrite / Ferrita
Magnet Weight / Peso del Imán............................................................................................................49.6 Oz
TWEETER SPECIFICATIONS / ESPECIFICACIONES DEL TWEETER
Voice Coil Diameter / Diámetro de la Bobina de Voz..............................................................1.75" / 44.4mm
Type / Tipo ......................................................................... Compression Driver / Controlador de Compresión
Diaphragm Material / Material del Diafragma .....................................................................Titanium / Titanio
Magnet Material / Material del Imán........................................................................................Ferrite / Ferrita
Magnet Weight / Peso del Imán........................................................................................................... 22.2 OZ