manuals.online logo
Brands
  1. Home
  2. •
  3. Brands
  4. •
  5. ZURN
  6. •
  7. Water System
  8. •
  9. ZURN Z1390 User manual

ZURN Z1390 User manual

ZURN PLUMBING PRODUCTS GROUP SPECIFICATION DRAINAGE OPERATION, 1801 PITTSBURGH AVENUE, ERIE, PA 16502 PHONE 814/455-0921 FAX: 814/454-7929 WEBSITE: www.zurn.com
Page 82
HYDRANTS
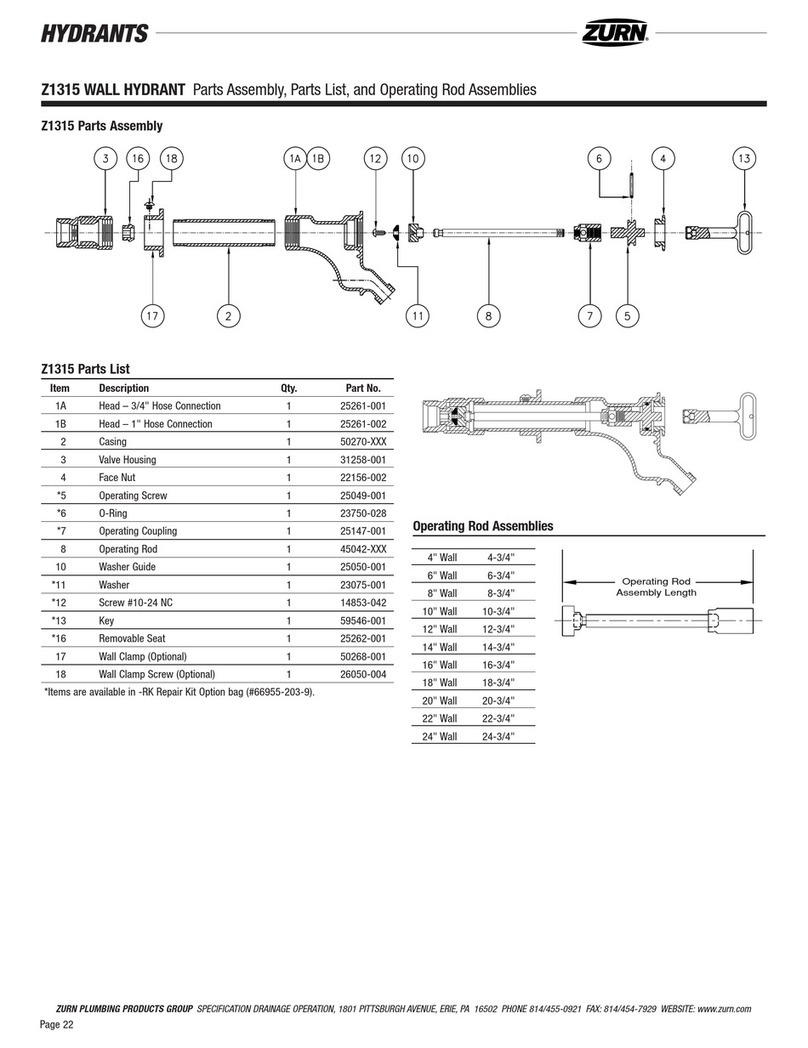
Z1390 POST HYDRANT Parts Assembly, Parts List, and Operating Rod Assemblies
Z1390 Parts Assembly
Operating Rod Assemblies
2' Bury 55"
3' Bury 67"
4' Bury 79"
5' Bury 91"
6' Bury 103"
7' Bury 115"
8' Bury 127"
9' Bury 139"
10' Bury 151"
Operating Rod
Assembly Length
Z1390 Parts List
Item Description Qty. Part No.
1A Head – 1-1/4" Hose Connection 1 25519-003
1B Head – 1-1/2" Hose Connection 1 25519-002
1C Head – 2" Hose Connection 1 25519-001
2 Casing 1 25515-XXX
3 Valve Housing 1 25517-003
4 Face Nut 1 25505-001
*5 Operating Screw 1 25506-001
*6 O-Ring 1 23750-037
*7 Operating Coupling 1 25507-001
8 Operating Rod 1 25516-XXX
9 Washer Guide 1 31436-001
*10 Washer 1 25520-001
*11 Screw #10-24 NC 1 14853-042
13 Casing Guard 2 38489-001
14 Casing Guard Setscrew 2 18006-045
*15 O-Ring 2 23750-040
*16 Key 1 11600-001
*17 Removable Seat 1 25510-001
18 Screw #10-24 NC 4 14853-046
19A 1-1/2" x 2" Bushing 1 23471-007
19B 1-1/4" x 2" Bushing 1 23471-009
*Items are available in -RK Repair Kit Option bag (#66955-200-9).
ZURN PLUMBING PRODUCTS GROUP SPECIFICATION DRAINAGE OPERATION, 1801 PITTSBURGH AVENUE, ERIE, PA 16502 PHONE 814/455-0921 FAX: 814/454-7929 WEBSITE: www.zurn.com
Page 83
HYDRANTS
Z1390 POST HYDRANT Troubleshooting Guide
Z1390 Troubleshooting Guide
PROBLEM CAUSE SOLUTION
Hydrant will not operate when turned on. Water supply is shut off. Turn on water supply.
Cannot turn the hydrant on with key. Hydrant hasn’t been used for a long time – O-Ring Follow steps 1-2, 4, and 7-8 of the Service Guide.
has adhered to the operating screw and head.
Water does not shut off completely when Debris between seat and washer. Follow steps 1-3 and 6-8 of the Service Guide.
hydrant is turned off. Clean by turning water supply on and flush hydrant.
Washer is worn out. Follow steps 1-3 and 5-8 of the Service Guide.
Wire draw in seat. Replace seat.
Water is flowing out of the hydrant drainage Washer guide O-Rings are broken or missing. Follow steps 1-3 and 5-8 of the Service Guide.
port when the hydrant is turned on.
Hydrant exhibits low flow. Water supply to hydrant is restricted. Check water supply to ensure that all upstream valves
are fully open.
ZURN PLUMBING PRODUCTS GROUP SPECIFICATION DRAINAGE OPERATION, 1801 PITTSBURGH AVENUE, ERIE, PA 16502 PHONE 814/455-0921 FAX: 814/454-7929 WEBSITE: www.zurn.com
Page 84
HYDRANTS
Z1390 POST HYDRANT Service Guide
Z1390 Service Guide
Step 1: Shutting Off the Water Supply to the Hydrant
Locate the supply shut-off valve and rotate until water supply is off.
Step 2: Removing the Face Nut and Adjacent Components
Using crescent wrench or 1-1/2 inch open-end wrench, remove the face nut
(4) from head (1) by turning counterclockwise.
Step 3: Removing the Internal Operating Assembly
The internal operating assembly (5-11 and 15) can be removed by gripping
the square end of the operating screw (5) with a pair of pliers and pulling
straight out.
If the operating screw O-Ring was not the reason for service – skip to step 5.
Step 4: Replacing the Operating Screw O-Ring
Remove the operating screw (5) from operating coupling (7) by turning
clockwise and slip the old O-Ring (6) off, and replace with new O-Ring (6).
Reinstall operating screw (5) into operating coupling (7) by turning counter-
clockwise. (Note: Lubricate the operating screw (5) threads and the O-Ring
(6) with Lubriplate FGL-2 if needed.)
If the hydrant shutoff washer and washer guide O-Rings were not the
reason for service – skip to step 8.
Step 5: Replacing the Hydrant Shutoff Washer and Washer Guide O-Rings
Remove #10-24 NC x 3/8 screw (11) using a flat screwdriver and turning
screw (11) counterclockwise, remove washer (10) and replace with new
washer (10) and new screw (11) turning screw clockwise until tight. Remove
old O-Rings (15) and replace with new O-Rings (15). (Note: Lubricate the
O-Rings (15) with Lubriplate FGL-2 if needed.)
Step 6: Replacing the Internal Operating Assembly
There is a flat or a V-notched boss inside of the hydrant head (1) that keeps
the operating coupling (7) from rotating when hydrant is turned on and off.
With operating screw (5) turned counterclockwise into operating coupling
(7) until it stops, and making sure that a flat side or corner of operating
coupling (7) lines up with appropriate boss, reinsert the internal operating
assembly into the hydrant.
Step 7: Replacing the Face Nut
Insert face nut (4) into head (1), and rotate clockwise until hand tight, then
using a crescent wrench or 1-1/2 inch open end wrench, snug nut (4) tight.
Step 8: Turning On the Water Supply
Locate the water supply shut-off valve and rotate until water supply is on.

Other ZURN Water System manuals

ZURN Z1375 User manual

ZURN

ZURN Z1375 User manual

ZURN Z1325 User manual

ZURN

ZURN Z1325 User manual

ZURN Z1315 User manual

ZURN

ZURN Z1315 User manual

ZURN Z1335 User manual

ZURN

ZURN Z1335 User manual

Popular Water System manuals by other brands

Salvador Escoda FRESH HYDRO FWS40 manual

Salvador Escoda

Salvador Escoda FRESH HYDRO FWS40 manual

Clean Water Systems Pro-OX 7800 Installation & start?up guide

Clean Water Systems

Clean Water Systems Pro-OX 7800 Installation & start?up guide

Thermo Scientific VersaCool user manual

Thermo Scientific

Thermo Scientific VersaCool user manual

EINHELL GC-WW 8042 ECO Original operating instructions

EINHELL

EINHELL GC-WW 8042 ECO Original operating instructions

Wilo Isar BOOST5 Installation and operating instructions

Wilo

Wilo Isar BOOST5 Installation and operating instructions

Red Sea WaveMaster Pro Installation & operation manual

Red Sea

Red Sea WaveMaster Pro Installation & operation manual

Truma Aquatherm operating instructions

Truma

Truma Aquatherm operating instructions

Oase ProfiClear Premium operating instructions

Oase

Oase ProfiClear Premium operating instructions

Vaillant auroFLOW plus VPM 15 D Installation and maintenance instructions

Vaillant

Vaillant auroFLOW plus VPM 15 D Installation and maintenance instructions

ACO HygieneFirst installation manual

ACO

ACO HygieneFirst installation manual

Lancaster LRO-35 Installation, operation and service manual

Lancaster

Lancaster LRO-35 Installation, operation and service manual

deconta C110 L 110V instruction manual

deconta

deconta C110 L 110V instruction manual

Pelican 1354 NaturSoft owner's manual

Pelican

Pelican 1354 NaturSoft owner's manual

TMC Aquarium V2Skim 200 Compact Instructions for installation and use

TMC Aquarium

TMC Aquarium V2Skim 200 Compact Instructions for installation and use

Rinnai Enduro SP200A installation manual

Rinnai

Rinnai Enduro SP200A installation manual

EINHELL GC-WW 1046 N Original operating instructions

EINHELL

EINHELL GC-WW 1046 N Original operating instructions

Enapter EL4.0 quick start guide

Enapter

Enapter EL4.0 quick start guide

Munters WDP installation manual

Munters

Munters WDP installation manual

manuals.online logo
manuals.online logoBrands
  • About & Mission
  • Contact us
  • Privacy Policy
  • Terms and Conditions

Copyright 2025 Manuals.Online. All Rights Reserved.