3Dconnexion Numpad Pro | 5
Status LED
The Numpad Pro features a status LED that shows the battery status as well as the connection status.
Battery status:
Immediately after turning on the device or after wake-up from sleep, the LED will show the current charge level:
- Green The Numpad Pro is sufficiently charged.
- Red The Numpad Pro has less than 10% charge and requires charging.
Pairing and connection status:
After the battery status is displayed, the device will show the current connection and pairing mode.
- White (steady) Successfully connected in 3Dconnexion wireless mode.
- White (pulsing) Ready for 3Dconnexion wireless connection.
- Blue (steady) Successfully connected in Bluetooth mode.
- Blue (pulsing) Ready for Bluetooth connection.
After the device has been successfully connected, the LED turns off.
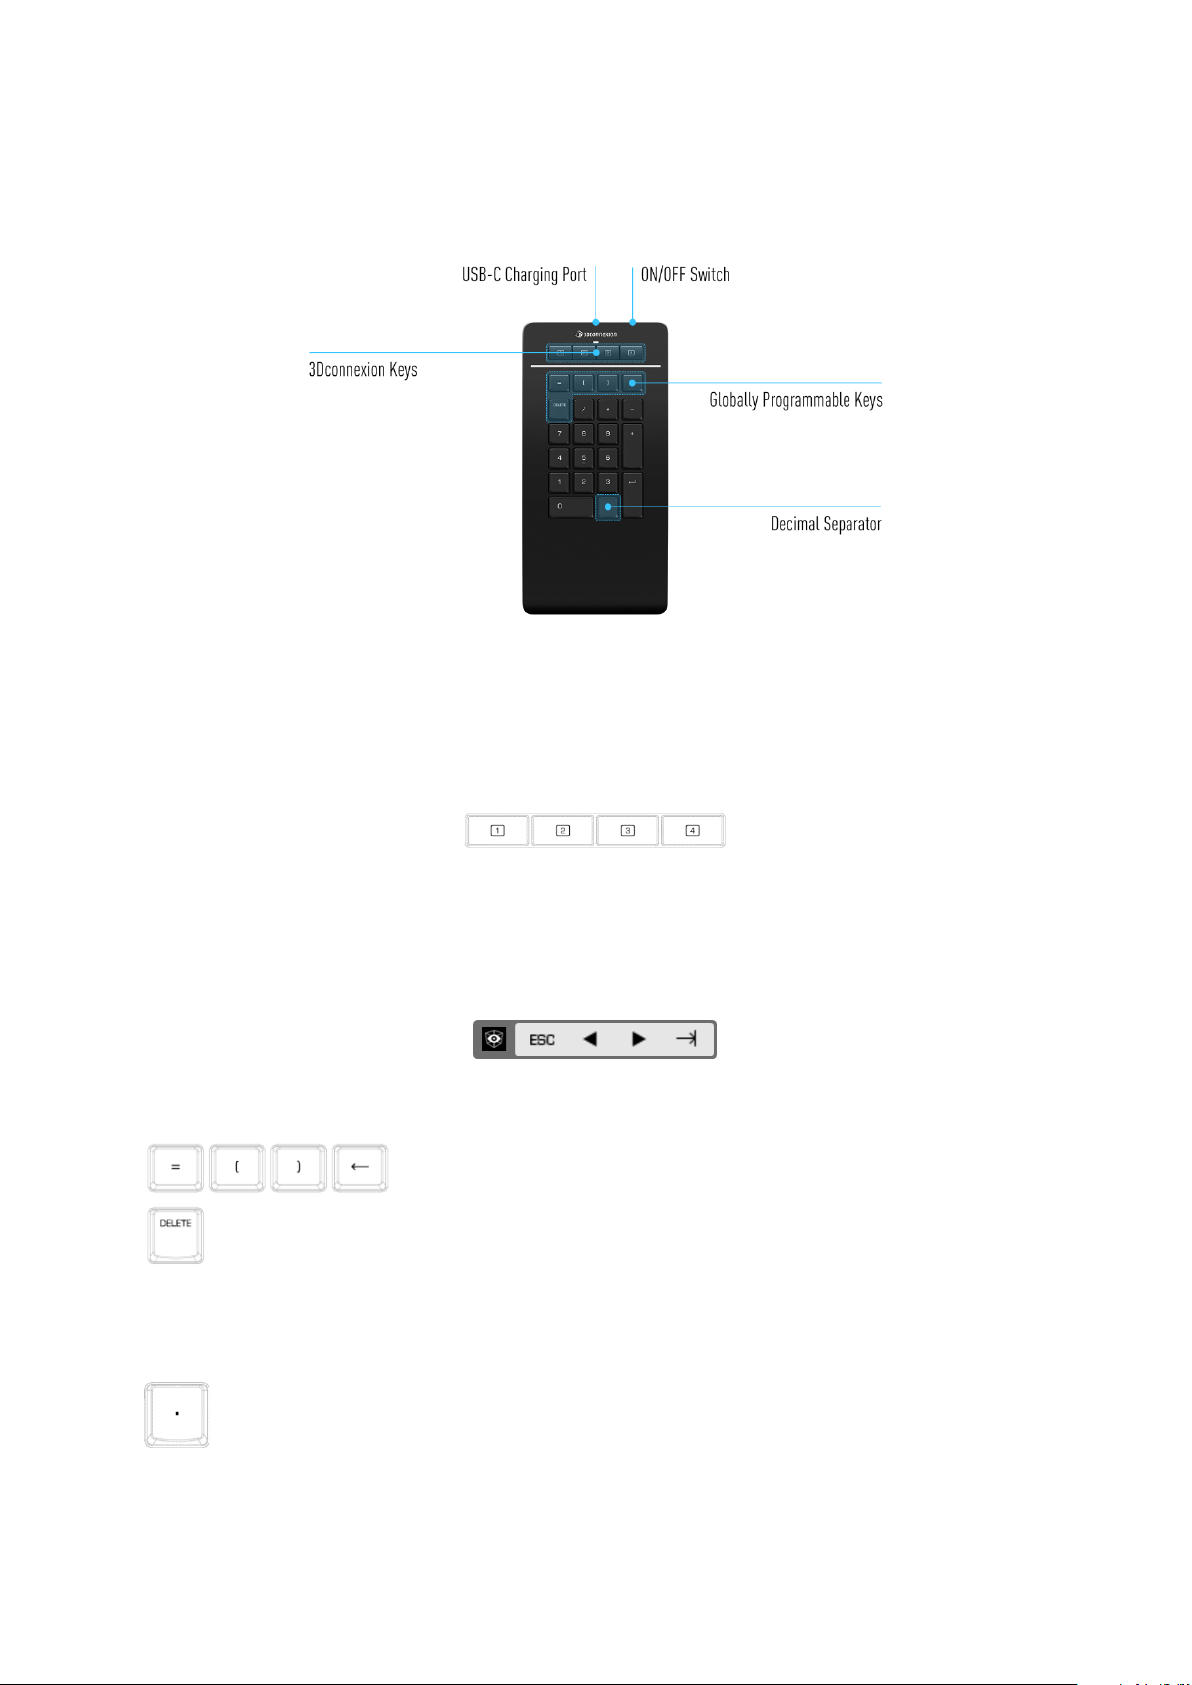
Charge your Numpad Pro
Connect your Numpad Pro to a charging port on your computer by using the included USB cable. As long as the Numpad Pro is
charging, the status LED will flash green, and it will turn solid green when it is fully charged.
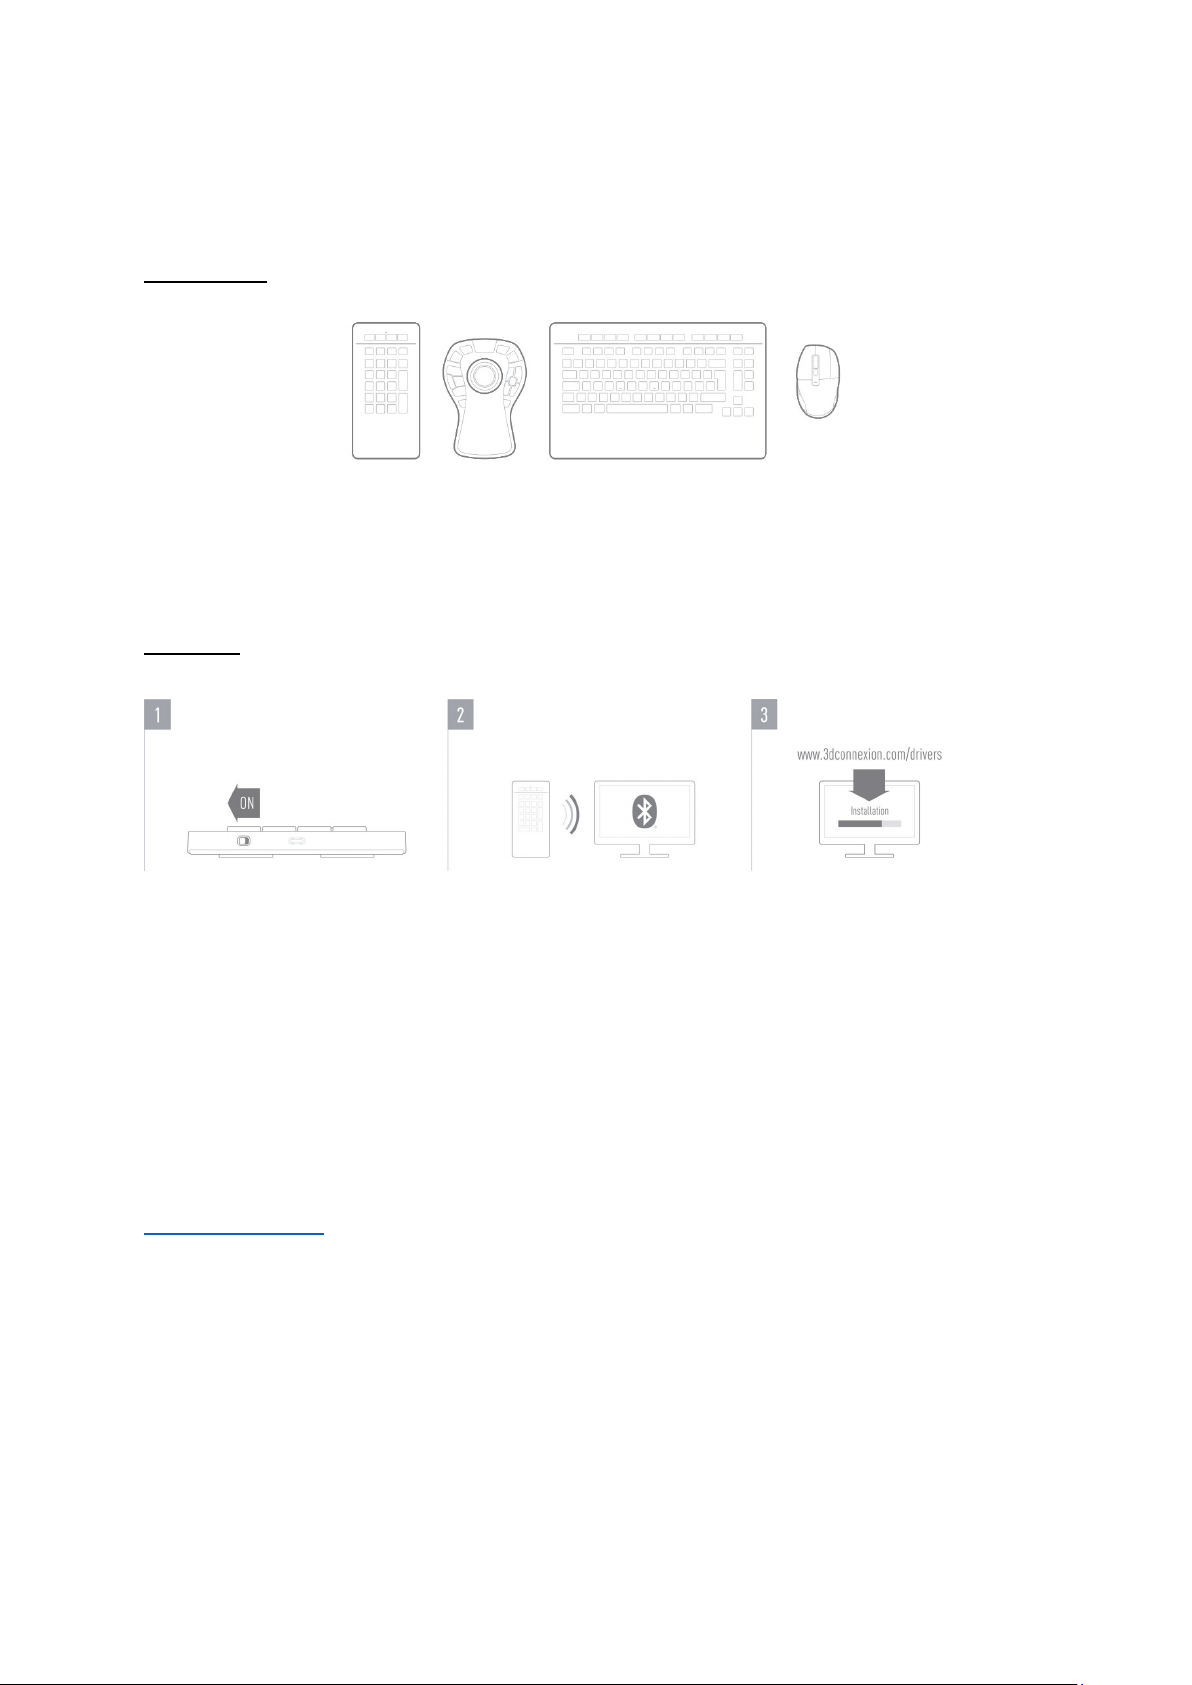
Connect your Numpad Pro
The Numpad Pro can be connected via Bluetooth®(Swift Pair included), the Keyboard Pro, or
USB cable. The wireless connection of your Numpad Pro is always encrypted in order to ensure
the security of your data.
Note: To pair your Numpad Pro, first turn on the device and the status LED on your Numpad Pro will start flashing blue. Next,
make sure Bluetooth is active on your PC and in discover mode. Now choose your device from the list of available devices and
pair it to your PC.
To benefit from the simplified Bluetooth®Swift Pair, make sure your computer's Bluetooth module is turned on and the
Numpad is close to it when it is switched on. Then enter the displayed code on your Numpad and confirm with Enter to complete
the pairing.