A1BabyCare E005 User manual

A1BabyCare
Combination Pram and Stroller E005
Designed in Australia
English

Page 2 Version 13 © 2015
Read these instructions before assembling your pram/stroller.
Keep these instructions for future reference.
WARNING::
TO AVOID INJURY OR DEATH:
ALWAYS APPLY THE BRAKES WHENEVER THE
PRAM/STROLLER IS STATIONARY.
• DO NOT LEAVE CHILDREN UNATTENDED.
• SECURE THE CHILD IN THE HARNESS AT ALL
TIMES.
• DO NOT CARRY EXTRA CHILDREN OR BAGS ON
THIS PRAM/STROLLER.
• MAKE SURE CHILDREN ARE CLEAR OF ANY
MOVING PARTS IF YOU ADJUST THE
PRAM/STROLLER.
USE THE HARNESS AT ALL TIMES WHEN USING THE
STROLLER SEAT.
WHEN NOT IN USE DISCONNECT SHOULDER
STRAPS FROM THE WAIST STRAP AND/OR BUCKLE.
AVOID SERIOUS INJURY FROM FALLING OR SLIDING
OUT. ALWAYS USE HARNESS.

Version 13 © 2015 Page 3
WARNING::
PARCELS OR ACCESSORY ITEMS, OR BOTH,
PLACED ON THE PRAM/STROLLER MAY CAUSE THE
PRAM/STROLLER TO BECOME UNSTABLE.
EXCEEDING ANY RECOMMENDED MAXIMUM
WEIGHTS IS UNSAFE AND MAY CAUSE THE
PRAM/STROLLER TO BECOME UNSTABLE.
NEVER LEAVE CHILD UNATTENDED.
CHILD MAY SLIP INTO LEG OPENINGS AND
STRANGLE. NEVER USE IN RECLINED CARRIAGE
POSITIONS UNLESS CHILD IS CORRECTLY SECURED
IN HARNESS.
ALWAYS FIT THE HANDBAR FABRIC COVER WHEN
THE CHILD HANDBAR IS IN USE.

Page 4 Version 13 © 2015
WARNING::
DO NOT USE THE STROLLER SEAT WITH ANY OTHER
MODELS OF PRAM/STROLLER.
DO NOT USE ANY OTHER MODELS OF STROLLER
SEAT WITH THIS PRAM/STROLLER.
THE SEAT OPENING STRAP MUST ALWAYS BE
FITTED WHEN THE STROLLER SEAT IS IN USE.
DO NOT REMOVE THE STROLLER SEAT FROM THE
STROLLER IF THERE IS A CHILD IN THE SEAT.
DO NOT USE THE BASSINET WITH ANY OTHER
MODELS OF PRAM/STROLLER.
DO NOT USE ANY OTHER MODELS OF BASSINET
WITH THIS PRAM/STROLLER.
DO NOT USE THE BASSINET ONCE THE CHILD CAN
SIT UP UNAIDED.
MAINTAIN YOUR PRAM/STROLLER AS DESCRIBED
UNDER THE MAINTENANCE SECTION. DO NOT USE
THE PRAM/STROLLER IF IT IS DAMAGED OR NOT
PROPERLY MAINTAINED.

Version 13 © 2015 Page 5
CONTENTS
SAFETY INFORMATION 6
SPECIFICATIONS 8
WHAT IS INCLUDED 9
ASSEMBLY 10
USING YOUR PRAM/STROLLER 18
MAINTENANCE 51

Page 6 Version 13 © 2015
SAFETY INFORMATION
Plastic packaging can create a suffocation hazard. Dispose of plastic
packaging as soon as possible after removing the pram/stroller
components. Keep all plastic packaging away from young children.
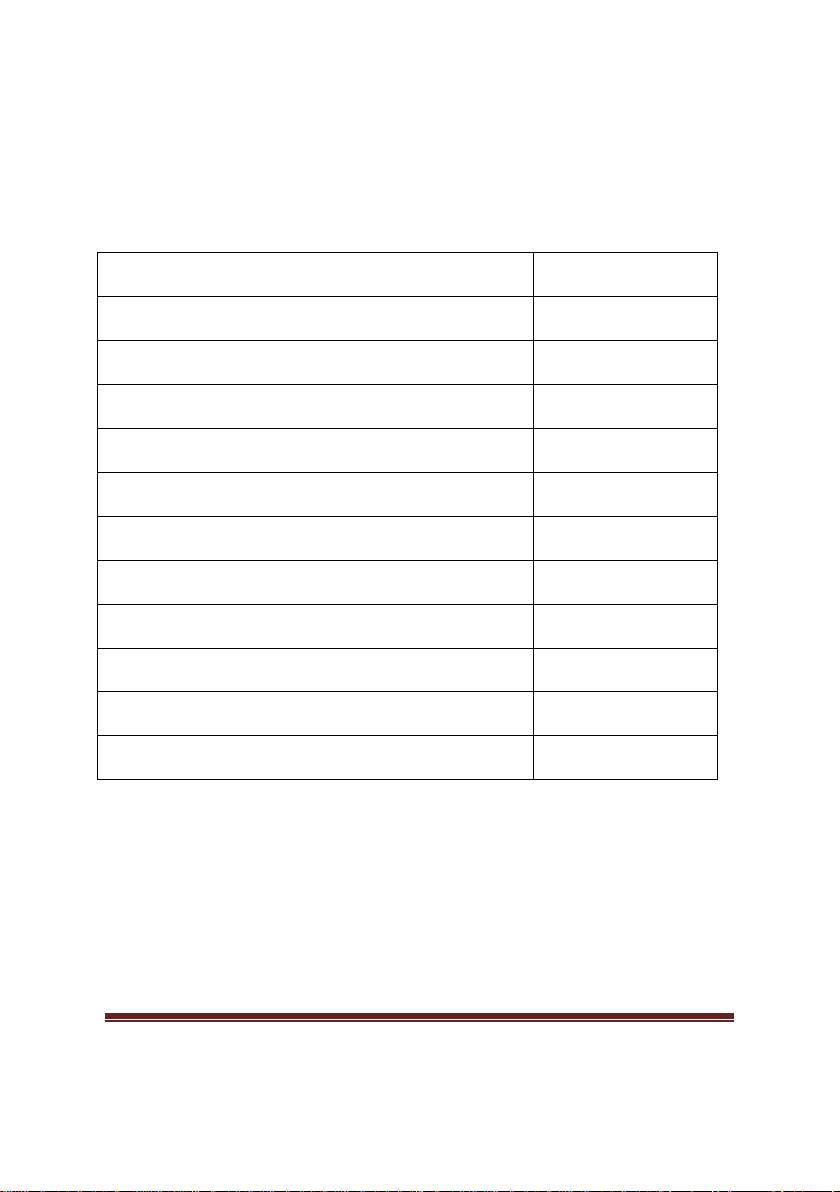
The bassinet is for the use of one child up to a maximum of 12 kg (26
lb).
The stroller seat is for the use of one child up to a maximum of 30 kg
(66 lb).
The maximum total load for all seatback pockets is 1 kg (2 lb).
The maximum total load for all bassinet pockets is 1 kg (2 lb).
The maximum weight for the storage basket is 4 kg (8 lb).
The pram/stroller is to be used by only one child at a time.
Do not cover the ventilation holes when using the raincover.
Do not use your pram/stroller if it is damaged or if any part is
missing.
Use the wrist strap and keep a firm hold of the pram/stroller when it
is moving.
Do not hang items from the handlebar.
Do not jog, run or skate while pushing the pram/stroller.
Do not use the pram/stroller on escalators.
Take care if using the pram/stroller on stairs, ensure that it is
properly supported and no parts are overloaded.

Version 13 © 2015 Page 7
When adjusting the seat recliner apply the brakes. Press the button
with one hand and firmly hold the end of the seat with the other
hand, to prevent sudden movement.
Remove your child from the stroller before removing the seat from
the stroller.
Remove your child from the pram/stroller before folding it.
When installing the seat or bassinet ensure that it is firmly locked in
position.
After unfolding the pram/stroller ensure that it is firmly locked in the
open position and the safety catch has been pushed down.
When folding and unfolding the pram/stroller take care to avoid
injury or entrapment of fingers.
Do not inflate tyres above 170 kPa (25 psi).
Do not allow children to fold, assemble or adjust the pram/stroller.
Do not allow children to push the pram/stroller.
Do not use the pram/stroller near an open fire or flame.

Page 8 Version 13 © 2015
SPECIFICATIONS
All values given in the table below are approximate.
Maximum weight for bassinet 12 kg (26 lb)
Maximum weight for stroller seat 30 kg (66 lb)
Maximum weight for the base tray
4 kg (8 lb)
Maximum total load for all seatback pockets
1 kg (2 lb)
Maximum total load for all bassinet pockets
1 kg (2 lb)
Maximum width of the stroller
66 cm (26 in)
Distance between front and rear axles
51 cm (20 in)
Diameter of front wheels
19 cm (7.5 in)
Diameter of rear wheels 30 cm (12 in)
Recommended tyre pressure 70 kPa (10 psi)
Weight of pram (bassinet fitted) 10.0 kg (22 lb)
Weight of stroller (stroller seat fitted) 9.5 kg (21 lb)
The pram/stroller complies with the following standards:
Australia and New Zealand
AS/NZS 2088:2009
Australian Trade Practices Act 1974 - Consumer Protection Notice No.
8 of 2007

Version 13 © 2015 Page 9
USA
ASTM F833-13
WHAT IS INCLUDED
Standard Items included:
1 Bassinet
1 Seat opening strap for the stroller seat
1 Footmuff for the stroller seat
1 Frame
1 Handbar for the stroller seat
2 Padded seat covers
1 Raincover, this fits the seat and the bassinet
1 Stroller seat
1 Suncover, this fits the seat and the bassinet
2 Wheels 30 cm diameter, as rear wheels
2 Wheels 19 cm diameter, as front wheels

Page 10 Version 13 © 2015
ASSEMBLY
Unpack all items from the box and check the contents. Keep plastic
bags away from children.
Videos showing assembly of the pram/stroller can be viewed at:
E005videos.a1babycare.com
Stroller Seat
Refer to illustration 1.
Attach the seat opening strap (1) to the rear of the stroller seat (2).
Pass the seat opening strap (1):
- around the bottom of the frame at the centre of the bottom tube
(3);
- through the D ring (4) where the back support meets the flat
rotating support.
Then clip together the snaplock on the seat opening strap.
The seat opening strap (1) must be looped around the bottom of the
seat frame, behind the black footrest. If it is passed around the top of
the seat frame then the seat will not open.
Ensure that all snaplocks are connected with their corresponding
snaplocks.
If the seat opening strap (1) has been removed to fold the seat flat, it
must be attached again before using the stroller seat.
The seat opening strap (1) must always be fitted when the stroller
seat is in use.

Version 13 © 2015 Page 11
Illustration 1
Frame
Refer to illustrations 2A and 2B.
Unfold the frame (5). Undo the snaplock on the folded lock strap on
the left of the frame. Pull up the handlebar to open the frame and
ensure that the frame is locked in the open position. Pass the folded
lock strap around the rear strut and close the snaplock, to ensure
that the folded lock strap is well clear of the rear wheel.

Page 12 Version 13 © 2015
Ensure the brake lever (6) is in the upright position so it does not
interfere when inserting the rear wheels.
Remove the foam padding from the rear wheels (7) and insert the
rear wheels into the frame.
Remove the foam padding from the front wheels (8) and insert the
front wheels into the frame.
Illustration 2A

Version 13 © 2015 Page 13
Illustration 2B
Bassinet
Refer to illustrations 3A to 3D.
Remove the cover (10) from the bassinet(9).
Remove the mattress (11) and lining (12) from the bassinet(9).
Using the nylon tab (13) pull the metal wire (14) to the metal clips
(15). Do not put your fingers beneath the metal wire. Slide the nylon
tab to one end of the metal wire and pull on the tab so that the wire
clicks into the clip.

Page 14 Version 13 © 2015
Repeat this for the other end of the metal wire, so that both ends of
the wire have engaged the clips.
Repeat the above two steps for the metal wire and clips at the other
end of the bassinet.
Put the lining back in the bassinet then put the mattress back in the
bassinet. Pass the crotch harness strap (16) through the mattress
loop (17).
Illustration 3A

Version 13 © 2015 Page 15
Illustration 3B

Page 16 Version 13 © 2015
Illustration 3C

Version 13 © 2015 Page 17
Illustration 3D

Page 18 Version 13 © 2015
USING YOUR PRAM/STROLLER
Videos showing use of the pram/stroller can be viewed at:
E005videos.a1babycare.com
Removing the Stroller Seat
Refer to illustrations 4A and 4B.
Apply the brakes so the stroller does not move. Press the two white
buttons (18) on each side of the frame, at the base of the seat fitting
sockets. Both buttons must be pushed in fully simultaneously. This
releases the seat, the seat may then be lifted by the seat frame.
Illustration 4A

Version 13 © 2015 Page 19
Illustration 4B
Do not lift the seat by the hood. Do not release the seat while a child
is sitting in the seat.
Removing the Bassinet
Refer to illustrations 4A and 4B.
Apply the brakes so the pram does not move. Press the two white
buttons (18) on each side of the frame, at the base of the seat fitting
sockets. Both buttons must be pushed in fully simultaneously. This

Page 20 Version 13 © 2015
releases the bassinet, the bassinet may then be lifted by the
combination handle and hood adjuster.
If carrying the bassinet while a baby is lying in the bassinet, hold the
bassinet firmly by the combination handle and hood adjuster. Use
your other hand to hold the end of the bassinet and stabilise the
bassinet, to prevent the bassinet tipping. Ensure that the bassinet is
kept horizontal if carrying a baby in the bassinet.
Inserting the Stroller Seat or Bassinet
Refer to illustration 4B.
Apply the brakes so the pram/stroller does not move. Align the plugs
(19) on the seat or bassinet with the sockets (20) on the frame.
Gently push the seat or bassinet down until there is a click when the
plug engages the catch in the socket. Both plugs must click into their
sockets. Check that the metal buttons (18) are out, and that the seat
or bassinet is locked into the socket.
If you are unsure if the seat is locked into the socket, then you can lift
the stroller by the seat, both sides of the seat must remain locked
into the frame.
Adjusting the Stroller Seat
Refer to illustrations 5A and 5B.
Apply the brakes so the stroller does not move. Push the hood on the
stroller seat to the fully raised (covered) position. Hold one end of
the stroller seat with one hand, preferably hold the end of the seat
away from the handlebar, so that the handlebar does not obstruct
the adjustment of the seat.
Table of contents