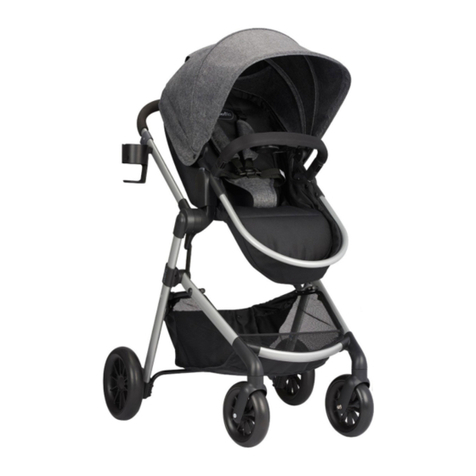
ingenuity inventrure PRO User manual

INSTRUCTION MANUAL
STR_PD000013_ING102114
© 2015 Ingenuity | ingenuitybaby.com
Keep this manual for future use. It is very important
to read, understand, and follow this manual before
using your stroller.
Multi-Functional Stroller

Kids II, Inc. • Atlanta, GA 30305 USA • www.kidsii.com
MANUFACTURED FOR
®
Consumer Service • Servicios al consumidor • Service consommateurs
www.kidsii.com/customerservice
US/Canada 1-800-230-8190
Australia (02) 9894 1855
Mexico (55) 5292-8488
UK +44 (0) 1582 816 080
JAPAN (03) 5322-6081
©
2015 Kids II, Inc. • Printed in China
Kids II Canada Co.
Toronto, Ontario M2J 5C2 Canada
Kids II Australia Pty Ltd.
Castle Hill, NSW, 2154 Australia
Kids II US Mexico S.A. de C.V.
Av. Vasco de Quiroga No. 3900 – 905 A
Col. Lomas de Santa Fe
Cuajimalpa, México D.F. • C.P. 05300
Kids II UK Ltd.
725 Capability Green, Luton, Bedfordshire LU1 3LU UK
Kids II Japan K.K.
Shinjuku-ku, Tokyo, Japan, 163-0529
Welcome to the Ingenuity family
Thank you for choosing Ingenuity, where all our products are born
from the question: How can this meet baby’s needs, and make life
easier for parents? We work hard to ensure every Ingenuity product
includes clever features selected specically to help you in your
daily life as a parent…from bouncers that bounce automatically
to play yards that zip o for machine-washing. Not only are our
design teams some of the best and brightest in the industry, they’re
also parents with rst-hand experience.
We hope you’ll enjoy this product and that you’ll benet from the
features we’ve added. Please visit ingenuitybaby.com to learn
more about us and our other products that are Designed with
parenthood in mind™.

3
TABLE OF CONTENTS
Warnings . . . . . . . . . . . . . . . . . . . . . . . . . . . . .4
Features . . . . . . . . . . . . . . . . . . . . . . . . . . . . . .6
In the Box . . . . . . . . . . . . . . . . . . . . . . . . . . . . .8
Assembly . . . . . . . . . . . . . . . . . . . . . . . . . . . . .9
Unfolding . . . . . . . . . . . . . . . . . . . . . . . . . . . . . . . . . . . . . . . . . . . . . 9
Attaching Basket . . . . . . . . . . . . . . . . . . . . . . . . . . . . . . . . . . . . . . . . .10
Attaching Front Wheels. . . . . . . . . . . . . . . . . . . . . . . . . . . . . . . . . . . . .10
Attaching Rear Axle . . . . . . . . . . . . . . . . . . . . . . . . . . . . . . . . . . . . . . .11
Attaching Rear Wheels . . . . . . . . . . . . . . . . . . . . . . . . . . . . . . . . . . . . .11
Positioning Foot Rest for Use . . . . . . . . . . . . . . . . . . . . . . . . . . . . . . . . .12
Attaching the Seat . . . . . . . . . . . . . . . . . . . . . . . . . . . . . . . . . . . . . . . .12
Attaching Child’s Tray . . . . . . . . . . . . . . . . . . . . . . . . . . . . . . . . . . . . . .13
Attaching Parent Tray . . . . . . . . . . . . . . . . . . . . . . . . . . . . . . . . . . . . . .13
USE . . . . . . . . . . . . . . . . . . . . . . . . . . . . . . . . 14
Folding . . . . . . . . . . . . . . . . . . . . . . . . . . . . . . . . . . . . . . . . . . . . . . .14
Unfolding . . . . . . . . . . . . . . . . . . . . . . . . . . . . . . . . . . . . . . . . . . . . .15
Locking Brake . . . . . . . . . . . . . . . . . . . . . . . . . . . . . . . . . . . . . . . . . . .16
Unlocking Brake . . . . . . . . . . . . . . . . . . . . . . . . . . . . . . . . . . . . . . . . .16
Front Wheel Swivel Locks . . . . . . . . . . . . . . . . . . . . . . . . . . . . . . . . . . .16
Adjusting Handle Height. . . . . . . . . . . . . . . . . . . . . . . . . . . . . . . . . . . .17
Headphone Cord Slot . . . . . . . . . . . . . . . . . . . . . . . . . . . . . . . . . . . . . .17
Foot Rest . . . . . . . . . . . . . . . . . . . . . . . . . . . . . . . . . . . . . . . . . . . . . .17
Rotating Child’s Tray. . . . . . . . . . . . . . . . . . . . . . . . . . . . . . . . . . . . . . .18
Removing Child’s Tray. . . . . . . . . . . . . . . . . . . . . . . . . . . . . . . . . . . . . .18
Reclining Toddler Seat . . . . . . . . . . . . . . . . . . . . . . . . . . . . . . . . . . . . .18
Canopy . . . . . . . . . . . . . . . . . . . . . . . . . . . . . . . . . . . . . . . . . . . . . . .19
Visor . . . . . . . . . . . . . . . . . . . . . . . . . . . . . . . . . . . . . . . . . . . . . . . . .19
Peek-a-Boo Window . . . . . . . . . . . . . . . . . . . . . . . . . . . . . . . . . . . . . . .19
Attaching Toddler Seat . . . . . . . . . . . . . . . . . . . . . . . . . . . . . . . . . . . . .20
Removing and Rotating Toddler Seat . . . . . . . . . . . . . . . . . . . . . . . . . . . .21
Securing Your Child . . . . . . . . . . . . . . . . . . . . .22
5-Point Harness. . . . . . . . . . . . . . . . . . . . . . . . . . . . . . . . . . . . . . . . . .22
Adjusting Shoulder Strap Height. . . . . . . . . . . . . . . . . . . . . . . . . . . . . . .23
Removing Child. . . . . . . . . . . . . . . . . . . . . . . . . . . . . . . . . . . . . . . . . .24
3-Point Harness. . . . . . . . . . . . . . . . . . . . . . . . . . . . . . . . . . . . . . . . . .24
Removing Infant Insert . . . . . . . . . . . . . . . . . . . . . . . . . . . . . . . . . . . . .24
Travel System Mode . . . . . . . . . . . . . . . . . . . . .25
Attaching InTrust™35 and InTrust™35 Pro Infant Car Seats (sold separately). . . .25
Removing and Rotating InTrust™35 and
InTrust™35 Pro Infant Car Seats (sold separately). . . . . . . . . . . . . . . . . . . . .26
Care and Maintenance. . . . . . . . . . . . . . . . . . . . 27
Warranty . . . . . . . . . . . . . . . . . . . . . . . . . . . .29

4
■To Avoid Serious Injury or Death:
■Always read and understand these instructions before using
this product. Store this user guide in a convenient place so
it can be consulted often. Failure to follow all warnings and
instructions could result in serious injury or death.
■Always read and understand the infant car seat instructions
before using it with this product.
■Do not exceed the infant car seat’s maximum weight limit
when using with this product.
■Never leave child unattended.
■Never use stroller with child unrestrained.
■Avoid serious injury from falling or sliding out. Always use
seat belt.
■Child may slip into leg openings and strangle. Never use in
reclined stroller positions unless child is properly restrained
in harness.
■Stroller is for use with children who can sit upright,
unassisted.
■Do not use stroller with a child weighing more than 50 lbs
(22.7 kg).
■Do not use stroller with a child taller than 44 inches (112 cm).
■Do not use stroller with more than one child at a time.
■Do not overload basket – maximum weight in basket is 10
lbs (4.5 kg). Overloading the basket may cause the stroller to
become unstable.
■Do not place more than 1 lb (0.5 kg) in the child’s tray and 1
lbs (0.5 kg) in the parent storage tray.
WARNING
WARNING

5
WARNING
WARNING
■Always use harness system.
■To avoid burns, Do not place hot liquids in the cup
holders.
■Always make certain that the stroller is fully open and locked
before use.
■Assembly of this stroller must be performed by an adult.
■Do not hang or place items on the stroller handle, frame, or
canopy. Purses, shopping bags, parcels, or accessory items
placed on the stroller may cause the stroller to become
unstable. Never place items on top of the canopy.
■Only use Ingenuity-approved car seats or the Ingenuity
adapter with approved car seats with this stroller.
■Do not allow children to hang on or to play with the stroller.
■Never allow children to climb into the stroller unassisted.
■Never use stroller on stairs or escalators.
■To avoid entrapment or pinching, do not fold or unfold
stroller when child is in or near stroller.
■Stroller is intended for walking speed only. Do not use while
jogging, skating, etc.
■Always lock the parking brake when stroller is not moving or
unattended.
■Do not lift the stroller by the child’s tray when seat is
occupied. Never lift the stroller by the child’s tray, parent tray,
or canopy.
■Always ensure the storage latch is engaged when storing the
stroller and when removing from storage.
■Only use replacement parts approved by Ingenuity.

6
FEATURES
1
2
3
4
5
6
7
8
9
11
12
13
14
15
16
17
18
19
20
21
22
23
10

7
FEATURES
1 Parent Handle
2 Parent Tray
3 Parent Handle Height Adjuster
4 Fold Trigger
5 Canopy
6 Storage Latch
7 Toddler Seat Release Lever
8 Storage Basket
9 Rear Wheel
10 Brake Foot Pedal
11 Front Swivel Wheel Lock
12 Front Wheel
13 Foot Rest
14 Foot Rest Adjuster
15 Harness Buckle
16 Child’s Tray Release Tab
17 Child’s Tray
18 Harness Strap Covers
19 Harness Straps
20 Peek-a-Boo Window
21 Canopy Visor
22 Headphone Cord Slot
23 Child Insert
FEATURES

8
IN THE BOX
REAR WHEELSFRONT WHEELS
CHILD’S TRAY &
BRACKETS
PARENT
TRAY
REAR AXLE
STROLLER FRAME
& STORAGE BASKET
TODDLER
SEAT
ASSEMBLY

9
Unfolding
1Locate the storage latch on
the side of stroller, near the
front.
2Pull out to release from
locking pin.
3Keeping the latch free from
the pin, pull upwards on the
stroller from the handle bar
until you hear the stroller
click.
4Audible click means frame is
locked.
NOTE: The red lines on the frame
near the basket attachment
should no longer be visible. This
also indicates the frame is locked.
ASSEMBLY

10
Attaching Basket
1Slide basket tubes into the basket
connectors until they click into
place.
Attaching Front Wheels
1Lay stroller frame on
oor as shown.
2Attach front wheels as
shown until you hear
an audible click.
3Pull up on wheels
to ensure they are
securely attached.
ASSEMBLY ASSEMBLY

11
ASSEMBLY
Attaching Rear Axle
1Attach the rear axle
onto the mounting
posts. Listen for an
audible click.
2Make sure axle locks
into place by pulling
up.
Attaching Rear Wheels
1Attach rear wheels
onto rear axle
mounting pins until
wheels click in place.
2Pull wheels to make
sure they are locked
in place.

12
Positioning Foot Rest for Use
1Press buttons on both sides
of the foot rest and rotate to
adjust position.
2Foot rest is locked when an
audible click is heard.
NOTE: There are two locked use
positions.
Attaching the Seat
1Align both connection points
on toddler seat and stroller
frame to attach as shown.
2Push down on frame until an
audible click is heard.
3Pull up on the seat to ensure
that it is secure.
NOTE: Check that nothing interferes
with seat connection.
ASSEMBLY ASSEMBLY

13
ASSEMBLY
Attaching Child’s Tray
1Insert child’s tray
mounting brackets into
toddler seat frame until
they click into place.
2Pull tabs open to slide tray
onto mounting brackets
until tray snaps into place.
Attaching Parent Tray
1Insert parent tray onto
mounting brackets until it
snaps into place.

14
Folding
1Locate the triggers on both sides of the frame, just beneath the
handle.
2Trigger on the right has a
release button, trigger on
the left does not.
3Press button on right while
simultaneously pulling both
triggers up, toward you.
4Lower frame until storage
latch is engaged.
NOTE: Stroller can be folded with
the toddler seat in the forward
facing position. Stroller cannot be
folded with the infant car seat
attached.
USEUSE

15
Unfolding
1Locate the storage latch on
the side of stroller, near the
front.
2Pull out to release from
locking pin.
3Keeping the latch free from
the pin, pull upwards on the
stroller from the handle bar.
4Once the stroller is partially
unfolded, place your foot on
the brake crossbar to assist in
unfolding until you hear the
stroller click.
5Audible click means frame is
locked.
NOTE: The red lines on the frame
near the basket attachment
should no longer be visible. This
also indicates the frame is locked.
USE

16
Locking Brake
1Press rear of brake pedal
with foot until it clicks/locks
in place.
Unlocking Brake
1Press the front part of brake
pedal with foot until it clicks/
unlocks.
Front Wheel Swivel Locks
1Align wheels parallel to the
frame.
2Push down to lock. Push up
to unlock.
USEUSE

17
Adjusting Handle Height
1Press buttons on both sides of
handle and rotate to adjust.
2Handle is locked when an
audible click is heard.
NOTE: There are three locked use
positions.
Headphone Cord Slot
1Place headphone cord through
slot in storage compartment.
Foot Rest
1Press buttons on both sides
of the foot rest and rotate to
adjust position.
2Foot rest is locked when an
audible click is heard.
NOTE: There are two locked use
positions.
USE

18
Rotating Child’s Tray
1Pull one of the tray release
tabs to rotate the tray
upward.
Removing Child’s Tray
1Pull both tabs outward to
release tray.
2Lift tray o mounting
brackets.
Reclining Toddler Seat
1Squeeze clip and adjust to
desired recline position.
USE USE
1
2

19
Canopy
1Push or pull canopy into
desired position.
Visor
1Pull or push visor into desired
position.
Peek-a-Boo Window
1Pull window cover open or
closed.
USE

20
Attaching Toddler Seat
1Align both connection points
on toddler seat and stroller
frame to attach as shown.
2Push down on frame until an
audible click is heard.
3Pull up on the seat to ensure
that it is secure.
NOTE: Check that nothing interferes
with seat connection.
USE USE
Table of contents
Languages:
Other ingenuity Stroller manuals
