Wallmount Chassis AEC-206
Chapter 1 General Information 1 -
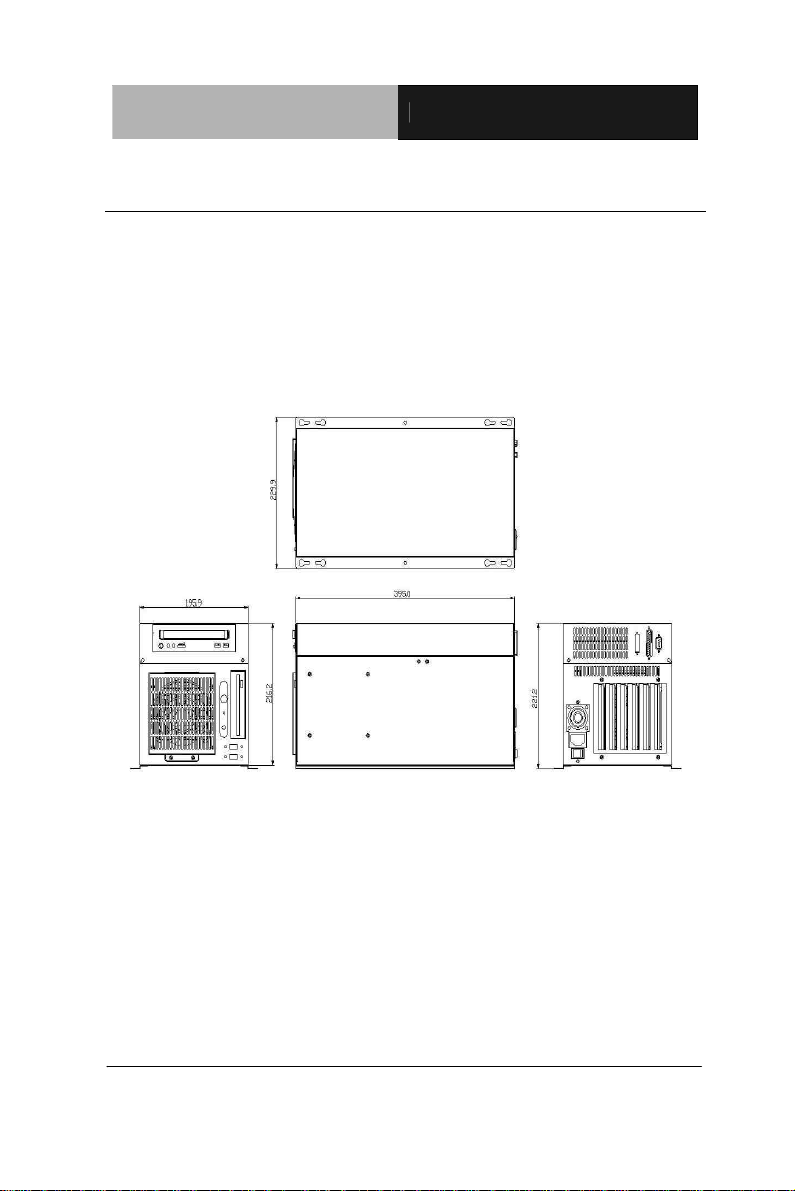
1.1 Introduction
The AEC-206 is 6-slot industrial wall-mount chassis ideal for
wall-mount and space-constrained applications. Especially in
rugged factory floor environment, AEC-206 ensures stable
operation to free you from shut-down risk or any other
disturbance.
The AEC-206 comes with a 6-slots PICMG or an ISA back-plane
to maximize the high performance of Pentium 4 full-size CPU
Card. An ATX 12V power supply up to 300W is also equipped
dedicated to Pentium 4 CPU Card. Inside this chassis, you can
attach one 5.25”CD-ROM, one Floppy and TWO 3.5”Hard disk
drives for high data storage capacity. Despite of the high density
inside, you never worry about the overheat of the chassis because
we attach one 12x12 system fan in the chassis front cover for
excellent heat dissipation.
On the front panel of AEC-206, two LED indicators indicate the
power and HDD activity. The front panel also provides two
switches for system reset and power ON/OFF. And two USB ports
beside the LED indicators provide easy-to-access interface for
your various USB peripherals. At the bottom of AEC-206, one set
of wallmount kit reserves the flexibility for wallmount application.