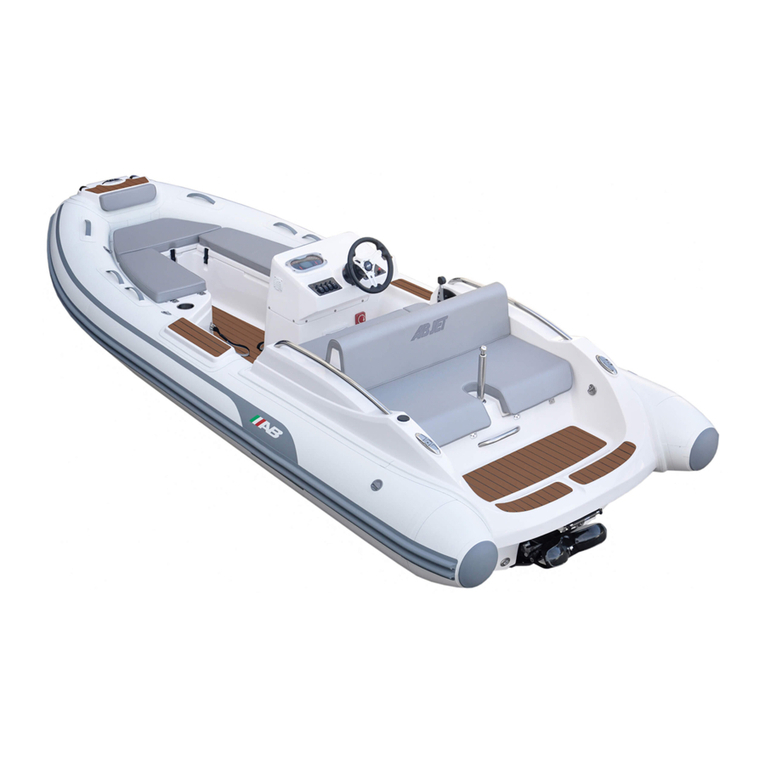
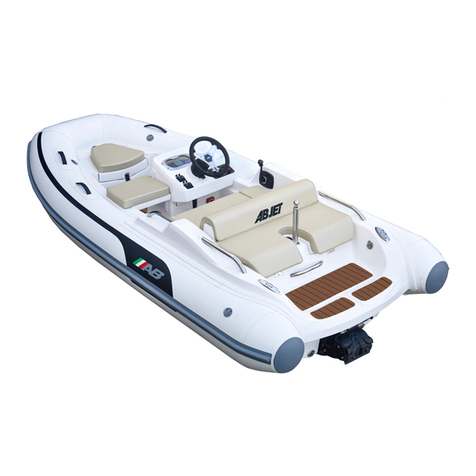
AB Inflatables Nautilus 13 DLX User manual

Owner’s Manual

This manual has been compiled to help you operate your craft with safety and
pleasure. It contains details of several models in our line, the equipment supplied
or fitted, its systems, and information on its operation and maintenance. Please
check the specifications chapter to confirm which features are standard or
optional on your inflatable. Please read this manual carefully, and familiarise
yourself with the craft before using it.
If this is your first craft, or you are changing to a type of craft you are not familiar
with, for your own comfort and safety, please ensure that you obtain handling
and operating experience before assuming command of the craft. Your dealer,
national sailing federation or yacht club will be pleased to advise you of local sea
schools or competent instructors.
Download, the owner’s manual if needed, from our webpage
www.abinflatables.com
PLEASE KEEP THIS MANUAL IN A SECURE PLACE, AND HAND IT OVER TO THE
NEW OWNER WHEN YOU SELL THE CRAFT.
Warranty Registration Card
It is important that you complete, sign and mail this Registration Card within
fifteen (15) days from date of purchase to THE DISTRIBUTOR in order to validate
your warranty and comply with the Federal law requiring boat manufacturers to
keep a permanent record of owner’s names and addresses.
OWNER’S NAME
ADDRESS
CITY
ZIP CODE COUNTRY
STATE OR PROVINCE
HULL IDENTIFICATION NUMBER • CO
MODEL
YOUR DEALER
I read and understand the AB Limited Warranty as it appears within the AB Owner’s Manual.
OWNER’S SIGNATURE DATE • DAY / MONTH / YEAR
DO YOU OWN ANOTHER BOAT?
YES NO IF SO WHAT KIND? LENGTH
TENDER CAMPING RESCUE FISHING WATER SKIING OCEAN RESEARCH HUNTING
SCUBA DIVING PRIMARY CRAFT GOVERNMENT
OTHER
DEALER FRIEND MAGAZINE
BOAT SHOW OTHER

Member of National Marine
Manufacturers Asociation
DATE PURCHASED • DAY / MONTH / INVOICE NUMBER
INFORMATION
NAME
ADDRESS
PHONE NUMBER FAX NUMBER
E-MAIL WEB SITE
BOAT MODEL
HULL IDENTIFICATION NUMBER • CO
MANUFACTURER • BOATING INTERNATIONAL
ADDRESS: CALLE 1E NO. 2-15 • BODEGA NO. 9 • ZONA FRANCA DE BARRANQUILLA
BARRANQUILLA, ATLANTICO • COLOMBIA
PHONE +57 (5) 379.5132 • FAX +57 (5) 379.5667
YOUR DISTRIBUTOR
FROM
STAMP HERE
INFO@ABINFLATABLES.COM

Electrical Installations 14-15 DLX
Electrical Installations 17-19 DLX
Electrical Installations 11-15 VST
Electrical Installations 19-28 VST
Troubleshooting Chart
Seating Arrangements
Warranty
Index
36
38
40
42
44
45
45
Prologue
Materials
Deck Plans & Profiles
Declaration of Conformity
Certification
Marine Safety
Boating Terminology
Identification Numbers
General Description
Assembly
Inflating Instructions
Fitting of Rowing Seat
Fitting & Assembly of Oars
Hull & Deck Drain Plug
Fuelling & Fuel System
Maintenance
Storage
Repair of the Hull
Repair of the Tube
Use & Performance
Operation
Boater’s Check List
Towing your Inflatable
Davit Lifting
Transporting by Road
Electrical Installations
Color Code
Maintenance
Frequently Asked Questions
Recomendations
Electrical Diagrams
Electrical Installations 11-13 DLX
Index
2
2
3
4
5
7
8
9
9
10
10
12
13
13
14
15
17
17
18
20
22
22
23
24
25
26
31
31
32
32
33
34
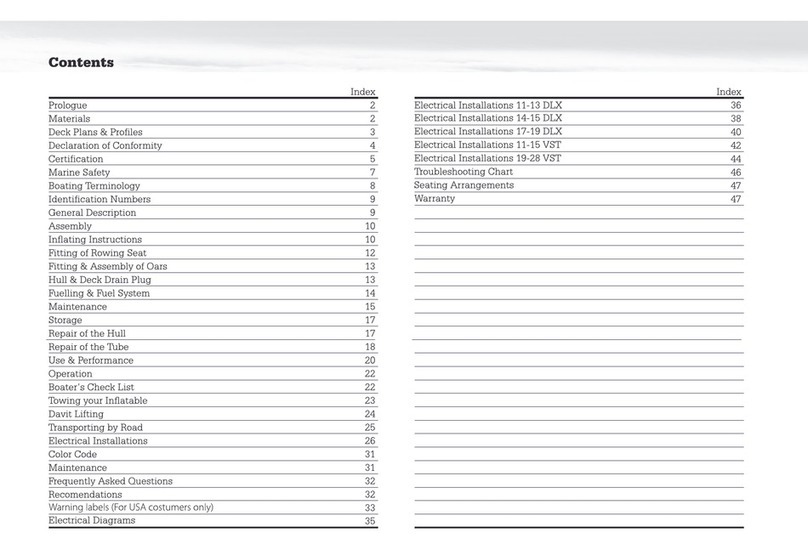
Contents

AB Inatables has been manufacturing boats since 1968. Each AB Boat is
carefully hand-crafted with the finest materials on the market. Our driving force is
our commitment to quality and continuous improvement. We build all our
inflatables with the same exacting care and attention to detail and durability,
therefore we have chosen to manufacture our inflatables with the finest (CSM)
Coated Fabric , proven durable in all climates and conditions. Every AB craft
undergoes strict pressure tests, seam and adhesive bond inspections, and a
rigorous quality control process, to provide you with unsurpassable quality and
durability. Whether your needs run to commercial, rugged personal use or pure
pleasure, an AB inflatable is virtually indestructible and unsinkable.
At AB we combine superior design with meticulous craftsmanship and proven
materials, such as 5-ply (CSM) Coated Fabric, to create unmatched tube quality. At
AB Inflatables we use 1,100 Decitex polyester material on all our models except
models 24 VST and larger which are manufactured with 1,670 Decitex (1518
Dernier)
Prologue
CONSTITUTION OF (CSM) COATED FABRIC
A. COLORED (CSM) Coated Fabric SHEET
B. COLORED NEOPRENE SHEET
C. ADHESION SYSTEM
D. POLYESTER TEXTILE HIGH TENACITY
E. BLACK NEOPRENE SHEETS
Materials
(Fabric)
AB
E
C
D
2

Deck Plans + Profile
Rigid Hull Model
3

Standard(s) to which conformity is declared
RSG Guidelines
ISO/DIS 6185-2
ISO/DIS 6185-3
Design Category:
“B” Offshore: Craft designed for offshore voyages where conditions up to and
including wind force 8 (Beaufort scale) and significant wave heights up to and
including 4 metres (13.12 ft) may be experienced. “C” Inshore: Craft designed for
voyages in coastal waters, large bays, estuaries, lakes and rivers, where conditions
up to and including wind force 6 (Beaufort Scale) and significant wave heights up
to and including 2 metres (6.56 ft) may be experienced.
Certifying Body
HPi Verification Services Ltd
EU Notified Body number 1521
The Manor House, Howbery Park, Wallingford, OX10 8BA
United Kingdom
Web site: www.hpivs.com
Email: [email protected]
The CE mark allows us as manufacturer to perform a declaration of conformity per
boat when it is needed. Please contact us if you need this certification or further
information.
ABYC: American Boat & Yacht Council
NMMA: National Marine Manufacturers Association
231 S .LaSalle Street, Suite 2050
Chicago, IL.60604 U.S.A.
Phone: (312) 946-6200
Web site: www.nmma.org
Email:_ [email protected]
Type of Equipment: Inflatable Recreational Craft
Serial N° Type
Year of Manufacture
I, the undersigned, hereby declare that the equipment specified above conforms
to the above Directive(s) and Standard(s).
Full Name: Ivor W. Heyer Date: June 1, 2012
Manufacturer’s Address
AB Marine Group, Calle 1E Nº 2-15, Bodega Nº 9, Zona Franca de Barranquilla,
Colombia. Phone: +57(5) 379.5132. Fax: +57(5) 379.5667
Manufacturer’s Name
AB MARINE GROUP
4
Declaration of Conformity
Application of EU Recreational Craft Directive 94/25/EC as amended by 2003/44/EC

5
1 Nautilus 11 DLX HPI-088-001 C 3 VII
2 Nautilus 12 DLX HPI-088-002 C 3 VII
3 Nautilus 13 DLX HPI-088-003 C 3 VII
4 Nautilus 14 DLX HPI-088-004 C 3 VII
5 Nautilus 15 DLX HPI-088-005 C 3 VII
6 Nautilus 17 DLX HPI-088-006 C 3 VII
7 Nautilus 19 DLX HPI-088-007 C 3 VIII
8 Nautilus 19 DLX-I/O HPI-088-008 C 3 VIII
9 Oceanus 11 VST HPI-088-009 C 3 VII
10 Oceanus 12 VST HPI-088-010 C 3 VII
11 Oceanus 13 VST HPI-088-011 C 3 VII
12 Oceanus 14 VST HPI-088-012 C 3 VII
13 Oceanus 15 VST HPI-088-013 C 3 VII
14 Oceanus 19 VST HPI-088-014 C 3 VIII
15 Oceanus 24 VST HPI-088-015 B 3 VIII
16 Oceanus 28 VST HPI-088-016 B 4 X
17 19 MACC HPI-088-021 C 3 VIII
18 19 OPEN HPI-088-022 C 3 VIII
19 Navigo 8 VS HPI-088-023 C 2 V
20 Navigo 9 VS HPI-088-024 C 2 V
21 Navigo 10 VS HPI-088-025 C 3 VII
22 Navigo 12 VS HPI-088-026 C 3 VII
23 Navigo 13 VS HPI-088-027 C 3 VII
24 Navigo 14 VS HPI-088-028 C 3 VII
25 Ventus 8 VL HPI-088-029 C 2 V
26 Ventus 9 VL HPI-088-030 C 2 V
27 Ventus 10 VL HPI-088-031 C 3 VII
28 Ventus 12 VL HPI-088-032 C 3 VII
CERTIFICATION
MODELS HPI 2011
Certication CE CAT. ISO
6185 Type MODELS HPI 2011
Certication CE CAT. ISO
6185 Type
29 Lammina 8 AL HPI-088-033 C 1 II
30 Lammina 9 AL HPI-088-034 C 2 V
31 Lammina 9,5 AL HPI-088-035 C 2 V
32 Lammina 10 AL HPI-088-036 C 2 V
33 Lammina 11 AL HPI-088-037 C 2 V
34 Lammina 12 AL HPI-088-038 C 3 VII
35 Lammina 13 AL HPI-088-039 C 3 VII
36 Lammina 14 AL HPI-088-040 C 3 VII

MODELS HPI 2011
Certication CE CAT. ISO
6185 Type
6
39 AB Rider HPI-088-043 C 3 VII
40 Lammina 8 UL HPI-088-044 C 1 II
41 Lammina 9 UL HPI-088-045 C 2 V
42 Lammina 10 UL HPI-088-046 C 2 V
43 Alumina 11 ALX HPI-088-047 C 2 V
44 Alumina 12 ALX HPI-088-048 C 3 VII
45 Alumina 13 ALX HPI-088-049 C 3 VII
46 Alumina 14 ALX HPI-088-050 C 3 VII
47 Alumina 15 ALX HPI-088-051 C 3 VII
48 Alumina 16 ALX HPI-088-052 C 3 VII
CERTIFICATION
37 Lammina 15 AL HPI-088-041 C 3 VII
38 Lammina 16 AL HPI-088-042 C 3 VII

7
Marine Safety
Notice
Warning
Danger
•
•
•
Depending on the model you have chosen, we recommend you include
many or all of the following items:
Anchor & anchor line
Bailer
Batteries
Bellows
Charts
Engine tools
Extra fuel
First aid kit
Flares
Fresh water
Maintenance kit
Mooring lines
Oars/paddles
PFDs
Portable marine re extinguisher
Portable radio with weather band
Spare keys
Sunscreen lotion
Tool kit
VHF
Waterproof ashlight
This manual is not intended to provide complete training on all aspects of boat
operation. We strongly recommend that all operators of this boat seek additional
training on boat handling and safety.
Safety requirements differ from country to country, from state to state and
whether you’re within coastal waters or inland waters. For more detailed
information check with the local authorities.
Your AB inflatable is already a safety device all by itself, due to its numerous air
chambers, but the law also requires at least one Type I, II or III Personal Flotation
Device (PFD) for each person on board or towed on water skis; and in addition,
one throwable Type IV PFD. As the owner, obtaining PFDs and other necessary
safety equipment is your responsibility.
PFDs are intended to help you save your own life; you and your passengers
should wear a PFD whenever boating. Many countries/states require children,
age 18 or younger, to wear PFDs at all times. It is especially important that
children or non-swimmers wear a PFD. Make certain you know how to use PFDs.
Try it on and make adjustments for a comfortable fit. Show children how to
properly put on a PFD.
Special PFDs are available for skiing and other water sports. These
PFDs are constructed with materials suitable for high impact falls
into the water.
It is a requirement that you carry at least one B-1 type Coast Guard
approved portable marine fire extinguisher on all our models with
prefitted fuel tanks.
When operating, occupants MUST AVOID standing up or sitting with
their feet hanging over the gunwale.
Leaking fuel is a fire & explosion hazard. Inspect fuel system
regularly.
Shut off engine before reboarding from the water.

8
Stern
Waterline
Bow
Freeboard
Keel
Forward
Aft
Beam
Transom
Length Overall
Starboard side
Port side
1.
2.
3.
4.
5.
6.
7.
8.
9.
10
11.
12.
Boating Terminology

9
Warning
Danger
Safeguard the information about your boat by recording the Hull Identification
Number (HIN) and model of your boat on the inside front cover of this manual.
The HIN is located on the upper starboard corner of the transom. The HIN must
be clearly visible at all times and must not be removed, altered or tampered with
in any way. The Identification Number is very important! Keep a copy of this
number stored in a safe place off the boat. In case of theft, damage, warranty
claims, etc., report this number to the local authorities, your insurance agent and
your dealer.
The Hull
The buoyancy chamber or tube is “U” shaped with rounded airtight cones in the
same material, ensuring complete safety and seaworthiness. AB uses large tubes
for each boat size to increase payload capabilities and to give you a dry ride. In
addition, each tube is “U” shaped and sized proportionately to the boat’s hull
dimensions which maximises internal space.
The bottom of your AB boat is made out of aluminium or fibreglass, providing
you with unsurpassable seaworthiness. Models DLX & VST contain a pre-fitted
marine grade aluminium fuel tank, and some DLX & VST models an underdeck
freshwater tank.
The Transom
At the stern a special marine transom is fixed to the hull to support the outboard
engine. The transom is made of a composite of marine grade plywood (a min. of
20mm to a max. of 50mm / (0.787” to 1.968”)) and fiberglass which is equipped
with an engine mounting plate.
Identification Numbers General Description
Caution
In the models with pre-fitted fuel & fresh water tanks, do not drill
holes in the deck deeper than 1.27 cm (1/2’’). Otherwise the tanks will
be perforated. Fuel leaks could occur, which if ignited may cause
serious injury or death.
Do not drill holes or screw objects in the deck or transom without
sealing the holes. Failure to do so will result in water penetration and
eventually will cause delamination.
Do not drill holes on the deck of any boat that contains a full or
partially full fuel tank. Trapped gases in the tank could explode,
causing serious injuries or death.

10
Hard bottom dinghies or R.I.B’s, as they are frequently called, require very little
preparation before launching. Simply inflate the buoyancy chambers, fit the
removable accessories that come standard with your AB, attach the outboard
engine and include the fuel tank (except models “DLX & VST”) and the safety
equipment required. For more detailed information, please read the Marine
Safety chapter in this manual.
At the same time, make sure your boat has the hull and condensation (if
applicable) drain plugs tightened into the valves before launching the boat. For
more information, read the Hull & Deck Drain Plug chapter in this manual.
The inflating system includes the inflation valves and a hand pump with its valve
connector.
The Ination Valves: The inflation valves are plastic, therefore non-corrosive and
double sealed for safety. The valve is divided into two pieces, one is located on
the inner side of the buoyancy chamber. The other is screwed to the
afore-mentioned piece from the outside of the buoyancy chamber. This last
piece is composed of a one-way check valve, a diaphragm and a cap.
This screw-on system enables you to remove and replace a damaged valve very
easily.
To Inate: Push the end of the bellows hose with the correct valve connector
into place on the valve as far as possible and turn clockwise until the valve
connector locks in place. Compress the hand pump gently and unhurriedly.
When inflated, screw the plastic cap onto the valve until it is fully seated.
CONNECTION OF HOSE ADAPTER TO VALVE
INFLATION VALVE HAND PUMP
VALVE CAP PLUNGER
Inflating InstructionsAssembly
The inflation valves are designed with a push-push system, this system consists of a rod-spring type gate that allows or prevents the flow of air into the air
chambers. In this way, when you push the rod-spring located in the valve this remains open permanently. When pushing back the rod-spring, this will close and
seal the valve.
Note that in the end of the hand pump hose, located in the center of the adapter, you may find an adjustable screw. When you insert the hose adapter hand pump
in the inflation valve, the screw presses the valve rod- spring by making the inflate process easier. The adjustment in the height of the screw allows the user to
adapt to the needs of the buoyancy chambers.

Notice
11
Important: The correct way to inflate the air chambers is by inflating the aft
chambers first, and then those towards the bow. When the inflatable
buoyancy chambers have been inflated, screw the cap on the valve properly in
order to secure final air-tightness. The buoyancy tubes must be inflated to the
recommended pressure otherwise the craft will perform inefficiently. When the
buoyancy tube cannot be depressed by finger pressure, the approximate
working pressure has been reached.
Air tightness is obtained partly by means of the plunger one-way check valve
that is set in the base of the valve insert; complete air-tightness is ensured by the
properly fitted valve cap. Before screwing on the cap, check that the valve is
clean, free from sand, weeds or other debris.
To deate: Remove the cap and with your finger, push down the spring loaded
plunger in the centre of the valve. To deflate totally you may want to lock the
plunger down.
The Hand Pump, also called Cylindrical Pump: To inflate your boat, connect
the valve connector appropriate for the valve. Put the pump in an upright
position and step onto the tongues, located at the bottom of the pump. The
hand pump is a double-action one. Each time you lift and push the handle, 4lts.
(1 gallon) of air will enter the buoyancy chambers. The hand pump comes with
two connections; one for inflation the other for deflation.
The Buoyancy Chambers: Depending on the model you have chosen it will
have two or more air chambers. For specific information on your boat turn to the
chapter on Specifications. The more chambers it has, the safer it will be. Each
chamber is divided from the other by a special baffle system that keeps our
multiple air chambers completely sealed off from one another, while working to
equalise air pressure between compartments. It is advisable to inflate your boat
properly and check the pressure frequently. The pressure should be maintained
at 0.20 bar (3 psi) in the buoyancy chambers. (A pressure gauge is not included
with the boat).
A good rule of thumb is: When you cannot depress the tube more than 1 cm
(1/2 inch) with the pressure of your finger, you have then reached approximate
working pressure.
Inflating Instructions
Warning
Never use a gasoline service station or high compression pumps to
inflate your boat. They could damage the buoyancy collar.
The pressure of the boat fluctuates with change in temperature.
Pressure increases after prolonged exposure to sun, and falls when
the boat is launched and when in darkness. Do not worry about this.
We have seen experienced people send boats over for repair which
were in excellent condition that either lost air due to a loose air valve,
or because of shifts in temperature.

12
Inflating Instructions
1
2
3
Warning
1. REMOVABLE ROWING SEAT
2. (CSM) COATED FABRIC SEAT RETAINER
3. BOUYANCY TUBE
THE REMOVABLE SEAT IS EASIER TO FIT IF THE BOUYANCY CHAMBER IS SLIGHTLY DEFLATED
Fitting of Rowing Seat
Care should be taken not to allow a boat which has been fully inflated
in the cool of the morning to stand in direct sunlight. Buoyancy
pressure will quickly raise with the temperature and could strain or
cause serious damage to the buoyancy tube.
COMPRESS THE HAND PUMP GENTLY AND UNHURRIEDLY

13
FOLLOWING THE CORRECT ASSEMBLY OF THE OARS, THE
PINTYPE OARLOCKS MAY BE FITTED TO PERMANENTLY
ATTACHED OAR LOCK BASES AS SHOWN IN THE ILLUSTRATION:
FULLY SEAT THE OARLOCK INTO THE SLEEVE PORTION OF THE BASE
BY ALIGNING THE FLAT PORTION OF THE OARLOCK PIN, AND THE
FIXED PIN WITHIN THE SLEEVE OF THE BASE. WHEN FULLY SEATED IN
THE BASE, ROTATE THE OAR ASSEMBLY 180 DEGREES TO LOCK THE
OAR INTO POSITION. AFTER CORRECT ASSEMBLY, THE OAR AND
PIN-TYPE OARLOCK WILL NOT PULL OUT OF THE OARLOCK BASE.
DISASSEMBLY OF THE OARS AND OARLOCKS IS PERFORMED IN THE
REVERSE ORDER.
Fitting & Assembly of Oars
1
21
2
3
4
3 4
Hull & Deck Drain Plug
1. DRAIN SOCKET WITH O-RING & SAFETY PLUG
2. EXPANDING DRAIN PLUG FOR RIBS
3. TO FIT THE HULL DRAIN PLUG:
• PUSH THE PLUG INTO SLEEVE LOCATED IN THE TRANSOM
• TO LOCK, LIFT HANDLE THROUGH 90º AS SHOWN BY ARROW
4. TO FIT DECK DRAIN PLUG, ALSO CALLED THE CONDENSATION VALVE:
• THE DECK DRAIN PLUG IS A SCREW FIT INTO THE FLANGE
• MAKE SURE O-RING IS IN PLACE
• TURN ANTICLOCKWISE TO UNDO, AND CLOCKWISE TO TIGHTEN

14
Do not open either the hull drain plug or the deck drain plug while
afloat, i.e. when the boat is NOT in motion.
Before launching the boat, make sure both plugs are secured into the
valves.
Caution
Danger
Notice
Caution
Portable tanks must be removed from the boat when fuelling.
Hull & Deck Drain Plug Fuelling & Fuel System
Note 1: When open, the deck drain plug is retained by the flange. You should
periodically remove it to empty any water build up from between deck and hull.
Note 2: If leaving the boat on davits or storing it out of the water, remove both
drain plugs so rain water may drain and/or condensation evaporate.
Please check the specificatios chapter to confirm if your craft comes standard
with a pre-fitted marine-grade aluminium underdeck fuel tank, and its capacity.
if the craft you have chosen does not come standard with a pre-fitted fuel tank, a
portable one should be supplied with the outboard engine.
The pre-fitted fuel tank is permanently installed underneath the deck. Where
necessary the craft is equipped with removable inspection plates for fuel system
component inspection.
Fuel lines, vent hoses and drain hoses should be checked frequently for leaks. If
leaking occurs, inspect the fuel system connections. If they are too tight or too
loose they may leak. If upon tightening or loosening the connection, the leak
persists, replace the hose. If hose presents surface cracking, is dry or mushy
replace immediately. If fittings show damage due to abrasion or rust, replace
immediately.
• Take care not to spill gasoline. If gasoline is spilled, use dry rags or
sponges to soak up the fuel and dispose of them properly onshore.
Discharging fuel or oily waste in navigable waters is prohibited. Help
protect your waters.
• Make sure you are using the filler pipe marked “Fuel”.

15
Periodic cleaning is the best way to keep your AB boat looking new, and
performing as the day you bought it. Keeping an AB boat clean and in top shape
could not be easier. To do so, please follow these steps after each use, and more
often when used in salt water:
Console Tenders
1. Clean as afore mentioned.
2. If you can lift the boat out of the water, remove both the condensation valve
and the expanding drain plug. If not use your bilge pump.
3. Wash the hull and floor with mild detergent and fresh water.
Open Tenders
1. Remove the outboard engine, seat and oars or paddles.
2. Inflate the boat up to working pressure.
3. If wet, leave it to dry, against a wall for example.
4. When dry, vacuum-clean or brush it in order to get any sand, gravel rubbish
or debris off the floor.
5. If necessary remove all tar or sea particles with toluene.
6. Clean all over with ordinary soap and water and rinse thoroughly with fresh
water.
7. Check the inflation valves, clean them and remove any sand or debris
Please check the specifications chapter to confirm if your craft comes standard
with a pre-fitted marine-grade aluminium underdeck fresh water tank, and its
capacity.
Notice
Make sure you are using the filler pipe marked “Water”.
Warning
Fuelling & Fuel System Maintenance
Caution
• Replace with certified marine parts only. Do not use automotive
parts.
• Gasoline is extremely flamable and highly explosive. When
refuelling, always turn off the engine, never smoke or allow open
flames or sparks within 15 metres (50 feet) of the fuelling area.
• Do not store flamable material in a non-vented area.
• Do not fill tank to capacity. Allow for fuel expansion.
• Do not drill holes in the deck deeper than 1.27 cms. (1/2”).
Otherwise the fuel tank will be perforated. Fuel leaks could occur,
which if ignited may cause serious injury or death.
Underdeck Pre-fitted FreshWater Tank
Never spray any kind of greasy solution or solvent on the tubes, as
this could contaminate the materials should repairs become
necessary.

16
Upholstery
Regular washing with mild detergent and warm water, or automotive vinyl
cleaners is sufficient to keep the cushions, canopy top and vinyl coverings in
good condition. Keep the cushions from becoming soaked, and dry them off
thoroughly after washing to prevent mildew accumulation after the boat is
covered. Prop the cushions up in the boat when covered to allow air circulation,
and spray with mildew repellent. Periodically, lubricate canopy top snaps with
petroleum jelly and lubricate zippers with paraffin wax.
Fibreglass Care
Waxing the entire gel coat surface at least twice a season is recommended for all
climates. Use of a specially formulated gel coat wax will prevent colour fade and
soil and scum adhesion. If the gel coat has chalked or faded from lack of proper
maintenance, buffing may be necessary to bring back the shiny appearance.
Hand buffing with #7 rubbing compound or power buffing with glazing
compound #1 will quickly restore the surface.
Aluminium Care
Wax the painted surfaces of the boat twice a season. You may use boat or
automobile wax.
Aluminium Corrosion
Under certain conditions aluminium boats are subject to corrosion. Two forms of
corrosion are possible, galvanic and stray current. Both types of corrosion result in
metal being eaten away, and, if not stopped, can cause severe damage. Although
both types of corrosion can occur in freshwater; salt, brackish, polluted and high
mineral content water will greatly accelerate corrosion. For boaters, corrosion is a
common occurrence.
Boats used in afore-said water should be properly protected with antifouling
paint or a similar protectant. It is best to remove the boat from the water when
not in use.
It is also advisable to add extra zinc anodes securely attached with clean and
tight connections. Never paint or coat zinc anodes and replace if they are eroded
to 50% or more.
Maintenance
Warning
Do not use abrasive cleaners, solvents, ammonia or chlorine as these
will damage the gel coat surface. Under extreme conditions, special
cleaners may be used to remove marine growth such as scum or
algae, from the hull.
Use as few cleaning agents as possible; do not discharge waste
agents into the water.
Notice
Caution
Warning
Sacrificial zinc anodes protect hardware that is exposed to the water.
Electrolysis attacks the softest metals first. The zinc will decompose
before the other metal on your boat. The zinc anode is usually
attached to the engine. For more information, check the motor
owner’s manual.
Certain automotive, household and industrial cleaners can cause
damage and discoloration. Whenever using a product for the first
time, be sure to test the treatment in an inconspicuous area first.
Do not cover the boat with a canvas until completely dry, as this could
damage the tissue of the tubes due to mildew and water stains.

17
After you have cleaned the boat including the fibreglass hull, and it has dried
completely, deflate it slightly, (the drain and condensation valves must remain
unplugged), cover the boat with a canvas and store it on top of chocks, boat
cradle or trailer under a roof/shade.
Fibreglass Hull Repair
Periodically you must inspect every square centimetre (inch) of the rigid hull of
your inflatable. The best way to do it is by rubbing your hand over the surface.
Generally, you will feel the scratches and chips before seeing them, more so
when they do not extend right through the gel coat to the laminate underneath.
Mark these areas with a waterproof felt pen for further inspection. When you see
the same colour right through the scratch or chip, the gel coat has been
damaged. In this case, simply lightly grind out the cavity with an emery disc in an
electric drill or with emery paper used by hand, and fill up the hole with gel coat.
To complete the job, you then grind the gel coat filling flush with the surroun-
ding surfaces using a very fine emery disc and polish the whole area with an
abrasive cleaner so that it blends in. Small chips and scratches of this type can be
left in most cases without fear of the damage worsening because the gel coat still
provides a seal against water entering the laminate. The touching up treatment
suggested is only necessary if you are greatly concerned about the cosmetic
appearance of your boat.
More serious are chips and scratches which extend into the laminate. These can
usually be identified as a white surface under the gel coat with a fibrous texture.
If the damage is minor with only the gel coat having been removed, then follow
the same procedure as described above, but make sure that you grind back the
gel coat to a point where there is positive adhesion between the gel coat and the
laminate underneath.
For major fibreglass damages, please take your inflatable to an authorized
service centre.
Aluminum Hull Repair
Due to the strength and durability of aluminum hulls, they tend to suffer a lot less.
In case of dents, perforations, ruptures or fractures, please take your inflatable to
an authorized service centre specialized in aluminium welding. If the aluminium
hull has not received the proper care specified in the Maintenance chapter, it
could be a victim of corrosion. Depending on the amount of corrosion, it could
be repaired at the above mentioned centre.
Notice
Warning
Storage
The hand pump can also deflate the boat by changing the conection
from the inflation position to the deflation one.
When storing your inflatables, ensure protection against rodents and
other vermin as they will feed on the fabric of the boat.
Repair of the Hull
This manual suits for next models
47
Table of contents
Other AB Inflatables Boat manuals
Popular Boat manuals by other brands

Sea Ray
Sea Ray Sundancer 370 Specific information

CarpMadness
CarpMadness Phantom 2020 Assemble instructions

e-motion
e-motion electric pleasure boat Owner's instruction

Grand Soleil
Grand Soleil 43 owner's manual

LaserPerformance
LaserPerformance Bug Rigging manual

e-motion
e-motion STEALTH PRO ANGLER owner's manual