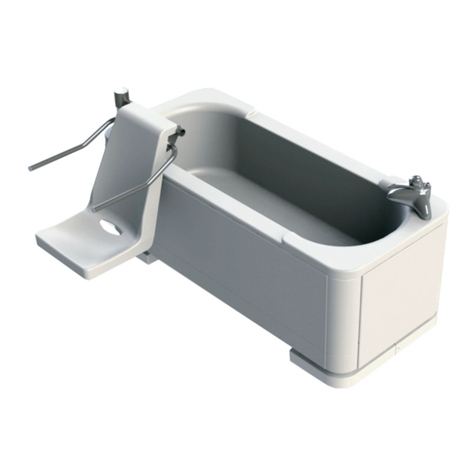
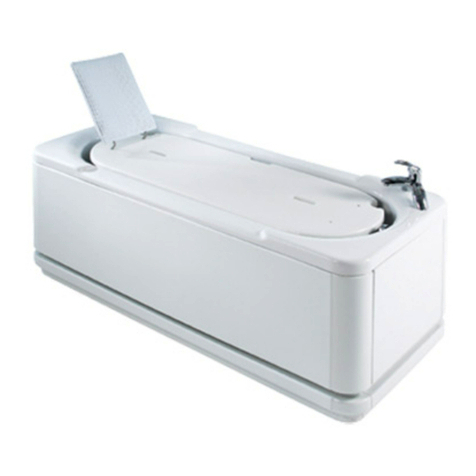
ABACUS ARIES 2000 User manual

Aries 2000 Installation Manual v1.0 1
ARIES 2000
INSTALLATION MANUAL
Tel: 01527 400024
www.abacushealthcare.co.uk

General Information
You must follow all instructions in this manual. Failure to do so will result in you assuming
liability for the product. Failure to comply with all instructions may result in serious injury.
Intended Use
To provide assistance when bathing by means of an adjustable height bath. The bath is
powered by a 24V (Low voltage) supply with battery backup in case of power failure to allow
the bather to exit the bath. The bath allows the user to be bathed through the provision of a
moving bath, within the confines of the bath footprint. There is a two button handset to control
the raising and lowering of the powered bath
With the user in the bath (Usually via a ceiling or mobile hoist) the bath can be raised to a
comfortable bathing height for the helper/carer. Exit is a reversal of the above procedure.
Responsibility of the Installer
The installer must inspect the product prior to installation to ensure the unit is free of defect or
damage. In the event of a problem, the unit must not be installed. If the packaging or product
has been damaged contact your supplier immediately.
This product is designed to be sold on a supply and install basis by a trained certified installer
and electrical work carried out by a qualified electrician.
Only accessories authorised by the manufacturer should be used with this product.
Aries 2000 Installation Manual v1.0 2

Installer Instructions
This product is heavy. Two persons minimum to move the unit.
The bath is a two person install. Attempting a one person install is not recommended, and
may result in damage to the bath.
Always check around the bath for any obstructions before raising or lowering the bath.
Never drop or insert any objects into any openings.
WARNING! The bath is only to be installed on concrete ground level flooring. If
upper level installation is required it must not be without reference technical support.
WARNING! Check floor loading capacity against bath weight. Total weight
(maximum) is 800kg (including water and maximum user weight).
If the flooring is not capable of withstanding the 800kg load the bath must not be
installed!
WARNING! Risk of electric shock; connect only to a separate circuit protected by an RCD.
Risk of electric shock; do not permit electric appliances (such as a hair dryer, lamp,
telephone, radio or television) within 2 metres of this bath.
The unit must be connected to an RCD. Such a circuit is to be provided by a qualified
electrician and should be tested on a routine basis.
To test the RCD push the test button; the RCD should interrupt power. Push the RESET
button; power should be restored. If the RCD fails to operate in this manner there is the
possibility of an electrical shock. Do not use this unit. Isolate the unit and have the
problem corrected by a qualified service representative before any further use.
Whirlpool and spa motors where fitted must be connected to an RCD protected outlet as
must any electrical accessories.
Although compliant with IEC/EN60601-1-2 for EMC, the bath may still cause interference
with sensitive medical equipment. Should any electro-magnetic interference be
experienced whilst using this product, remove the user immediately and seek medical
advice.
Where a safety lap belt is supplied this must be used for the safety of the bather.
WARNING! If this unit is to be utilised by many different bathers, we would strongly
recommend that it is cleaned regularly with a medical disinfectant as well as following a
strict cleaning routine.
WARNING! This Bath moves. Ensure there are no objects or persons that can become
trapped or injured while the bath raises or lowers.
Aries 2000 Installation Manual v1.0 3

Access
When deciding on the positioning of the bath there are a number of points that should be taken
into consideration:
IMPORTANT –The bath should be sited at least 100mm away from any wall to ensure there are
no finger trap areas.
It must not be sited closer without reference to the sales office or technical support.
FLOORING
Prepare the floor area and ensure it is flat, level and structurally sound. There must be NO
SERVICES OR UNDER FLOOR HEATING BURIED within the ‘foot plate’ area detailed in figure
1.0. All floor finishes should be in place prior to installation (i.e. altro/tiling).
1. Hoist/wheelchair access.
2. Service/cleaning access.
3. Positions of any existing under floor pipe work or cabling.
4. Conflict between doorways.
5. Distance from walls/other objects.
6. Under-floor obstructions (water/heating pipes, waste pipes, under-floor heating
etc)
7. Level Flooring
Aries 2000 Installation Manual v1.0 4
Foot
plates
Tap end of
bath
Head end of
bath Figure 1.0

Side Wall Pre-install Plumbing
Figure 2.0
When fitted against a side wall, all pipework connections to the bath should be made through
the foot side panel (tap end).
(figure 2.0).
This will provide the neatest solution for side wall installation.
Waste outlet and water feed connections will exit the panel as shown in figure 3.0 when
installed correctly.
Tap end of bath –Plumbing connections
Note: for right handed bath plumbing
connectors will be mirrored to
opposite side of the bath foot.
5
Left hand bath tap end shown shown
Figure 3.0
Waste feed: Ensure that of the 3 water
Pipes which come through the wall/floor,
The waste pipe is the closest to the
‘bath plumbing connections’ (figure 3.0).
Hot & Cold water feeds:
Notice the position of the hot
and cold pipes entering the bath in
figure 3.0.
This orientation will be mirrored for a
right hand bath, with cold water pipe
being closest to the bath foot plate.
Aries 2000 Installation Manual v1.0

Side Wall Pre-install Plumbing
Plumbing feeds -Wall fed (Dimensions shown in mm)
As plumbing connections will be from the side of the bath as shown, side wall plumbing is preferred
as it is the most straightforward and hidden solution. End wall plumbing is also possible, however
pipework will be required to follow the perimeter of the bath (see fig 4.0)
Note: when a peninsula layout in chosen, all visible pipework must also be boxed and identified as
a trip hazard.
Hot & Cold - Feeds should be fed in 22mm. Feeds should terminate with full bore isolating
valves 25mm from the wall. These should be set between 20- 40mm centres off the floor where
possible to ensure a neat connection.
Isolation valves must be located so that they are easily accessible.
Waste - 40mm Waste outlet @ 3ltr/sec. It is recommended that the waste should be set at
between 30-100mm centre from the floor.
Figure 4.0
Left hand bath wall fed
plumbing locations
shown.
Note: for right handed
bath plumbing will be
mirrored to opposite
side.
It is preferable that
plumbing enters the
room anywhere in the
green area shown.
Pipework must not
enter the room in the
location shown in
orange, as doing so
will hinder installation.
6Aries 2000 Installation Manual v1.0

Plumbing feeds -Floor fed (Dimensions shown in mm)
Where wall entry is not possible, floor fed connections may also be made.
Hot & Cold - Feeds should be fed in 22mm. Feeds should terminate with full bore isolating
valves. Elbow isolation valves may be used to improve plumbing routing where possible.
Isolation valves must be located so that they are easily accessible.
Waste - 40mm Waste outlet @ 3ltr/sec. Waste pipe highest point should not exceed 120mm
from the floor.
Side Wall Pre-install Plumbing
7
Left hand bath floor fed
plumbing locations
shown.
Note: for right handed
bath plumbing will be
mirrored to opposite
side.
It is preferred that
plumbing feeds will
terminate anywhere
along the midpoint of the
green area outlined.
When the bath is fitted at
more that 100mm from
the wall, floor feed
centres should be 50mm
from the wall.
Pipework must not enter
the room in the location
shown in orange, as
doing so will hinder
installation.
Figure 5.0
Aries 2000 Installation Manual v1.0

End Wall Pre-install Plumbing
Figure 6.0
The bath may also be supplied with pipework fitted to exit the foot end panel (tap end).
This configuration of plumbing is preferred when the bath is fitted with a foot end panel
against a wall (peninsula).
Waste outlet and water feeds will exit the foot end panel as shown in either figure 6.0 and 7.0,
depending on the handing of the bath.
Note: plumbing will exit the foot end panel slightly differently depending on bath handing, with
either the waste outlet at the far end (right hand, figure 6.0) or in the centre (left hand, figure
7.0).
Tap end of bath –Plumbing connections
8
Left hand bath
Right hand bath
Figure 7.0
Note: Consider which handing the bath is, this will influence where the plumbing will enter.
Waste feed: Ensure that of the 3 water pipes
which come through the wall/floor, the
waste pipe is the closest to the
‘bath plumbing connections’ (figure 8.0).
Hot & Cold water feeds:
The hot and cold water feeds entering the bath
will always maintain the same order, regardless
of bath handing. Cold water to the left of the
bath, hot water to the right of the bath
(figure 8.0).
Figure 8.0
Aries 2000 Installation Manual v1.0

End Wall Pre-install Plumbing
Plumbing feeds -Wall fed (Dimensions shown in mm)
As plumbing connections will be from the end of the bath as shown, end wall plumbing is preferred
as it is the most straightforward and hidden solution. Side wall plumbing is also possible, however
pipework will be required to follow the perimeter of the bath (see fig 9.0).
Note: when a peninsula layout in chosen, all visible pipework must also be boxed and identified as
a trip hazard.
Hot & Cold - Feeds should be fed in 22mm. Feeds should terminate with full bore isolating
valves 25mm from the wall. These should be set between 20- 40mm centres off the floor where
possible to ensure a neat connection.
Isolation valves must be located so that they are easily accessible.
Waste - 40mm Waste outlet @ 3ltr/sec. It is recommended that the waste should be set at
between 30-100mm centre from the floor.
Figure 9.0
End wall peninsula
plumbing shown.
Note: plumbing
connections terminate
in the same location for
both left and right
handed baths.
It is preferable that
plumbing enters the
room anywhere in the
green area shown.
Pipework must not
enter the room in the
location shown in
orange, as doing so
will hinder installation
(unless the bath is
positioned 150mm or
more from the wall.
9Aries 2000 Installation Manual v1.0

Plumbing feeds -Floor fed (Dimensions shown in mm)
Where wall entry is not possible, floor fed connections may also be made.
Note: when a peninsula layout in chosen, all visible pipework must also be boxed and identified as
a trip hazard.
Hot & Cold - Feeds should be fed in 22mm. Feeds should terminate with full bore isolating
valves. Elbow isolation valves may be used to improve plumbing routing where possible.
Isolation valves must be located so that they are easily accessible.
Waste - 40mm Waste outlet @ 3ltr/sec. Waste pipe highest point should not exceed 120mm
from the floor.
End Wall Pre-install Plumbing
10
Floor fed peninsula plumbing
locations shown.
Note: plumbing connections
terminate in the same location for
both left and right handed baths.
It is preferred that plumbing feeds
will terminate in the green area as
close to the bath centreline as
possible, without entering the
orange margin.
Pipework must not enter the room
in the location shown in orange, as
doing so will hinder installation.
When the bath is fitted 200mm or
more from the wall plumbing may
terminate along the bath centreline,
providing it does not enter the
orange margin.
Plumbing pipes should terminate
the floor with centres a minimum of
50mm form the wall.
Figure 10.0
Aries 2000 Installation Manual v1.0

Aries 2000 Installation Manual v1.0 11
Water Pressure Requirement
As the bath requires a Thermostatic Mixing Valve, which has been manufactured to NHS
model engineering specification D08, and approved under the TMV scheme, please read the
following which outlines how a TMV may affect the use of your bath.
The working parameters of the TMV require a water pressure of 1-5 bar with a
maximum pressure loss ratio of no greater than 10:1 between hot and cold feeds.
The maximum bath water temperature according to DO8 is no higher than 43°C and
the maximum for the shower is 39°C.
It is important to note that a pressure difference between hot and cold pipes will have a great
effect on the time it takes to fill a bath, i.e;
Hot water 1.4 bar and Cold water 2.4 bar = Approx. 12.5min. to fill bath with 250 litres
Hot water 2.2 bar and Cold water 2.2 bar = Approx. 7min. to fill bath with 250 litres
If in doubt a pressure test should be carried out prior to installation of the bath, and if
required a booster pump or pressure reducing valve fitted, as required.

Electrics
Electrical Connection & Earth Bonding
A 30mA RCD is required in accordance with current IET regulations. This should be located
outside the bathroom or on the consumer unit covering that area of the building.
Earth Bonding and Cross Bonding are to be fitted and tested for continuity in accordance with
IET regulations. Trailing flex should be protected by use of protective conduit.
Image for Plumbing and Electrical Supplies
(Reference purposes only) -Side & end wall feeds
Aries 2000 Installation Manual v1.0 12
300 - 500mm
Second spur required if
spa system is fitted
IP65 rated cable outlet wired to
5Amp fused spur at high level
75mm min
The bath should be connected via a 5 Amp IP65 rated non-switched fused spur unit, with 2
metres of 1.5mm 3 core flex. Located at the tap end of the bath, positioning and specification
to be in accordance with IET regulations. The spur box should be mounted between 300-
500mm off the floor.
Where electrical options are fitted (i.e. spa, lights, etc) a 13 Amp IP65 rated non-switched
fused spur is also required. The second spur is required to ensure the bath will continue to
operate should there be a fault in the accessory fitted.

ARIES 2000 ON SITE ASSEMBLY AND INSTALLATION INSTRUCTIONS
The bath will come in a partly built state on a pallet, with all panels boxed separately.
Depending on the individual bath location, the bath may require some break down to
safely get it on site. If breakdown is required, reverse the assembly instructions provided
where necessary.
Where access allows, taking the bath into the property without any breakdown in
preferable.
Preparation
a) Carefully remove all packaging and inspect all components thoroughly. Note: Do not use
sharp knives or instruments to remove packaging around the finished surface areas of the bath.
b) Ensure all component parts are present before proceeding to remove any existing facilities. It
is important to ensure the complete kit is there. If there are ANY components missing contact
the office and quote the number on the side of the bath
c) Prepare the floor area and ensure it is flat, level and structurally sound & there are NO
SERVICES BURIED within the floor fixing area.
Ensure the bath location has suitable clearance for correct installation (When the bath is in the
room it may be difficult to move once fully assembled. Please refer to the detailed layout plan
provided on page 14.
D) All panels and contents should come labelled to help simplify assembly and installation.
Check that all contents is labelled prior to install.
Aries 2000 Installation Manual v1.0 13
Items
Items supplied with the kit should be as
follows:
•Installation Manual (this booklet)
•User Manual
•Bath unit complete (Bath Shell, belly pan,
frame, control pack)
•Bath Surround Panels –top, foot end side
panels, bottom end panels and bellows.
•Flexible water feed pipes x2
•User Handset
•Bath Shower Mixer Tap (TMV) –optional
•Dispatch kit (Floor fixing kit, panel
bolts/washers, plumbing kit, cable ties
etc).
ARIES 2000 ON SITE ASSEMBLY AND INSTALLATION INSTRUCTIONS
The bath may come fully built (excluding panels) or in kit form, with all panels boxed
separately.
Depending on the individual bath location, the bath may require some additional break
down to safely get it on site. If the complete bath requires some breakdown, please read
through the ‘Kit form assembly ‘ instructions (Page 14) carefully, and revere where
necessary.
When the bath is purchased fully assembled, where access allows, it is advised to take
the bath into the property complete.
Preparation
a) Carefully remove all packaging and inspect all components thoroughly. Note: Do not use
sharp knives or instruments to remove packaging around the finished surface areas of the bath.
b) Ensure all component parts are present before proceeding to remove any existing facilities. It
is important to ensure the complete kit is there. If there are ANY components missing contact
the office and quote the number on the side of the bath
c) Prepare the floor area and ensure it is flat, level and structurally sound & there are NO
SERVICES BURIED within the floor fixing area.
Ensure the bath location has suitable clearance for correct installation (When the bath is in the
room it may be difficult to move once fully assembled. Please refer to the detailed layout plan
provided on page 14.
D) All panels and contents should come labelled to help simplify assembly and installation.
Check that all contents is labelled prior to install.

Please note: if locating the bath into the installation site is difficult, partial disassembly of
the bath is recommended.
Bath teardown
1. Belly pan removal
The belly pan is located on the underside of the base frame. When pressure is applied to the
underside of the bath, the belly pan will rise, activating the safety edge feature. Once activated,
the bath can only be raised, preventing any further lowering.
Removing the belly pan is optional, However is recommended as it will decrease the size and
weight of the base frame, and make removing the platform rods easier as access will be
improved.
1. Whilst supporting the belly pan from the underside, remove the M17 bolt holding the belly pan
at each corner (4 in total).
2. Now that the belly pan is released, carefully lower
slightly and set aside.
Note: When refitting the belly pan, it is critical
that a gap of approximately 1mm is maintained
between the switch contact surface and the top
of the belly pan. This will ensure no miss
triggering of the safety edge system.
Aries 2000 Installation Manual v1.0 14
1mm
KIT FORM ASSEMBLY INSTRUCTIONS
Note: It is recommended that a minimum of two people assemble the bath.
With all contents carefully inspected and moved onto site, it is now time to begin
assembling the bath kit.
Firstly, position the wooden blocks (found beneath the frame) in the room near where the
bath will be installed. The blocks should be spaced apart, and slightly inward of where the
foot end assemblies will be fitted.
Note: Bath should not be in the final installation position! Leave enough room to access all
sides of the bath for correct assembly. The bath will be moved into position in later stages.
1. Base frame positioning
Identify which end of the base frame is which, and lay onto the wooden blocks accordingly.
The frame should be positioned so that only the metal brackets on the base of the frame are in
contact with the wooden block, as shown below.
2. Plug in foot end actuators
Position the foot end assemblies near the ends of the base/scissor frame (one at each end)
Locate the 2 foot end actuator leads (marked with yellow cable ties), and insert 1 of the plugs
into the first foot end actuator. Press down the retaining clip firmly, securing the lead into place.
Next, repeat this process at the opposite end of the bath.
3. Connecting the handset
Locate the handset extension cord/ port (this will later be fitted to the bath), and line up the plug
with the port, ensuring the plug is correctly orientated.
Plug in until no further movement if felt.
Fix the foot end into position with 4 x M10 Washers
and 4 x M10 x 16 cap head bolts provided.
2. Plug in foot end actuators
Locate the 2 foot end actuator leads (marked with yellow cable ties), and insert 1 of the plugs
into the first foot end actuator. Press down the retaining clip firmly, securing the lead into place.
Next, repeat this process at the opposite end of the bath.
3. Connecting the handset
Locate the handset extension cord/ port (this will later be fitted to the bath) and line up the plug
with the port, ensuring the plug is correctly orientated. Plug in until no further movement if felt.
4. Removing wooden blocks
With the handset correctly fitted, the bath is now able to be move up and down. Before doing
this, it is critical to check that no cables can be caught/ damaged during the movement of the
bath.
Now, press the ‘bath up button’ (found on the handset) until the bath reaches its maximum
height. The bath will stop when the maximum height has been reached.
Note: It is critical the foot end assemblies have been securely fitted at this stage.
Remove the wooden blocks and set aside. These are no longer needed.
Note: With the blocks no longer beneath the bath frame, the bath is able to reach its minimum
height. Ensure nothing is left beneath the bath frame whilst the bath is being installed.
FOOT END
HEAD END
2. Plug in foot end actuators
Locate the 2 foot end actuator leads (marked with yellow cable ties), and insert 1 of the plugs
into the first foot end actuator. Press down the retaining clip firmly, securing the lead into place.
Next, repeat this process at the opposite end of the bath.
3. Connecting the handset
Locate the handset extension cord/ port (this will later be fitted to the bath) and line up the plug
with the port, ensuring the plug is correctly orientated. Plug in until no further movement if felt.
4. Removing wooden blocks
With the handset correctly fitted, the bath is now able to be move up and down. Before doing
this, it is critical to check that no cables can be caught/ damaged during the movement of the
bath.
Now, press the ‘bath up button’ (found on the handset) until the bath reaches its maximum
height. The bath will stop when the maximum height has been reached.
Note: It is critical the foot end assemblies have been securely fitted at this stage.
Remove the wooden blocks and set aside. These are no longer needed.
Note: With the blocks no longer beneath the bath frame, the bath is able to reach its minimum
height. Ensure nothing is left beneath the bath frame whilst the bath is being installed.
Wooden blocks
Metal
Bracket

Aries 2000 Installation Manual v1.0 15
3. Bath shell removal
This requires two people. Firstly disconnect the handset. Remove the 10 x 15mm M6 screws
located on the underside of the bath.
The bath waste pipe will still be attached, remove this from the waste water trap.
Remove the control boxes from the underside of the bath using the quick release tabs
attached.
Unscrew the 2 x junction boxes from the underside of the bath.
Ensure all wiring linking the bath shell to the bath frame is disconnected.
Keeping the bath level, the bath can now be carefully guided off the platform rods, ensuring no
damage is caused to the seal housings or seals. (The seals will contain silicone grease, check
that this is clean and free from any dirt prior to reassembly).
Now that the bath shell has been removed, carefully set aside.
5. Scissor frame removal.
The next stage of the bath breakdown is to remove the scissor frame.
1. To do this the first stage is to unplug the wiring from all 4
actuators around the bath. Secondly, the Safety Edge
switches will all require moving. To do this remove the 2 x M5
round head allen bolts for each switch. (There are 4 in total
on the base frame).
2. Whilst supporting the scissor frame, disconnect one of the
side actuators from the upper scissor frame mount by
removing the clevis pin.
Repeat for the other side of the bath.
With the top mount disconnected and the scissor frame
flat, remove the actuator from the lower mount by removing
the clevis pin. The actuator can now carefully be set aside.
Repeat for the other side.
Now cable tie the scissor fame together to prevent opening.
15
4. Fitting the foot end assembly (head end)
The fixing holes in the foot end assemblies will be too low to correctly match the holes in the base
frame at this point. This will require some fine adjustment with the handset.
Starting at the head end, raise the foot end assemblies
up slightly by pressing the up button on the handset.
Continue to do so until the holes in the base frame
line up with the holes in the foot end assembly.
If the holes in the foot end assembly become
too high, simply press the bath down button.
Fix the foot end into position with 4 x M10 Washers
and 4 x M10 x 16 cap head bolts provided.
5. Fitting the foot end assembly (foot end)
Once the head end foot assembly has been correctly
fitted, the bath will now require raising once again.
Repeat the same process covered in STEP 4 at
the foot end.
Fix the foot end into position with 4 x M10 Washers
and 4 x M10 x 16 cap head bolts provided.
6. Removing wooden frame support blocks
To remove the wooden block the bath should be taken to it’s highest position.
To do this, press and hold the ‘bath up’ until the bath reaches its maximum height. The bath will
stop when the maximum height has been reached.
Note: It is critical the foot end assemblies have been securely fitted at this stage.
Remove the wooden blocks and set aside. These are no longer needed.
Note: With the blocks no longer beneath the bath frame, the bath is able to reach its minimum
height. Ensure nothing is left beneath the bath frame whilst the bath is being installed.
4. Positioning the bath shell
In a team of at least 2 people, carefully lift the bath shell onto the bath frame, making sure the
waste is at the foot end of the bath. Slowly lower, and set into place.
Ensure no cables are trapped between the bath shell and base frame.
6. Platform rod fitting
Insert all 4 rods through the rod glands in the bath shell, whilst ensuring
both anti lift rods (with cut-out around one end) are positioned user side
and facing upwards (cut out on top).
The rods should be a snug fit, but not require excessive force to insert.
When correctly inserted, push down all 4 rods until contact is made with
the bath base frame.
Now locate 4 x M8 x 40mm washers, and 4 x M8 x 20 Hex head bolts,
and starting with one rod, insert the bolt (with washer fitted) through the
base frame and into the rod. Tighten down firmly. Next repeat the
process with all 4 rods.
Note: At this stage the bath shell will still have movement due to not being screwed down. This is
essential for correct rod alignment, and the bath shell should NEVER be screwed down before the
rods.
7. Securing the bath shell
With the bath shell now in position, and located correctly by the platform rods, the needs to be
screwed down.
Locate the 10 x ‘8 x 19 countersink screws’ and 10 x ‘M5 flat washers’ provided. Place a washer
over each screw, and screw into the bath shell support board through the base frame.
Note: The board has been pre screwed. Where possible pick up the original holes in the support
board.
8. Platform support braces
The platform rod braces now need positioning on the rods. Whilst standing user side, position the
hingestay (features hingestay mounting point) rod support brace on the rods to the left. Next,
position the standard rod support brace on the rods to the right. When correctly orientated, the
braces should appear as in the image below.
Secure both rod braces into place user side, using the 2 x M10 x 25 (1 for each brace) Hex head
Nylon bolts provided. Do not overtighten.
USER SIDE
Standard rod
support brace
Nylon M10 bolts
Hingestay rod
support brace

Aries 2000 Installation Manual v1.0 16
3. Bath shell removal
This requires two people. Firstly disconnect the handset. Remove the 10 x 15mm M6 screws
located on the underside of the bath.
The bath waste pipe will still be attached, remove this from the waste water trap.
Remove the control boxes from the underside of the bath using the quick release tabs
attached.
Unscrew the 2 x junction boxes from the underside of the bath.
Ensure all wiring linking the bath shell to the bath frame is disconnected.
Keeping the bath level, the bath can now be carefully guided off the platform rods, ensuring no
damage is caused to the seal housings or seals. (The seals will contain silicone grease, check
that this is clean and free from any dirt prior to reassembly).
Now that the bath shell has been removed, carefully set aside.
5. Scissor frame removal.
The next stage of the bath breakdown is to remove the scissor frame.
1. To do this the first stage is to unplug the wiring from all 4
actuators around the bath. Secondly, the Safety Edge
switches will all require moving. To do this remove the 2 x M5
round head allen bolts for each switch. (There are 4 in total
on the base frame).
2. Whilst supporting the scissor frame, disconnect one of the
side actuators from the upper scissor frame mount by
removing the clevis pin.
Repeat for the other side of the bath.
With the top mount disconnected and the scissor frame
flat, remove the actuator from the lower mount by removing
the clevis pin. The actuator can now carefully be set aside.
Repeat for the other side.
Now cable tie the scissor fame together to prevent opening.
16
7. Positioning the bath shell
In a team of at least 2 people, carefully lift the bath shell onto the
bath frame, making sure the waste is at the foot end of the frame.
Slowly lower, and set into place.
Ensure no cables are trapped between the bath shell and base frame.
On the underside of the base frames there is a locating mark which
will now need to be correctly aligned with the matching mark on the
frame.
Manoeuvre the bath until the marks match up as shown.
8. Securing the bath shell
Locate the 10 x ‘8 x 19 countersink screws’ and 10 x ‘M5 flat washers’ provided. Place a washer
over each screw, ready to secure the bath.
The bath base board has been pre screwed, and where possible it is important to try to pick up the
existing holes when securing the bath.
To do this, place a screw through the frame, and slightly lift the bath shell. The hole should
become visible. Insert the screw into the hole, but do not tighten. Repeat this process with
remaining holes in the base board. Tighten all screws. The bath is now fully secured.
9. Fitting handset extension port
Firstly, fully raise the bath to its highest point using the ‘bath up’ button. This will provide maximum
access to the underside of the bath.
Now disconnect the handset from the extension port.
Find the following parts in the dispatch kit:
•2 x M6 shake proof tooth washed,
•2 x M5 nut.
•2 x M5 x 20 button head bolt.
Locate the hole in the bath shell where the extension port will be mounted. This is on the bath
flange, user side near the corner.
Position the extension port into the hole from the rear of the flange. When correctly seated, holes
will be visible through the bath flange for the port fixings.
Insert one of the M5 x 20 bolts through the bath flange and
through the extension port. Fit a M6 shake proof washer at
the rear followed by a M5 nut. Hand tighten the nut.
Repeat this with the second hole on the opposite side of the
extension port.
With the port now hand tightened, check that it is correctly
seated. Now tighten the fixings.
Cable tie the extension port cable into position,
ensuring there is no risk of entrapment or damage.
USER SIDE
Standard rod
support brace
Nylon M10 bolts
Hingestay rod
support brace
11.Fitting the handset extension port
Firstly, raise the scissor frame to the maximum height using the ‘platform up’ button. This will
provide maximum access to the underside of the bath.
Now disconnect the handset from the extension port.
Find the following parts in the dispatch kit:
•2 x M6 shake proof tooth washed,
•2 x M5 nut.
•2 x M5 x 20 button head bolt.
Locate the hole in the bath shell where the extension port will be mounted. This is on the bath
flange, user side near the corner.
Position the extension port into the hole from the rear of the flange. When correctly seated, holes
will be visible through the bath flange for the port fixings.
Insert one of the M5 x 20 bolts through the bath
flange and through the extension port. Fit a M6
shake proof washer at the rear followed by a
M5 nut. Hand tighten the nut.
Repeat this with the second hole on the
opposite side of the extension port.
With the port now hand tightened, check that it
is correctly seated. Now tighten the fixings.
Cable tie the extension port cable into position,
ensuring there is no risk of entrapment or damage.
Bath support board
Bath frame

Aries 2000 Installation Manual v1.0 17
6. Base frame removal
The bath base frame can now be removed from the foot
plate assemblies.
1. Starting at one end, whilst supporting the frame, remove
the 4 x M8 allen head bolts from the top of the base
frame.(2 bolt each side of frame).
2. Remove the 2 x M8 allen head bolts form the underside of
the base frame.(1 bolt each side of frame).
3. The base frame will now come free from the foot plate
assembly.
Carefully lower the end of the frame to the ground.
4. Repeat the process for the opposite end of the bath.
Remove
Remove
10. Connecting the Spa motor (Optional extra –Baths fitted with air spa only)
Pneumatic spa
Where a pneumatic spa has been fitted, the air switch pipe will need to be connected to the front
of the air spa blower.
The air pipe is a clear PVC pipe and can be found hanging down at the tap end of the pipe.
Unravel the coiled air pipe and insert firmly into the
air hose connection located on the spa motor
Cable tie the hose to the frame if required,
ensuring there is no risk of entrapment.
Electronic spa
If the bath comes fitted with an electronic spa pump
system, the power cable and air hose will require wiring
up and connecting.
Warning: Before wiring the motor to the control box,
make sure the control box is not connected to the
Mains voltage supply.
Starting with the motor power cable, unravel the
coiled power lead found at the foot end. The cable will need
to be routed behind the frame section as shown.
Following this, fit the cable to the bunny ear connectors
found on the bath, rotating the tabs to secure into place.
Open the control box. The motor now needs wiring up.
Insert the cable through the cable gland, and make sure
the seal is well seated. The cable will have two wires, a
brown (live) and a blue (neutral).
Connect the neutral wire to the neutral block, (marked
‘Neutral’).
Connect the live wire to the live terminal (marked ‘Motor’).
Now that the box is correctly wired up, replace the cover.
The next step will be to connect the air feed hose to the
spa motor.
Place a jubilee clip over the hose. Fit the rubber end of the hose onto the nozzle protruding from
the spa blower. Slide the rubber back over the rubber section and secure into place.
The earth cable now needs reconnecting. To do this find 1 x M6 Shake proof tooth washers and 1
x M6 x 12 button head bolt in the dispatch kit.
Find the earth cable. This will still be connected to the bath frame. Locate the fixing hole for the
opposite end of the cable, this will have a green earth sticker next to it.
Insert the bolt through the earth cable eyelet, followed up by the M6 shake proof washer. Screw
the bolt into the fixing hole. Whilst tightening, hold the earth cable eyelet, as this will prevent it
rotating.
11.Fitting the waste flexi pipe
The flexi waste pipe will now need connecting to the S-trap.
Locate the waste locking ring and rubber seal in the dispatch kit. Next place the locking nut over
the end of the waste pipe. Now, place the rubber seal onto the end of the waste pipe.
Note: It is important that the flexi waste pipe travels around the base frame as shown on
page 18.
Gently plug the end of the waste pipe into the S-trap. Push gently, ensuring the flexi pipe end will
insert no further.
Whilst holding the flexi waste pipe end in place, begin to tighten the locking nut.
Note: Holding the waste pipe in place will prevent it rotating whilst the locking nut is being
tightened. Tighten firmly hand tight, however do not overtighten.
12.Fitting the Flexi water pipes (Hot and Cold)
The Hot and Cold water feeds now require connecting to the bath plumbing, and will need to
follow the same route around the base frame that was taken by the waste flexi pipe.
The hot flexi pipe can be identified by a red cable tie, the cold flexi pipe by blue.
Using the push fit connectors at the end of the water flexi pipes, fit the flexi pipes to the
corresponding colour coded hard pipes on the bath.
Once the pipes have been correctly fitted, secure the flexi pipes to the cable tie mount positioned
at the tap end of the bath, near the S-trap.
Air hole connection

Aries 2000 Installation Manual v1.0 18
6. Base frame removal
The bath base frame can now be removed from the foot
plate assemblies.
1. Starting at one end, whilst supporting the frame, remove
the 4 x M8 allen head bolts from the top of the base
frame.(2 bolt each side of frame).
2. Remove the 2 x M8 allen head bolts form the underside of
the base frame.(1 bolt each side of frame).
3. The base frame will now come free from the foot plate
assembly.
Carefully lower the end of the frame to the ground.
4. Repeat the process for the opposite end of the bath.
Remove
Remove
11.Earth cable fitting
The earth cable now needs reconnecting. To do this find 1 x M6 Shake proof tooth washers and 1
x M6 x 12 button head bolt in the dispatch kit.
Find the earth cable. This will still be connected to the bath frame. Locate the fixing hole for the
opposite end of the cable, this will have a green earth sticker next to it.
Insert the bolt through the earth cable eyelet, followed up by the M6 shake proof washer. Screw
the bolt into the fixing hole. Whilst tightening, hold the earth cable eyelet, as this will prevent it
rotating.
12.Fitting the waste flexi pipe
The flexi waste pipe will now need connecting to the S-trap.
Locate the waste locking ring and rubber seal in the dispatch kit. Next place the locking nut over
the end of the waste pipe. Now, place the rubber seal onto the end of the waste pipe.
Gently plug the end of the waste pipe into the S-trap. Push gently, ensuring the flexi pipe end will
insert no further.
Whilst holding the flexi waste pipe end in place, begin to tighten the locking nut.
Note: Holding the waste pipe in place will prevent it rotating whilst the locking nut is being
tightened. Tighten firmly hand tight, however do not overtighten.
Note: When connected correctly, the waste pipe should resemble the image show on page 19, in
the section ‘Bath plumbing Orientation).
13.Fitting the Flexi water pipes (Hot and Cold)
The Hot and Cold water feeds now require connecting to the bath plumbing, and will need to
follow the same route taken by the waste flexi pipe.
The hot flexi pipe can be identified by a red cable tie, the cold flexi pipe by blue.
Using the push fit connectors at the end of the water flexi pipes, fit the flexi pipes to the
corresponding colour coded hard pipes on the bath.
Once the pipes have been correctly fitted, secure the flexi pipes to the cable tie mount positioned
at the tap end of the bath, near the S-trap.

Gemini 2000 Installation Manual v1.3 19
Bath Plumbing Orientation –Side Wall and Peninsula Plumbing
The water Feeds and waste outlet must be checked to ensure no damage can be caused to the
pipes during use.
For the bath to raise and lower without hindrance, the Water Feeds and Waste Outlet must be
correctly orientated (right handed bath shown).
Note: For left hand bath, Pipes will travel around opposite side of frame.
Please take note of the image shown, all flexi pipes should follow a continuous smooth curve.
This will prevent any damage or kinking.
NOTE: Ensure final plumbing from plumbing bracket to bath appears as shown
in the image.
WARNING: Plumbing the Water Feeds and Waste Outlet incorrectly may result in
plumbing entrapment or kinking.
Waste Flexi
Hose
Hot and Cold
Flexi Hoses

Aries 2000 Installation Manual v1.0 20
Shower Mount Fitting (Bath with roaming shower only)
Before the bath is installed or panels fitted, the shower head mount must be fitted.
There are 2 x pre-drilled holes on top of the bath where the mount will locate.
Note: The mount must be fitted so that
the outer screw cover is facing
away from the bath, as shown.
Using the fixings provided with the mount,
firmly secure the mount to the bath.
Next, the mount screw cap must be fitted.
Position the screw cover over the mount
from above, and when lined up correctly
press down firmly.
When correctly installed the top of the cover
will come flush with the top of the mount, as
below
Table of contents
Other ABACUS Bathtub manuals
Popular Bathtub manuals by other brands

RAVAK
RAVAK New Day 150x150 Assembly

Kohler
Kohler Greek K-1492-H2 Homeowner's guide

Kohler
Kohler K-1110 Roughing-In Guide

American Standard
American Standard Stratford Whirlpool 2470.028 parts list

American Standard
American Standard Salem 14 0153.015 Specifications

Swiss Madison
Swiss Madison SM-DB559 installation instructions

American Standard
American Standard Reminiscence 2908.018W Specifications

Empava
Empava EMPV-67AIS05 manual

Kohler
Kohler Underscore VibrAcoustic BubbleMassage... quick start guide

A&E
A&E Italia Owner's manual and installation guide

PAA
PAA Opera quick start guide

DURAVIT
DURAVIT Happy D.2 7 0316 Series Mounting instructions