ABL WHEMH10 User manual

EN
Article No.: 0301894_EN_b
Installation manual
WHEMH10
1W0001
PVEMH10

Contents | iii
Contents
Contact ii
Additional technical information 4
Intended use 4
Information in this document 4
Important information 5
General 5
Safety instructions 5
User information 6
Dimensional drawings and dimensions 7
WHEMH10 7
1W0001 7
PVEMH10 8
Introduction to the WHEMH10, 1W0001 and PVEMH10
mounting plates 9
Identification of the mounting plate 9
Items supplied 9
Compatible products 10
Installation 11
Requirements for the installation site 11
Specifications for mechanical installation 11
Preparation for installation on a wall 12
Preparation for installing the PVEMH10
mounting plate 14
Screwing to the wall 15
Preparation and fixing to the POLEMH1
mounting pole 16
Preparing the eMH1 Wallbox for installation 18
Mechanical installation of the wallbox on
the mounting plate 19
Using the mounting plates in practice 24
Enabling and blocking the charging function
with the 1W0001 24
Selecting the charging mode for the PVEMH10 25
Troubleshooting and maintenance 27
Maintenance 27
Appendix 28
Technical specifications 28
IP rating 28
Trademarks 29
Copyright and disclaimer 29
Disposal advice 29
Drilling template 30

| Additional technical information
4
Additional technical information
Additional technical information is required to install the WHEMH10, 1W0001 and PVEMH10 mounting plates on a
wall or on the POLEMH1 mounting pole and to install an eMH1 Wallbox on the mounting plate. It is contained in sep-
arate documents.
In addition, the technical data for your mounting plate and the compatible products are collated in product-specific
data sheets. You can download these documents from the ABL website using the following link:
https://www.ablmobility.de/en/service/downloads.php
NOTE
Displaying the additional information on a computer, tablet or smartphone
Additional technical information is made available in the Portable Document Format (PDF).
To display PDF files, you need the free Adobe Acrobat Reader or comparable software.
You can find further information about our product range, as well as about separately available accessory compo-
nents on our website at www.ablmobility.de. Please visit:
https://www.ablmobility.de
Intended use
The WHEMH10, 1W0001 and PVEMH10 mounting plates are holders for various eMH1 wallboxes from ABL. They can
be fixed either to the wall or to the POLEMH1 mounting pole from ABL. While the WHEMH10 mounting plate only
serves as a cable holder, the 1W0001 offers an integrated key switch for controlled enabling of the charging pro-
cess. The PVEMH10 mounting plate can be used in conjunction with a PV system for charging via photovoltaics or via
mains power.
Information in this document
This document describes how to install the WHEMH10, 1W0001 and PVEMH10 mounting plates, as well as the addi-
tional switching functions of the 1W0001 and PVEMH10 models. It is recommended that all working steps described
in this document are carried out by qualified specialist electrical contractors only.
User Specialist electrical contractor
Installation manual (this document)
Additional technical information
Data sheets
eMH1 installation instructions
POLEMH1/2/3 installation instructions

Important information | 5
Important information
General
This manual describes all working steps required to install and/or operate the product it concerns.
Certain sections of this manual are specially formatted for quick and easy reference.
Descriptions listing equally valid options are indicated by bullet points.
1 Descriptions listing operating steps are numbered in chronological order.
DANGER!
Indicates life-threatening electrical voltages
Sections marked with this symbol indicate electrical voltages that present a danger of loss of life or grievous
bodily injury.
Actions marked with this symbol must not be carried out under any circumstances.
WARNING!
Indicates important actions and further hazards
Sections marked with this symbol indicate further hazards that may result in damage to the product or to other
connected components.
Actions marked with this symbol must be carried out with special care.
NOTE
Indicates important information for operation or installation
Sections marked with this symbol indicate further important information and features necessary for successful
operation.
Actions marked with this symbol should be carried out as required.
Passages marked with this symbol contain valuable additional information.
Safety instructions
The safety notices serve to ensure the proper and safe installation, as well as subsequent safe operation of the
device.
DANGER!
Violation of the safety information
Disregard of or actions contrary to the safety information and instructions contained in this manual may lead to
electric shock, fire, severe injury and/or death.
Please pay attention to the following points:
Please read this manual carefully.
Heed all warnings and follow all instructions.
Only use components intended and sold for the product by ABL.
Do not install this device in close vicinity to running water, water jets or areas subject to flooding.
The product must not be installed in explosive atmosphere areas (EX areas).
Mechanical installation should be carried out by qualified specialist personnel.

| Important information – User information
6
Electrical installation and testing must be carried out with reference to local rules by a qualified specialist
electrical contractor, who, on the basis of their specialist training and experience, as well as their knowledge of
the relevant standards, is able to assess and carry out the working steps described in this manual and recognise
potential hazards.
In case of installation faults, or malfunctions that can be traced back to faulty installation, always contact the
contractor who carried out the installation first.
The product must not be covered with other objects or materials.
No liquids or receptacles containing liquids must be placed on the product.
Do not under any circumstances make alterations to the product. Any disregard of this instruction represents a
safety risk, fundamentally breaches the guarantee provisions and may void the warranty with immediate effect.
Malfunctions affecting the safety of persons, connected electric devices or the device itself must be resolved by a
qualified specialist electrical contractor.
Should one of the following malfunctions occur, please contact the specialist electrical contractor who has carried
out the installation of your wallbox and accessories:
yThe product housing has been damaged mechanically, or the housing cover has been removed or can no longer
be closed.
ySufficient protection against splashing water and/or foreign objects is no longer provided.
yThe product does not function properly or has been otherwise damaged.
WARNING!
Observation of further safety instructions
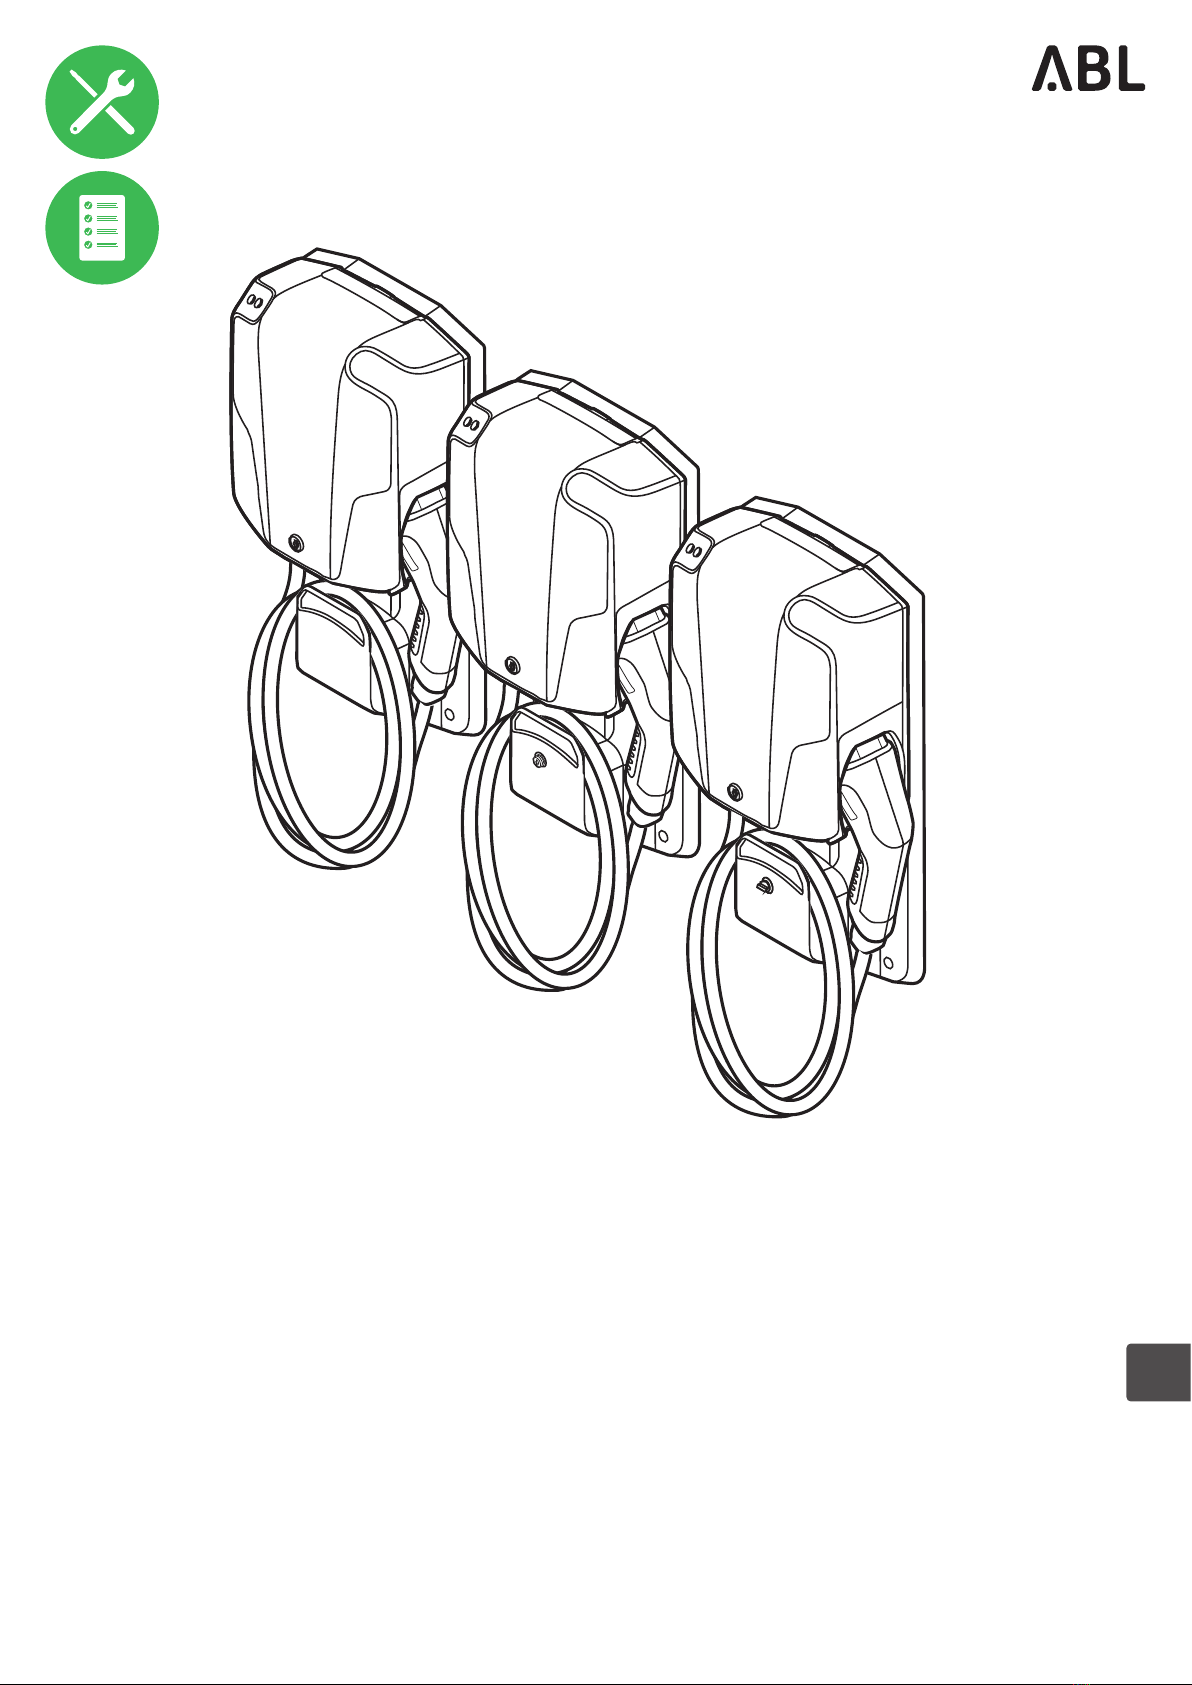
Please always observe all further safety instructions in the manuals for the optionally available eMH1 Wallbox
and the POLEMH1 charging pole.
User information
Ensure that rated voltage and rated current of the supply cable at the installation location comply with the param-
eters of your local electricity grid and that the rated output of the wallbox installed on the mounting plate is not
exceeded during operation.
Local safety regulations regarding the operation of electrical devices for the country in which you operate the
wallbox installed on the mounting plate always apply.
No user-maintainable parts are located inside the device.
Only have the mounting plate repaired by a qualified specialist electrical company.
An eMH1 Wallbox installed on the mounting plate may only be operated after it has been installed without any
technical faults and subsequently approved by a qualified specialist electrical company.
NOTE
Changes to functions and design features
Please note that all technical details, specifications and design characteristics of the product may be changed
without prior notice.

Dimensional drawings and dimensions | 7
Dimensional drawings and dimensions
The following dimensional drawings show the dimensions and drill holes of the WHEMH10, 1W0001 and PVEMH10
mounting plates.
WHEMH10
Mounting plate for an eMH1 Wallbox, front and side view
(all dimensions in mm)
1W0001
Mounting plate with key switch for an eMH1 Wallbox, front and side view
(all dimensions in mm)
179
226
93
482
152 268
179
226
482
152 268
101

| Dimensional drawings and dimensions – PVEMH10
8
PVEMH10
Mounting plate with selector switch for an eMH1 Wallbox, front and side view
(all dimensions in mm)
NOTE
Further information on installing on the POLEMH1 charging pole
If you wish to install the mounting plate on the optionally available POLEMH1 mounting pole, you will need the
installation instructions for the POLEMH1/2/3 mounting poles: All information on the mechanical and electrical
installation of the POLEMH1 mounting pole can be found here.
→www.ablmobility.de/en > Service > All downloads > Operation manuals > Accessories > Installation
instructions for POLEMH1, POLEMH2 and POLEMH3
179
226
482
152 268
101

Introduction to the WHEMH10, 1W0001 and PVEMH10 mounting plates | 9
Introduction to the WHEMH10, 1W0001 and PVEMH10 mounting plates
Thank you very much for choosing the WHEMH10, 1W0001 or PVEMH10 mounting plate from ABL!
The mounting plates are used for attaching an ABL eMH1 Wallbox to a wall or the optionally available POLEMH1
mounting pole. All mounting plates have a holder on the front for winding up your wallbox’s charging cable to mini-
mise the risk of tripping at the point of use. The 1W0001 mounting plate also has an integrated key switch which can
be used to block the wallbox’s charging function and only enable it for authorised access. The PVEMH10 mounting
plate has a selector switch which can be used in conjunction with the supplied coupling relay and the inverter of a PV
system to switch between charging via photovoltaics (ECO mode) or via mains power (GRID mode).
With housing impermeability in accordance with IP44, the mounting plates are suitable in principle for outdoor instal-
lation. Further information on technical data is available in the appendix from page28.
Identification of the mounting plate
There is a rating plate on the back of each mounting plate for identification purposes. Check the rating plate to make
sure that the model you have is the mounting plate suitable for your intended use.
WHEMH10
Bracket eMH1
MADE IN GERMANY
ABL GmbH
Albert-Büttner-Straße 11 2022-01-27
Typ: ZUBEHÖR
D-91207 Lauf / Pegnitz
1W0001
IP44
Bracket eMH1
IP44
MADE IN GERMANY
ABL GmbH
Albert-Büttner-Straße 11
1W0001
2022-01-27
Typ: ZUBEHÖR
D-91207 Lauf / Pegnitz
PVEMH10
IP44
Bracket eMH1
IP44
MADE IN GERMANY
ABL GmbH
Albert-Büttner-Straße 11
PVEMH10
2022-01-27
Typ: ZUBEHÖR
D-91207 Lauf / Pegnitz
Items supplied
All mounting plates are supplied with the following components:
Mounting plate, 1pc Drilling template, 1pc
Download note (multilingual), 1pc
Zubehör
Download-Hinweis, Stand 10/2019
Produktnummer: 0301431_b
Die ausführlichen Installations- und
Bedienungsanleitungen stehen als
Download unter www.ablmobility.de
bereit.
The detailed installation and operating
manuals are available for download at
www.ablmobility.de.
DE
EN
ABL_Downloadhinweis-Anleitung_01.indd 1 21.10.19 17:03
Flat-head screw (5×20mm, T20),
3pcs
Countersunk screw (5×60mm, T20),
6pcs
Countersunk screw (5×20mm, T20),
6pcs
Wall plugs (8×40mm), 6pcs Blind plugs, 8pcs
The 1W0001 mounting plate additionally contains:
Key for enabling the charging process,
2pcs
031 XXX

| Introduction to the WHEMH10, 1W0001 and PVEMH10 mounting plates – Compatible products
10
WARNING!
Retaining the lock number
If you lose one or both keys, you can order more via ABL’s Customer Service, as long as you
have noted down the lock number. Without a lock number, the entire switching element of the
1W0001 must be replaced.
Be sure to make a note of the lock number of both keys supplied with the 1W0001!
The lock number is the three right-hand digits directly below the key head.
031 XXX
The PVEMH10 mounting plate additionally contains:
8–230V AC/DC coupling relay for
connecting to the inverter of a PV
system, 1pc
Top-hat rail 12V power supply unit
for powering an inverter with float-
ing output, 1pc
NOTE
Checking the components included
Check immediately after unpacking whether all components are included: should any components be missing,
please contact the dealer from whom you purchased the mounting plate.
Compatible products
No separate accessories are offered for the WHEMH10, 1W0001 and PVEMH10 mounting plates.
However, the following products are compatible with the mounting plates:
POLEMH1
Mounting pole for installing the eMH1 Wallbox with or without mounting
plates
h = 1,647mm, w = 285mm, d = 180mm
Wallbox eMH1
Charging station from ABL for charging an EV, available either as a version with
a permanently integrated charging cable or with a charging socket
h = 273mm, w = 222mm, d = 116mm
(Housing without protrusions)
You can find further information on ABL charging stations and accessories at
www.ablmobility.de.

Installation | 11
Installation
The WHEMH10, 1W0001 and PVEMH10 mounting plates are designed exclusively for installing an eMH1 Wallbox
indoors or outdoors. When operating the eMH1 Wallbox, the following specifications regarding the location and the
connection technology must be met in order to ensure safe operation.
Requirements for the installation site
To operate an eMH1 Wallbox on a mounting plate, you as the operator must adhere to the following specifications
regarding the location and positioning.
Be sure to observe all local regulations for electrical installations, fire prevention and accident prevention.
All guidelines for the installation of low-voltage systems in accordance with IEC 60364-1 and IEC 60364-5-52
apply.
The installation surface must have sufficient strength to withstand the mechanical loads.
A sufficiently dimensioned supply cable for the power supply of the respective wallbox must be provided at the
installation location. If necessary, the supply cable must be protected against mechanical influences by a suitable
hose or pipe.
To ensure safe operation, minimum distances to other technical installations must be observed: you can obtain
further information from your electrical contractor or distributor.
It is important to ensure that the maximum permissible operating temperature is not exceeded due to external
influences such as direct sunlight or similar. Otherwise, adequate cooling or shading must be provided.
WARNING!
Observation of environmental conditions for the eMH1 Wallbox
Always pay attention to all additional environmental conditions for the eMH1 Wallbox. These are listed in the
section “Specifications for the installation location” in the installation instructions for the eMH1 Wallbox:
Installation instructions for the eMH1 Wallbox
Specifications for mechanical installation
The WHEMH10, 1W0001 and PVEMH10 mounting plates can be installed either on a wall or on the POLEMH1 mount-
ing pole.
The process for installing on a wall is described from page15 onwards.
The process for installing on the POLEMH1 mounting pole is described from page16 onwards.
The entire installation of the mounting plate should always be carried out by qualified personnel. For mechanical in-
stallation, you will need the following components included:
Drilling template, 1pc Mounting pole installation:
M5×20 countersunk screw, 6pcs
Wall mounting:
Wall plugs (8×40mm), 6pcs
Wall mounting:
Countersunk screw (5×60mm,
T20), 6pcs

| Installation – Preparation for installation on a wall
12
In addition, you will need the following components and tools:
Electric drill Pencil
8 mm ∅drill bit suitable for
the respective mounting surface Spirit level
Torx screwdriver Phillips screwdriver
Pliers Utility knife
Tape measure Scissors
Hammer
Preparation for installation on a wall
A sufficiently dimensioned surface-mounted or concealed supply cable must be laid at the installation location in or-
der to establish an electrical connection to the eMH1 Wallbox. The supply cable is fed through the central opening in
the mounting plate and can then be inserted into the eMH1 Wallbox for the electrical connection (see “Mechanical
installation of the wallbox on the mounting plate” on page19).
NOTE
Inserting a surface-mounted supply cable
If you wish to insert a surface-mounted supply cable into the mounting plate, you must open one of the six pre-
stamped plastic guides in the edge of the plate by cutting it on both sides with a cutter and then carefully break-
ing it out with pliers.
There are two plastic guides on the top edge, two on the bottom edge and two in the middle of the side
edges of the mounting plate.
DANGER!
Dangerous electrical currents
Always observe the 5 safety rules:
1Cut power source
2Secure all cut-off devices
3Verify absence of voltage
4Ground and short-circuit
5Cover or bar access to adjacent components under voltage

Installation – Preparation for installation on a wall | 13
As a matter of principle, the electrical supply cable in the domestic power distribution must be switched off for the
entire duration of mechanical and electrical installation. The connection to the power grid must only be made live for
the purpose of commissioning after electrical installation is complete (see Step 16 in section “Mechanical installa-
tion of the wallbox on the mounting plate” on page23).
Proceed as follows:
1 Cut crosswise into the marks for the fixing points
on the drilling template using the utility knife.
yIf necessary, you can also use the cutter to cut
out the central opening for the supply cable.
2 Align the drilling template vertically and horizon-
tally on the wall with the spirit level and mark the
fixing points with the pencil.
3 Pre-drill the marked fixing points with the electric
drill and drill bit.
4 Drive the wall plugs into the pre-drilled fixing points
(with a hammer if necessary).

| Installation – Preparation for installing the PVEMH10 mounting plate
14
Preparation for installing the PVEMH10 mounting plate
If you are installing the PVEMH10 mounting plate, you will need to install the supplied coupling relay in the eMH1
Wallbox and then establish a connection to the inverter of the PV system (see Steps 7 to 9in the section “Mechani-
cal installation of the wallbox on the mounting plate” from page21 onwards).
When the PVEMH10 selector switch is set to ECO, the inverter enables the charging process based on the power
threshold set for the system in the ABL Configuration Software.
NOTE
Information on the inverter and wiring
Please read the operating instructions for your inverter before installation. All the requirements for the control
cables as well as the permissible peak voltages for the control cables will be specified there.
You’ll also be able to find out how to set the threshold value for enabling the charging process. The threshold
value is the power at which the inverter enables charging in ECO charging mode.
When selecting the threshold value, you should always take into account the size of the PV system, the
average consumption for your own use and the charging power of the eMH1 Wallbox set in the ABL Config-
uration Software.
Operation with an inverter with digital output
Can be used for inverters with a control output with switching voltages from 8 to 230V AC/DC.
+A1
1(L)
-A2
2
N
PVEMH10 Relay Inverter PV system
You must always provide an appropriate cable connection to the inverter at the installation location, which is then
connected to the +A1 and -A2 contacts of the relay. The allocation is shown in the following table.
The connection itself is described in Step 7 in section “Mechanical installation of the wallbox on the mounting plate”
on page21.
PVEMH10 Relay terminal Relay contact Inverter
Black wire 1 (L) +A1 Relay control terminal A
Blue wire 2 -A2 Relay control terminal B

Installation – Screwing to the wall | 15
Operation with an inverter with floating output
Can be used for inverters with a control output with switching voltages from 8 to 230V AC/DC.
+A1
1(L)
-A2
2
N
− 8 ~ 230 V +
PVEMH10 Relay
Power supply unit
Inverter PV system
For an inverter with a floating output, you will need to provide a power supply via the supplied top-hat rail power sup-
ply unit. Install the power supply unit in a suitable switch cabinet or similar and then lay the cable at the installation
location. The allocation is shown in the following table.
The connection itself is described in Step 8 in section “Mechanical installation of the wallbox on the mounting plate”
on page21.
PVEMH10 Relay terminal Relay contact Power supply unit 12V Inverter
Black wire 1 (L) +A1 Relay control terminal A
Blue wire 2 -A2 Minus/Plus pole Relay control terminal B
WARNING!
Maximum cable length between power supply unit, inverter and relay
Please note that the length of the cables between the power supply unit and the inverter or relay must not ex-
ceed 30 metres.
Screwing to the wall
Once the installation location has been prepared, you can screw the mounting plate to the wall.
Proceed as follows to prepare the 1W0001 and PVEMH10 mounting plates:
1 Loosen the control cable which is fixed to the back
of the 1W0001/PVEMH10 with a cable tie.
2 Run it through the opening to the front of the
mounting plate.

| Installation – Preparation and fixing to the POLEMH1 mounting pole
16
Proceed as follows to screw the mounting plate to the wall:
1 Place the mounting plate on the wall and align it
with the pre-drilled fixing points.
yWHEMH10: Run the supply cable through the
opening.
y1W0001: Run the supply cable and the control
cable of the mounting plate through the opening.
yPVEMH10: Run the supply cable, the control
cable of the mounting plate and the cable from
the inverter (and the cable from the power sup-
ply unit, if applicable) through the opening in the
mounting plate.
2 Screw the mounting plate into the holes using
the six 5×60 countersunk screws and the Torx
screwdriver.
3 Close the openings in the mounting plate with the
six blind plugs.
After fixing the mounting plate to the wall, you can proceed with the preparation of the eMH1 Wallbox. Go to the
section “Preparing the eMH1 Wallbox for installation” on page18.
Preparation and fixing to the POLEMH1 mounting pole
Instead of fixing it to a wall, you can also attach the mounting plate to the POLEMH1 mounting pole. To do this, the
mounting pole must be installed at the desired location and prepared for electrical connection to an eMH1 Wallbox.
Please read the corresponding chapters in the installation instructions for the POLEMH1/2/3: POLEMH1/2/3 in-
stallation instructions
WARNING!
Detaching the control cables for the 1W0001 and PVEMH10 versions
In contrast to the WHEMH10, the 1W0001 and PVEMH10 versions have additional control cables on the back
that are connected in the eMH1 Wallbox during electrical installation.
Disconnect the control cables and run them through the opening to the front of the mounting plate
before screwing it to the POLEMH1!

Installation – Preparation and fixing to the POLEMH1 mounting pole | 17
Once the POLEMH1 is properly installed and the supply cable properly laid, proceed as follows to fix the mounting
plate to the POLEMH1:
1 Remove the blind plugs from the six thread points
of the mounting pole by carefully pushing them for-
ward with a screwdriver on the inside of the mount-
ing pole.
yKeep the blind plugs in case you want to operate
the eMH1 Wallbox without the mounting plate
on the POLEMH1 at a later time.
2 Install the mounting plate and align it with the
thread points on the mounting pole.
yWHEMH10: Run the supply cable through the
opening.
y1W0001 and PVEMH10: Run the supply cable
and the control cable of the mounting plate
through the opening.
3 Screw the mounting plate into the thread points us-
ing the six M5×20 countersunk screws and the Torx
screwdriver.
4 Close the installation openings with the six blind
plugs.
After fixing the mounting plate to the POLEMH1, you can proceed with the preparation of the eMH1 Wallbox.

| Installation – Preparing the eMH1 Wallbox for installation
18
Preparing the eMH1 Wallbox for installation
Before screwing the eMH1 Wallbox to the mounting plate, you must first prepare it.
Steps 1to 5are identical for all mounting plates. For the 1W0001 and PVEMH10 versions you will also need to per-
form Step6.
Proceed as follows:
1 Open the housing cover of the Wallbox eMH1 using
the key supplied and flip it up.
2 Loosen the four screws of the upper part of the
housing using the Phillips head screwdriver.
yKeep the four screws in a safe place.
3 Remove the upper part of the housing from the
housing base.
4 Using the Torx screwdriver (T20), loosen the internal
strain relief, which is located on the inside of the
rear shell of the housing above the large grommet
for the supply cable.

Installation – Mechanical installation of the wallbox on the mounting plate | 19
5 Remove the large grommet for the supply cable, use
the cutter to cut an opening for the supply cable in
the membrane and then replace the grommet.
yStep 2 in the next chapter describes how to
insert the supply cable into the wallbox.
For installation on the 1W0001 and PVEMH10 mounting plates, you will also need to carry out the
following working step:
6 Remove the small grommet for the control cable(s),
use the cutter to cut an opening in the membrane
and then replace the grommet.
yStep 2 in the next chapter describes how to
insert the supply cable(s) into the wallbox.
Mechanical installation of the wallbox on the mounting plate
Proceed as follows to attach the wallbox to the mounting plate:
1 Using the Torx screwdriver, screw a 5×20 flat-head
screw from the scope of delivery into the upper fix-
ing point of the mounting plate.
4 mm
yThe distance between the bottom of the screw
head and the mounting plate must be 4 mm.
2 Insert the supply cable through the large grommet
into the housing of the eMH1 Wallbox.
y1W0001: In addition, insert the mounting plate
control cable through the smaller grommet into
the housing of the wallbox.
yPVEMH10: In addition, insert the mounting plate
control cable, the inverter cable and, if appli-
cable, the power supply unit cable through the
smaller grommet into the housing of the wallbox.
3 Hang the wallbox on the screw in the upper fixing
point.

| Installation – Mechanical installation of the wallbox on the mounting plate
20
4 Using the Torx screwdriver and the two remaining
5×20 flat-head screws, hand-screw the wallbox into
the two lower fixing points of the mounting plate
(torque: max. 2Nm).
5 Connect the supply cable to the internal RCCB or
terminal block (basic models) of the eMH1.
6 Using the Torx screwdriver, secure the power supply
cable in the internal strain relief.
NOTE
Completing the installation
To complete the installation of the WHEMH10 mounting plate, go to Step 13.
The following working steps are only relevant to the PVEMH10 mounting plate (Steps 7 to 10) and the
1W0001 mounting plate (from Step 11 onwards).
This manual suits for next models
2
Table of contents