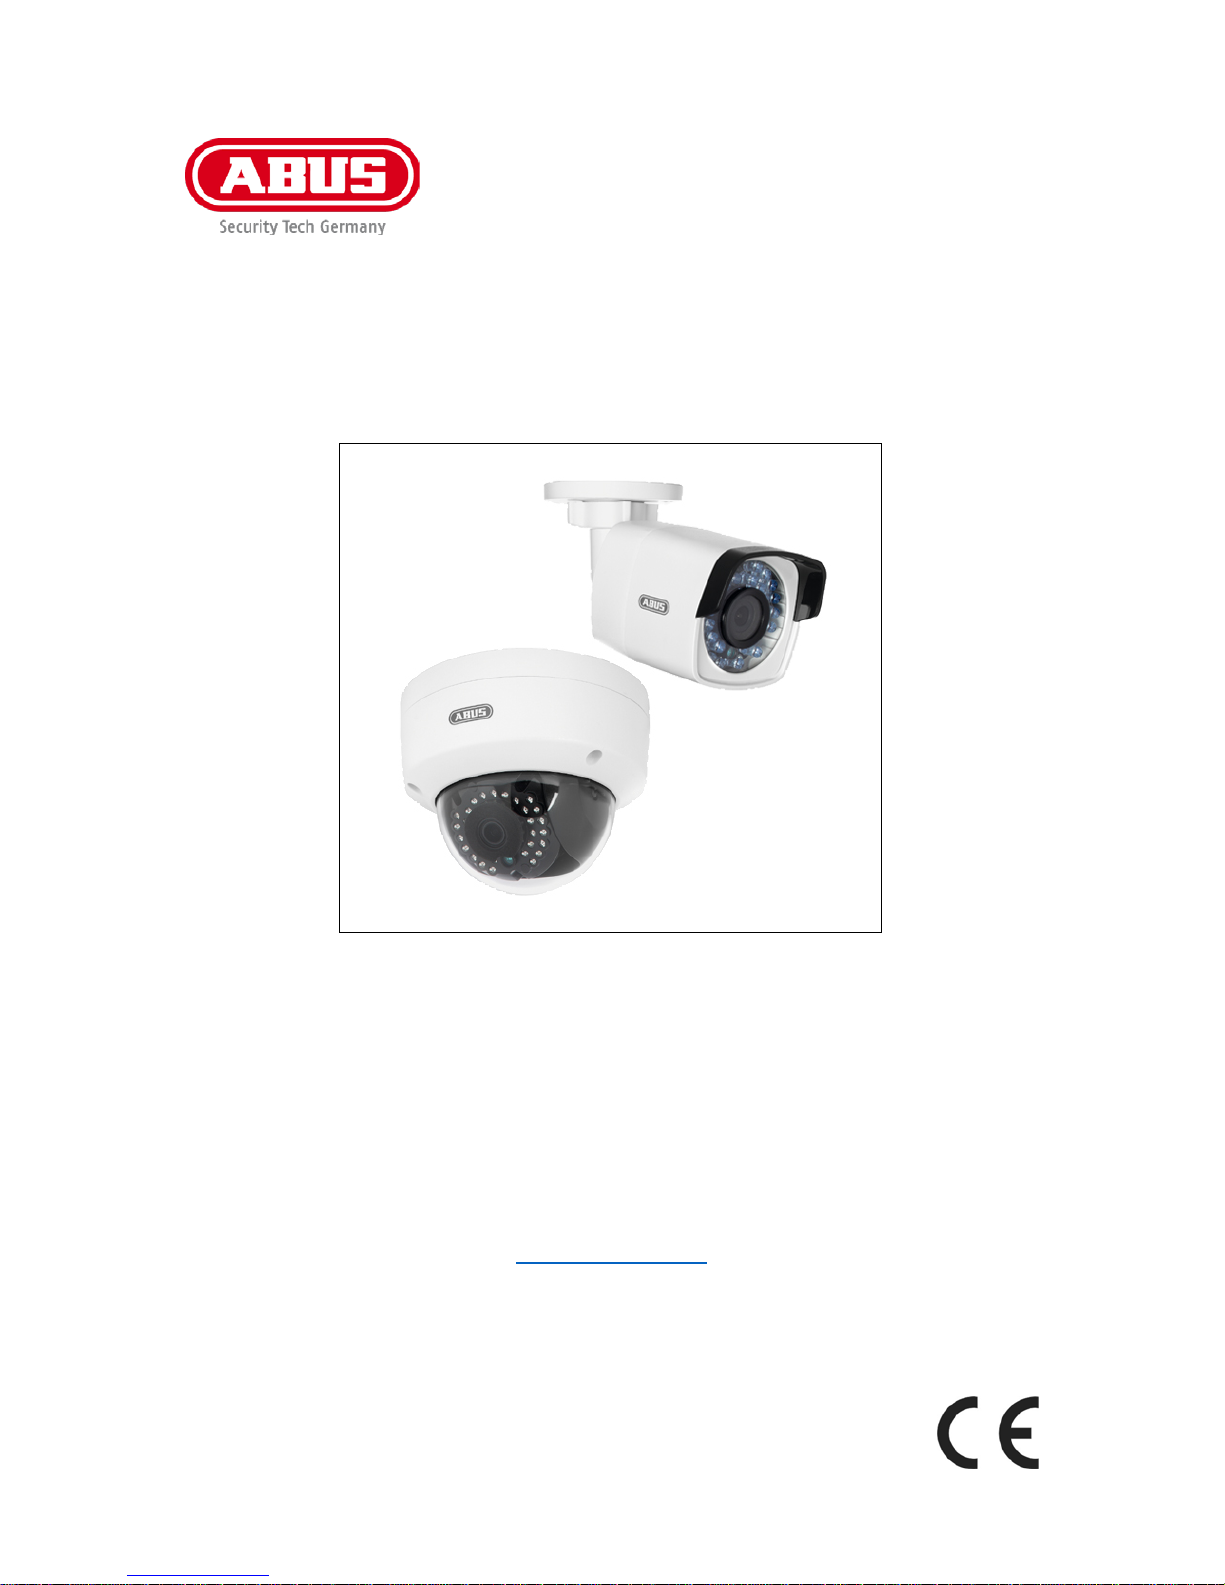
Abus TVIP41560 User manual

TVIP41560 / TVIP61560
User manual
You can find important information and FAQs about this and other
products online at:
www.abus.com
Version 1.0 English translation of the original German user manual.
Retain for future reference.

English
Introduction
Dear Customer,
Thank you for purchasing this product.
This device complies with the requirements of the applicable EU directives. The declaration of
conformity can be obtained from:
ABUS Security-Center GmbH & Co. KG
Linker Kreuthweg 5
86444 Affing
GERMANY
To ensure this condition is maintained and that safe operation is guaranteed, it is your obligation to
observe this user manual.
Please read the entire user manual carefully before putting the product into operation, and pay
attention to all operating instructions and safety information.
All company names and product descriptions are trademarks of the corresponding owner. All
rights reserved.
If you have any questions, please contact your specialist installation contractor or specialist
dealer.
Data storage is subject to national data privacy guidelines.
Disclaimer
This user manual has been produced with the greatest of care. Should you discover any omissions
or inaccuracies, please contact us in writing at the address provided above.
ABUS Security-Center GmbH does not accept any liability for technical and typographical errors,
and reserves the right to make changes to the product and user manuals at any time and without
prior warning.
ABUS Security-Center GmbH is not liable or responsible for direct or indirect damage resulting from
the equipment, performance and use of this product. No guarantee is made for the contents of this
document.
72

English
Explanation of symbols
The triangular high voltage symbol is used to warn of the risk of injury or health
hazards (e.g. caused by electric shock).
The triangular warning symbol indicates important notes in this user manual
which must be observed.
This symbol indicates special tips and notes on the operation of the device.
Lists
1. …
2. … Lists with a set order, given either in the text or warning notice
•…
•… Lists without a set order, given either in the text or warning notice
Intended use
Only use the device for the purpose for which it was built and designed. Any other use is considered
unintended!
This device may only be used for the following purpose(s):
•The WLAN HD 720p Outdoor Camera enables high-quality monitoring. This camera is designed
for indoor and outdoor installation. The integrated infrared LEDs enable day and night surveillance
for objects up to 10 metres away.
Since it has protection class IP66, it can used both inside and outside.
Important safety information
General
Before using this device for the first time, please read the following instructions carefully and observe
all warning information, even if you are familiar with the use of electronic devices.
All guarantee claims are invalid in the event of damage caused by non-compliance
with this user manual. We cannot be held liable for resulting damage.
We cannot be held liable for material or personal damage caused by improper
operation or non-compliance with the safety information. All guarantee claims are
void in such cases.
Retain this handbook for future reference.
If you sell or pass on the device to third parties, you must include these instructions with the device.
The following safety information and hazard notes are not only intended to protect your health, but also
to protect the device from damage. Please read the following points carefully:
73

English
Power supply
•Only operate this device through a power source which supplies the mains power specified on the
type plate. If you are unsure which power supply is available, contact your utility company.
•Disconnect the device from the power supply before carrying out maintenance or installation work.
•To fully disconnect the device completely from the mains, the mains plug must be withdrawn from
the mains socket.
•In order to eliminate the risk of fire, the device's mains plug should always be disconnected from
the mains socket, if the device is not being used for an extended period of time.
Overload/overvoltage
•Prior to unstable weather and/or when there is a risk of lightning strike, disconnect the device from
the mains network or connect the device to a UPS.
•Avoid overloading electrical sockets, extension cables and adapters, as this can result in fire or
electric shock.
Cable
•Always grasp all cables by the plug connector and do not pull the cable itself.
•Never grasp the power cable with wet hands, as this can cause a short circuit or electric shock.
•Do not place the device itself, items of furniture or other heavy objects on the cable and ensure
that it does not become kinked, especially at the connector plug and at the connection sockets.
•Never tie a knot in the cable and do not bundle it together with other cables.
•All cables should be laid so that they cannot be trodden on, or cause a hazard.
•Damaged power cables can cause fire or electric shock. Check the power cable from time to time.
•Do not modify or manipulate the power cable or plug.
•Only use adapter plugs or extension cables that conform to applicable safety standards, and do
not interfere with the mains or power cables.
Children
•Do not allow electrical devices to be handled by children. Do not allow children to use electrical
devices unsupervised. Children may not properly identify possible hazards. Small parts may be
fatal if swallowed.
•Keep packaging film away from children. Risk of suffocation.
•This device is not intended for children. If used incorrectly, parts under spring tension may fly out
and cause injury to children (e.g to eyes).
Surveillance
•The use of surveillance equipment may be forbidden or regulated by law in some countries.
•Before using this equipment, ensure that all of your surveillance activities are completely legal.
74

English
Installation location/operating environment
Operating temperature and operating humidity:
-20°C to 50°C, maximum 95% relative humidity.
Ensure that:
•no direct sources of heat (e.g. radiators) can affect the device
•the image sensor is not exposed to direct sunlight or strong artificial light
•the device is not in the immediate vicinity of magnetic fields (e.g. loudspeakers)
•no naked lights (e.g. lit candles) are on, or next to the device
•there is no contact with aggressive liquids
•the device is never submerged
•no foreign bodies penetrate the device
•the device is not exposed to wide temperature variations, as otherwise there may be condensation
from humidity causing electrical short circuits
•the device is not exposed to excessive shock or vibration.
Unpacking the device
Handle the device with extreme care when unpacking it.
Packaging and packaging aids can be reused and, as far as possible, should be sent for recycling.
We recommend the following:
Paper, cardboard and corrugated cardboard as well as plastic packaging items should be placed in the
appropriate containers provided.
If no such facility exists in the area, these materials should be put into the general household waste.
Warning
If the original packaging has been damaged, start by inspecting the device. If the device
shows signs of damage, return it in the original packaging and inform the delivery
service.
75

English
Start-up
•Observe all safety and operating instructions before operating the device for the first time.
Warning
When installing the device in an existing video surveillance system, ensure that all
devices have been disconnected from the mains power circuit and low-voltage circuit.
Warning
Improper or unprofessional work on the power supply system or domestic installations
puts both you and others at risk.
Connect the installations so that the mains power circuit and low-voltage circuit always
run separately from each other. They should not be connected at any point or become
connected as a result of a malfunction.
Care and maintenance
Maintenance is necessary if the device has been damaged (e.g. damage to the power cable and plug,
or the housing), or if liquids or foreign bodies have got into the interior of the device, or if it has been
exposed to rain or damp, or if it does not work properly or has been dropped.
Maintenance
•If smoke, unusual noises or smells develop, switch the device off immediately and unplug from
the socket. In such cases, the device should not be used until it has been inspected by a qualified
technician.
•Have all maintenance tasks carried out by qualified technicians only.
Cleaning
•Only clean the device housing with a damp cloth.
•Do not use solvents, white spirit, thinners etc. or any of the following substances:
•Brine, insect spray, solvents containing chlorine or acids (ammonium chloride), or scouring
powder.
•Rub the surface gently with the cotton cloth until it is completely dry.
The device operates with a dangerous voltage level. When conducting maintenance
work (e.g. cleaning), disconnect the device from the mains.
76

English
Contents
1. Scope of delivery............................................................................................................................... 79
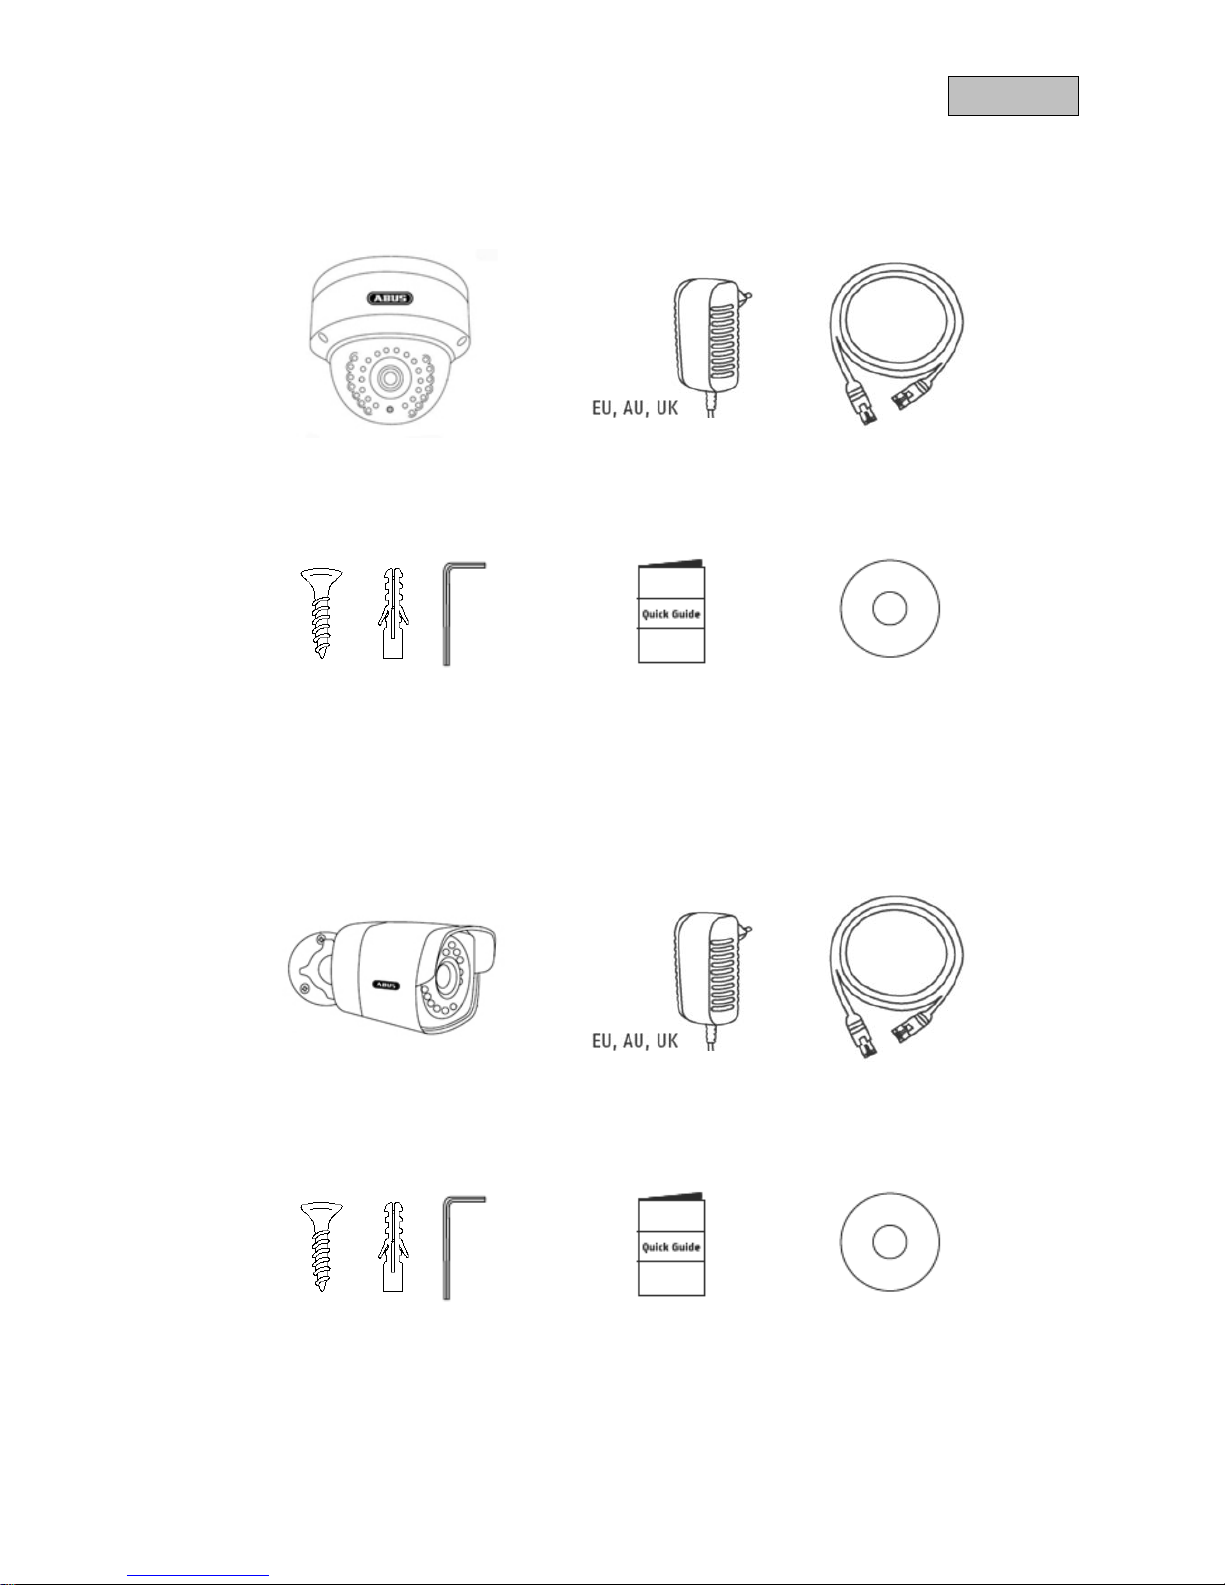
1.1. TVIP41560............................................................................................................................. 79
1.2. TVIP61560............................................................................................................................. 79
2. Camera description ........................................................................................................................... 80
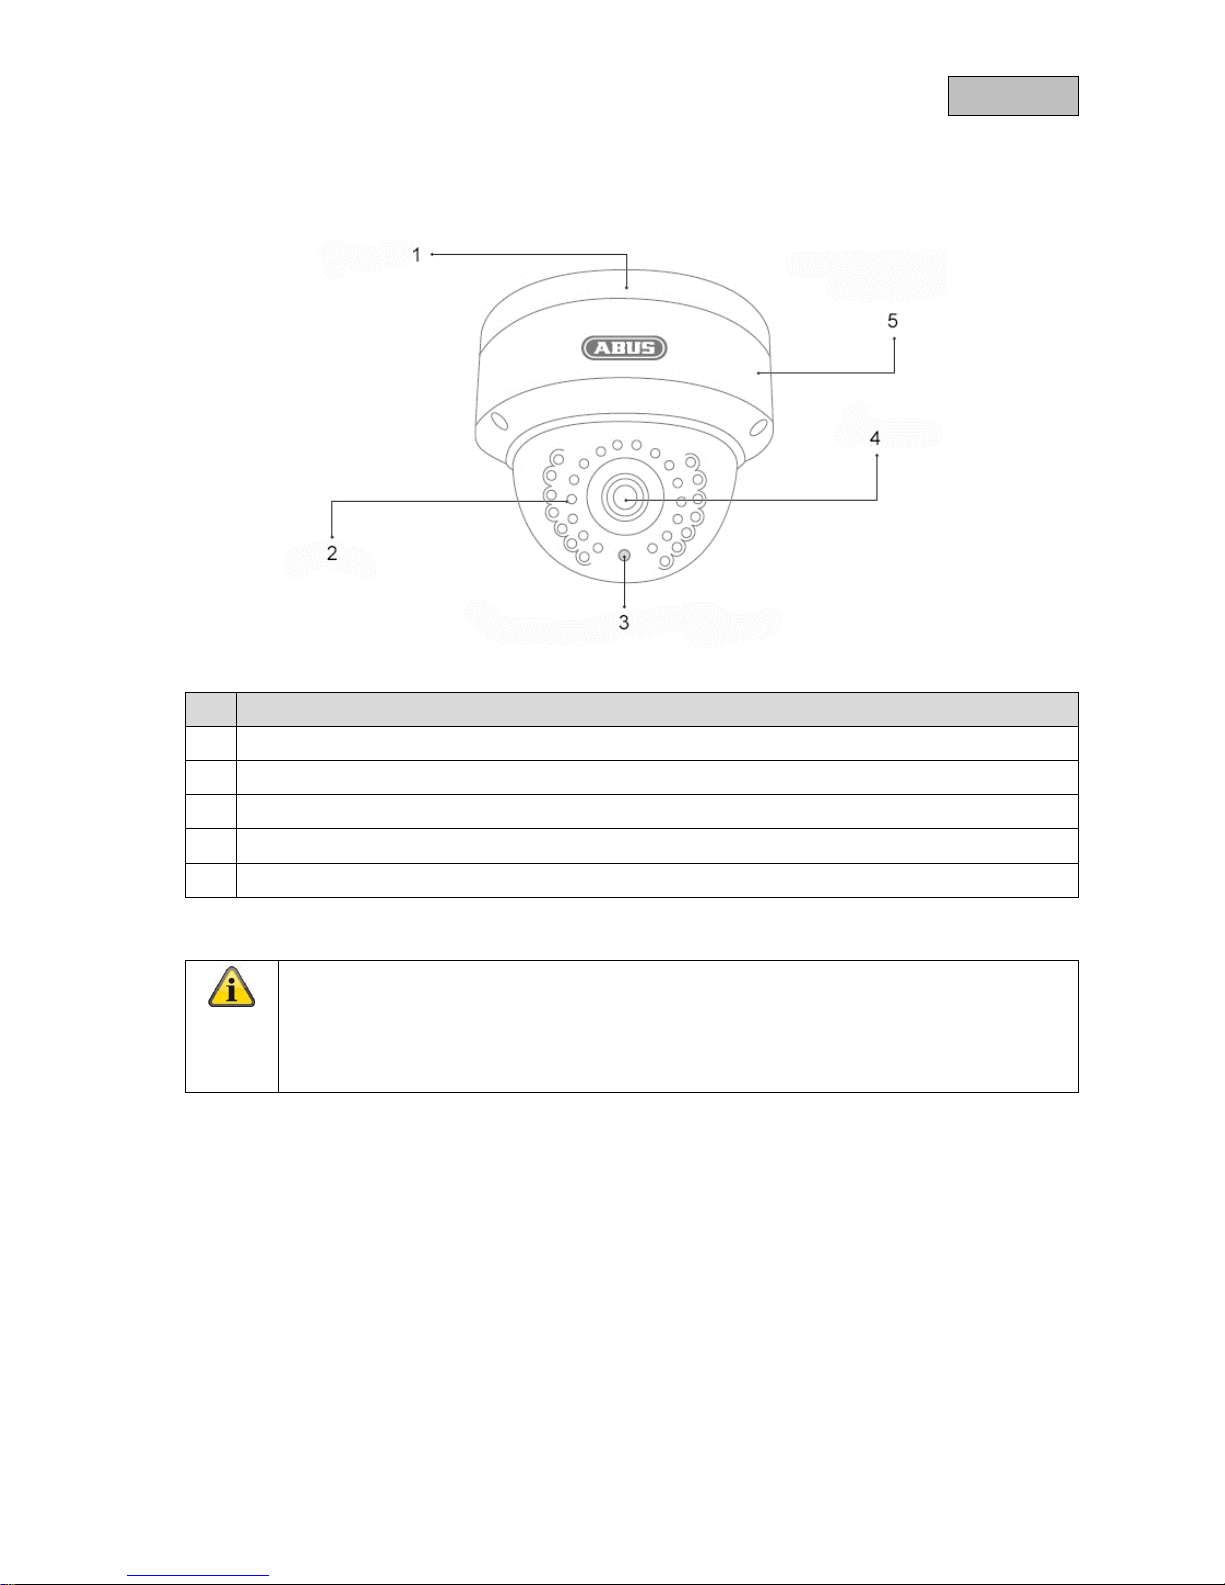
2.1. TVIP41560............................................................................................................................. 80
2.2. TVIP61560............................................................................................................................. 81
3. Description of the connections .......................................................................................................... 81
4. Mounting/installation.......................................................................................................................... 82
4.1. TVIP41560............................................................................................................................. 82
4.1.1. Mounting the camera..................................................................................................... 82
4.1.2. Orientation of the camera.............................................................................................. 83
4.2. TVIP61560............................................................................................................................. 83
4.2.1. Mounting the camera..................................................................................................... 83
4.2.2. Orientation of the camera.............................................................................................. 84
5. Initial start-up..................................................................................................................................... 85
6. Accessing the network camera for the first time................................................................................ 86
7. Password prompt............................................................................................................................... 87
8. User functions.................................................................................................................................... 88
8.1. Menu bar................................................................................................................................ 88
8.2. Live image display................................................................................................................. 89
8.3. Video control.......................................................................................................................... 89
9. Playback............................................................................................................................................ 90
10. Configuration ................................................................................................................................... 91
10.1. Local Configuration............................................................................................................ 91
10.2. Basic Configuration............................................................................................................ 93
10.3. Advanced configuration..................................................................................................... 94
10.3.1. System........................................................................................................................... 94
10.3.1.1. Device Information....................................................................................................... 95
10.3.1.2. Time Settings............................................................................................................... 96
10.3.1.3. Maintenance................................................................................................................ 97
10.3.1.4. DST.............................................................................................................................. 98
10.3.2. Network.......................................................................................................................... 99
10.3.2.1. TCP/IP....................................................................................................................... 100
10.3.2.2. Port ............................................................................................................................ 102
10.3.2.3. DDNS......................................................................................................................... 103
10.3.2.4. FTP............................................................................................................................ 105
10.3.2.5. Wi-Fi .......................................................................................................................... 106
10.3.2.6. UPnP™...................................................................................................................... 108
10.3.2.7. Email.......................................................................................................................... 109
10.3.2.8. NAT............................................................................................................................ 111
10.3.3. Video/Audio ................................................................................................................. 112
77

English
10.3.3.1. Video.......................................................................................................................... 113
10.3.4. Image........................................................................................................................... 115
10.3.4.1. Display Settings......................................................................................................... 116
10.3.4.2. OSD Settings............................................................................................................. 119
10.3.4.3. Text Overlay .............................................................................................................. 120
10.3.4.4. Privacy Mask ............................................................................................................. 121
10.3.5. Security........................................................................................................................ 122
10.3.5.1. User ........................................................................................................................... 123
10.3.5.2. IP Address Filter........................................................................................................ 124
10.3.6. Basic event.................................................................................................................. 125
10.3.6.1. Motion detection ........................................................................................................ 126
10.3.6.2. Event-triggered snapshot .......................................................................................... 129
10.3.7. Storage ........................................................................................................................ 130
10.3.7.1. Recording plan........................................................................................................... 131
10.3.7.2. Storage Management................................................................................................ 133
10.3.7.3. NAS ........................................................................................................................... 134
10.3.7.4. Time-triggered snapshot............................................................................................ 135
11. Protocol.......................................................................................................................................... 136
12. Technical data ............................................................................................................................... 137
13. Disposal......................................................................................................................................... 138
14. GPL license information ................................................................................................................ 138
78

English
1. Scope of delivery
1.1.TVIP41560
WLAN HD 720p Outdoor Dome
Camera PSU 1 m network cable
Installation material Quickstart guide
CD
1.2.TVIP61560
WLAN HD 720p Outdoor Camera PSU 1 m network cable
Installation material Quickstart guide
CD
79

English
2. Camera description
2.1.TVIP41560
No. Description
Base plate
IR LEDs
Photo sensor for day/night switching
Lens
WPS/reset button & microSD card slot inside
Reset: (applies to TVIP41560 and TVIP61560)
To reset the camera to its factory settings, first disconnect the power supply. Keep the
WPS/reset button pressed and reconnect the power supply to the camera. Continue pressing
the WPS/reset button for another 15 seconds, then release.
80

English
2.2.TVIP61560
No. Description
Base plate
WPS/reset button & microSD card slot inside
Lens
Photo sensor for day/night switching
IR LEDs
Sun shield
3. Description of the connections
No.
Description
1 12 V DC power supply connection (round plug 5.5x2.1 mm)
2 Network access (RJ45, PoE-compatible)
The network access includes a cover, which can be used if necessary. This cover provides
additional protection by preventing moisture from entering the equipment. When using the cover,
the network cable must only be connected (crimped) to the network plug once it has been
passed through the cover. In addition, the connections (as well as the power supply connection)
can be sealed with insulation tape.
1
2
81

English
4. Mounting/installation
4.1.TVIP41560
4.1.1. Mounting the camera
IMPORTANT!
The camera must be disconnected from the power supply during installation.
Loosen the fixing screws for the camera dome and remove them. Use
the accompanying drilling template for drilling the mounting holes.
Secure the base plate with the screws and dowels provided.
Use the fixing screws to screw the camera dome back on to the camera. Adjust the orientation of the
camera before doing this.
82

English
4.1.2. Orientation of the camera
First, undo the black dome cover. Loosen the screws at the side of the bracket to align the lens.
The camera can be aligned in three axes.
Setting the panning angle.
Panning: 0°–355°
Setting the angle of inclination.
Inclination: 0°–65°
Setting the angle of rotation.
Rotation: 0°–360°
Do not forget to tighten up the screws again!
4.2.TVIP61560
4.2.1. Mounting the camera
IMPORTANT!
The camera must be disconnected from the power supply during installation.
Use
the accompanying drilling template for drilling the mounting holes.
Secure the base plate with the screws and dowels provided.
83

English
4.2.2. Orientation of the camera
The camera can be aligned in three axes.
Panning: 0°–360°
Loosen the rotary wheel (1) to adjust the alignment horizontally.
Inclination: 0°–90°
Loosen the screw (2) to adjust the alignment vertically.
Rotation: 0°–360°
Loosen the screw (3) to adjust the rotation of the camera image.
Do not forget to tighten up the screws again!
1
2
3
84

English
5. Initial start-up
The network camera automatically detects whether a direct connection between the PC and camera
should be established. A crossover network cable is not required for this. You can use the supplied
patch cable for direct connection for initial start-up.
Connecting the network camera directly to a PC/laptop
1. Ensure that a CAT 5 network cable is used.
2. Connect the cable to the Ethernet interface of the PC/laptop and the network camera.
3. Connect the network camera to the power supply.
4. Configure the network interface of your PC/laptop to the IP address 192.168.0.2 and the default
gateway to 192.168.0.1.
5. Proceed to point 8 to finish the initial set-up and establish the connection to the network camera.
Connecting the network camera to a router/switch
1. Ensure that a CAT 5 network cable is used for the connection.
2. Connect the PC/laptop to the router/switch.
3. Connect the network camera to the router/switch.
4. Connect the network camera to the power supply.
5. If a DHCP server is available on your network, set the network interface of your PC/laptop to
"Obtain an IP address automatically".
6. If no DHCP server is available, configure the network interface of your PC/laptop to 192.168.0.2
and the default gateway to 192.168.0.1.
7. Proceed to point 8 to finish the initial set-up and establish the connection to the network camera.
85

English
6. Accessing the network camera for the first time
The network camera is accessed for the first time using the ABUS IP Installer.
After the installation wizard is started, it searches for all connected ABUS network cameras and video
servers on your network.
You can find the program on the CD-ROM included. Install the program on your PC and then run it.
If a DHCP server is available on your network, the IP address is assigned automatically for both the
PC/laptop and the network camera.
If no DHCP server is available, the network camera automatically sets the following IP address:
192.168.0.100.
Your PC system must be located in the same IP subnetwork to establish communication with the
network camera (PC IP address: e.g. 192.168.0.2).
The default setting for the network camera is "DHCP". If no DHCP server is in operation on
your network, we recommend setting the IP address manually to a fixed value following initial
access to the network camera.
86

English
7. Password prompt
An administrator password is defined for the network camera prior to delivery. For reasons of security,
however, the administrator should select a new password immediately. After this administrator
password has been saved, the network camera asks for the user name and password every time it is
accessed.
The administrator account is set up in the factory as follows: user name "admin" and password
"12345". Each time the network camera is accessed the browser displays an authentication window
and asks for the user name and password. Should your individual settings for the administrator
account no longer be accessible, please contact our technical support team.
To enter a user name and password, proceed as follows:
Open Internet Explorer and enter the camera's IP address (e.g. "http://192.168.0.100").
You will then be presented with the following authentication prompt:
-> You are now connected to the network camera and can already see a video stream.
87

English
8. User functions
Open the network camera home page. The interface is divided into the following main areas:
8.1.Menu bar
Make a selection by clicking on the appropriate tab: "Live View", "Playback", "Configuration" or "Log".
Button Description
Display of the user logged on
User logout
Selection of the desired language
Live image display
Video control
Menu bar
88

English
8.2.Live image display
You can access the full-screen view by double-clicking.
Button Description
Activate 4:3 view
Activate 16:9 view
Display original size
Automatically adjust view to browser
Selection of the streaming type for the live view
8.3.Video control
Button Description
Disable live view
Enable live view
Instant image (snapshot)
Start/stop manual recording
Digital zoom on/off
89

English
9. Playback
In playback, you can play back data that is recorded on the microSD card or network drive. Select the
desired day in the calendar and click on "Search".
The recordings for the selected day are shown in the timeline. The coloured labelling indicate the
nature of the event that triggered the recording.
You can set the time of the desired recording under playback time.
90
This manual suits for next models
1
Table of contents
Other Abus IP Camera manuals

Abus
Abus TVIP11561 User manual

Abus
Abus TVIP51500 User manual

Abus
Abus TVAC19100A User manual

Abus
Abus TVVR11000 User manual

Abus
Abus TVAC19000A User manual

Abus
Abus TVIP71501 User manual

Abus
Abus TVIP21502 User manual

Abus
Abus IPCB42500 User manual

Abus
Abus TVHD50000 User manual

Abus
Abus TVHD60000 User manual

Abus
Abus TVIP52502 User manual

Abus
Abus PPIC90000 User manual

Abus
Abus PPIC90000 User manual

Abus
Abus eyseo TV7144 User manual

Abus
Abus TVAC15000 User manual

Abus
Abus TVAC16010B User manual

Abus
Abus TVAC16010C User manual

Abus
Abus TVIP62000 User manual

Abus
Abus TVIP21502 User manual

Abus
Abus TVIP70000 User manual