ACC WF-100 Smartouch Wifi Quick start guide

WF-100 Smartouch Wifi
Installation and
Operational Guide
Now you can monitor and control
your spa from anywhere you
have internet access!
emote access is compatible
with ALL smart devices
and computers

THIS PAGE INTENTIONALLY LEFT BLANK
ACC Wifi Module WF-100 Installation
Module Installation:
1. Make sure power is off to the spa before proceeding!
2. If this is a new complete control system installation, skip this step and go to step 4.
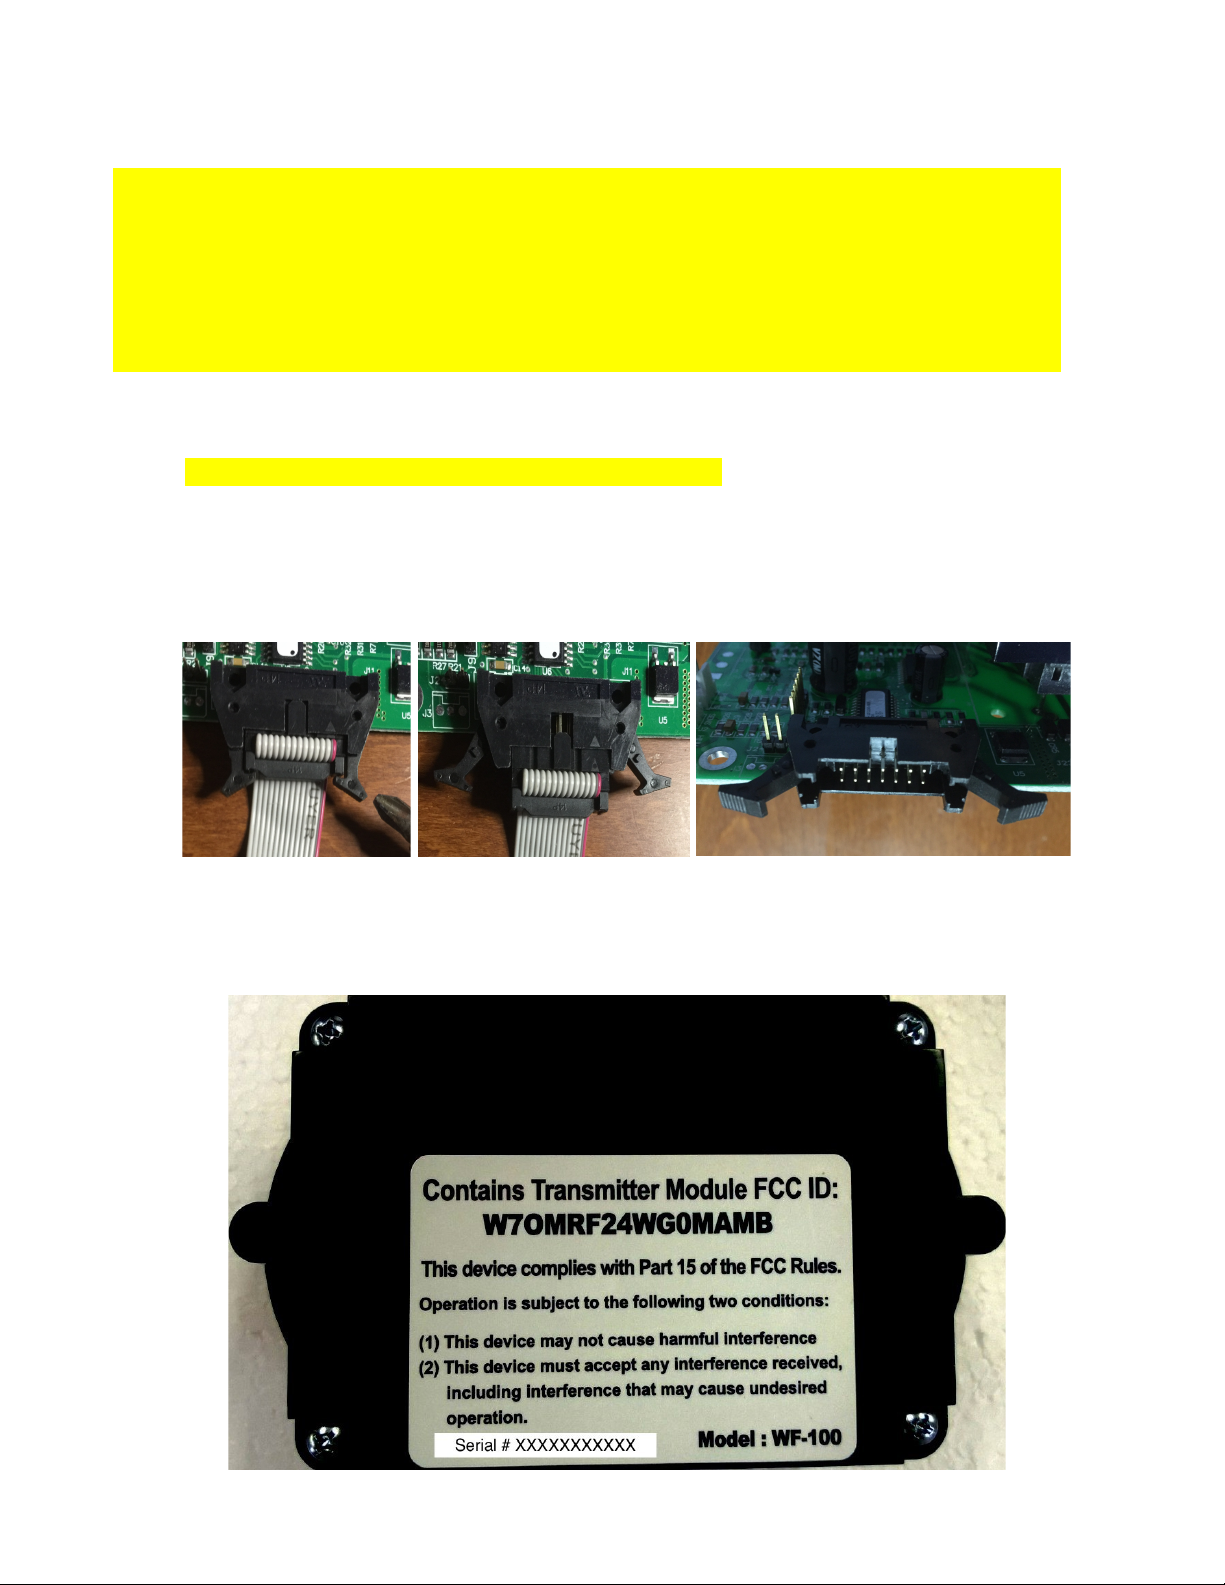
3. Open up the Smartouch Digital control bo and disconnect the e isting spaside control panel
cable from the circuit board connector by firmly (but carefully) spreading the 2 levers on each
side at the same time.
4. Open up the ACC Wifi module WF-100 by removing the 4 corner screws on the back. (do not
remove the single screw located near the middle if present.)
POWER MUST BE TURNED OFF AT THE BREAKER WHEN CONNECTING THE WIFI
CONTROLLER.
AVOID ROUGH HANDLING THE RIBBON CABLE DURING INSTALLATION DO NOT PINCH OR
CRIMP THE CABLE.
IT IS NOT RECOMMENDED TO HAVE THIS CABLE EXPOSED TO DIRECT SUNLIGHT IN A
PERMANENT INSTALLATION.
DO NOT INSTALL THE WIFI CONTROLS BEHIND THE SPA SINCE WATER BLOCKS THE WIFI
SIGNAL AND ACTS AS A BARRIER BETWEENTHE ROUTER AND THE WIFI CONTROLS.

Insert the spaside control ribbon plug into the wifi module ribbon jack.
5. Route the 2 ribbon cables carefully through the opening shown and reinstall the wifi module
cover and screws., The cover has a groove that needs to slide into the bo edges at the ribbons.
6. Document the serial number on the back of the wifi module for your records.
Serial Number _____________________________

7. Plug the Wifi module ribbon plug into the Smartouch digital circuit board ribbon cable jack for
the spaside control panel. Be sure the plug key is aligned in the slot and press in firmly to make
the 2 side levers fold in automatically and lock.
8. Mount the wifi module enclosure, using the screws provided, in an appropriate spot oriented
with the ribbon cables coming down out of the wifi module. DO NOT position the box with
cables coming out sideways, horizontal or pointing upward if the box is being mounted
outdoors. This will prevent any possibility of moisture present (i.e. rain) from running along
the cable into the bo and damaging the wifi board inside. Also make sure the spot chosen is
not directly ne t to any high current AC motors or located inside any metal bo es or covered
with any metallic or mylar materials (yes this includes that reflective bubble wrap insulation)
that will obstruct wifi signal. Household cordless phones that are labeled 2.4gHZ should not be
used near 2.4gHZ wireless networks or devices (like your new wifi module) as they will
adversely affect and even disrupt wifi connectivity. If you do have 2.4gHZ cordless phones,
consider replacing them with ones featured with 900Mhz, Dect 6.0 or 1.9Ghz. You can skip the
mounting step until the end if moving the module around for best wifi reception is required
during the setup process.
Configuring Wifi settings:
1. It is very important to insure you have strong wifi signal available from your preferred wireless
router. Test your wifi router's signal strength with your mobile phone or tablet while standing
right ne t to the spa and right ne t to the wifi module installation location. This device does
NOT support the 5 ghz spectrum due to range limitations that e ist within that spectrum. The
2.4gHz spectrum is more reliable over greater distances. If you have a lot of devices sharing
your network, it's important to connect as many wireless devices using your network, that are
5ghz capable, to that spectrum instead of the 2.4gHz spectrum. The more devices sharing
2.4Ghz the slower that spectrum performs. An overloaded network in the 2.4Ghz spectrum will
cause connectivity issues and result in unreliable remote access to your spa.

2. Power up the spa control system.
3. Using your smart device (phone, tablet, laptop, etc)
access your wifi settings and look in the available
wifi choice list for AGI_BOARD_ and connect
to it. There will be no password required.
4. E it out of your wifi settings and open your web
browser – OS X or IOS Safari may e perience
problems completing the registration process if
you are using an outdated version, so make sure
you have the latest version or use Google Chrome
or Mozilla Firefo instead.
5. In your browser URL address field, type in
192.168.1.3 and proceed (click go)
6. You will see a page appear like this:
7. Click the “Display Scan Results” Button and wait for the available wifi sources to appear.
8. Choose your preferred wifi source by clicking on it. It is important that the signal strength be

better than 50%, to insure access to the unit is reliable.
9. Select the security type your preferred wifi is using. If you do not know, try WPA as the default
choice for any router made in 2006 or newer. If your wireless router was manufactured before
2003, you will have to choose WEP. We strongly advise against using WEP security protocol as
it is NOT secure and is easily hacked. Newer routers are far more secure and have much better
range and reliability and will provide the best support any new IOT (Internet of Things)
products including your new spa WiFi.
10. Enter the password for your preferred wifi source.
11. Now enter a valid email address in the field provided.
12. Re-enter the email address again in the field provided.
13. Click on the “Accept” button
14. Verify your settings are accurate and then click the “Join!” button.
15. You might see a subsequent page failure notice, but just ignore it and close your web browser.

16. Now check your email for a registration email
with the subject “Your registration email for
mac “ ”. Click on “this link” in
the email to complete your device registration
process. Save this email for future use to
reregister up to 9 more times.
17. Enter a “Spa” name (limited to no less than 3
and no more than 8 characters (numbers and
letters only, no spaces or punctuation)
18. Now click the “Register” button.
19. Your web browser will now display your spa
control webpage with a bookmark link or
your spa controls. If you do not see the spa
controls, simply reload or refresh the page
20. SAVE THE PAGE AS A BOOKMA K or
to your mobile device home screen.
21. Upon completing the registration, you will
also receive a second email. Check your
inbo . Check your junk mail or spam folder if
you do not see the email. This email contains
the direct link to your spa controls. Save it for
safe keeping.
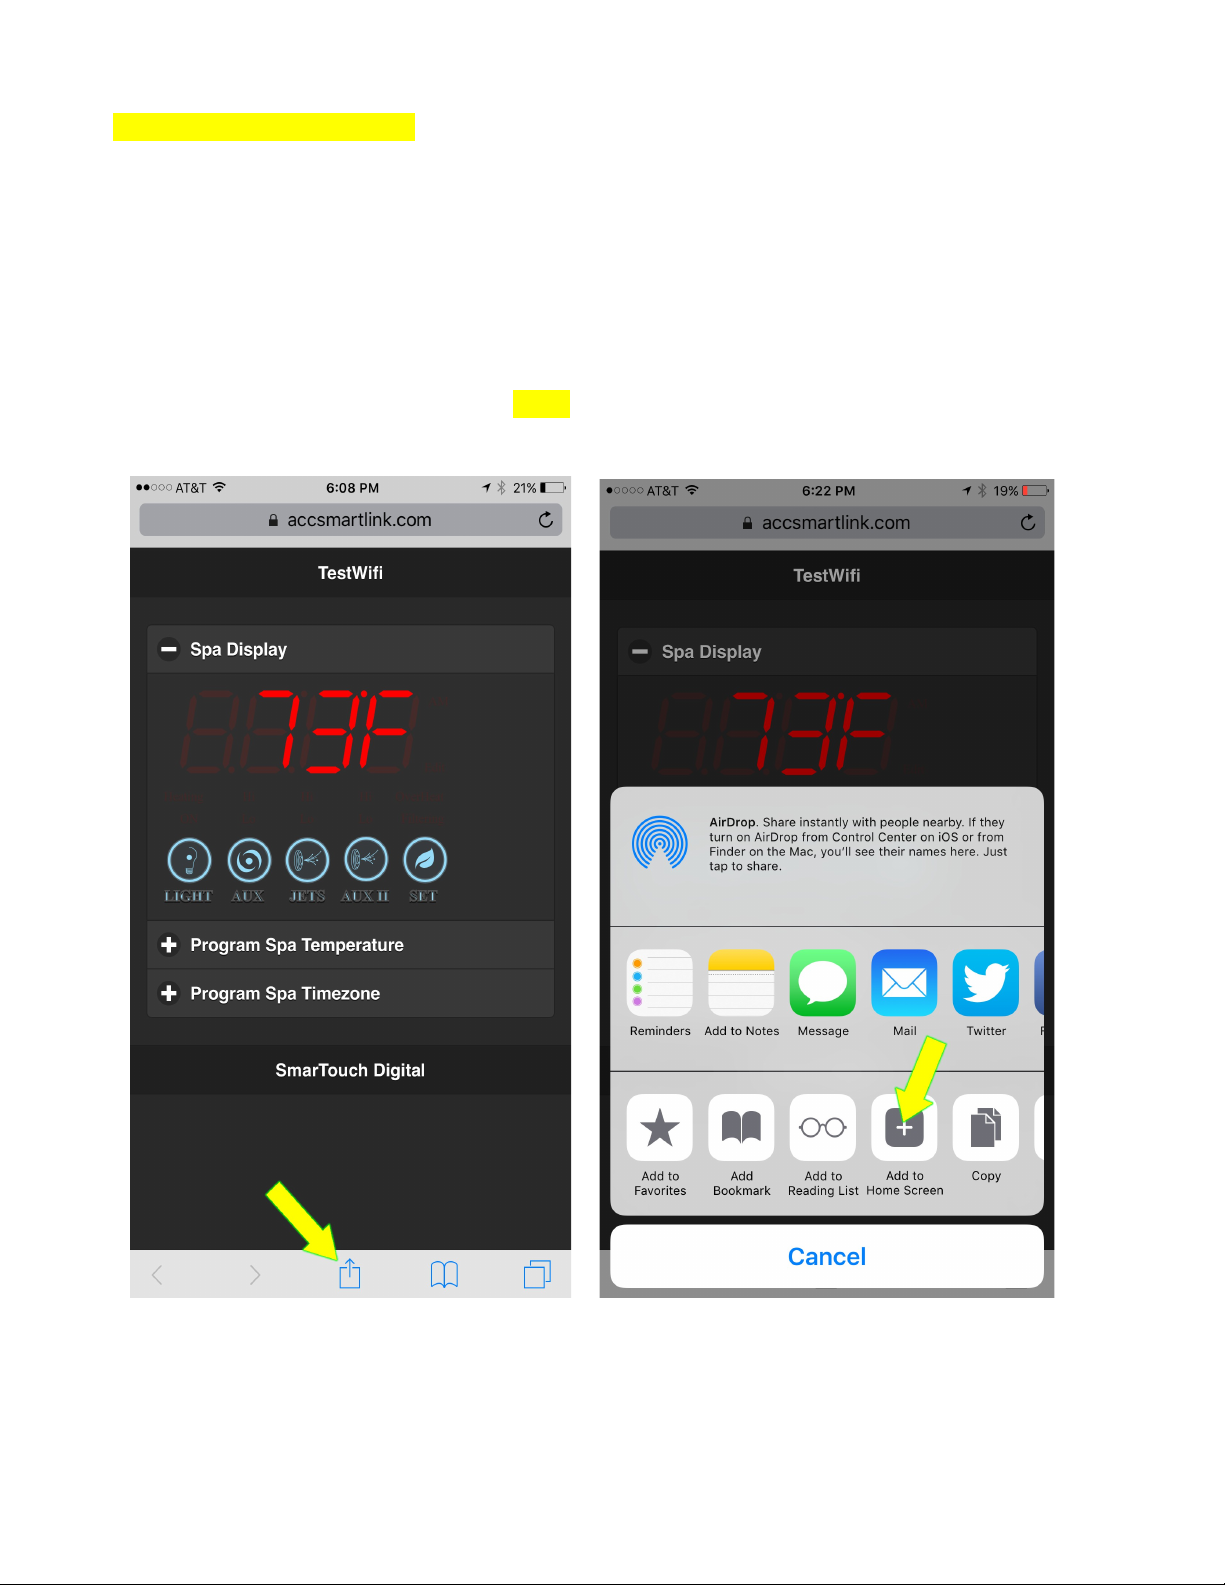
Accessing your Spa emotely
1. The email from the registration process will contain a link similar to this:
https://accsmartlink.com/spa/ /app
2. Open this link from any computer, tablet, smartphone etc. to access your spa controls.
3. Save this link! Save the email containing it! This is the link to share with your privileged few.
4. You can create a shortcut on the computer desktop or web browser or your mobile device home
screen by following the appropriate steps for your device.
•IOS – Open the link using Safari, then scroll down to the bottom and click the Share
icon and select Add to Home Screen.
5. You will see a link on your device screen like the one shown in this IOS home screen e ample:

For Android, Windows or other mobile platforms, refer to your device documentation for creating
home screen links.
Popular Spa Accessories manuals by other brands


Takara Belmont
Takara Belmont YUME ESPOIR installation instructions

COVANA
COVANA EVOLUTION COVER owner's manual

Leisure Concepts
Leisure Concepts Covermate Vanish XL installation instructions

Gecko
Gecko BAHAMA SPAS Quick reference card

Takara Belmont
Takara Belmont YUME SWING installation manual

MAR PLAST SPA
MAR PLAST SPA KOMPATTO SPRAY SENSOR Use and maintenance manual