Acer Acer –LCD-P205H
9
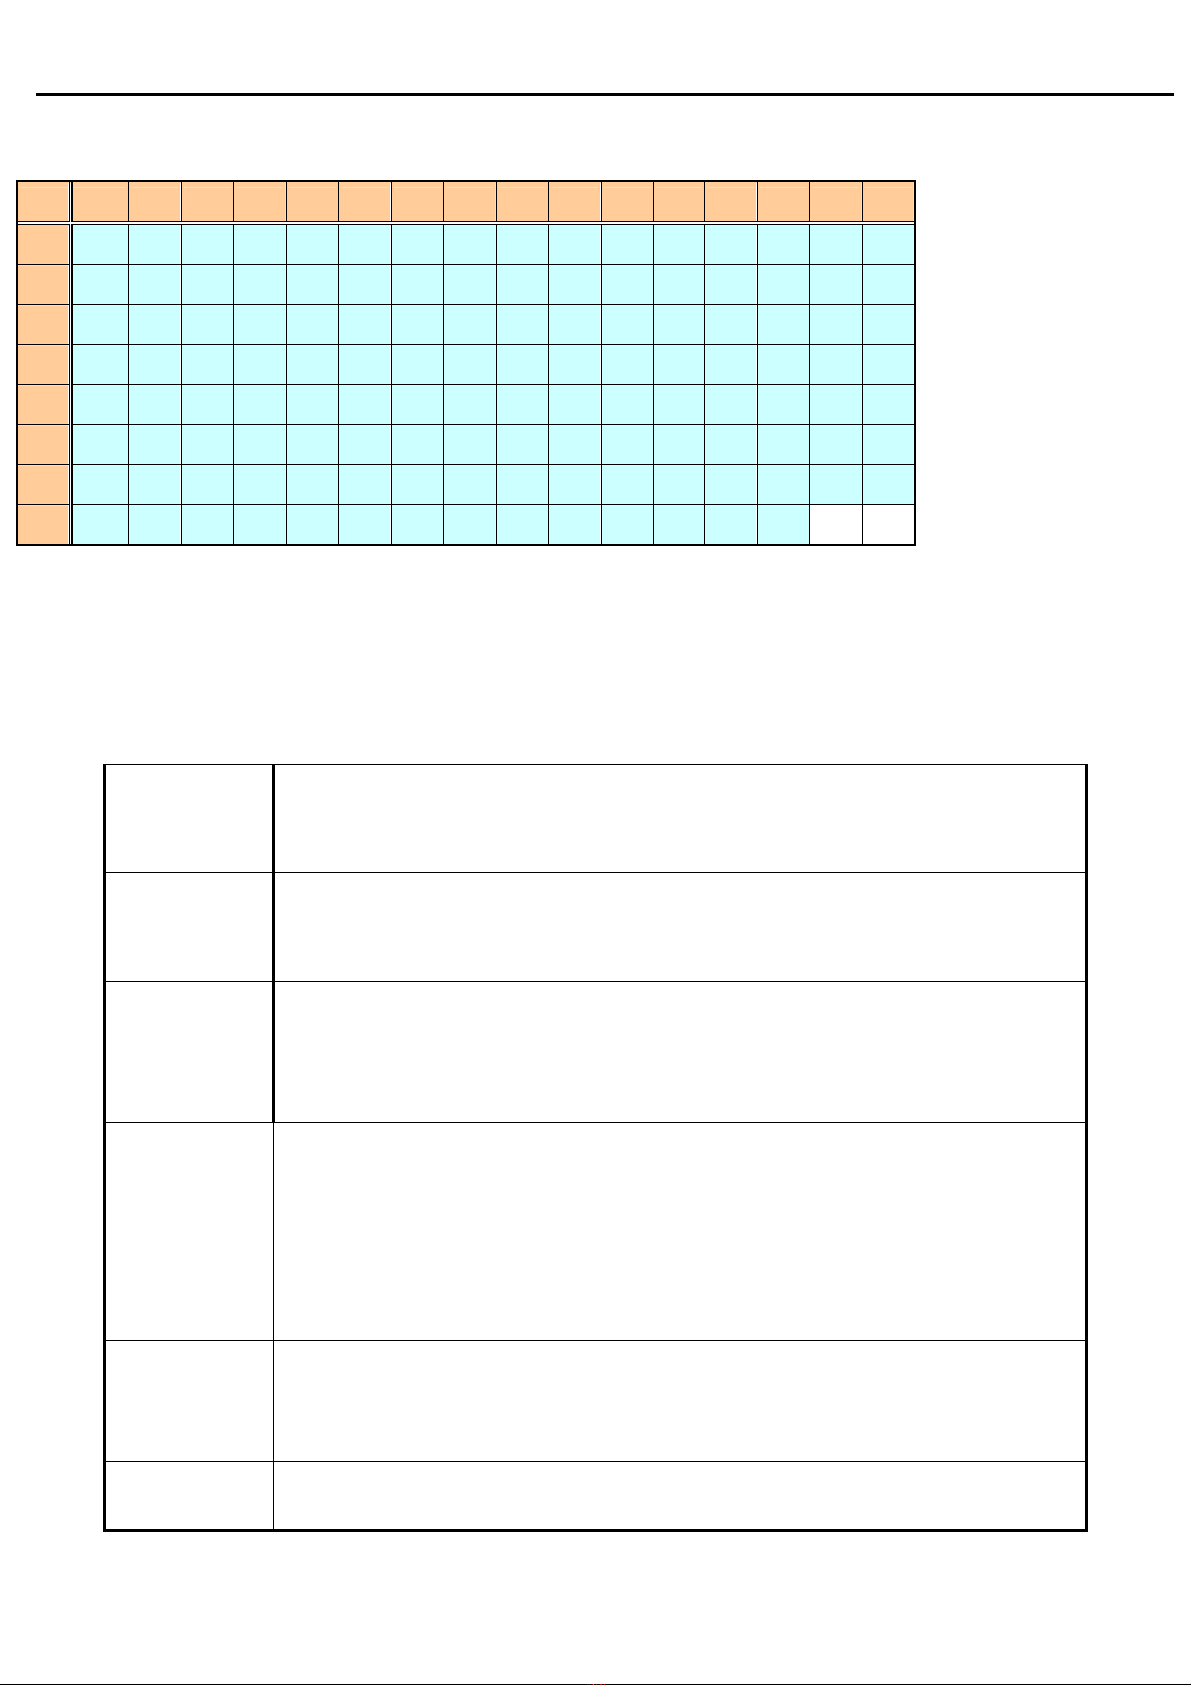
P205H DVI
0 1 2 3 4 5 6 7 8 9 A B C D E F
0 00 FF FF FF FF FF FF 00 04 72 D1 00 00 00 00 00
1 00 00 01 03 80 2C 19 78 EA DE 95 A3 54 4C 99 26
2 0F 50 54 BF EF 90 81 00 71 4F 81 40 81 C0 A9 C0
3 01 01 01 01 01 01 31 2E 40 00 62 84 22 30 58 A8
4 35 00 BB F9 10 00 00 1F 00 00 00 FD 00 38 4B 1F
5 54 10 00 0A 20 20 20 20 20 20 00 00 00 FF 00 30
6 30 30 30 30 30 30 30 30 30 30 30 0A 00 00 00 FC
7 00 50 32 30 35 48 0A 20 20 20 20 20 20 20 00 62
5. Function Specifications
5.1 Keypad Function
6.1.1 Control buttons
[AUTO]
A. When OSD un-displays, press [AUTO] and the function menu will show on the screen;
B. When function menu displays, press [AUTO] to perform auto-adjustment;
C. When OSD displays, press [AUTO] to return to previous level menu;
D. When “e Color OSD” OSD displays, press [AUTO] to exit the OSD.
[MENU]
A. When OSD isn’t shown on screen, press [MENU] to enter the function menu;
B. When function menu displays, press [AUTO] to enter the main menu OSD;
C. When OSD displays, press [MENU] to perform function of menu icon that is highlight or
enter next level menu
[◄] A. When OSD isn’t show on screen, press [◄] to enter the function menu;
B. When “MENU OSD” displays, press these keys to change the contents of an
adjustment item, or change an adjustment value;
C. When Function menu displays, press [◄] to show “Audio” OSD and decrease the
volume.
[►]
A. When OSD isn’t show on screen, press [►]to enter the function menu;
B. When “MENU OSD” displays, press these keys to change the contents of an
adjustment item, or change an adjustment value;
C. When Function menu displays:
a.Press[►] key one time to search (a port with signal in order)
b. Show “source icon” at the same time, as searching that port
c. Go into next port automatically, if search the port without signal
d. Display it, if search the port with signal
D. When the volume menu displays, press [►] to increase the volume.
[e Color ]
A. When function menu displays, press [e Color] to show “e Color OSD”, and press
again the OSD can not disappear, but the time of “e Color OSD ”disappearing is reset
to 10 seconds again.
B. When OSD disappear not including “e Color OSD”, press [e Color] to show “e Color
OSD” OSD, the OSD before disappears, but the parameters of it should be saved
[POWER] Power on or power off the monitor
5.1.2Hot Key Operation